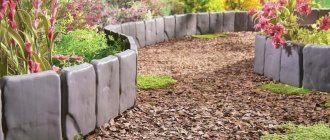
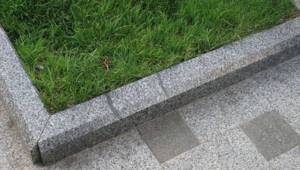
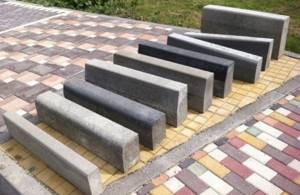
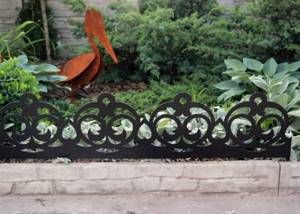
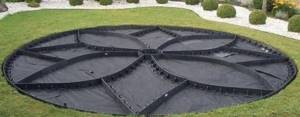
To make the paving look complete, sidewalk curbs are used to delimit the pedestrian and garden areas. In addition to aesthetics, road curbs also perform an auxiliary function. A stormwater system is built along the paths, directing wastewater from the road surface. Therefore, it is important to choose a high-quality edge stone that has a long service life.
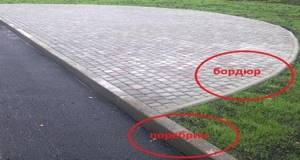
Using curbs and curbs to delimit pedestrian and garden areas.
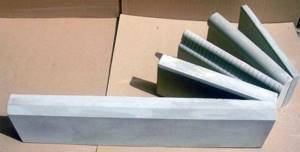
Types of road curbs
Road curbs are divided according to the method of manufacture and use. Depending on the method of production of the border element, there are:
chopped; sawn; burnt; polished.
All of them have a natural base and aesthetic appearance, decorating any type of road surface, and the quality of the material allows you to install borders for almost any construction project - from sidewalks to highways. The disadvantages include the heavy weight and high price of the products.
Side stone is available in the following types:
- Road. It is the most popular because it is used to design all road surfaces. Mainline. Used when laying highways. Sidewalk. Used for arranging paths in park areas, pedestrian paths and sidewalks. Garden. Refers to sidewalk borders, intended for decorating garden paths and limiting the lawn area.
In addition to the above, there are other subtypes of edge stone, differing in their size and appearance:
- Curb. Used in the design of lawns, paths and pedestrian areas. Lawn block. It is a type of curb and is intended for laying on lawns to prevent soil from spreading. Side stone with a beveled side. Installed in places designated for entry into parking lots. Radial border. With its help, sections of roadways and flower beds of round and oval shapes are built.
Radius border
Lawn block
Side stone with beveled side
In addition, curb fences are classified according to the type of raw materials used:
- Vibropressed. Possessing great strength, such fences have a long service life at high temperature changes. The moisture resistance of the material allows you to install the sides in almost any climate zone. Reinforced concrete. For their production, fine-grained reinforced concrete is used, which is distinguished by its durability and resistance to mechanical damage. Granite. Products made from this material are the most durable, but also the most expensive. Withstands large temperature changes and has increased abrasion resistance.
Types of borders
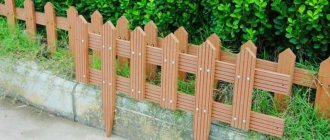
To be honest, curbs can be made from completely different materials, regardless of the purpose of the site or road. The most common types of borders for garden paths:
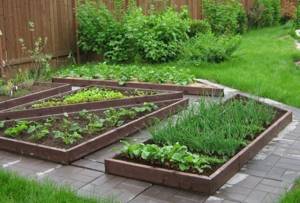
- Wood is simple and concise, and the required environmental friendliness of the site is maintained. No foreign odors will be emitted even at high temperatures. Wood is an ideal option, first of all, when decorating the so-called rustic garden style. Suitable for highlighting narrow wooden or embankment paths. The material should be either beams, boards or even hemp. Moreover, even special sets of borders are sold.
- Bricks are a more classic and traditional way of establishing unique boundaries between areas for a specific purpose. You can install the brick any way you like, the only limit here is your own imagination. You can dig in separate parts or simply lay down a kind of wall on cement mortar. By the way, keep in mind that if you plan to construct a brick border, it is best to select a special facing one, which, in principle, is designed for external influence. Otherwise, the curb will not last long.
Read on topic: Curb and curb: differences
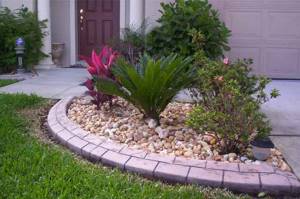
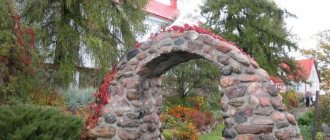
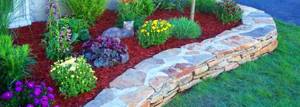
- Original fences made of real natural stone look simply magnificent and unimaginable. A particularly successful combination with paving slabs, paving stones or even a regular embankment. The stones should be chosen to be approximately the same size and not placed tightly, so that there is space left that should be filled with cement and similar, but smaller stones.
- Metal is practicality, there is no escaping it. You can use both steel, aluminum and even copper, but keep in mind that the cost will then be enormous, to say the least. Metal borders are often chosen to make the maximum border inconspicuous. But at the same time, it is necessary that a certain restriction between zones be maintained.
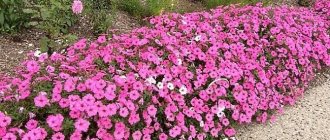
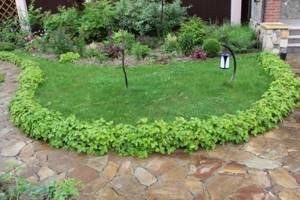
- It’s certainly true that a natural hedge . It is better to use plants such as cotoneaster or boxwood; they look the most attractive.
It can also be noted that for fencing and arrangement of territories, it is permitted and permitted to use not only the listed varieties, but also concrete and even plastic borders. From the first option you can create any exposures and shapes as your heart desires. The second type of material attracts with its durability and reliability.
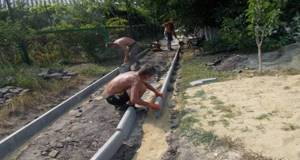
Laying a road curb
The technology is no different from laying a sidewalk curb. The difference lies in the scale of the work.
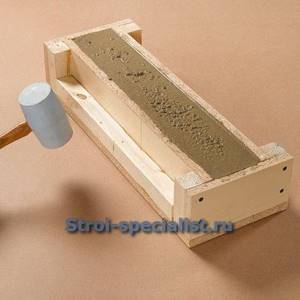
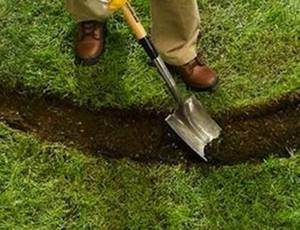
- A site is prepared for laying curb stones, followed by digging a trench 40 cm wide and one third deeper than the height of the curb stones. Crushed stone and sand are poured onto the compacted bottom of the trench with a total layer height of 15 cm. A solution is prepared for coupling the products with the base in the proportions 2.5: 1: 2: 2 (sand, cement, fine crushed stone, water). A solution is applied to the base. The curb element is installed. Using a rubber hammer, the product is tapped until it is immersed in the solution to a third of its height. The joints are fastened together with mortar on both sides, then the remaining gaps in the trench are filled.
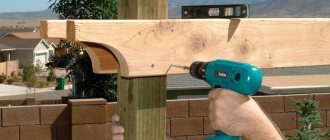
Video about cutting a road curb at an angle
Road blocks are sawn at an angle to ensure a tighter fit of the individual elements to each other. The road curb is cut using a concrete grinder. This procedure is performed when it is necessary to adjust the length of the fence.
The beveled edges are sanded so that the surfaces adhere to each other faster and better during installation.
Non-standard border sizes
Agree, such large and massive borders are not needed to arrange a personal plot. Or rather, they are very rarely needed. Perhaps the smallest ones are used to separate the car path from the lawn/vegetable garden. Here their strength will be required so that all the beauty does not disperse. And the rest are applicable in the construction of roads.
For garden and driveway paths, such options are more acceptable. They not only look better, but also weigh and cost less
Therefore, manufacturers of the same paving slabs make curbs according to their own dimensions. Such products are called lawn or garden borders. By the way, the standard does not prohibit the production of curb stones of other sizes. Only they must have a strength of at least B22.5 and frost resistance of at least F200. You can come across such a name as a standard size border. This means that this size is common. But not about the fact that it is spelled out in the standard. Here are the sizes of borders for paths in the garden or yard:
- 500*200*80, weight of one piece is about 20 kg;
- 390*190-90 and weighing about 15 kg;
- 500*240*35, weight 9 kg.
There are even some with some kind of pattern. But this is not for everybody, of course.
In general, there are different sizes of borders. Length from 80 cm to 40 cm, height - about 200 mm, width - from 3.5 cm to 10 cm. They can be “standard” gray. Colored ones are a little more expensive. The colors are usually the same as the paving slabs. Most often it is red, brown, green, sometimes yellow. Please note that the colors are not “pure”, but with a hint of cement gray.
Granite curbs are laid with granite tiles
There are also granite curbs. They also come in several sizes:
- length from 70 cm to 2 meters,
- width - from 80 mm to 200 mm,
- height - from 150 mm to 600 mm (150, 200, 300, 400 and 600 mm).
Granite curbs, of course, are beautiful and very durable, but they are very heavy and very expensive.
sidewalk curb
When choosing a sidewalk curb, you need to pay attention to technical indicators.
physical characteristics
These include:
- Durability brand. Concrete must have a grade strength of M400 and higher. Concrete class. Concrete class B30 is recommended (concrete strength 39.29 MPa). Frost resistance. The curb stone should withstand 200 to 300 cycles. Lifetime. Manufacturers guarantee product durability and service life of up to 20 years.
Advantages of sidewalk curbs
Advantages of concrete curb fencing:
durability; frost resistance; moisture resistance; wear resistance; resistance to mechanical damage; aesthetics; ease of installation.
How does a curb differ from a curb?
This is the same side stone, which differs from the curb fence in the installation method: the curb is installed flush with the pedestrian path, and the curb protrudes above it by 2/3 of its height. Otherwise, the manufacturing and installation technology is the same.

The difference between a curb and a curb
Border for paving slabs
A fence for paving slabs will help maintain the integrity of the coating, preventing the base from spreading.
How to properly install a border for paving slabs with your own hands?
Having decided on the location of the garden paths, you can begin installing the border. The work process itself is simple, you just need to follow the following procedure:
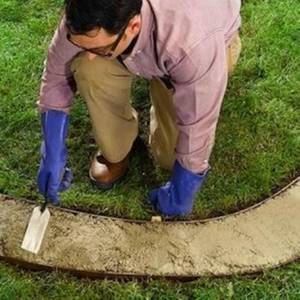
- Prepare the site for construction: remove debris from the area, level the surface. Conduct markings for future paths. Drive pegs along the edges of the paths and stretch a cord between them. The height of the cord should be measured with a building level, since this will be the upper limit of the border made independently. Dig a trench along the entire length of the marking into which the curb sections will be laid. It should be remembered that the depth of the trench should be one third of the highest point of the side, and the width should be 10 cm greater than the curb. At the bottom of the trench, previously compacted and compacted, pour a solution of sand and cement in proportions 3:1 (sand-cement). The solution should have the consistency of viscous sour cream for easier pouring. Lay the border elements, adhering to the level of the cord. In this case, the stones must be leveled in height, adding solution to the bottom where it is needed. Fill the butt joints with mortar and leave the structure to harden for a day. Fill the remaining gap with soil, compacting it thoroughly.
It must be remembered that laying the tiles themselves should be done only after installing the curb.
Installing a border with your own hands.
What is needed for the solution, in what ratio to mix
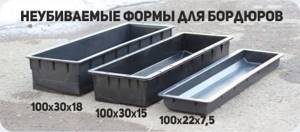
Border stones can be purchased at the store or made by yourself. To make the sides, you can use ready-made molds, but it’s better to build them yourself. In the second case, you will need to install a formwork system.
The block size can be any. The only thing that needs to be taken into account is the length of the section for piece borders - it should not exceed 2 m. Otherwise, the border structure will be inconvenient during installation and will quickly collapse.
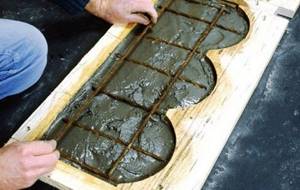
The manufacturing technology for borders is as follows:
- A mold is being prepared for pouring the fences. A dry mixture is prepared at a ratio of 3:1 (sand-cement); the components are thoroughly mixed. Then fine-grained crushed stone is added there at a ratio of 3:1 (crushed stone-dry cement-sand mixture), after which everything is filled with water and mixed. The appearance of lumps in the solution and the formation of air bubbles should be avoided.
In order for the installation of the sides to be convenient, one side of the element must be made with a small chamfer after being released from the formwork system. This can be achieved by cutting off the excess.
Decorative borders and moldings made of concrete
It is possible to make curbs of almost any profile from concrete. You just need to select the appropriate forming element. Plastic skirting boards and moldings are well suited for the latter.
Before work, decide on the desired number of elements to be produced. For personal use and if you have enough time, several forms are quite suitable; to speed up the process and expand production, it is better to prepare several dozen containers.
It is better to use the previously mentioned wood materials as a material. Give preference to those that have a durable glossy finish - this will facilitate the process of removing finished products.
Saw the required number of parts using templates.
Then assemble the molds to the desired size using screws.
Attach pieces of floor plinth of the desired profile to the bottom of wooden containers. For this, it is better to use small nails, since self-tapping screws or staples can irreparably damage the profiling elements.
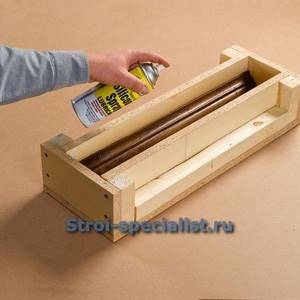
If necessary, carefully treat the inner surface of the mold with liquid wax or silicone.
When preparing a concrete mixture for such products, it is necessary to purchase natural stone screenings with small fraction sizes. This will give the mixture a more uniform structure and improve the quality of the outer layer. Filled forms also need to be compacted and removed from excess air. In mass production, an indispensable device for this is a simple vibrating table. For small volumes, a percussion instrument or lightly tapping the bottom of the mold on a table or solid base is suitable.
Any spatula will help remove irregularities formed when air escapes.

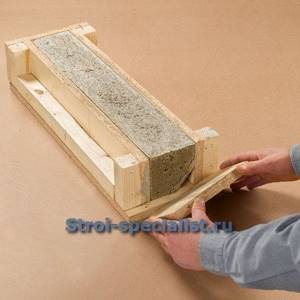
We remove the frozen product by partially disassembling the mold - disconnecting the end and side walls.
If necessary, the surface of the finished product can be puttied and coated with dye on any basis.

We recommend other articles on the topic
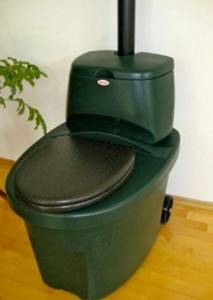
Finnish peat toilet for a summer residence - design, installation, operation
Which swing to choose for your dacha - overview of options
Do-it-yourself functional summer kitchen: stationary and mobile options for a country kitchen
Porch made of polycarbonate and metal in a private house: photos, examples
Types of sidewalk curbs
These include concrete curbs and side stones made using vibrocasting and vibrocompression.
Concrete curbs
Curbs are widely used in the construction of highways: they separate the roadway from the pedestrian one. Curbs are made in accordance with GOST, by pressing or casting.
Vibro-molded curbs
Manufactured by casting, such products have a curved geometry due to the use of liquid concrete mortar. The air remaining in the solution is not expelled, as a result of which the finished product has a porous structure and is easily destroyed. Such side stones are cheaper than curb stones made by vibration pressing, but have no other colors except gray, and the reinforcing frame makes it difficult to install fences if they are cut.
Currently reading: DIY concrete sink (sink) - step-by-step manufacturing plan
Vibropressed curb
Manufacturing technology allows you to get a smooth surface. According to technical indicators, vibration-pressed side stones have reduced moisture absorption, strength and wear resistance. The stamping method allows you to obtain a large number of finished products with different colors.
Vibropressed curbs
Vibro-molded curbs
Concrete curbs
What is the difference between vibration-pressed and vibration-cast curbs?
First of all, products differ in the production method. Vibrocompression involves the production of products on a large scale and therefore uses vibration installations. And vibro-cast curbs are made manually.
| Type of border | Specifications | Appearance |
| Vibrocast | Heavy weight, low frost resistance and performance indicators. As a result of the pores, cracks and chips quickly form, which leads to rapid destruction of the side. | The surface is porous, unaesthetic gray in color, and rough joints remain after installation. Difficulty in installation when making turns - the reinforcement is difficult to cut without damaging the overall appearance of the product. |
| Vibropressed | Compact and relatively light weight, smooth surface, absence of pores, good performance due to high strength and frost resistance. | Smooth surface without pores, aesthetic appearance, wide range of colors, can be used for decorating corners. |
What materials are suitable for building a border?
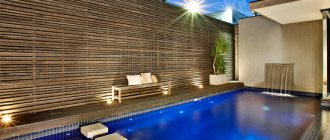
When choosing the type and method of fencing, as well as construction and finishing materials for its manufacture, the characteristics of the flower garden or flower bed and the plants grown on it must be taken into account. For decorative purposes, low-height curb fences made from the most affordable and practical materials are most often used.
Gabion borders for flower beds
Gabions used to create flower beds are an original solution that allows you to make the design stylish and non-standard. The filling of the mesh base can be represented by artificial or natural materials, as well as any combination thereof. As a rule, stones, pebbles, crushed stone or wooden cuts are used for this purpose.

Even ordinary crushed stone is suitable as a filler for such a border.
Advantages of the designs: the ability to create a complex, multi-level flower bed, as well as the use of a variety of types of fillers, the comparative ease of self-construction, durability and visual appeal. The disadvantages include: the need to purchase a special mesh and strictly follow the design manufacturing technology.
Wooden fences
Wood borders are used for arranging flower beds and flower beds in a rustic style. They go well with stone and a variety of garden figures, as well as with wooden benches or gazebos. For decoration, you can use edged boards or clapboards, picket fences and slabs, bars, logs or transverse cuts.
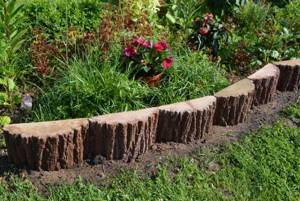
A wooden border always looks cozy and environmentally friendly
Advantages of the designs: ease of processing using a standard set of working tools, environmental friendliness and ease of disposal after the end of their service life, no heating in summer and prevention of plant burns. Sufficiently high fences can be used as a support for climbing vegetation. The disadvantages include: limited service life, risk of rotting, the need to use special antiseptics or paints for processing.
Brick flower garden fencing
A strong and durable building material retains solar heat well, but does not overheat the soil of the flower garden. An excellent option for framing a flower bed if there are already brick buildings on the site. Due to the peculiarities of its texture, brick perfectly complements the minimalist style in landscape design.
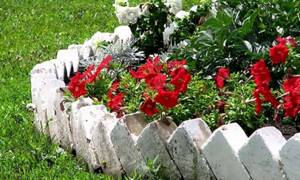
This flowerbed fencing will last for many years.
Advantages of the structures: beautiful appearance, the ability to combine bricks of different colors, strength and reliability, no need for complex care or expensive maintenance. The disadvantages include: the labor intensity of the work performed on brickwork, the need to select material without chips and with the correct geometry.
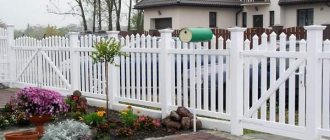
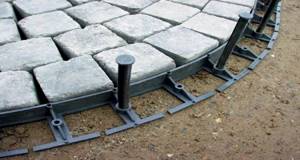
Plastic borders
Polymer fencing can be represented by sectional plastic fences and simpler border tape, which differ in strength and mobility. If necessary, available plastic elements can be used, which allows you to create a fencing design that is unique in shape and appearance.
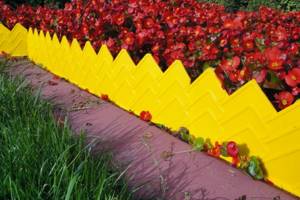
This curb is not afraid of rain
Advantages of a plastic border: the presence of special pegs on the underside facilitates self-installation, the fence prevents irrigation water and eroded soil from leaking onto the paths, aesthetic appearance and guaranteed durability. The disadvantages include: the need to place all sections at the same height with the elements precisely adjacent to each other without gaps or cracks.
Stone borders
Budget-friendly and reliable stone fencing can be made of sandstone or slate, traditional limestone, volcanic tuff or granite. Any natural stone looks great framed in various flower beds, including alpine slides and Japanese-style garden compositions.
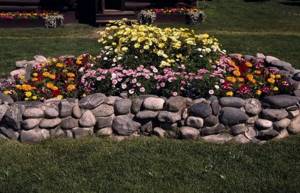
Inexpensive and reliable fencing
Advantages of the structures: limestone, tuff and sandstone, which are soft in structure, are perfectly processed by hand and are suitable for fixing fasteners or planting ground cover vegetation; natural stone is distinguished by its environmental purity and natural beauty. The disadvantages include: the high porosity of some rocks and their tendency to become polluted, the destruction of limestone under the influence of rain, the formation of plaque on the surface, the incompatibility of limestone with some types of plants.
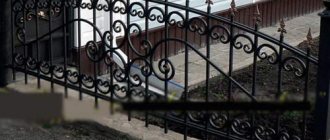
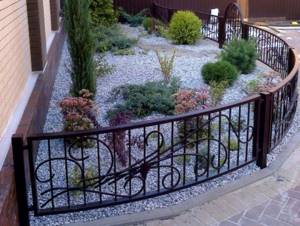
Metal fencing
Metal structures can be forged, welded or cast. Openwork forged metal gratings, characterized by strength and durability, have a very impressive appearance and reliability.
Metal fences look elegant and match with any colors and decorative elements
Advantages of the structures: strength, guaranteed durability, aesthetic appearance. Such fences are perfectly combined with any decorative vegetation, stone or wooden elements, barbecues and benches made from different types of construction and finishing materials. The disadvantages include: the need to carry out systematic anti-corrosion treatment with special compounds.
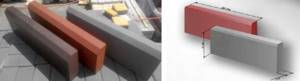
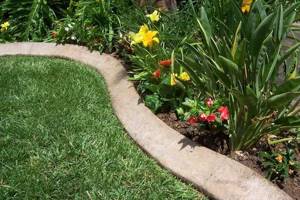
Structures based on concrete curb stones
Concrete is one of the most affordable and durable materials used in arranging the contour of a flower bed. The practical concrete border of the flower garden does not change the acidity of the soil, is not destroyed by precipitation and easily tolerates temperature changes.
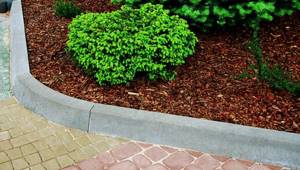
Easy to use and frost-resistant fencing
Advantages of the structures: concrete is easy to work with and allows you to create a border of any shape, the finished products are beautiful and durable, they are characterized by high levels of frost resistance and resistance to any adverse external factors, the availability of additions with various decorative elements. The disadvantages include: the need to quickly work with ready-made concrete mortar.
Slate fencing for flower garden
Wave and flat slate belong to the category of durable and practical materials compared to ready-made decorative border tape made of plastic. Such a fence does not lose its original shape and does not require increased attention during operation.

Anyone can handle installing such a border
Advantages of the designs: availability and low price, ease of installation, attractive appearance, the ability to paint and create beautiful multi-tiered compositions. The disadvantages include: the presence of asbestos in the composition can have a negative impact on the growth and development of the root system of some ornamental plants, as well as the fragility of the material and limited choice of border shapes.
Mini wattle fence for flower beds
Pastoral French fencing perfectly copes with its purpose: it reliably preserves ornamental crops and retains snow cover in winter, protecting vegetation from freezing.
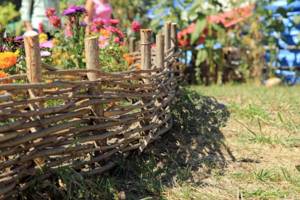
To create such a border, you need to harvest the material in a certain season.
Advantages of the designs: a generally accessible and environmentally friendly type of material, aesthetics and the possibility of use when decorating a fence in a country style. The disadvantages include: some labor intensity of the weaving process, the need for seasonal procurement of material, as well as insufficient durability of the finished structure.
Available materials
Self-made borders using a variety of waste or improvised materials are in great demand; they are affordable and easy to process, and also help create a unique appearance for the fence.
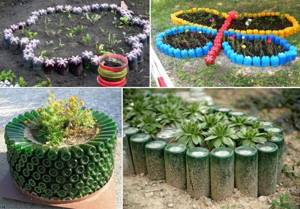
And there was a use for old bottles
Bamboo trunks, glass and plastic bottles, scraps of ondulin and profiled sheets, large sinks and old plates, discs and vinyl records, as well as unnecessary car tires can be used as fencing.
Garden borders
They are intended for decorating a garden plot. Flowerbeds and beds, artificial ponds and alpine slides cannot be imagined without border fences.
What are the advantages of garden borders?
In addition to the decorative function, side stones:
- Reduces the growth of weeds in cultivated areas. They hold the soil back, preventing it from spreading when watered. Contribute to more rational care of cultivated plants.
Garden borders add aesthetics and a well-groomed appearance to beds and flower beds. They can be made of wood, plastic, stone, concrete and available materials.
plastic garden border
Plastic sidewalk curb
It is used mainly for decorating garden areas in summer cottages and has the following advantages:
low cost; ease of installation; large selection of products; easy to replace; aesthetics.
Since plastic is light in weight and can be processed, it can be used to build a border of almost any shape - from straight to winding. If we consider a plastic border as a repairable material, then individual sections of the fence can be easily replaced in case of damage, which cannot be said about stone borders.
An example of using a plastic sidewalk curb.
The disadvantages include the following:
poor fire resistance; low resistance to weathering; instability to mechanical damage.
Over time, a plastic border, unlike a stone one, will fade in the sun and crack from sudden temperature changes, which will shorten the service life of the product.
Installing a plastic border
If we compare the installation of plastic fences with concrete ones, the former win due to their simplicity. Installing a plastic curb is more convenient, and its light weight makes it quick and easy.
- A trench is dug along the sidewalk path. The depth of the groove should be up to 10 cm. Pegs located at the base of the plastic fence are driven into the trench. The individual elements of the border are connected to each other “in a lock”, forming a continuous row. The fence is leveled using a building level, and the trench is backfilled.
The peculiarity of installing a plastic border is that no preliminary preparation of the construction site is required. Such fences will be good when framing flower beds in garden plots.
DIY concrete border
Sometimes it is difficult to do without borders when laying out a new flower bed or garden path.
Whatever you say, in addition to its aesthetic function, it also greatly facilitates the process of caring for decorative plantings. There are a huge number of recommendations on how to make borders from scrap materials. There are also plenty of options for ready-made border elements, which anyone can purchase at a garden store or hardware supermarket.
The author decided to settle on an intermediate option - to make a border with his own hands, similar to those that can be bought in a store.
If the technological process is followed, as well as in the presence of certain conditions, which will be discussed below, such a border will last a considerable number of years and, like any other creation of one’s own hands, will delight its creator for a long time.
The technology described in this master class allows you to build borders of arbitrary shapes and any length, thereby saving you the hassle for a long time.
So, today we will talk about how to arrange a border around a flower bed or garden path without the help of specialists.
To work you will need:
1. Materials:
- cement; — river or quarry sand (do not use sea sand!); — crushed stone; — wire for reinforcement (you can do without it); — pigment for coloring concrete (optional); — dishwashing liquid (used to give elasticity to the solution); - any flexible sheet material such as plywood or thin fiberboard for formwork; — wooden slats for formwork; — metal screws or staples for constructing formwork; - wooden pegs (for formwork); — liquid for sealing concrete curbs; — sand for backfilling in case of work in clay soil.

2. Tools:
- bucket; — wheelbarrow; - shovel; — wooden trowel for leveling the concrete surface; - Master OK; - screwdriver or furniture stapler; - hammer; - wood hacksaw or jigsaw; — container for concrete; — concrete mixer (you can mix the solution manually in a concrete container); - a hose or cord for marking the curb line.
Step 1: Consider local conditions
The easiest way to carry out such work is for the lucky owners of sandy soil. The only mandatory condition for this is to moisten the finished concrete curb throughout the entire time it dries and hardens. And this is almost a month. The fact is that sand has excellent drainage properties and the moisture that is in the concrete mixture will pass through the sand. Concrete acquires the necessary strength only when moistened. In summer it will dry out a lot.
If you want your curb, built on sandy soil, to last a long time, take this feature into account.
In second place is loose forest soil. It is the least demanding when constructing concrete structures, even such insignificant ones.
The third place is occupied by black soil. In its properties it is close to loamy and clayey soils.
And finally, loam and clay are the most capricious soils. But it’s easy enough to tame him by resorting to one simple trick.
The fact is that clay is unusually hygroscopic. This means that it literally attracts moisture to itself - like a sponge. In the cold, all the moisture contained in the clay freezes, and the clay soil seems to expand. If there is a curb in it, he will undergo real torture. As a rule, concrete structures in clay soil quickly deform, cracks form in them and they begin to collapse.
For this purpose, a sand cushion was invented a long time ago. Before laying the curb mortar into the ditch, add a layer of sand. It will prevent concrete from deforming and protect it from destruction.
You can also pour concrete mortar without deepening it into the ground. This is a more economical option since you will not have to incur the cost of sand for the sand bed.
However, pay attention to the amount of rainfall that occurs during the rainy seasons. If it rains continuously in the fall, and you have clay in your garden and impassable dirt forms, keep in mind that over time the border will go deep into the soil until it is no longer visible above the surface. In this case, it is better to abandon the construction of concrete curbs and opt for other options. Or strengthen the soil before taking on such work.
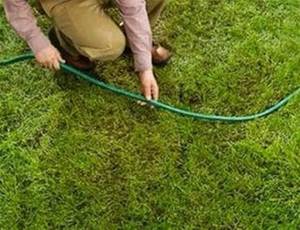
Step 2: preparing the base and erecting formwork
So, we have a little understanding of the local geological conditions and we can get to work.
If you have planned a curly border line, use a garden hose to mark it. This will make the process much easier. As a last resort, you can take a cord. But it is recommended not to neglect the markup, but to give it special importance.
Mark a strip at least 10 cm wide under the curb, remove the grass and remove the plant layer of soil. If you want to securely fix the curb, as is usually the case with industrial elements (their height is at least 30 cm and sometimes reaches half a meter), deepen the trench to the desired level. Don't forget about the sand cushion.
Drive in pre-prepared wooden pegs on both sides at a distance of about 50 cm. This is the outline of the future formwork.
In order to construct the walls of the formwork, flexible plywood was used, because the border was designed to be shaped. In areas where there are no bends, you can use non-bending material, including boards. But working with boards is not so convenient. In addition, the texture of the wood will be transferred to the walls of the border in places where it is inappropriate.
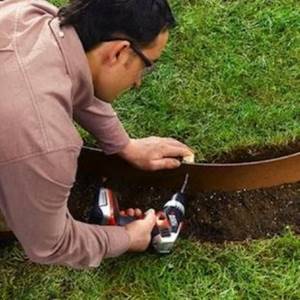
To secure the plywood to the stakes, use your choice of a furniture stapler and staples, or a screwdriver and self-tapping screws. You can also use nails, but such formwork will be much more difficult to disassemble after all the work is completed.
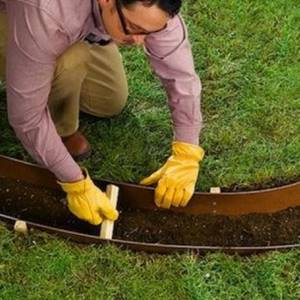
To ensure that the width of the border is the same, prepare and install spacers from pieces of unwanted wood. The spacers, of course, must be located above the planned height of the curb itself.
Step 3: preparing the solution
In the process of preparing the concrete solution, you can use a concrete mixer or do without it - decide for yourself. However, mixing the solution by hand is not an easy task.
Prepare the necessary tools so that there are no delays during the work (the prepared solution has a limited service life), as well as materials: cement, sand, crushed stone, water, dishwashing detergent and pigment, if you plan to use it.
Also prepare even pieces of wire if you want to reinforce the border. This measure is optional and somewhat costly, but this way you will be sure that deep cracks will not form in it over time due to seasonal soil movement.
Mix the ingredients in order: first cement and sand, then water and detergent, and only after that crushed stone.
Carefully read the instructions for the pigment and prepare it if necessary. Add the pigment to the solution as indicated in the instructions.
The solution should be thick enough, but not so thick that it cannot be smoothed out with a wooden trowel.
Step 4: forming a border
Place the mortar into the formwork using a trowel, compacting it and filling all voids.
First level the surface of the curb with a trowel and wait until the solution sets slightly.
Now it's time to work with the wooden trowel. It is very effective if you need to make the surface of concrete smooth and dense.
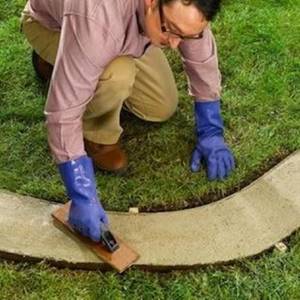
When the solution has set enough that the formwork can be dismantled, but still retains its plasticity, you can optionally smooth out the edges of the curb as the author did.
You can also arrange the jointing, imitating industrial sections of the border.
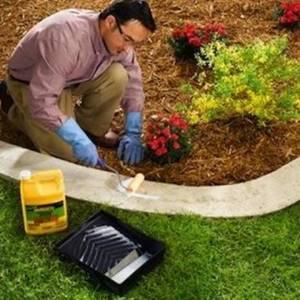
The concrete solution sets quickly, but it takes a long time to gain strength - up to one month. All this time you need to make sure that it does not dry out in the sun and sometimes water the border with water.
After a month, apply a solution to the surface of the curb to seal it. You can try using it as soon as the solution sets to prevent the border from drying out. You can also use a primer.
If there are voids on the sides of the curb, compact the soil. Source
Become the author of the site, publish your own articles, descriptions of homemade products and pay for the text. Read more here.
Weight and size chart of sidewalk curb

The ready-made sidewalk curb is produced in accordance with GOST, in different weight categories and size range. In factory conditions, side stones made of reinforced concrete are produced in accordance with GOST 6665-81, they have the classification BR (ordinary), BU (ordinary widened), BUP (ordinary widened intermittent), BL (straight with a tray), BV (drive-in), BK (radial, radius of curvature 5-15 m).
1000x200x80
Sidewalk curb, brand BR100.20.8, weight 40 kg. Garden curb used for fencing lawns and sidewalks.
500x200x30
Small garden border thin, weight 6.65 kg. Used to delimit the garden plot and the local area.
500x200x70
Vibro-cast garden border BR 50.20.7, weight 15 kg. It is made by vibration casting and is used in the design of park areas and pedestrian paths.
500x200x80
Garden border brand BR 50.20.8, weight 18 kg. It is used in the design of pedestrian areas and playgrounds.
500x200x60
Sidewalk curb brand BR 50.20.6, weight 16 kg. It is used for fencing sidewalk paths in park areas.
What and how to make a border with your own hands
Not all summer residents use ready-made forms - many prefer to create borders for their garden plots with their own hands. The advantage of a self-made fence is cost-effectiveness and the creation of an original design.
They can be made from various materials and available materials:
- Plastic. This includes plastic bottles and polycarbonate sheets. Tree. Fences can be designed in the form of a picket fence, a small fence or a fence. Profiled sheets. After repairs, there are always excess building materials left on the site, which include trimmings of corrugated sheets. Using them, you can delimit the beds on the site. Brick. The simplest option for decorating flower beds is to lay them out with sand-lime bricks. Rubber. Old tires can be used as a mini lawn fence by painting them in bright colors.
However, instead of improvised materials, you can use forms for pouring concrete curbs.
Subtleties of selection and installation
The properties of garden borders, strength and all-weather resistance, determine the range of their applications. Most plastic fences fix the boundaries of landscape elements; some can be used for arranging multi-tiered flower beds and plantings. To better understand the capabilities of the selected model, you should read the instructions included with the product. General recommendations for the purchase, installation and further operation of curbs are as follows:
- The plastic from which garden path borders are made includes special additives that allow the product to be used outdoors. The type of plastic is marked on the curb; You can find out about its properties and recyclability by using an Internet search.
- A practical solution for decorating a garden path made of stone, paving stones or paving slabs would be the corner border B-300.8,5.4,5 or any segmented version with supports. If the path is made of bulk material (for example, gravel), the best divider will be a “Country” curb. Flat ribbon borders are ideal for decorating flower beds.
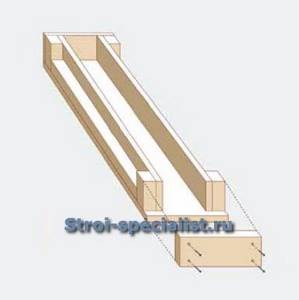
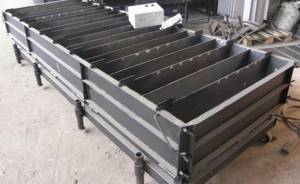
DIY forms for borders
Edges for flower beds and lawns, and design of paving stone paths are sold ready-made, but you can create them yourself. Summer residents use forms for pouring concrete mortar, which are also made by hand.
There are 2 main methods: using a formwork structure and making a frame-mold. The simplest and most affordable option is removable formwork. To do this you will need edged boards or metal sheets. The work is carried out directly at the site where the curbs are installed.
The work order is as follows:
- Preparing the area. Marking for future fencing using rope and pegs. Digging trenches. The depth of the trench is 5-7 cm greater than the height of the future border; the width should be 20 cm, taking into account the thickness of the boards. Installation of formwork. The boards are installed on both sides of the trench and secured for stability. Preparing the base for the curb. A crushed stone cushion is poured onto the compacted bottom of the trench, which should also be well compacted. Reinforcement. Rods are laid on the crushed stone to strengthen the future border.
After the preparatory work, a concrete solution is prepared, which is used to fill the trenches. After the concrete has hardened, the formwork can be removed.
The second method is to make forms for borders. It differs from the first one in that the fence is not monolithic, but sectional. For this purpose, an edged board of the required length is used, from which a frame is created for pouring concrete, and the resulting elements are cut at an angle on one side for standardization according to GOST.
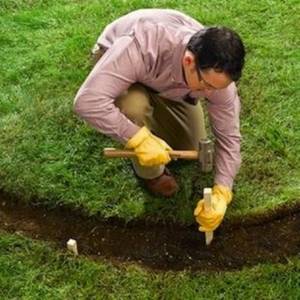
To create a border fence of an unusual shape and color, you can also use a special device that resembles an auger receiver. A mixture of sand and cement with the addition of pigment dye is poured inside, which, mixed, is squeezed onto the ground.
The advantages of this method are as follows:
high performance; ease of solution processing and installation; no need to prepare the base for laying the fence.
A concrete structure that has not completely hardened can be decorated with various patterns and carved elements.
Making borders with your own hands: preparing concrete and pouring forms
To create your own fences from concrete mortar you will need:
river sand; cement; plasticizer; pigment additive (for colored fencing); used machine oil.
The cooking technology consists of the following steps:
- Cement, sand and crushed stone are mixed in a concrete mixer in proportions 1:3:4, respectively. First, half a portion of sand and crushed stone is poured into the concrete mixer, mixed, then cement and the remaining crushed stone and sand are loaded completely. The dry mixture is transferred in a concrete mixer for at least 5 minutes. The plasticizer is dissolved in water according to the instructions and poured into a concrete mixer, then water is gradually poured in. Adjust the amount of water until the mixture reaches the consistency of a viscous mass. Add the pigment dye diluted in water to the solution and stir it for another 5 minutes. The form for borders is greased with oil - subsequently the finished product will be easier to remove. The resulting solution is poured into the mold and removed from it when it sets - after at least 2 days.
To increase the density and strength of products, it is recommended to use a vibrating table - in molds with a solution, all air will be removed from the pouring. For concrete mortar, it is recommended to use cement grades M400 or M500, this will make the structure much stronger. It is advisable to sift river sand before mixing to remove clay impurities, which can reduce the strength of concrete.
For additional strength, reinforcement is placed in molds half filled with mortar, which is then filled with the remaining mortar. The concrete product will finally gain its original strength only after a month, so it is not recommended to install concrete blocks earlier.