What is it used for?
You can make a mailbox both for your private home and for a child’s play. Many child psychologists and teachers consider it very important to use objects from everyday life or professions in a child’s amusement. By coming into contact with such things and understanding their essence from early childhood, children will be more prepared for adulthood.
Using the example of a mailbox, you can explain to your child how letters get into our homes. If you approach the issue from a creative side, you can also come up with many interesting games. Making a mailbox with your own hands is quite simple. First you need to familiarize yourself with the items you will need for the job.
Briefcase
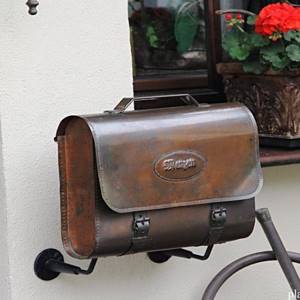
By making a metal mailbox stylized as a retro briefcase, you will be able to stand out from your neighbors, emphasizing your individuality and unique style. To make such a mailbox-briefcase, you will need skills in working with metal. People who feel like a fish in water in this matter will not have any difficulty in drawing a sketch of a briefcase and using it to recreate an effective model of a letter box and mail.
Necessary materials
First you need to choose the main material - the one from which you will make the frame of the product. If it will hang outside, it is better to use dense and waterproof materials. In the case of a children's mailbox, you will need:
- Paper, cardboard, wood or even foam.
- Scissors, glue, markers, pencil, ruler, paints.
- All kinds of decorative elements: beads, colored paper, stickers.
If you are making a mailbox out of wood, you will need varnish.
Manufacturing Instructions
You can make and install a mailbox for a private home with your own hands from metal or wood. But the technological process of each option differs in complexity. In order for the result to be not only strong, but also a reliable storage for letters and newspapers, in the process of developing your own drawing or processing a ready-made one, you need to adhere to the following rules:
- To assemble a mailbox from wood, additionally buy metal corners. Due to them, they increase the strength of the box and simplify its repair if necessary.
- The placement of the door for removing letters is a complex issue - much depends on the overall design of the box. For traditional boxing, it is better to choose a hinged bottom. It is convenient to remove letters through such a hatch, but it is better to immediately expose the bag or hands.
- The slot for correspondence, regardless of its location, must be covered from precipitation with a visor. Even in the holes on the side of the box, drops or snowflakes will fall into the holes in a strong wind.
- A lock on the mailbox is only needed in cases of outdoor placement. When making it yourself, it is better to choose the mortise option. A padlock is useless - they often get torn off.
Attention!
Some craftsmen, for their own convenience, implement an alarm system into a street mailbox - they install photos and LEDs on different walls and connect them to a light bulb in the house. If a letter blocks the light, the warning light lights up.
Tools and materials
Before starting work on making your own correspondence box, you need to first prepare materials and tools. Depending on the choice - metal, wood or masonry, the set of fixtures will differ. Example - for a free-standing cabinet in the English style, all you need is brick, mortar and a trowel. For a standard wooden mailbox you need the following set:
- screwdriver or screwdriver;
- jigsaw;
- hacksaw;
- drill;
- vice;
- clamp;
- wood screws (length up to 10 mm);
- sandpaper or fine-grain paper;
- anti-corrosion impregnation for wood;
- paint or varnish for exterior use;
- epoxy glue for wood (polyester resin);
- small lock for mortise;
- stainless steel hinges (card, heel or piano);
- block 7.5*5 cm, length from 1 m;
- thin (3 mm) plywood or veneer – 65*65 cm;
- plywood 9 mm – 65*43 cm.
Wooden blocks and plywood sheets must be carefully inspected before purchasing - there should be no knots. You can choose any type of wood - just go to a hardware store and buy the pieces of lumber you need. Self-tapping screws are selected according to the slots in the hinges - only the thickness of the plywood is taken into account. Additionally, you can take a clamp to attach the finished box to a pole - it is fixed on the back wall when installed in a permanent place.
Cardboard product
It is considered optimal for children's play. You can make your own mailbox out of cardboard using an ordinary shoe box. Its size can be anything. Next, you need to follow the following step-by-step instructions:
- Remove the lid from the box. Cut a rectangular hole in it, into which the envelope will fit.
- Use colored paper, stickers and markers to decorate your mailbox to make it look more colorful. This work should be entrusted to the child so that he develops his creative abilities. Ready!
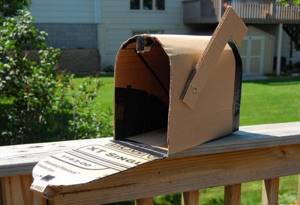
There is another, more complex way to make a mailbox with your own hands from cardboard. For this you will also need a regular shoe box. The action plan will be as follows:
- Remove the lid from the box. Cut off the last wall to create a rectangle that can be glued to the empty side of the box.
- Next, you need to place the box vertically in front of you. And carefully cut out the top cover so that it only sticks on one side. This will be the top of the mailbox.
- The upper walls need to be cut obliquely so that they are lowered towards the front side of the box, which will be the front. This way we will get a slope, like in real mailboxes.
- In the cut out lid you need to make a rectangular hole into which the letters will be placed. And use tape to glue this lid to the empty side of the box.
- The lid should be glued so that it is tilted down.
- The last stage is decorating the product to your liking.
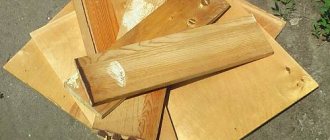
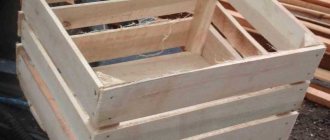
Mailbox from a box
If you have very little time left and no time to buy special materials, you can make a box for letters to Santa Claus with your own hands from an ordinary box of a suitable size. Here is our master class with photos.
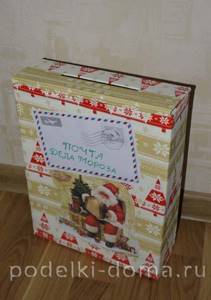
We found such a box