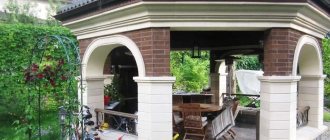
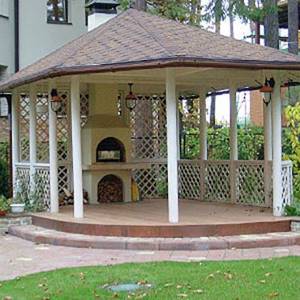
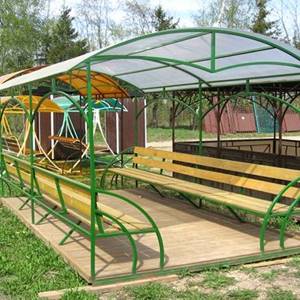
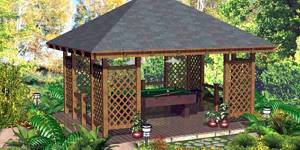
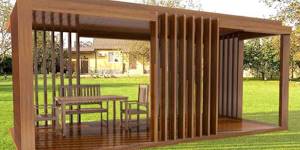
There are so many options for building gazebos in the country that choosing the design that will ideally fit into the landscape design of your garden plot and will meet the requirements for it is not difficult at all. Below we describe how to make a gazebo-tent, a mushroom and a rotunda with your own hands. In addition, you can learn how to build beautiful gazebos of other designs.
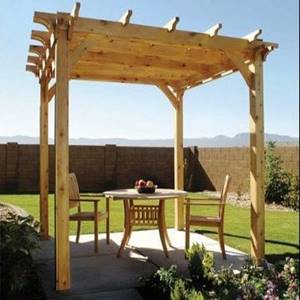
Do-it-yourself gazebo-tent for a summer residence (with photo)
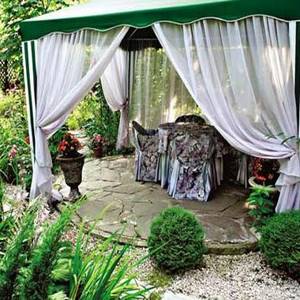
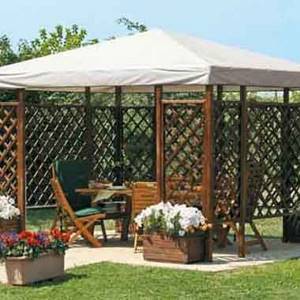
If you do not want to install a durable stationary gazebo on your site, you can limit yourself to small things: build a light tent.
To build a gazebo-tent with your own hands, you need to place four concrete disks or slabs in the corners of the site you like, which will serve as the foundation of the structure. In each of them, install a metal rod or tube made of aluminum or durable plastic, which are connected together at the top using a clamp or wire. You form supporting arches for the canopy.
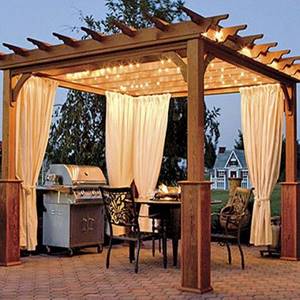
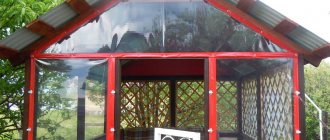
As you can see in the photo, for a gazebo-tent at the dacha, you can use thick colored fabric, oilcloth or thick film as a covering:
First secure the material in the center - put a new clamp over the connection of the arches or wind wire or twine, but through the roof fabric. Then stretch the awning and tie it to the supports, and to prevent the fabric from slipping along the pipes, tighten the clamps in place of the ties. When making such a gazebo with your own hands, around two or three posts from the ground to the awning, you can stretch a mosquito net (as an option, a large-mesh net through which to let climbing plants), leaving space for the entrance.
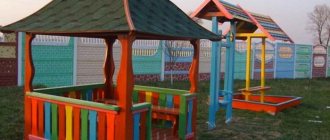
Under this gazebo-tent at the dacha you can place a rocking chair, a table, light plastic chairs, a cot for daytime naps - everything you need for relaxing in the fresh air. This design will successfully last the entire summer season, and it only needs to be dismantled with the onset of cold weather, and then only by removing the fabric awning.
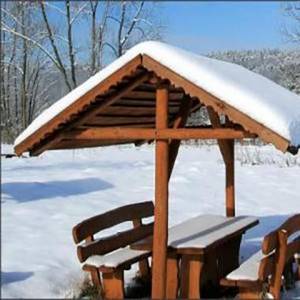
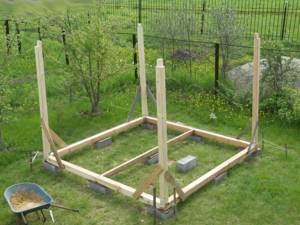
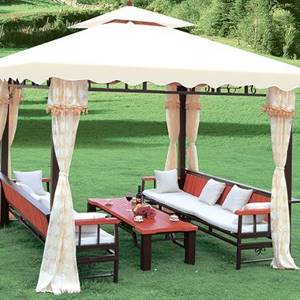
How to make a summer gazebo with your own hands at the lowest cost: photo, video, step-by-step instructions
Gatherings with guests, dinner with your family in the fresh air, relaxing after work in the garden - an economy class summer gazebo will be very useful to you in any of these situations.
It is not always advisable to make it large-scale and spacious; in most cases, a small and budget building is enough, which will delight you and your guests. The optimal size of a small summer gazebo is 3 by 3 meters. This is enough for both a family circle and a small group of people.
Today's problems sound like this:
- How to build a budget summer gazebo with your own hands?
- What materials can be used to make a summer structure at the lowest cost?
- How much would such construction cost?
This publication will discuss the step-by-step process of constructing, with photos and videos, a small gazebo made of timber with dimensions of 3 by 3 meters. This option is one of the cheapest and most practical for construction, but if for some reason it does not suit you, at the end of the publication I will provide links to similar articles on construction.
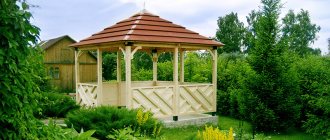
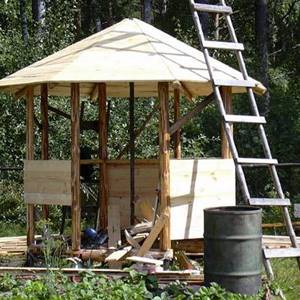
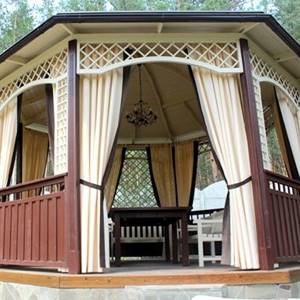
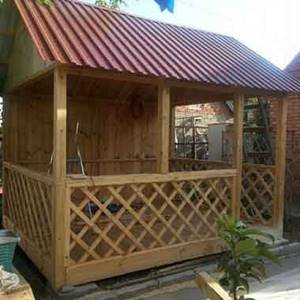
How to build a beautiful mushroom gazebo for your dacha with your own hands (with photos and videos)

To protect from the sun and rain, you can make a summer cottage-mushroom gazebo on your site with your own hands: the support of this small open building consists of two parts: the lower one - a metal pipe 0150 mm and 1.5 m long, and the upper one - a wooden post 2 m long.
Before you build such a gazebo in your country house, you need to install a pipe. To do this, dig a hole 50 cm deep in the intended location, install a pipe, fill it with crushed stone, compact it and concrete it. While the concrete hardens, you can make the mushroom itself.
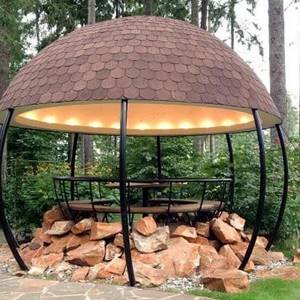
The lower end of the wooden post is cut so that it fits tightly into the pipe to a depth of 50 cm. Then the roof frame is assembled at the upper end of the post. Having measured 70 cm from its top, bars 15 x 15 cm and 5 cm thick are nailed on four sides. To each of them, slats 80 x 15 cm of the same thickness are attached from below, thus obtaining a cross-shaped lower part of the frame. When making a ramp, four similar slats are used. They are marked in place and filed down at the ends. At the joints, gussets are nailed to increase strength.
Look at the photo - such a self-made gazebo can be sheathed with any suitable material (plywood, oilcloth, plastic):
The finished rack with a mushroom roof is inserted into the pipe and a bench is installed around it. The iron posts of a wooden bench can also be concreted into the ground. If desired, arrange a small table around the central pillar of such a beautiful gazebo, built with your own hands. To do this, corners are welded to the post, on which a composite tabletop of two halves is placed with a cutout for the post in the center.
This video shows how to build a mushroom gazebo on a personal plot:
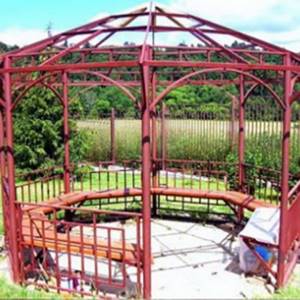
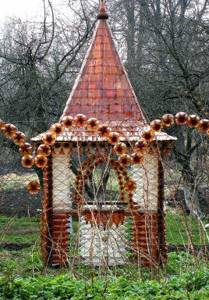
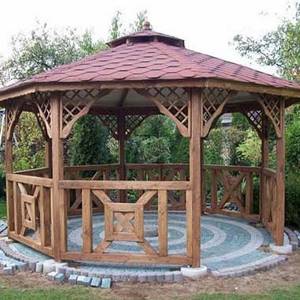
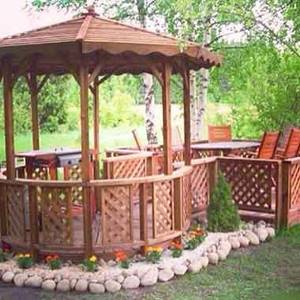
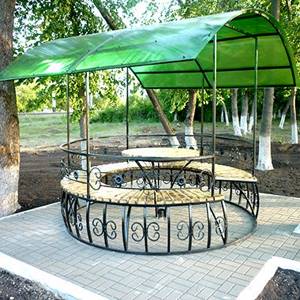
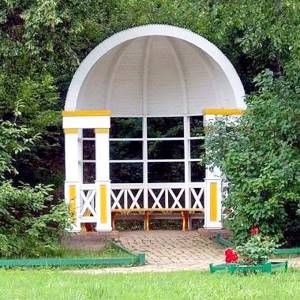
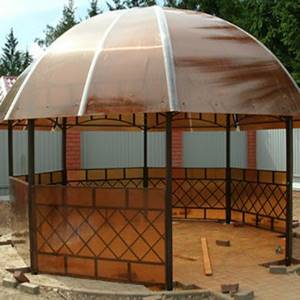
How to easily make a country rotunda gazebo with your own hands
It is very easy to make a cylindrical rotunda gazebo: as practice shows, it is best to use 0.8 mm pieces of reinforcing wire, the lower ends of which must be vertically fixed in the bricks of the ring base, and the upper ends, bent towards the center and connected together, should form a kind of dome . The strength of the structure is given by horizontal weaves from the same reinforcement. The entrance to the gazebo is through a vaulted opening.
To make such a simple gazebo with your own hands, you will need about 50 pieces. red solid brick and 310 linear meters of reinforcing wire with a diameter of 8 mm.
Before building a rotunda gazebo, you need to select a suitable site and lay out the base. In the center of the future gazebo, a peg is driven into the ground and, having tied twine or twine to it, two concentric circles with radii of 1.75 m and 1.9 m are marked on the ground. Then the top layer of soil is removed from the resulting circular ditch to a depth of 15-20 cm , instead of which a layer of sand 10-15 cm thick is poured, watering it abundantly and compacting it.

By laying bricks on the prepared base at small intervals and pouring and compacting sand in the gaps between them, a foundation for the foundation of the future gazebo is obtained. The bricks should lie horizontally, and their top surfaces should be flush with the platform.
Look at the photo - to build such a gazebo with your own hands, to install reinforcing bars, drill an 8-10 mm hole in the center of each brick:
It is better to do this with an electric drill with a carbide drill. To prevent the bricks from splitting, first drill holes with a thinner drill (03-4 mm), and then drill them to the required diameter.
When installing rods for a gazebo built by yourself, do not forget to skip 4 bricks - the entrance to the gazebo will be located in this place. If you want to make the passage wider or narrower than 1 m, pass more or fewer bricks, based on the fact that each is 250 mm long.
Having sealed pieces of reinforcing wire approximately 4 m long each in cement mortar in the holes, they are bent towards the center of the gazebo at a height of 2-2.2 m. The shape of the dome of the gazebo will depend on the bending radius. The ends of the reinforcement brought together in the center are welded to the central ring 0200 mm.
Then, when making a gazebo for a summer house, they begin to form the central frame. Horizontal rows are spaced 275 mm apart. The intersections of the reinforcement bars are secured by welding, having previously been secured with clamps.
The finished garden gazebo, made by yourself, is coated with a metal primer, such as PF, and painted in a discreet color. Finally, you should plant climbing and climbing plants around the gazebo. By the end of the first summer season, they will wrap around the frame and make it almost invisible and windproof, creating the impression of a weightless green dome. Even during the most intense summer heat, this gazebo will be cool and fresh, and the simple design of the gazebo, hidden by beautiful flowers and foliage, will delight guests.
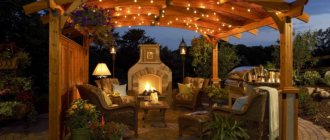
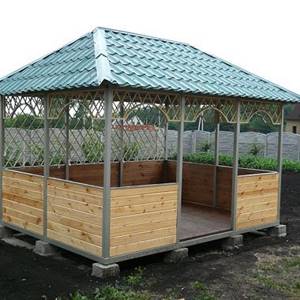
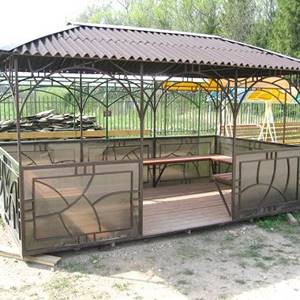
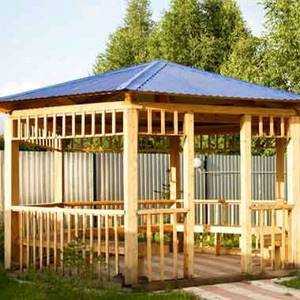
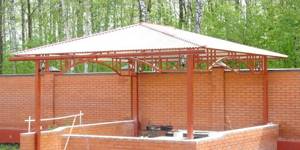
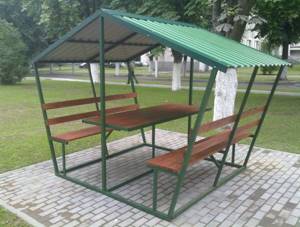
Technology of construction and installation of a welded metal gazebo at the dacha (with photo)
Continuing the theme of metal buildings, learn how to build a gazebo with your own hands, the entire frame of which is welded from steel corners. Such a building may not look rich, but it is quite capable of decorating a modest plot of six acres and will allow you to fully relax after working in the garden.
For corner posts you will need a 75 x 75 mm corner, and for the remaining frame elements - a 50 x 50 mm corner. The fencing of the welded metal gazebo is finished with eurolining, the tabletop is made of tongue and groove boards.
Pay attention to the photo - the highlight of the folding gazebo is the original roof:
To make the frame, you first need to mark the position of the corner posts, two pillars of the doorway and the places where the table and benches will be installed.
To ensure the stability of a welded gazebo made by yourself, all posts should be concreted. To do this, use a mechanical drill with a diameter of 25 cm to make holes 75 cm deep. For concreting, use a mixture of cement, sand and crushed stone of a fraction of 20-40 mm in a ratio of 1: 2: 1.5.
Following the technology for constructing such a gazebo, when concreting, it is important to control the verticality of the posts, for which it is very convenient to use a level with magnets, which allow you to securely fix the tool on a stand made of steel angle, freeing your hands.
The doorway posts of a welded gazebo for a summer house are different from the corner ones - they are thinner. You can, of course, make a doorway from a thick corner or immediately concrete different corners, but it is better in the places where the opening will be located to monolith sections of the corner 75 x 75 mm so that they protrude above the supports by about 50 mm. The opening posts themselves are then welded to these protruding ends from a 50 x 50 mm corner. Such an entrance to the gazebo will look more elegant.
When the concrete at the base of the corner posts has set, use a grinder or a hacksaw to cut the corners that will become elements of the upper, middle and lower frames. Weld the steel corners of the top frame around the perimeter of the gazebo, trying to ensure the rectangularity of the resulting frame. After this, you need to weld the corners of the middle and lower trim. Weld 50 x 50 mm corners crosswise perpendicular to the sides of the top trim, and in the center of the resulting crosshair - a vertical post, to the top of which 4 diagonal rafters are already attached. According to the technology for installing such a gazebo, the corners must be installed in such a way that the shelf of the corner faces upward.
To protect metal surfaces from corrosion, they are coated in two layers of black oil paint (MA-115), allowing the first layer to dry thoroughly.
Making a roof. To attach sheathing elements and roof parts made of dense fiberboard to the metal elements of the gazebo frame, first attach wooden blocks with a cross-section of 40x40 mm. For fastening, use 03.5 x 35 mm screws, which are screwed from the inside through the holes in the metal corners.
Triangular blanks for roof slopes are marked according to a cardboard template. Using a saw with a straight, fine tooth, cut pieces of dense fiberboard. Attach the cut pieces to bars screwed to the metal inclined ribs (corners) of the roof.
As you can see in the photo, the roof of the gazebo at the dacha, built with your own hands from a welded structure, is made of bitumen tiles:
The basis for the flexible tiles on the roof of the gazebo is uncoated roofing felt, glued to the fiberboard using bitumen mastic. Tiles of flexible tiles are also glued to bitumen mastic, and in places of overlap they are nailed with small galvanized nails with a diameter of 0.5 x 20 mm with round heads. The tiles are glued starting from the bottom edge of the slope, overlapping the glued bottom row with the top row.
When building a gazebo at the dacha, the bars of the fencing sheathing are placed on the corners of the frame from the outside, drawing them to the corner with screws from the inside. For cladding, it is best to use lining, pre-painted with two layers of paint. Profiled boards are nailed to the sheathing with galvanized nails 01.0 x 20 mm with small heads. Handrails made of planed bars with a cross-section of 50 x 100 mm are nailed along the perimeter of the fence.
Handrails and fencing trim should be coated with durable clear furniture varnish in three layers.
At the top of the fence you can install green sliding trellises: cut them to the size of the openings and screw them to the slats on top of the handrails.
When preparing the base, you first need to select a layer of soil about 5 cm thick inside the gazebo, and then level the surface in a horizontal plane. Place crushed stone on top in a 3 cm layer and compact it thoroughly. After this, pour coarse river sand in a 3 cm layer. Instead of sand, it is better to use so-called flour (crushed industrial slag) with the addition of M400 cement (approximately 10% of the volume).
When building a gazebo in a dacha, you can use 300 x 300 mm paving slabs for paving the floor and making a blind area. This coating will go well with a tiled roof if the tiles are used in different colors and laid in a checkerboard pattern. To lay the tiles, use a rubber mallet and a 500 mm long building level.
After laying the paving slabs, they must be shed generously with water, and after drying, the remaining flour or sand must be removed.
On the outside, along the perimeter of the gazebo, tiles are laid with an outward slope - they serve as a blind area. The water flowing from them during rain falls into a nearby gutter and is drained away from the gazebo.
To build a welded gazebo in the country, follow the photos below:
Construction of a gazebo
Step 1. Making the foundation
There are several types of grounds:
- tape;
- columnar;
- tiled.
Considering that the gazebo is not a particularly massive structure, a columnar foundation is perfect, since it is easy to manufacture and cheaper than the other two varieties.
The work takes place according to the following plan:
- The site for the future gazebo is being marked. To do this, the dimensions available in the drawing are transferred to the site on the appropriate scale. You can use twine by pulling it over pegs driven in at the edges.
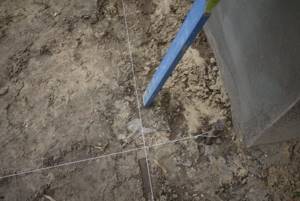
For marking, a string stretched over pegs is used.
- After this, a layer of soil is removed in the right places. It is advisable to remove the soil to a depth of at least 50 cm. The edges of the holes are made smooth, since in the future they will serve as formwork for pouring concrete.
Holes for filling are dug in the right places
- We fall asleep on the pillow. It consists of two 10-centimeter layers - sand and crushed stone - which must be thoroughly compacted.
- Fill the remaining space of the holes with concrete mortar. It is mixed from cement, sand and crushed stone in a ratio of 1:3:3.
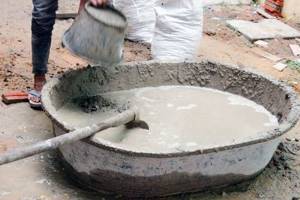
Concrete is used to fill the columns
- After the concrete has hardened, roofing felt is placed on it, which will serve as a waterproofing material.
- Then a brick column is laid on the resulting base. It is enough to put 3-4 rows. It is necessary that there be an air cushion between the surface of the soil and the bottom of the future conversation to prevent the wood from rotting.
Ready foundation for the gazebo
Step 2. Construction of the frame
After the foundation comes the turn of the frame.
Let's look at the whole process in detail:
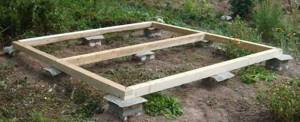
- The base is being made. It is supported by a massive beam with a cross-section of 150x150 mm, which is connected to each other using nails or self-tapping screws. To give the structure strength, you can use bevels.
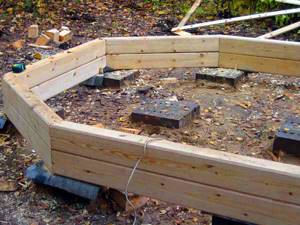
Foundation for a future gazebo
- The supporting supports are made thin. The minimum cross-section of the timber is 40x40 cm. The upper ends are secured using horizontal strapping, which, at the same time, serves as a support for the roof rafters.
Frame for gazebo
- You can sheathe the structure with boards, however, no one prohibits the use of other materials:
- branches for weaving;
- decorative plastic mesh;
- textile;
- polycarbonate and so on.
You can use wood to cover the gazebo
- The floor is made of boards, which are laid on logs. The latter rest on the lower trim and are secured with self-tapping screws.
Step 3. Roof construction
For the roof of the gazebo, it is advisable to use the same material that was used in the construction of other buildings. This will allow the structure to fit more organically into the landscape design of the site.
Most often used:
- Slate. In this case, even at the design stage, it is recommended to make a frame of such dimensions that when laying it, the sheets do not have to be cut. The material must be secured with nails with special heads that are driven into the joists.
The slate is secured with special nails
- Ondulin. Before laying this type of roofing material, OSB boards should be fixed to the roof, to which the bitumen shingles are glued.
Don't forget about functional and decorative elements:
- table and chairs for the garden;
- hedges;
- flowers in pots;
- small garden architectural forms and so on.
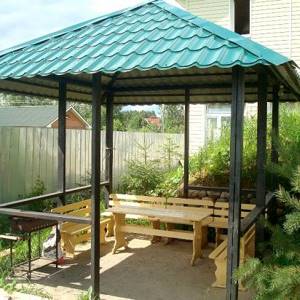
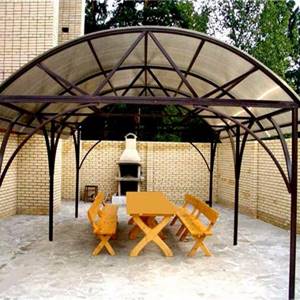
Alternative - metal gazebo
The main advantage of this material is its elegant appearance and long service life of the building. This is especially true for wrought-iron gazebos, which will undoubtedly attract the attention of guests. Designs that have a complex geometric shape - a hexagon or octagon - look even more unusual.
Let's look at some aspects of the process of constructing a standard metal gazebo.
- The preferred material is profile pipe. It is quite durable, but, unlike the corner, has much less weight. To protect against corrosion, all metal parts after assembly should be cleaned with sandpaper, primed and painted.
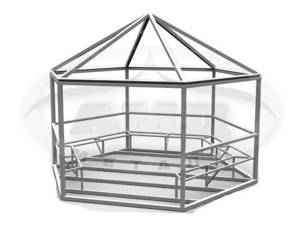
Gazebo frame made of profile pipe
- The connection can be made using bolts or welding. The first option is more preferable, since in this case you will receive a mobile structure that can be moved, assembled and disassembled at the request of the owner of the site.
Advice! Construction supermarkets sell ready-made gazebos. Once purchased, they only need to be delivered to the site and assembled on a pre-prepared base, which saves time and money. The disadvantage is the lack of individuality in the design and a small selection of sizes.
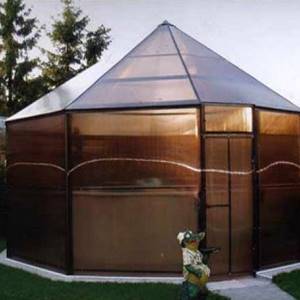
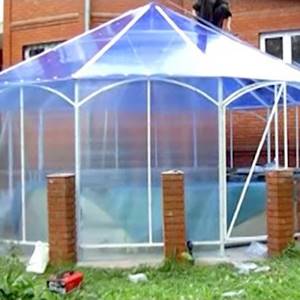
- Previously, profiled metal sheets were used as wall cladding. This material has not lost popularity today. But a structure covered with cellular polycarbonate will be more attractive, light and airy.
- As in the case of a wooden gazebo, to give the structure a complete look, you should decorate it with climbing plants, flowers in tubs, install a barbecue oven and a table for your summer cottage inside. Here everything depends on the individual preferences and artistic taste of the inhabitants of the dacha.
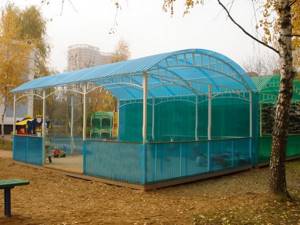
Photo of a polycarbonate gazebo
The main disadvantage of a metal gazebo is its susceptibility to corrosion. You should carefully monitor the condition of the structure and, if pockets of rust appear, take measures to eliminate them. To do this, just clean the damaged area, prime and paint it again.
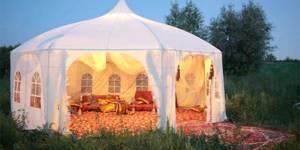
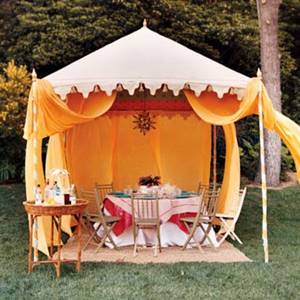
A simple summer gazebo made of fabric for a summer cottage with your own hands (with photo)
As mentioned earlier, many materials are suitable for creating gazebos. But there are often problems with their delivery to a summer cottage, and construction work, as a rule, is not completed quickly.

Few people know that there is an easy, quick and simple way to erect structures such as gazebos, showers, verandas, and toilets. Moreover, the only building materials you will need are pieces of any fabric, epoxy resin and four metal pipes or wooden poles for supports. The technology for building a fabric gazebo for a summer residence is extremely simple.
Install four pillars (metal pipes, logs, etc.) in the chosen location at the corners of the future building.
Apply parquet wax to some horizontal, flat surface, such as a plywood panel.
From any fabric, cut out a piece to the size of the future wall panel, lay the fabric on the panel and impregnate it with epoxy resin, adding dye if necessary. For greater durability of a summer gazebo made of fabric, you can form a panel of 2-4 layers of fabric. Make the required number of panels for the walls and ceiling - they will be ready in a day. Attach the panels to the installed posts. Strong, durable, lightweight construction is ready!

Look at the photo - you can build such a simple gazebo in oriental style with your own hands. To do this, make not a flat roof, but an elegant dome: attach a panel of any fabric to the tops of four pipe-racks located in the corners of the building so that it sag, and apply epoxy resin to it (preferably by spraying). The next day, remove the panel, turn it over and secure it to the tops of the pipes.
Of course, if necessary, you can thicken the walls of the dome, making them two or three layers.
As you can see in the photo, building such a gazebo is not at all difficult:
What materials can be used to make a summerhouse?
Let's see what scrap materials and household waste can be used to make a beautiful and cozy gazebo with minimal costs.
From glass bottles
Glass bottles, which we sell for pennies, can be used as building material. They provide high strength to the structure and also have excellent thermal insulation properties. Residential buildings are built from glass containers, and a gazebo made of such material would be an excellent summer cottage solution.
Bottle glass is a heavy material both in weight and in the method of fastening. Therefore, if the concrete is too liquid or viscous, the masonry will be defective.
Since the characteristics of a bottle wall are similar to a brick wall, you will need to pour a strip foundation. If desired, you can use bottles to make any pattern that will decorate your gazebo. Beauty, convenience, low cost of construction and good thermal insulation are the main advantages of bottle building material.

Original gazebo made of glass wine bottles
From plastic bottles
Plastic bottles are also an excellent building material that some people may not realize. Plastic bottles, wooden boards, nylon thread and fasteners - and you can have a beautiful and original gazebo for your dacha. Since the decomposition period of plastic is 200 years, a building made from this material will last you a very long time. Unlike glass containers, plastic ones are lighter and more transparent, so the design will be almost “weightless” and at the same time durable and stable. There are practically no disadvantages to this design, except that the roof of the gazebo will have to be made of polyethylene film, polycarbonate, corrugated sheeting or other waterproof material.
Gazebo made from plastic bottles for a summer residence
From old videotapes
Videotapes can be an excellent material for building a summerhouse. You just need to collect a sufficient number of them and then put them together into an original gazebo. This will be a durable capital structure if you approach this issue correctly and choose a good, but inexpensive adhesive composition for plastic. Since the cassettes have a rectangular shape, constructing a building from them will be simple and convenient, unlike plastic or glass bottles. This design will not cost much, but you will have to buy material for the roof if you want to make the roof waterproof so that you can rest in it even in the rain.

Original summer gazebo made from old videotapes
From beer cans
Instead of throwing away aluminum beer cans or lemonade cans, you can make an excellent gazebo out of them. To do this, you need to collect a certain amount of metal containers and “turn on” your imagination.
Interesting fact! In the 1970s, an American named John Milkovich lined his entire house, outbuildings, and even his dog's kennel with empty beer cans. After the death of the owner, his children kept the house in order and regularly restored the walls, updating rusty cans. Today the house belongs to a charitable organization and is open to everyone who wants to look at this unique structure.
And if you make a gazebo out of beer cans, you can surprise your friends and neighbors. The disadvantage of the design is the effect of corrosion on the metal, so it cannot be said with confidence that the gazebo will stand for a long time without proper care or replacement of rusty cans.

House and other structures made from beer cans
From wooden pallets
Pallets have long become one of the most popular materials for the manufacture of garden furniture. And now you can make a garden gazebo out of them. This material is convenient and easy to work with, so you can quickly build a structure for your personal plot using a minimum amount of additional materials.
Advantages of the gazebo:
- Speed of construction;
- Ease of use;
- Versatility of finishing;
- Durability;
- Aesthetic appearance.
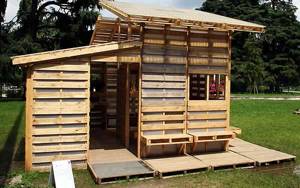
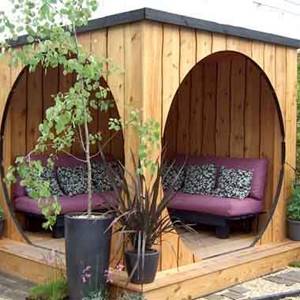
Stationary gazebo made from pallets for a summer residence
From cut tree trunks
If you decide to thin out your garden and cut down old fruit trees, then you should not immediately cut them for firewood. If you get a little creative, you can build an excellent gazebo that will serve you for many years. To build it, you will need a wooden, concrete or tile base, four, six or nine trunks, as well as the remaining branches for arranging additional elements. Nails, screws and other wood hardware can be used as fastenings. You will get a wonderful “fairytale” garden gazebo made of natural wood. Advantages:
- Speed of construction;
- Cheap materials;
- Simplicity of design;
- Ease of use;
- Long service life.
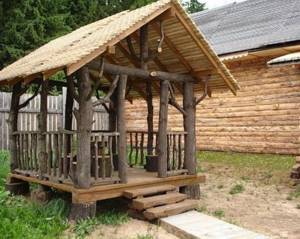
Gazebo made from sawn trunks on a pedestal
Made of natural stone with reed roof
If your region has a large amount of ordinary natural stone (river or sea), then you can use it to make an excellent garden gazebo with a roof made of real reeds. This would be a great summer structure to gather around on a hot afternoon. Since stone is a natural material, it will not be hot in the gazebo even at high temperatures outside. This design will look great on the exterior of a summer cottage overlooking a river or the sea.
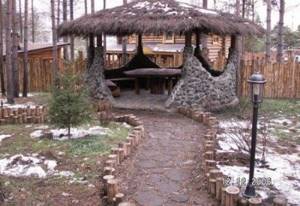
Stone gazebo with reed roof
Construction of a prefabricated garden gazebo for a summer residence with your own hands (with photo)
The proposed openwork gazebo has a prefabricated structure. This makes it easy to move it from one place on the site to another, and at the end of the summer season it is easy to disassemble and store it in the utility room. For such a prefabricated gazebo for a summer residence, neither a foundation nor a floor is needed. All you need is four walls and a light hipped roof made of four trapezoidal panels that are connected to the walls with hinges. Assembly is not difficult; It’s enough to lay out the parts on a flat area - and in a maximum of an hour the gazebo is ready. And after disassembling, the gazebo turns into four flat bags, convenient for storage.
The prefabricated garden gazebo has four walls that are completely identical in design. At the same time, there are also four entrances - each wall is formed by a light frame made of planks with a cross-section of 25 x 40 mm, a vertical beam-post with a cross-section of 40 x 40 mm divides the wall into two halves, one of which is barred, and the second is precisely the entrance opening.
The grid is assembled from 20 x 20 mm slats in a ready-made wall frame. In order for the lattice pitch to be the same, you need to mark the vertical strip of the wall and the middle beam into equal sections, setting them aside on the horizontal sections of the frame. First, one row of slats is nailed flush with the vertical bar and the middle beam, then along them - the second row, which will also be flush on the other side of the wall. Nails are driven not only at the ends of the slats, attracting them to the frame, but also into the crosshairs of the lattice, which will give the structure additional rigidity.
Additional mounting bars with a cross-section of 40 x 40 mm are nailed to the sides of two opposite frames. Through them, furniture bolts and nuts are used to connect to the other two frames when assembling the gazebo. Holes for bolts in these beams and the corresponding wall strips are drilled at strictly equal distances.
The easiest way to cut roof panels is from chipboard or MDF; In addition, their weight will give additional stability to the lightweight structure. Beveled strips are attached to the horizontal sides of the panels with screws: the lower one is for connecting on card loops with the upper strips of the wall frames, the upper one is under the central square made of the same material. To connect the panels to each other during assembly, use metal corners installed on their upper strips with holes for M5 fastening bolts and nuts.
Before assembling a summerhouse gazebo with your own hands, the prepared sets of walls and roof are thoroughly impregnated with drying oil and, after drying, painted with oil paint on the outside and inside. Both monochromatic structural elements and those painted in different colors (for example, color highlighting of the lattice part) will look good.
The gazebo must be assembled in packages: the finished wall is connected to the roof panel. Then, on a flat area, all four packages are laid crosswise, with their bases facing each other; the walls with the mounting bars should be on opposite sides.
If you now lift and join two adjacent walls, you get a corner of the gazebo; you can tighten it with furniture bolts, and fix the raised roof panels at the top with bolts through metal corners. The second corner of the gazebo is formed in a similar way, after which they are connected to each other, and a central square-shaped panel is installed on top.
The video “Do it yourself gazebo” shows how to install such a structure:
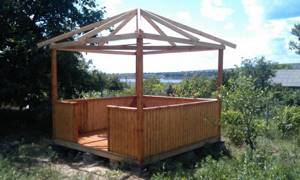
Lightweight gazebo for a summer cottage with your own hands (with photo)
Making an elegant light gazebo with your own hands is not at all difficult. You will need boards for the floor and roof, bars for the frame, slats for trellises, carpentry tools and some free time. Such a light summerhouse can decorate any garden plot.
As you can see in the photo, they begin to build a light gazebo for a summer house with their own hands from the floor:
Put together a shield from boards and nail it to a frame of 10 x 15 cm beams to create a flooring. Now make two side walls - approximately the same as in the previous design, attaching lattices of thin slats to the vertical support bars. Immediately attach a rafter beam to the upper ends of the half-tree supports, completing the wall frame at the top. Screw the assembled frames for a lightweight gazebo with self-tapping screws to the sides of the deck.
The back wall of a light summerhouse can be made separately and added to the side walls and decking. Or you can do it even simpler - screw the middle and top purlins to the rear posts of the already installed sidewalls, and then sew up the wall with trellises.
There is also no point in making a separate façade. Screw the upper roof purlin to the front supports and decorate the facade with trellises in any style, forming a door or leaving almost its entire area free.
Lay the roof with boards and cover it with roofing felt, shingles or bitumen tiles. That's all the work.
Look at the options for light, hand-made gazebos:
The following is a description and step-by-step photos of constructing a semicircular gazebo with your own hands.
Construction options from other materials
In addition to wood, there are several other materials from which you can build a gazebo with your own hands. In particular, I'm talking about metal pipes and bricks.
There are a lot of options using scrap materials (pallets, bottles, wicker branches), but in this article we are looking at the classic approach to construction, so you can get acquainted with similar options in other publications.
From a metal pipe (profile)
The installation of such a gazebo is radically different from what happened in the case of a wooden one. It is necessary to measure and cut the pipe to certain sizes, after which everything is welded into a single metal structure and some kind of shelter is added (corrugated sheeting, polycarbonate, wood).
Complete article on making a gazebo from a profile pipe.
Since the pipe is a lightweight material, it does not require a serious foundation (like, for example, a brick one).
In some cases, a flat surface is enough for the gazebo to stand stable. You can see several similar examples in the photo below.
For serious gazebos made of metal pipes, it is necessary to prepare a columnar foundation in advance or completely concrete the pillars. All this will allow you to fix the gazebo in one place as much as possible.
Before you begin construction, you will need a detailed diagram of the gazebo, which will prevent you from making mistakes when purchasing a certain amount of material. It is important to calculate the size of the pipe, since if the gazebo is large and the pipe is small, then it may not withstand the load. At the same time, there is no need to concrete pipes the size of an oil pipeline for a 3 by 3 meter gazebo.
I found the video of Andrey Vinnichuk , who single-handedly assembled a metal gazebo over the weekend, quite interesting. Moreover, in addition to the usual one, there is a bent pipe, as well as forging elements. You may be interested in some of the tricks of an experienced craftsman; after all, it’s worth a lot to assemble such a structure over the weekend.
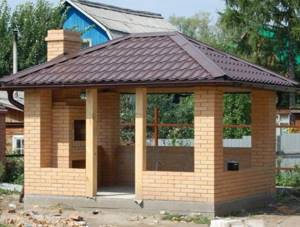
Made of brick
If you've ever wondered how to build a gazebo yourself, then you most likely know that a brick gazebo is the most difficult to build.
In addition to mental calculations, development of drawings and designs, its construction also requires physical strength - carrying bricks, concrete and mortar for bricks.
In addition, if we assume that construction is done with one’s own hands in order to save money, then in the case of a brick gazebo there is no talk of any serious savings.
In the vast majority of cases, a brick gazebo is the most difficult and expensive to build.
However, if you decide to undertake such serious construction, then if all requirements are met, you will be able to achieve both aesthetics and quality. First of all, you need to take care of the foundation - in most cases it should be strip and reinforced.
Strip and reinforced foundation for a brick gazebo
I would like to cite a few brick gazebos that seemed interesting to me for DIY construction. Some of them do not require large expenditures on material and, perhaps, you can get some ideas for self-construction.
DIY construction of a garden semicircular gazebo
What summer resident would not want to have a beautiful gazebo, even if the land in his possession is not enough? The proposed design of a semicircular garden gazebo will probably appeal to many. You can build such a gazebo with your own hands without much expense.
First you need to decide where to install the structure. Obviously, this depends not only on the orientation of the site to the cardinal points and its configuration, but also on what has already been built and planted on it. However, in any case, it is better if the gazebo is facing west. During the day, when the sun is shining from the south, the shade under the canopy will be quite enough for a comfortable rest. And if you plant a spreading fruit tree on the south side of the gazebo, it will provide additional shade during the day. In the evening, it will be pleasant to enjoy the gentle evening rays of the setting sun.
The site for the future structure is prepared based on the dimensions of the gazebo, which can be adjusted if necessary. First, the turf is removed and board formwork is installed to fill the base of the gazebo - a monolithic concrete strip into which pieces of metal pipes with a diameter of 100 mm are embedded, used as nests for installing load-bearing posts. Such a small (about 10 cm high) wall will reliably protect the site from grass, prevent rotting of the posts and increase the strength of the structure. This does not require much cement, but the benefits are obvious.
The surface of the site, lined with concrete tiles, which can be purchased ready-made, looks good.
Making such tiles yourself is not at all difficult, and there are many ways to do this. For example, the simplest of them is to make a square shape into four cells with sides of 300 mm from boards 50 mm wide. The finished frame is laid on a flat surface, and to prevent water from leaving the solution, the shield is covered with waterproofing, film, roofing felt or other similar material. The cells are then reinforced using pieces of mesh or wire, and concrete is poured into the mold.
As shown in the photo, a semicircular gazebo can be decorated with fragments of colored ceramic tiles, which are sunk into the solution until it sets:
But you can only use ceramic floor tiles for this, since ordinary tiles do not withstand frost well and quickly crumble.
Finally, the site can simply be filled with concrete and then laid out with a beautiful ornament of ceramic tiles.
Calculating the amount of materials required to build such a gazebo with your own hands can only be done by deciding on the size and shape of the semi-gazebo. You can use various auxiliary materials at hand. You can do without steel pipes under the racks by using folded sheet metal sleeves as nests.
Otherwise, to build a semicircular gazebo with your own hands, you need to stock up on the following materials (tentatively):
- cement grade M500 - 100 kg;
- river sand - 300 kg;
- concrete tiles 30 x 30 cm - 40-45 pcs.;
- timber 150 x 150 mm, length 2.2 m - 7 pcs.;
- block 50 x 50 mm - 15-20 linear. m.;
- block 40x40 mm with a selected quarter - 15-20 linear. m;
- tongue and groove floorboard 40 x 150 mm - 20 linear. m;
- edged board 25 x 150 mm - 10 linear. m;
- lining - 10m2;
- rail for gratings - 70 linear m.
You will also need nails and screws of various lengths.
All this, in principle, is not difficult to bring to the dacha even in a passenger car, having previously cut the long material to size.
Gazebo design. The gazebo is essentially a semicircular wall with a canopy, equipped with benches with backs. The load-bearing basis of the structure is seven racks made of coniferous timber with a cross-section of 150 x 150 mm, installed in the nests of a concrete tape.
The lower part of the wall consists of solid clapboard panels, stuffed onto strapping bars, and the upper part consists of decorative trellises, which are an excellent basis for climbing plants. The trim bars are connected to the posts by a notch in such a way that the sheathing panel is flush with the load-bearing posts.
In this case, the armrests installed on top of the panels cover the ends of the sheathing boards, while remaining aligned with the posts.
Decorative grilles. They are not difficult to make. To do this, you will need to assemble the frame with the selected quarter of the frame, and then stuff thin slats into the folds. The optimal cross-section of the bar is from 40 x 40 mm to 50 x 50 mm. However, if you are confused by the operations of selecting a quarter, then you can make prefabricated bars by connecting them together - for example, 20 x 20 mm bars and 20 x 40 mm slats.
The frequency and location of the lattice slats for building a gazebo at the dacha with your own hands can be different. The simplest option is two central diagonals and four segments in each sector parallel to them.
The filling sequence is as follows. First, all the slats parallel to one diagonal are fixed, and then the second layer is transverse to them. You can even use window glazing beads as slats - it will turn out beautifully.
The dimensions of the gratings depend, of course, on the dimensions of the structure. If their height is a matter of taste, then the width of the frames can be made slightly smaller (4-5 cm) than the size of the run between the posts. Using later (when installing frames to racks) small cylinders, cut, for example, from an ordinary shovel handle, you can get a very interesting decorative effect - the gratings seem to hang in the air.
There is also nothing unusual in the structure of the canopy. To ensure a slight slope of the canopy, the upper parts of the posts should be cut at an angle. It is better to do this before installing the stands, since working on the ground is undoubtedly easier.
Adjacent racks at the top are fastened with two boards, stuffed on the outside and inside of the structure. To do this, it is advisable to use thicker boards (at least 25 mm), which will allow you to equip a more durable and reliable canopy. Sections of lining are stuffed onto the ends of the boards of the top trim - and the simplest canopy is ready.
The completeness of the canopy will be given by cornice boards stuffed onto the ends of the roofing boards, which can be decorated with decorative carvings or highlighted with a color to your liking.
The most important element on which the convenience of the structure depends is the benches. As seats, you can use any sufficiently thick boards at hand - ordinary planed or floor tongue-and-groove boards (“forty boards”).
The optimal width of the seat is 30-34 cm. To do this, it is not at all necessary to look for whole wide boards, since the bench can be assembled from 2-3 pieces of narrow boards, located with a small gap, so that water does not stagnate in the joints, which can cause rotting of the wood.
The seats are mounted on two types of supports. Intermediate - traditional brackets made of 50 x 50 mm bars and embedded in racks. The two outer supports are decorative. Each of them is made of two pieces of floorboard, fastened at the ends with 50 x 50 mm bars, the top of which is also cut into the rack. Using a jigsaw, you can give the front faces of the supports any configuration and thereby further decorate the structure.
The seats of the benches can be made removable, which will allow them to be removed indoors at the end of the season, thereby extending their service life. To do this, when attaching elements, it is enough to use self-tapping screws instead of nails.
The backs are well-planed and sanded boards, mounted on supporting posts. A comfortable angle for the backrests can be easily achieved using small triangular brackets cut from scraps of the same board.
Wooden elements of the structure should be treated with decorative impregnation of one or several shades. In this case, the gazebo will be well preserved and will look elegant.
To make the relaxation area more comfortable, it can be additionally landscaped. To do this, a small ditch is dug along the perimeter of the structure, filled with fertile soil and various climbing plants are planted there - for example, maiden grapes, hops, ivy and the like.
DIY gazebo. Step-by-step instructions with photos and videos
23.06.2016, 01:05 209 Views
A self-made gazebo is not only a great place to relax at the dacha during the warm season, but also a wonderful decoration for your dacha or garden. Do-it-yourself gazebo , step-by-step instructions, practical tips on how to build a gazebo on your summer cottage.
How to make a gazebo with your own hands? Some practical tips for those who want to build a beautiful gazebo in their country house with their own hands
The first thing you need to do is choose the right place for the gazebo in your garden or summer cottage. Remember that the convenience of its operation and getting a good rest at the dacha depend on the choice of location of the gazebo .
For example, if we place our building in a low-lying area, then in the spring, when the snow melts or water collects after rain, your pavilion will be located in a flooded area; accordingly, when choosing such a place, your gazebo will rot, which reduces its service life. to get to your ideal place to relax through puddles and mud, and this is not the best way to relax in the country.
- if a fireplace, stove or barbecue is installed in the gazebo, then it is best to place it away from the house, since smoke can get into the living quarters, which will be very unpleasant;
- It is advisable that no trees grow in the place chosen for the construction of the gazebo ; their root system can present several unpleasant surprises and additional problems during the construction of the foundation;
- You should not place the gazebo on the shaded side of the site; try to place your building so that the sun peeks in there in the evening hours. Also, it must be remembered that regardless of the material chosen for the construction of the gazebo , it must be able to dry and ventilate after rain;
Despite its beauty, we do not recommend placing a gazebo on a summer cottage under the canopy of trees. During gusty winds or thunderstorms, branches may break, leading to roof failure. Also, fallen leaves will be blown by the wind, which will create additional rotting.
Advice! If your dacha plot has an uneven landscape, then choosing the right foundation for a gazebo will help you avoid this. Be sure to find out what level the groundwater is in your area.
DIY gazebo: choice of material, design and layout of the gazebo
For all novice builders, we advise you to first select a gazebo project and its type, determine its shape and dimensions. Be sure to discuss the roof structure as well as the materials used in the construction of the gazebo walls. In addition, it is necessary to determine the design and type of interior and exterior decoration.
You can make a gazebo project with your own hands , or resort to ready-made options, where all the calculations and drawings have already been made. Also, a gazebo project can be ordered from specialists, but this will significantly increase the cost of building a gazebo .
For the laziest summer residents, of course, a ready-made option is suitable - a “turnkey gazebo”, which you can buy and install on your summer cottage ready-made. But if you still decide to make a gazebo with your own hands , then you will have to determine what material to make the gazebo from , what sizes to choose, and its layout. When choosing the material and size of the gazebo, first of all you need to proceed from financial and practical considerations. We can confidently say that a wooden gazebo on a summer cottage looks better, and it is much more pleasant to relax in the company of friends and family. Wood has a pleasant texture, unlike metal, has healing properties and is conducive to relaxation.
When the issue with the choice of material, layout and project has been decided, we advise you to conduct an interactive review, or rather, review many options for a photo gazebo or video in order to take into account all the necessary possibilities. At the end of our article “How to make a gazebo with your own hands in the country?” We have prepared various options for photos of the gazebo , as well as videos, viewing which will help you decide on the type and layout of your future gazebo.
How to choose a foundation for a gazebo?
The next step is the foundation for building a gazebo on a summer cottage. correctly chosen foundation for a gazebo will allow you to avoid further problems during its operation. The types of foundations for gazebos can be different and depend on the needs of the site owners. This can be a strip foundation, a column foundation, a monolithic slab, as well as a pile-screw foundation (screw piles).
For a small and light gazebo, a shallow strip foundation is quite suitable. Before work begins, the site is marked. To do this, stakes (beacons) are driven into the corners of the future foundation, and between them we stretch a construction sword - this is the outer side of the foundation. Now, from each corner but inwards, mark 30–40 cm, drive in stakes (beacons), pull a rope or twine. It is along these marks that we dig a trench for the foundation of the gazebo.
Important! The height of the trench is dug below the freezing level of the soil in your area. After the trench for the foundation is ready, it is necessary to pour sand onto the bottom of the trench, which is then leveled, and a plastic film is placed on top to avoid air gaps in the foundation.
How to make a reliable and strong foundation for a gazebo?
After you have dug a trench and prepared it, you need to make your own reinforcement To do this, use construction reinforcement, which will give additional rigidity and reliability to the foundation, and it will not sag if you are making a gazebo out of brick. foundation reinforcement is done using periodic reinforcement with a cross-section of 8-10 mm. It is necessary to assemble a frame from reinforcement; in its manufacture, knitting wire and a special hook are used. The technique of knitting reinforcement with knitting wire is quite simple and anyone can master it.
Foundation for a gazebo - photo.
The finished metal frame is placed inside a wooden formwork. When making, use a board with a thickness of at least 2 cm. If you use an unedged board to make the foundation of the gazebo, then before pouring the concrete, you must seal all the holes in the formwork to avoid concrete leakage.
Advice! Ventilation holes must be provided to ventilate the foundation. They can be made from pipe scraps and placed on each side of the formwork depending on its size. If you are building a large gazebo, then there should be several ventilation holes on each side.
The height of the foundation for the gazebo depends on the landscape of the site. If you are building a gazebo on a flat and non-flooded area, then it is enough to understand the height of the foundation to be 25-35 cm from the ground level. This height will be enough so that the floor of the gazebo does not come into contact with the ground and is not susceptible to rotting. After the formwork has been assembled and the reinforcement frame has been installed, concrete is poured. During foundation concreting work, it is necessary to pierce the concrete foundation with a sharp stick or reinforcement to avoid the formation of air pockets in the concrete. After pouring concrete, the base of the foundation is leveled using a level.
Foundation for a gazebo - photo.
It is very important that the formwork is removed 4-5 days after pouring the concrete, and the concrete will gain maximum strength in a month. You can begin building a wooden gazebo after three weeks.
If you have never encountered or seen how a foundation for a gazebo , then the best solution would be to invite friends or acquaintances who are familiar with this work. Also, you can contact professional builders.
Gazebo walls
While your foundation for the gazebo is drying, you can prepare the necessary materials in advance, based on the size of the project. In the case of building a gazebo made of wood, it is necessary to treat the materials with an antiseptic composition, which prevents rotting and the appearance of fungus.
Metal structures are pre-treated with an anti-corrosion primer. After the foundation for the gazebo has dried, we proceed to installing the walls. In each case, the construction of walls is carried out strictly in accordance with the project. All dimensions must be checked using a building level and plumb line.
After installing the columns, you need to check the diagonal along the floor and ceiling. When installing the walls of the gazebo , do not rush, check the dimensions and drawings again.
Gazebo roof
After the walls of the gazebo are ready, begin building the roof in accordance with the project. If you prepared the rafter system in advance while the foundation was drying, its installation will not take much time. Remember to be project driven. After installing the rafter system and sheathing, you can begin installing the roofing. What kind of coating you use depends on your taste and preferences. Be sure to consider the color of the roof of existing country buildings when choosing the color of the gazebo roof.
Gazebo floor
To ensure that the floor in the gazebo is strong and reliable, we recommend using a wooden beam with a cross-section of 100x100mm. To ensure that it does not sag in the middle, it is necessary to make additional supports or fastenings. As an example: you can use pillars made of brick, which will provide additional support for the logs. We install the logs into pre-made holes during the assembly of the walls. After installation, do not forget to treat all wooden structures with an antiseptic to prevent rotting. Next, a floorboard is placed on top of the joists.
Watch the video. Gazebo made of 15x15 timber measuring 3 by 4 meters. Designed for 20 seats.
Barbecue in the gazebo
If you are planning to make a modern gazebo for relaxation, then you should provide it with a kitchen, as well as a grill, fireplace or barbecue. Try to think through this step in advance, at the stage of making the foundation, by making a monolithic foundation platform for these structures.
A barbecue in a gazebo or barbecue can be built along with the walls; do not forget to provide a hole in the roof for the chimney. When building a barbecue or fireplace, use only fireproof materials: brick and stone.
That's all, your DIY gazebo is ready. Now we are carrying out finishing work. We paint the outer and inner walls in the color we need, and don’t forget to cover the floor with a special, wear-resistant varnish.
After the construction and finishing work is completed, decorate the gazebo with garden decorations made by yourself or your loved ones, and place garden furniture.