How to choose a material to create a structure?
To correctly decide on the choice of polypropylene profile for making your own pool, you need to familiarize yourself with the types of this material:

Homopolymer is a material with a hard but flexible structure.
It contains molecules that have identical links and is characterized by high strength in places of bending.- Metallocene, resembling rubber in its composition and properties.
- A copolymer presented in the form of transparent or white granules. It is characterized by high elasticity, strength, and resistance to low air and water temperatures.
- Statistical copolymer is a material with a crystalline structure, most in demand in the production of laminating films and food packaging.
Polypropylene homopolymer is used for the production of swimming pools. To make the walls of an artificial reservoir bowl, you should use polypropylene sheets up to 15 mm thick. For the bottom, they can be a little thinner - within 8-10 mm.
When using sheets thinner than 5 mm, deformations and noticeable irregularities are likely to occur.
Features of polypropylene
This material does not absorb water, has various resistance to oils and some other liquids, and is safe for humans. Not only swimming pools, but even dishes are made from PP, and it is considered one of the best in terms of quality and safety among plastic varieties. In other words, the variety of uses of polypropylene also makes it possible to build swimming pools from it. Here are some key features of the material:
- Easy to process with simple tools
- When welding seams and joints, no additional waterproofing is required, as they have a reliable connection.
- When welding a pool bowl and installing it in a pit, no additional holding frame is required; it will be enough to reinforce the sides of the bowl with a concrete mixture.
- A polypropylene pool will have a pleasant, bright and beautiful surface, and therefore does not require additional external finishing inside the bowl. This simplifies and reduces the cost of creating a pool.
- The strength of the seams is so great that it allows the use of small PP pools even without installing them in a pit (consult a specialist regarding the size and water pressure on the pool walls).
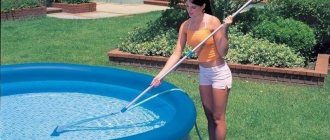
- Polypropylene is not only pleasant to the touch, it is also well suited for swimming pools, as its smooth surface is easy to clean.
- High-quality polypropylene sheets (which, for example, are sold here) are also resistant to temperature changes. If the material is not stable, it may burst in the cold.
- The cost of a polypropylene-based pool can be up to three times cheaper than purchasing a ready-made, stationary solution.
- Installation and welding work is unlikely to take more than 7 days
Necessary calculations
First of all, you need to determine the number of polypropylene sheets required for building a pool, using the table:
| Length/Width/Depth of the pool (in mm) | Width/length of polypropylene sheet (mm) | Required number of sheets |
| 4000 x 1500 x 1500 | 1500 x 300 | 5 |
| 6000 x 2000 x 1500 | 1500 x 300 | 10 |
| 6000 x 3000 x 2000 | 2000 x 4000 | 10 |
| 8000 x 2000 x 2000 | 2000 x 4000 | 7 |
If you plan to make an in-ground pool, you need to calculate the size of the pit in advance.
Regardless of the dimensions, it must be:
- 50 cm deeper than the planned upper edge of the pool;
- 100 cm wider than the bowl.
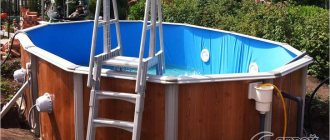
What are polypropylene pools?
A polypropylene pool is a one-piece bowl, the structure of which is made up of separate sheets. The main material is polypropylene, it is environmentally friendly and harmless, because it is even used in the production of baby bottles. It is more resistant to high temperatures than other types of plastics.
Polypropylene hydraulic structures, due to their universal characteristics, are used not only in private buildings. You can also see it in kindergartens, public water entertainment centers, and sanatoriums.
How to do it?
Using polypropylene sheets, you can make both an in-ground pool and one without it. In each case, the process, as well as the list of necessary tools and materials, differs slightly.
Recessed
To build an in-ground pool, which involves certain excavation work, you will need the following tools and equipment:

bayonet and scoop type shovels;- excavator;
- durable cord and pegs;
- extruder for working with polypropylene;
- thermal hair dryer for correcting joint seams;
- concrete mixer;
- wooden blocks for temporary supports;
- containers for bulk and liquid materials;
- building level;
- carpenter's knife;
- mallet with a tip made of soft and durable rubber;
- tape measure for taking measurements.
The step-by-step process for making an in-depth pool is as follows:
- Carrying out markings for the pit.
- Installation of beacons that will indicate the top mark of the edge of the structure.
- Carefully leveling the pool bottom. It also needs to be compacted and covered with a layer of special geotextile.
- Creating drainage using a crushed stone layer about 30 cm high.
- Adding additional rigidity to the concrete base by installing a metal reinforcement grid. It must be placed on a small hill.
- Pouring the base of the pool bowl with concrete mortar.
It will take at least 14 days for the concrete layer to harden. After their expiration, thermally insulate the concrete base using hydrotextile or polystyrene foam. And when it has completely hardened, you can proceed directly to making the bowl of the future pool.
The following steps are required:
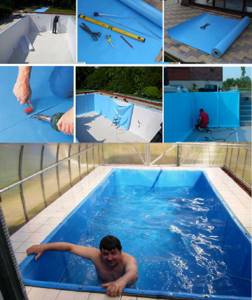
Use a heat gun to apply hot air to the polypropylene sheets, heating them to a condition at which they can easily bend and change shape.- Similarly, melt a polypropylene rod and use it to join the sheets. As a result, all seams will be perfectly even and smooth.
- From polypropylene sheets of suitable dimensions, cut out all the necessary parts for the pool bowl.
- Solder all the fragments from the front side, having previously installed nozzles designed for turned corners on the extruder.
- Using thinner polypropylene sheets, line the bottom of the pool bowl.
- Softening and bending polypropylene sheets with greater thickness, make the required number of steps.
- To create stiffening ribs - to do this, you need to place vertical reinforcing strips, maintaining a distance between them of 50 to 70 cm.
- Secure the finished bowl structure, and then proceed with the installation of filtering and pumping equipment.
- Fill the distance between the ground and the sides of the pool with concrete mortar. Several layers will be required, each of which must harden completely within 2-3 days.
- Perform reinforcement around the perimeter of the frame.
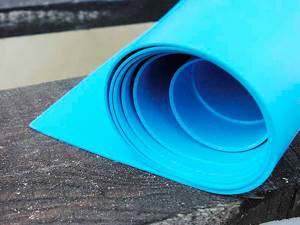
- To obtain the required texture, cover the bottom and edges of the pool bowl with butyl rubber film.
- Design the area around the pool at your discretion. To do this, you can use paving slabs or wooden boards, pre-treated with an antifungal compound and varnished.
How to make a polypropylene pool with your own hands, video instructions:
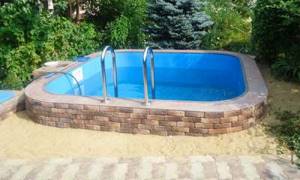
Without recess
To create a pool that is not buried in the ground, you will need the following materials and tools:
- polypropylene sheets in the required quantity;
- extruder for welding;
- extruder nozzles that form even and smooth seams.
It is necessary sequentially:
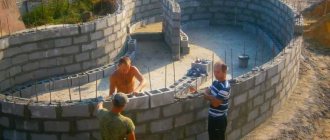
- Prepare the surface - remove the top layer of soil 10-20 cm thick, and then clean it of plant debris, pebbles and other solid particles protruding above the ground.
- Make a sand base about 15 cm thick.
- Make a strong frame by connecting polypropylene sheets using an extruder.
- Line the bottom with polypropylene sheets.
- Solder all parts using an extruder.
- When installing vertical strips of polypropylene, make stiffening ribs.
- Build a staircase with the number of steps, depending on the height of the pool. For a meter height, four steps in 25 cm increments are sufficient.
Preparing for construction: choosing material for work, determining dimensions
Before starting construction, you need to decide on the location for installation, draw up a draft of preparatory work and an exact plan diagram of the pool indicating all the elements and places where the sheets are connected.
When choosing a location, pay attention to the following points:
- trees and shrubs should be located at a great distance from the pool so that their root system does not damage the structure and falling leaves do not clog the water;
- the pool should be located in close proximity to the house, next to the water supply;
- Clay soil, which retains moisture well, is better suited for installation;
- the pit area should be approximately 1 m wider than the pool area.
Calculation of materials
To build a pool you will need polypropylene, geotextiles or polystyrene foam, crushed stone, metal rods, bricks and concrete mix.
To install the bowl, you need to use polypropylene, which differs in thickness. For the bottom part, a thinner sheet is used than for the walls of the structure. Additionally, the side parts are reinforced with stiffeners made of the same material.
Standard polypropylene sheets are produced by various manufacturers. They have dimensions of 150x300 or 200x400 cm, and the thickness can range from 5 to 15 mm. To make the bowl, it is recommended to use sheets with a thickness of at least 8 mm, since thinner material when gluing the seams can become deformed and look unaesthetic.
Professionals recommend choosing sheets depending on the size of the pool - the larger the area of the bowl, the thicker the material should be.
To calculate the exact number of sheets, it is enough to calculate the volume of the bowl. If the future pool has a complex shape, then on the plan it can be divided into simple figures and their volume can be summed up.
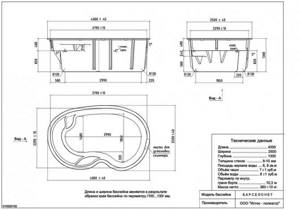
The volume of a pool of complex configuration is calculated by dividing into simple figures
Most often, a rectangular pool is made, since it is easier to install and is most convenient to use. We find the volume of the bowl using the formula for calculating the volume of a parallelepiped: V = a ∙ b ∙ h, where a is the length of the pool, b is its width, h is its height.
Table: calculation of the number of polypropylene sheets
| Length, mm | Width, mm | Depth, mm | Volume, m3 | Sheet size | Number of sheets |
| 4000 | 1500 | 1500 | 9 | 1500x300 | 5 |
| 6000 | 2000 | 1500 | 18 | 1500x300 | 10 |
| 8000 | 2000 | 2000 | 32 | 2000x4000 | 7 |
| 6000 | 3000 | 2000 | 36 | 2000x4000 | 10 |
When calculating the required amount of concrete, the following are taken into account:
- pool volume;
- bowl perimeter;
- the thickness of the gap between the pool bowl and the pit (as a rule, it is in the range of 30–50 cm).
To arrange drainage you will need crushed stone. Its amount is calculated based on the area of the base of the pool, multiplied by the height of the layer - 30 cm.
To make the base rigid, a grid of metal rods is installed with a pitch of 20 cm.
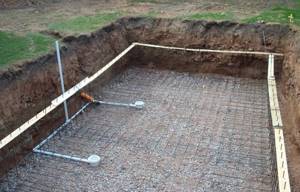
A grid with a pitch of 20 cm will strengthen the base
To determine the number of transverse rods, the width of the base is divided by the lattice pitch (20 cm), the longitudinal rods are calculated by dividing the length of the base by the pitch width. The rods are connected with metal wire. About 0.4 m is used for one connection, and the total number can be calculated by multiplying by the number of nodes. Since the grate cannot be placed directly on the crushed stone, it is necessary to stock up on brick halves.
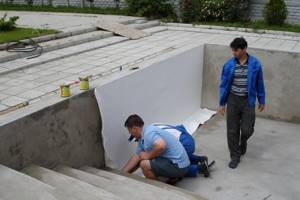
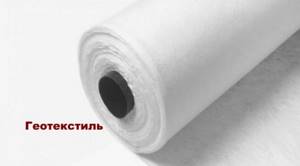
Geotextiles or foam plastic are laid on a dried layer of concrete
For thermal insulation, geotextiles or foam plastic are attached to the bottom and side walls of the pit. They are laid between concrete surfaces and the bowl. The thickness of the geotextile must be at least 300 microns.
Required tools and equipment
The most important stage of work is assembling the bowl. To perform this, expensive equipment is required - an extruder and a hot air gun. If you plan to limit yourself to building a pool just for yourself, it makes sense to rent equipment.
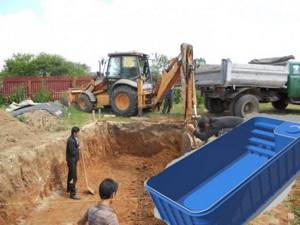
The most time-consuming work in building a swimming pool is preparing the pit. You can dig it yourself, using a shovel, but to save time it is better to invite a specialist with an excavator.
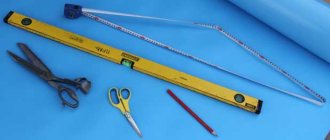
To complete the work you will need:
- shovel (scoop and bayonet);
- wooden pegs and cord;
- construction level (regular or laser);
- roulette;
- pencil;
- construction knife;
- concrete mixer;
- extruder;
- nozzles and rod for soldering polypropylene;
- hot air gun;
- wooden blocks;
- buckets for carrying various materials;
- mallet;
- ladder.
How to finish a finished polypropylene tank?
Proper finishing of a polypropylene pool will increase its aesthetic and functional properties, and also ensure maximum structural strength.
It is preferable to use as finishing materials:
Ceramic or granite tiles . It is laid on a pre-prepared screed to decorate the sides of the pool and the area around it.
- Natural or artificial stone , which is applied to the sides using a special adhesive.
- Deck board - this material is easy to install, does not rot and is able to retain heat in cool weather conditions.
To increase the frost resistance of a polypropylene pool, you should additionally install volumetric expansion compensators for freezing water in its bowl.
Their total volume should be 0.5% of the pool volume . To do this, you can use liter plastic bottles tied into a garland, partially filled with sand.
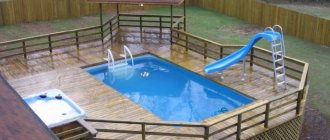
Pool made of polypropylene
Manufacturing
When manufacturing the product, polypropylene sheets are taken, which are welded using special welding. The design of the pool consists of different parts and walls, which have different diameters and thicknesses.
The seam between the welded sheets is almost invisible. At the same time, they turn out to be very durable, no worse than a solid sheet.
Installation
If you decide to create a pool with your own hands, you first need to determine the location where the pool will be located.
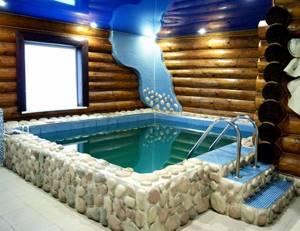
If it is in the house, then the room must have high ceilings, and there must also be space where the equipment will be located.
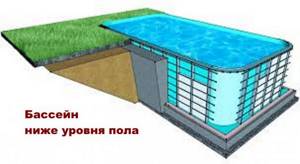
The most profitable option is when the pool is located below floor level, so if possible, dig a hole for the pool.
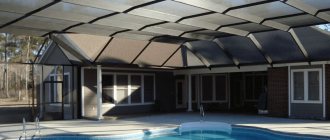
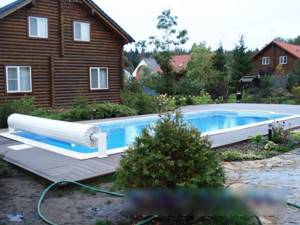
A simpler option is a polypropylene outdoor pool. Thanks to its qualities, it easily tolerates all climatic conditions; the main thing is not to make a mistake with the choice of location.
Choosing a location for installation
To choose the right place, you need to consider:
- The slope of the surface of the site.
- Understand what type of soil.
- In which direction is the wind blowing?
- Where and how large plants are located.
It is advisable to avoid the proximity of deciduous trees.
Firstly, the roots of young trees grow strongly and can damage the frame. Secondly, you will have to constantly fish out the leaves. The most optimal is clay soil. It will not allow excess moisture to pass through, which will be a plus in case of waterproofing damage. By using a surface slope, you can save on the amount of work with the ground. And the direction of the wind will help clean the pool, since all the garbage will be blown in one direction and if a drain pipe is placed there, then excess water will go away along with the garbage.
Preparing the foundation pit
The size of the pit depends on the size of the bowl. The pit should be one meter wider and 50 cm deeper.
If groundwater is located close, then remember the need for drainage.
If the bowl has an irregular shape, then installation will be more expensive and difficult.
The diagram will allow you to decide where the springboard, slide, equipment, etc. will be.
Calculation of the required material
We calculate monetary and time costs.
Pools made of polypropylene are considered the most optimal in terms of price and quality.
When calculating, remember:
- Cost of materials.
- The cost of the bowl.
- The cost of 1 square meter of digging soil for a foundation pit.
- Cost of concrete mortar for the bottom and walls.
It is not necessary to buy special equipment; you can find good rental options. Materials required: polypropylene sheets, geotextiles, fittings.
The cost of polypropylene varies between 3000-7000 rubles.- Geotextiles 12-60 rub.
- Concrete from 4500 rubles per cubic meter.
You can dig a pit yourself, but in this case the work will take a lot of time. You can also buy a pool bowl made of polypropylene rather than making it yourself. If you decide to do it yourself, then remember that the material from Russian manufacturers is cheaper.
Installation
First we carry out excavation work:
- We mark out the dimensions; you can use a cord for these purposes.
- We install beacons in the finished pit; they will show where the edges will be.
- We compact the bottom well and level it. We lay geotextiles on top.
- We fill in approximately 30 cm of crushed stone. The layer should be as even as possible.
- We install the fittings and make a grate on the bottom. Remember that it should rise above the rubble; you can lay it on bricks.
- We secure the grille; you can use a special hook for this.
- We pour concrete.
- The concrete must be at least 20 cm, and the width must be more than 50 cm from the pool. We wait until our base hardens, usually this is 4-5 days, but if the temperature is low, the process can increase to 4 weeks. If the weather is too hot, the concrete must be covered with a film to prevent excess liquid from evaporating.
- We cover everything with thermal insulation. This can be polystyrene foam or hydrotextile.
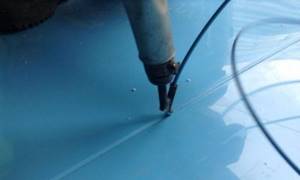
- Let's move on to creating the bowl. To make the seams even and strong, we use extruder welding.
We select nozzles, they are available for different seams.- To make the seams smooth, use a heat gun. Everything is very simple: hot air heats the surface, a polypropylene rod is brought into the joint, which melts and connects the sheets.
- We cut out all the parts, the edges should be cut at an angle of 45 degrees. Solder all the parts together.
- Lay the bottom.
- We weld the parts together. We make internal seams using rods; for external seams we use special nozzles.
- We also make steps.
- We create stiffeners. They are stripes located between each other at a distance of 50-70 cm.
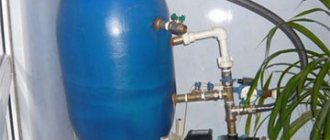
- We secure the structure, install all the necessary elements (for drainage, pipes, etc.).
- We secure the bowl. Fill the distance between the sides and the ground with concrete. Fill in layers after 2-3 days. In this case, the pool must be filled to an equal level with water.
- We make reinforcement around the entire perimeter.
- To obtain the desired texture, we glue a butyl rubber film. It should cover all the edges and the bottom of the bowl, and be sure to overlap the edges.
- We lay out the area around the pool with tiles, boards or any other material.
Preparatory stage
Before you begin building a pool, you need to carry out preparatory work; the further progress of installation will depend on it.
Work on the construction of a swimming pool must begin with design ; The entire cycle of work will depend on what the owner “imagines” for himself. The choice of pool depth is of great importance. According to the European standard, a pool is built from 1 meter to 1.65.
It is necessary to choose the shape of the design bowl, which will be affected by the configuration of the site for the structure.
When choosing a bowl shape, you need to take into account that a complex option will require more time for maintenance and calculation of filtration power.
The main pastime in the pool is communication and entertainment on the rides. Therefore, be sure to think about the placement of horizontal bars, springboards, stairs, and slides.
If your family members cannot swim, there is no point in planning a pool that is 2-3 meters deep.
Before starting work, you need to choose the right place for the hydraulic structure; the pool should be located in a free area near the water supply, but away from vegetation.
To facilitate installation, it is necessary to make a diagram of the structure, and from it calculate the installation of hydraulic equipment.
The dimensions of the pool structure need to be increased by at least 1 meter wider around the perimeter of the size of the propylene bowl, since a free area for movement will be needed.
How to make a swimming pool for your summer house from polypropylene? Watch the installation video.
Pros and cons of polypropylene artificial ponds
When thinking about this type of pool, you need to take into account the disadvantages that are inherent in it:
- seam joints are visible, which affects the aesthetics of the structure;
- finishing with mosaics or other decorative techniques is not possible, and the number of colors is limited;
- Compared to a composite bowl, polypropylene bowls are more difficult to install.
The advantages, of course, outweigh the disadvantages:
- despite all the complexity, installation is carried out very quickly (from one to two weeks);
- unlike monolithic bowls, these can be installed in already built premises;
- climate change and temperature changes are not scary for him;
- This material is resistant to aggressive environments, which simplifies its maintenance. You don’t have to worry about damaging its surface by cleaning with various means;
- not exposed to ultraviolet rays, will not fade;
- the price is lower compared to other types;
- the surface does not become slippery under the influence of water, which reduces the risk of injury;
- You can create a structure of any shape and size.