Advantages and disadvantages of seed growing
To obtain young thuja trees, many experienced gardeners prefer to use seed propagation. One of the advantages of this method is the ability to grow a large number of seedlings at once. The plants will be the same age and size, which is also considered an advantage over propagation from cuttings. This makes it possible to make a hedge or composition for landscape design from seedlings. In addition, crops obtained from seeds adapt well to the local climate and soil.
Despite these advantages, this method of breeding is not without its disadvantages:
- It takes a long time. It will take at least 5 years from sowing the seeds to transplanting the young thuja into the soil.
- There is a high probability that the seedlings will not inherit the parental varietal characteristics.
Propagation of thuja by branches at home. Features of propagation of thuja by cuttings
Despite the fact that the homeland of thuja is Asia, it is no less popular in our country. Unpretentious to growing conditions, it can be given almost any shape, and it will also become the main decoration of any site.
But first the thuja needs to be grown, and it is best to start this process by cutting branches. We will tell you what this procedure is and what subtleties it has in this article.
Pros and cons of the method
Propagation of thuja can be carried out by various methods, but cuttings are considered the most popular, and for beginning gardeners the easiest. But in reality, everything is not always as it seems.
You still need to know how to propagate this coniferous plant by cuttings correctly, and you should not forget about the nuances of this method, both positive and negative.
The main advantages of this method include the following:
- saving time - a person does not have to look for high-quality seed, and then plant it correctly and wait for healthy seedlings to appear;
- breeding thuja by cuttings speeds up the process of growing a full-fledged conifer;
- By choosing an adult plant as seed material, you can immediately assess the height and health status of its parent, which means you have the opportunity to choose the best material for cuttings.
In addition, for many, cuttings are generally the easiest and fastest option for propagating or breeding any plants.
This method also has some disadvantages. And they are all united by the need to have experience in cutting cuttings of any plant. You should not only cut the thuja branch correctly, but also choose the right time of year and further conditions for its cultivation and maintenance. And sometimes even experienced gardeners cannot take into account all these necessary factors.
But, despite all these potential difficulties, it is thuja cuttings that are truly the most popular and easiest way to grow it. But only if you follow all the recommendations below.
The right time
To date, it has not yet been established what time of year is best to cut thuja branches for further cuttings. Some people insist that it is better to do this in winter, while others believe that the best time of year is summer or autumn.
Professionals say that you can propagate thuja from cuttings at any time, but it is best in the spring - this way the root system forms faster, and it is stronger and more resilient.
But there are some additional recommendations:
- In spring, branches should be cut in April;
- In summer, cuttings are collected in June;
- if autumn is chosen, then the shoots are collected in October;
- For winter cuttings, branches are cut at the end of December.
However, if you correctly collect the material and root it in accordance with all the rules, then the time of year will not play any key role.
How to prepare branches?
So, it is on the correct choice of shoots for cuttings that not only the success of the entire procedure of growing and rooting them will depend, but also the health and appearance of the coniferous plants themselves in the future. Therefore, further actions will be as follows.
- It is necessary to decide in advance whether the thuja on your site will be in the form of a voluminous shrub or a thin and slender tree. In the first case, branches are broken off from the side shoots of the plant, and in the second, from the central crown of its trunk.
- The age of the thuja from which the branches will be cut for subsequent cuttings should not be less than 4 years. At the same time, it is worth refusing to collect materials from plants that are older than 9 years. In the first case, the thuja will not yet be strong enough, and in the second, the amount of nutrients required for normal growth of the cuttings will be too small.
- Particular attention should be paid to both the appearance of the tree itself and its condition. The branches that will be further cut should already be lignified. The color of the needles is bright, uniform and rich. The plant itself should be free of any pests, as well as traces of fungal diseases, since it will be impossible to grow a healthy plant from such material in the future.
Procurement of material
You can purchase planting material to grow thuja from seeds at gardening stores or collect it yourself. Harvesting is carried out in the last days of August or the first ten days of September. It is necessary to have time to remove the cones from the tree before they open, otherwise the seeds will fall to the ground. If they are difficult to separate from the branch, you can tear them off along with a piece of wood.
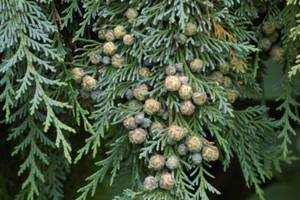
Thuja cones on a tree
The prepared cones are laid out on newspapers in a warm and dry room with good ventilation. They should not be exposed to sunlight, as this will impair germination. In such conditions, the cones quickly ripen and begin to reveal their scales. The seeds are spilled onto the laid paper.
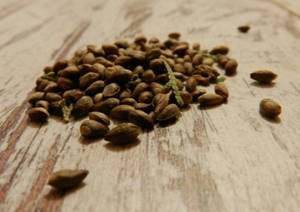
Collected thuja seeds
The resulting seeds must be sown in the same autumn. Long-term storage significantly deteriorates their quality.
If it is not possible to sow immediately, it is necessary to do stratification. To do this, the seeds are wrapped in a piece of cloth and buried in the soil on the site. This place is covered with insulation or fallen leaves or sawdust are placed on top. In the spring, when the ground thaws, the seeds are removed and poured into a jar, pouring sand on top. In this form they are stored for another 2 months in the refrigerator.
Variety selection
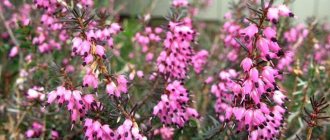
There are 5 species of this plant, but only the Western one is suitable for the Russian climate. Western thuja has many varieties. Let's talk about the most common ones:
- Thuja Brabant. If you want to grow a hedge, you need to choose this variety. The plant grows up to 5 m, the diameter of its trunk is 1.5 m, per year it increases by 30 cm, and becomes wider by 15 cm.
- Thuja Holmstrup. It grows very slowly, reaching a height of three meters in 10 years. But she is unpretentious and does not require special care. Thuja Fastigiata. Grows up to 6 m in height. Also good for creating hedges.
- Thuja Smaragd. Requires constant care, grows slowly, maximum height is 5 m. But it is not afraid of frost and strong winds.
- Thuja Vagneri. A low tree up to 4 m, which is best planted in an open place. Doesn't like snowfalls, but tolerates frosts well.
If you cannot decide on the variety, think about where and how you plan to plant this plant, what shape the thuja crown should be. It can be different:
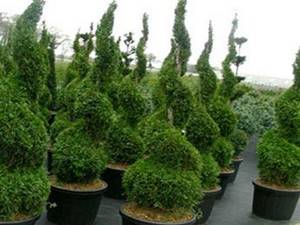
- Thujas are pin-shaped and umbrella-shaped. The name alone makes it clear what they look like. Pinheads are small, dense plants up to 2 m in height. Umbrella-shaped ones are used to decorate flower beds. Most varieties are miniature in size and grow up to 1 m in height;
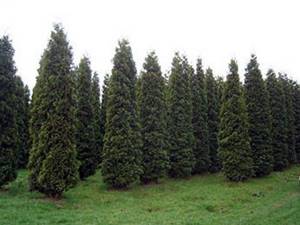
- Thuja pyramidalis. It will be an excellent decoration for the site. You can plant either one tree (it can grow up to 20 m in height, shrubs are no higher than 2 m) or a group of plants;
- Thuja columnar. Suitable for creating hedges. The average plant height is 5 m, there are many varieties;
- Thuja spherical. The most popular type, because unpretentious, feels good on any soil, even in the shade. This is a bush with dense branches. But it grows slowly.
But there is one very important point here. Growing thuja from seeds at home can lead to unexpected results. If you choose a certain variety, plant shape and collect seeds from the desired tree, you cannot guarantee that the thuja you need will grow. Often only the species characteristics are preserved, the variety, and the shape of the seedlings may be different.
Sowing seeds
For rapid growth, seedlings require a special soil mixture. It consists of:
- 1 part peat;
- 1 part of turf land;
- 2 parts sand.
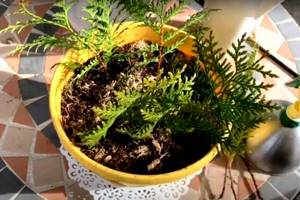
To sow seeds, you will need wooden boxes, on the bottom of which a drainage layer of any suitable material is placed with a layer of 2 cm or more. Then the container is filled with prepared soil, compacted tightly and leveled. Furrows are created on the surface with an interval of 6 cm and the prepared seeds are laid out in them. Sprinkle the remaining soil on top and spray with water from a spray bottle.
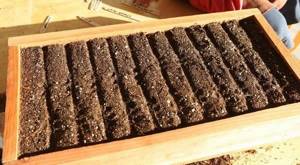
Soil prepared for sowing thuja in a box
The box, covered with film or glass, is left in a warm room until germination. When the sprouts hatch, the container is transferred to a cooler place, but well lit. Periodically, seedlings are inspected and damaged ones are removed. Also be sure to moisten the soil by spraying it with a spray bottle and ventilate the seedlings. After 40 days they will get stronger and the shelter can be removed.
If possible, thuja seeds are planted in the ground immediately after collection. In this case, planting is carried out in November. The sowing site is sprinkled with sawdust, creating shelter from winter frosts. In spring, the seeded material germinates and green, dill-like shoots appear. This method of growing thuja is more natural. During the growing season, plants manage to reach a height of 7 cm.
Seedling care
Regardless of the sowing method used, it is necessary to care for hatched plants in the same way. To prevent soil washing out, moistening is carried out with a fine dispersion spray bottle. If it was not possible to avoid exposing the seeds, they can be sprinkled with a new portion of soil. Watering should be moderate. The soil should not be moistened too much, but it should not be allowed to dry out either.
When warm weather sets in, the boxes with seedlings are taken out into the yard. They are placed in the shade, avoiding direct ultraviolet radiation. It is best to place them under the branches of large trees. In summer, you can keep sprouts outside in a pot at temperatures from +17 to +23 degrees.
For young thujas, direct sunlight is dangerous. They can cause burns to the plant. Therefore, when growing seedlings in the garden, they need to be protected from bright light in the first year of life.
To improve growth, seedlings are fed every 2 weeks. Complexes of mineral fertilizers that contain potassium, nitrogen and phosphorus are optimally suited for this. Some gardeners use Agricola or Mortar for this purpose, which, in addition to the required mineral additives, also contain other components that are beneficial for plants. When using these fertilizers, it is necessary for seedlings to halve the concentration indicated on the package.
The plantings are periodically treated with Fundazol or another fungicidal agent. This helps avoid the development of fungal diseases.
For the winter, seedlings in boxes are brought into a room where the temperature is kept from +14 to +18 degrees. Young thujas planted in beds are covered with peat, fallen leaves or sawdust in late autumn.
Transfer to school
This stage is necessary for thujas sown in boxes. After the first successful wintering, they are placed in open ground in a special bed called a shkolka. The place for it should be in partial shade. A site should be selected with fertile, light soil. If necessary, it is recommended to add organic matter - humus or ash. If the composition of the soil is poor, additional mineral fertilizer is applied. Then they dig it up again and level the surface.
To plant seedlings in the garden bed, rows are made with a distance of 30 cm. The same interval is maintained between individual specimens. Plants are placed so that the root collar is at ground level and not buried. Otherwise, the culture will begin to rot and die. The transplanted thujas are watered and the space between them is mulched with peat.
For quality care, it is enough to moisten the seedlings on time, pull out the weeds and periodically feed them with fertilizers. Water the soil sparingly, avoiding crust formation or stagnation of water. Mineral complexes balanced in composition are suitable for feeding. They can be paid monthly.
For the winter, young thujas need to be insulated. To do this, they are covered with fallen leaves, covered with spruce branches and non-woven covering material.
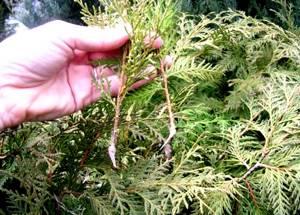
Thuja from a twig - description of the method
Growing a thuja from a twig is very simple and to obtain a new plant there are two methods of rooting - propagating thuja by cuttings at home or directly in open ground.
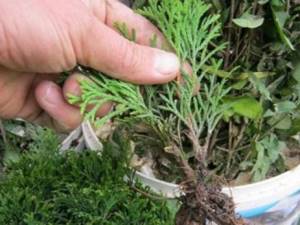
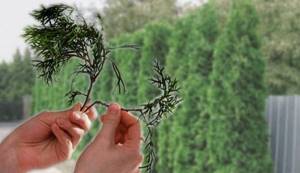
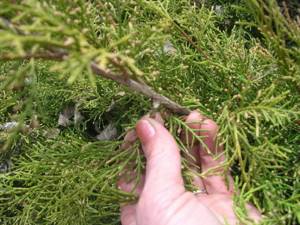
The time for the procedure is from May to September. The tops of young shoots are torn off from the plant, pulled down so that a piece of bark remains on the cutting, the so-called “heel,” which promotes better rooting.
Harvesting cuttings
The length of the cuttings is from 10 to 20 cm, and the heels are 1 cm. Larger cuttings are shortened from above to a length of up to 10 cm, it is advisable to trim the branches a little on the sides, and completely remove them from the lower part.
This procedure will reduce the intensity of transpiration, which will compensate for the initial lack of a root system. For the same reason, cuttings should not be too long.
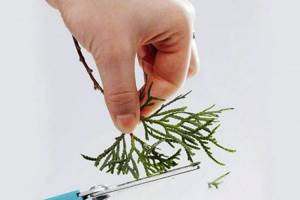
Light pruning of foliage
The time from the moment of separation from the mother sample to planting in the ground should be as short as possible.
Thuja cuttings at home step by step
Pots with soil for rooting must be prepared in advance. A good substrate is soil mixed with peat, sand and pieces of sphagnum moss in a ratio of 4:2:1:1. A drainage layer of fine crushed stone or expanded clay is poured at the bottom of the container or pot.
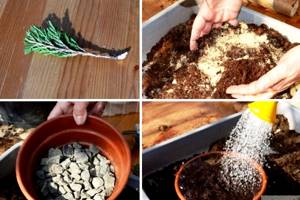
Soil preparation
Before planting, the heel of the cutting is dipped in a means that stimulates root formation.
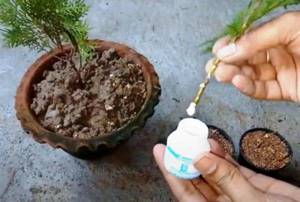
Treating the heel with a preparation that stimulates root formation
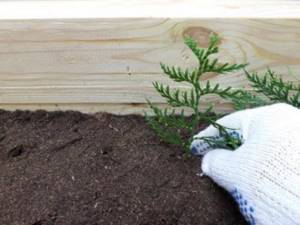
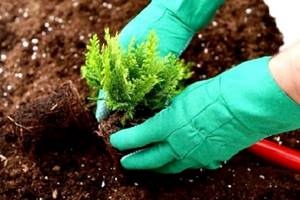
Make a hole in the soil with a pencil and bury the cutting there so that the biostimulant powder remains on the wood.
Planting cuttings in the ground
After planting, future seedlings are watered well, covered with a transparent bag or plastic bottle and placed in a place with diffused light. The substrate must be constantly moist.
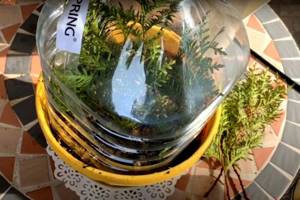
A plastic bottle will create greenhouse conditions
To prevent the formation of condensation, which causes the development of mold, the cover is removed once a day for 10-15 minutes.
Rooting usually takes two months and is indicated by the appearance of new growth, after which the greenhouse can be removed. If rooting took place in the spring, then in the summer and early autumn the pots are taken out into the open air in partial shade.
How to properly grow a rose from a cutting
The seedlings overwinter in a cool and bright place with regular watering, which is carried out after the top layer has dried 1-1.5 cm deep.
In April - May, seedlings are transplanted for growing in open ground in a fertile substrate of leaf soil, peat and compost (3: 1: 1) or in land intended for growing conifers. The place should be protected from direct sunlight.
Transplanting cuttings for growing in open ground
For the winter, young seedlings should be well insulated with fallen leaves or spruce branches, and when the temperature drops to 5-7 degrees below zero, cover the top with film.
Rooting in open ground
Rooting thuja using cuttings in the garden is a simpler method, but is not very suitable for areas with very harsh winters. It is better to propagate in May so that the cuttings have time to take root and get stronger.
- The “heels” are treated with a root-forming hormone, planted in a prepared place and watered well.

- Cover the top with a plastic bottle to maintain humidity.
- The soil is kept moist.
- For the winter, rooted cuttings provide good insulation.
Video of propagation of thuja from cuttings
Transplanting thuja to a permanent place
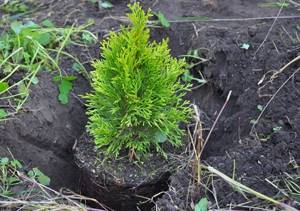
In the fifth year of their development, young plants need to be transplanted to their permanent place. This can be done in autumn or spring. The site should have light soil. It is best to choose sandy soil and dilute it with turf and leaf soil. Seedlings for transplantation must have a closed root system.
A hole for thuja needs to be dug with sides of 70 cm. In this case, its width should be twice as large as the earthen lump. The distance between individual plants is 1 m for a hedge and at least 2 m if a separate plant is planted. A drainage layer is placed at the bottom of the resulting hole, the thickness of which is about half the depth of the hole itself. Then the excavated soil is mixed with fertilizers intended for coniferous crops, according to the attached instructions.
Part of the soil is poured onto the drainage layer in the form of a mound. The seedling is placed so that its root collar is flush with the ground and covered with prepared soil. Immediately after planting, the tree is watered. Then, for a month, moisturizing is done every 3 days. After the thuja takes root, the amount of watering is reduced, since the plant tolerates drought well, and the soil is moistened only on the hottest days. For one-time irrigation, 10 liters of water is enough.
Cuttings of shoots
Propagation of thuja by cuttings is a convenient and effective method. This method allows you to preserve the varietal properties and characteristics of the plant and gives you a chance to grow strong seedlings in two years. If the owner of the site has decided to propagate thujas using this method, you need to know that the survival rate of the bushes in this case is low.
But don’t be discouraged, this is a normal phenomenon. With all your efforts, you can achieve a good result.
Spring harvesting
To prepare cuttings, you need to take only strong, healthy branches from the top of the thuja, which were formed no more than three years ago. In spring, rooting occurs faster, since this is the time of active sap flow in plants. Cuttings are best done in April. If this moment was missed, you can use a second chance in June, this is the time of re-growth of shoots. But the June shoots will take root only by next spring.
You can germinate the collected shoots in jars of water, for this you need:
Remove the green plates near the so-called heels.- Fill the jars with water, place the cuttings in a container so that only their ends are in the water (no more than 2 cm). There is no need to put more than five branches in one container.
- Sheet plates should not come into contact with water.
- Place the container in a bright place.
- Change water in jars promptly.
- Each time new water must be disinfected with potassium permanganate crystals.
You can root the cuttings in the substrate. The method has a number of advantages. Water does not contain micronutrients; with a substrate, rooting will be much more productive.
In the propagation procedure by cuttings, several stages can be distinguished:
- Place the selected cuttings in water with Kornevin for a day.
- Take containers of suitable size, pour crushed stone and calcined sand into them. You can use a soil mixture. To prepare it, you need to take peat, leaf humus and sand in equal proportions.
- Sprinkle the mixture with a solution of potassium permanganate. The sand should turn pink, but not very dark. Let the sand cool.
- Immerse the shoots in sand or substrate to 11.5 cm, lightly press the soil with your palms.
- Place containers with cuttings in a warm place. The ambient temperature should be from +17C to +23C.
- The sun's rays should not fall on the seedlings.
- It is necessary to spray the seedlings daily with a spray bottle.
- Water should not be allowed to get on the green plates, as this can cause rotting of the cuttings.
After two months, the branches will take root and the risk of the plantings drying out will be significantly reduced.
Germination of cuttings in autumn
Some gardeners believe that harvesting shoots in autumn is better, since during this period the sap flow slows down, which means that the number of seedlings dying from lack of water will decrease. But in this case, rooting will take longer. It is recommended to collect shoots on a cloudy October day, when the trees have shed their leaves. The branches need to be broken off from the top of the plant, selecting only lignified specimens no longer than 50 cm. In this case, it is necessary to preserve the woody heel at the ends of the shoots, the roots will grow from it. The longer it is, the faster rooting will occur.
In the fall, another rooting method is added: you can germinate shoots using sphagnum (swamp moss). With this method, thuja branches are wrapped in a kind of cocoon made of moss. This is called rooting cuttings in diapers. Process description:
- Place the collected branches in water with a root formation stimulator for 12 hours.
- Pour boiled water over the peat moss for three hours.
- Lay a strip of fabric horizontally on the table.
- Spread moss soaked in water along the entire length of the upper half of the fabric strip.
- Lay the thuja shoots, surrounding the heels with peat moss.
- Cover the cuttings and sphagnum with the free part of the diaper. Green branches should be free.
- Roll the strip of fabric into a roll.
- Place the roll in a plastic bag and hang it in a well-lit place.
Thanks to sphagnum, the required level of moisture is maintained for a long time. If there is no condensation on the inside of the bag, you need to moisten the moss using a spray bottle. This method of germination is considered the easiest.
Caring for an adult plant
Thuja is an ornamental tree, so it needs to be pruned regularly to form the desired crown. An adult plant is rarely watered; moistening with sprinkling has a beneficial effect on its condition. After this, the soil under the tree is loosened to a depth of no more than 10 cm and weeds are removed. To keep the soil moist longer and reduce the rate of emergence of weeds, it is recommended to mulch the tree trunk circle.
After planting in a permanent place in the first 2 years, it is necessary to periodically fertilize. To do this, they use organic matter in the form of charcoal or humus, as well as mineral fertilizers for coniferous plants with a complex content of useful elements.
An adult thuja can be bothered by insect pests such as aphids, moths and moths. To eliminate them, you can use the chemicals Decis, Actellik or Karbofos according to the instructions. Traditional methods of fighting insects - a decoction of onion peels or a soap solution - are also safe for the plant.
A fungus sometimes appears on young shoots of thuja. To get rid of signs of infection, the affected parts of the plant are cut off and destroyed. Then they are treated with an antifungal drug.
In late autumn, thuja needs to be prepared for the upcoming winter. To do this, its branches are tied to the trunk with a rope, then covered with non-woven material or spruce branches.
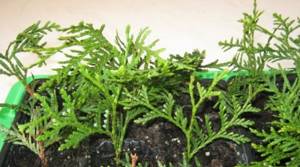
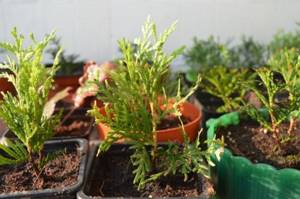
Growing seedlings
Sprouted cuttings need to be grown. For this, gardeners form special ridges (schools). Cuttings collected in the spring should be planted in schools in September of the current year, and autumn cuttings - next spring. There, the seedlings will gain strength for 2-3 years, after which they can be planted in a permanent place. For thuja, you should choose shaded areas with peat soil. The distance between cuttings when planting should be 25 cm. It is necessary to regularly water the seedlings and monitor the cleanliness of the soil and weed out weeds in a timely manner.
In the natural environment, thujas reproduce by seeds and vegetatively . Gardeners and nursery workers use thuja propagation by seed, root division, horizontal layering and cuttings. Planting thuja from cuttings saves time and effort. With this method there is no need to germinate the seed. It allows you to preserve the distinctive varietal characteristics of the parent plant. From one thuja you can get dozens of shoots; after three years they will turn into real trees.