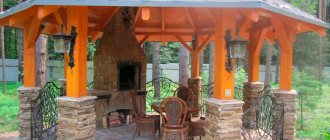
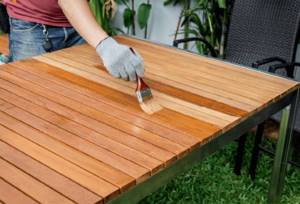
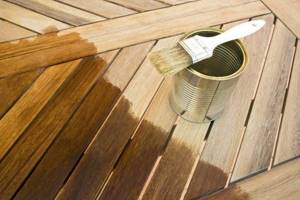
Wood: material for garden gazebos
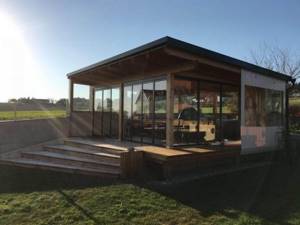
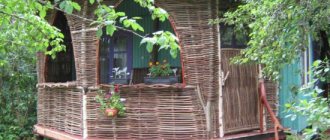
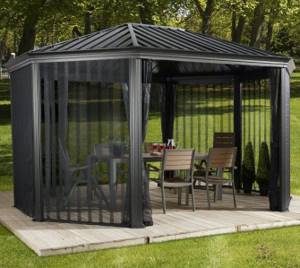
For a chalet, a gazebo "house", an open gazebo - wood is the ideal material for a lightweight type of structure that is installed in the corner of the garden. But before choosing an economy class gazebo model, you need to compare offers and construction methods.
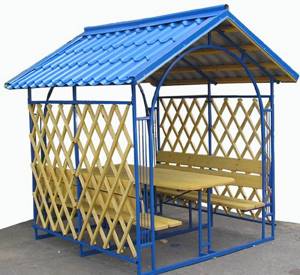
Panel or column gazebo
The structure consists of load-bearing panels (wood, metal, roof made of transparent panels). They are held together with screws. In the assembly of racks, the elements are connected with a tongue/groove or metal connectors, and the frame is of the usual type (purlins, rafters). The advantage of this method is that the posts remain visible and it is possible to create an openwork gazebo cover or add non-load-bearing walls to all or part of the structure to turn it into a shelter.
Many people use wooden pallets fastened together as a floor. Bent polycarbonate sheets are used as walls and ceilings. You can build an open canopy, then cover one or more sides with panels.
Gazebo construction technology
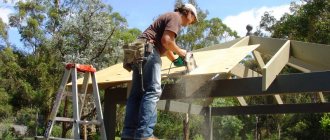
Building a gazebo with your own hands
For example, a 5.4x3 meter structure with a gable roof is used. The construction process consists of the following stages: marking the site, preparing the base, installing load-bearing supports, making frames, assembling and installing the roof, installing the floor, finishing.
First, prepare everything you need:
- profile pipe 40x40 mm and 40x20 mm;
- electrodes with a cross section of 3 mm;
- welding machine;
- Bulgarian;
- hand drill;
- building level;
- roulette;
- bitumen mixture;
- primer;
- square;
- wooden pegs;
- sledgehammer;
- concrete, sand and crushed stone.
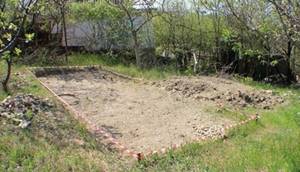
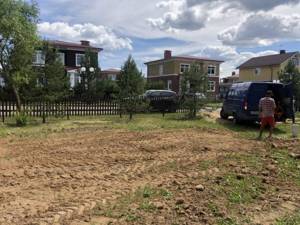
Step 1. Marking
Marking the future gazebo
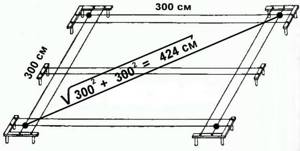
The area allocated for the gazebo is cleared and the turf is removed. One of the corners of the building is determined, a peg is driven into the ground, then the length and width of the gazebo are measured from it, and a string is pulled between the pegs. In the resulting rectangle, measure the diagonals - if they are equal, the corners are marked correctly. The width of the rectangle is 3 m, length – 5.4. The short sides are divided in half and the beacons are secured; one of the long sides, which will be the back wall of the gazebo, is divided into three equal sections of 1.8 m each. The remaining side is also marked: 2.2 m are retreated from the corners and pegs are also driven in.
Marking
Step 2. Preparing holes for pillars
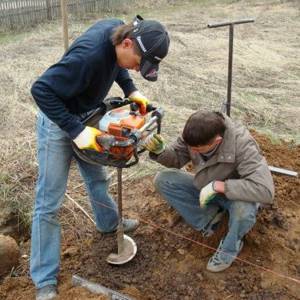
Preparing holes for poles
In place of the pegs, dig holes 0.5 m deep. It is most convenient to use a hand drill, then the soil around the support remains dense and stable. You should get 10 holes of equal depth and diameter.
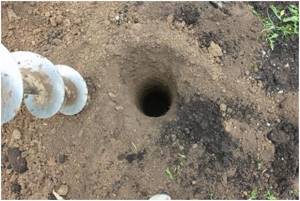
Post hole
Step 3. Installing supports
A 40x40 mm profiled pipe is cut into 10 pieces, 3 meters long, using a grinder. Each rack is coated with liquid bitumen for a third of its length and dried. After this, the pipes are lowered with the treated side into the pits, leveled and hammered with a sledgehammer to a depth of 80-90 cm. Verticality is checked again and the pits are filled: first with a layer of sand, and then with a layer of crushed stone. Concrete mortar is poured on top, pierced in several places with a metal rod or shovel to allow excess air to escape, and the surface is leveled.
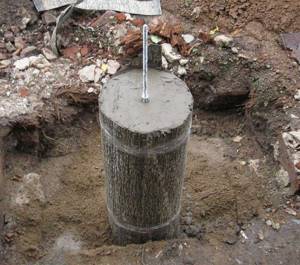
Foundation column (roofing felt is used instead of bitumen)
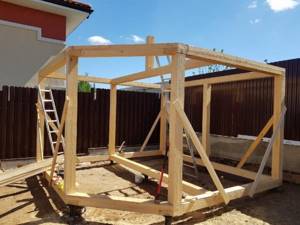
Step 4. Installation of the harness
You will need 6 pieces of pipe 40x40 mm 3 m long and 4 pipes 40x20 mm 5.4 m each. The harness should be attached along the perimeter of the structure at a height of 0.8-0.9 m from the ground and along the upper edge of the load-bearing supports. Since the supports have the same height, the piping pipes are simply laid on top and welded. To secure the lower strap of the harness, place a mark on one of the posts with a marker at the desired height, and then use a level to transfer it to all other posts. After this, the pipes are applied to the marks and welded. Finally, the upper frame is strengthened with two more transverse pipes and the roof assembly begins.
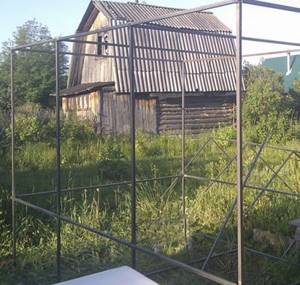
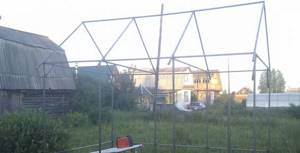
Frame
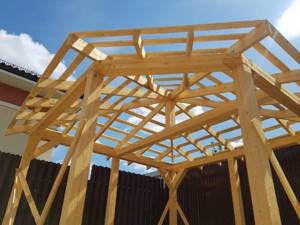
Step 5. Making the roof
The roof frame consists of a base, transverse lintels and slopes. To make it you will need a 20x40 mm profile pipe. The pipe is cut according to measurements: 3 sections of 5.4 m each, 4 sections of 3 m each and 8 sections of 2 meters each. Weld a rectangle to the size of the gazebo, then 2 pieces 2 m long are placed in the corners on the short side and connected to each other so that the lower ends protrude 5 cm beyond the edge of the frame. The remaining 6 sections are welded in the same way and secured to the roof frame at equal intervals. The trusses are reinforced at the top with a longitudinal pipe, and at the bottom with two transverse pipes.
An assistant will be needed to install the structure on the poles. The roof frame is lifted and carefully placed on top of the frame. After leveling, the frame is welded at the corners and at 4 points around the perimeter of the gazebo. Now you need to clean the welds, prime and paint the entire structure.
Step 6. Floor installation
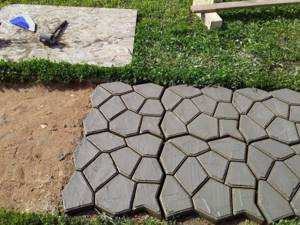
In the photo - the floor in the gazebo is made of paving slabs.
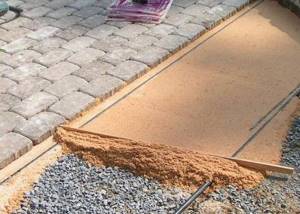
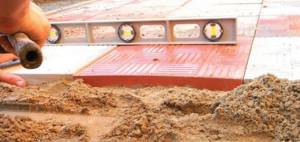
The floor in the gazebo will be laid with paving slabs. This is the most convenient and simplest option, but you can use others, for example, a concrete screed or a wooden floor. So, the turf layer was already removed during marking, so now you need to carefully level and compact the soil. Be sure to check the site level, add soil if necessary or remove excess. After this, the area is covered with sand or screenings; The height of the layer should not exceed 10 cm. In this case, it is necessary to make a slope of several degrees, which will prevent rainwater from accumulating on the floor of the gazebo.
Laying paving slabs
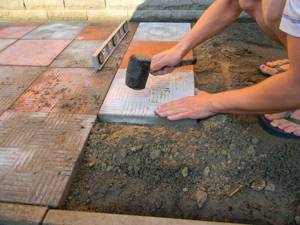
Laying paving slabs
Laying paving slabs in a gazebo
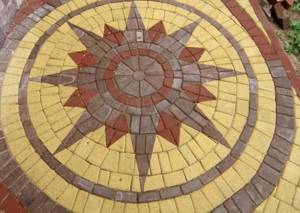
Laying paving slabs
They dig a groove around the perimeter of the future floor and install curbs, then lay the tiles on the sand, tap them with a rubber hammer so that the seams are as tight as possible, and check them with a level. When all the fragments are laid, the floor is covered with fine sifted sand and distributed along the seams with a broom. Then the remaining sand is swept away, and the tiles are well moistened with water. It is better to use a sprayer for this, as strong jets can wash away the sand.
Prices for paving slabs, curbs
Paving slabs, border
Step 7. Attaching the roof
Roof Roof
The roof can be made of slate, polycarbonate, corrugated board and other suitable materials. The roofing sheet is cut to the size of the slope, laid on top of the frame and screwed with metal screws. The ridge is mounted on top, and the end strips are attached.
Step 8: Finishing
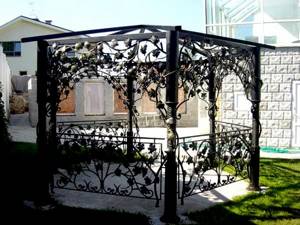
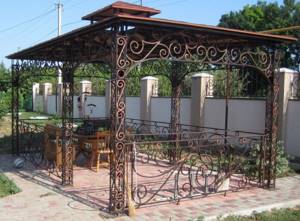
Finishing the gazebo with wrought iron
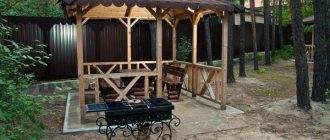
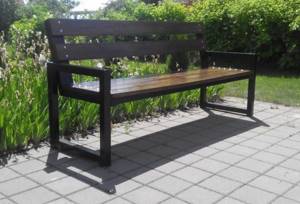
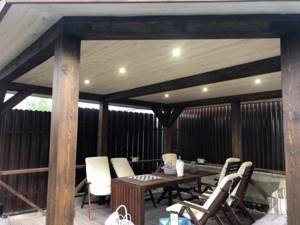
The gazebo can be left completely open, but if you close it on the sides with low walls, it will be much more comfortable. You can fix polycarbonate on the outside, install openwork welded gratings, wooden panels, waterproof plywood between the floor and the trim - whatever your imagination suggests. Benches and a comfortable table are installed inside the gazebo, and electricity is supplied if necessary.
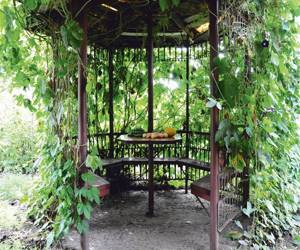
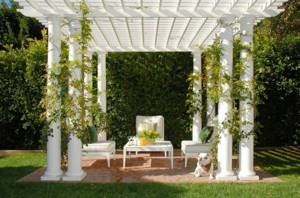
A building covered with grapevines
Using a similar technology, gazebos are built from wood and brick: they mark out the site, install or lay out load-bearing supports, and install the roof. Only the structure of the base differs, because for a brick gazebo it is better to pour a monolithic or strip foundation, while a columnar one is more suitable for a wooden one.
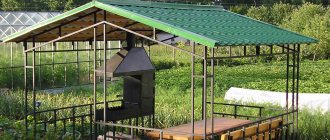
Gazebo made of metal profile Example of a gazebo made of metal
Video - Building a gazebo with your own hands
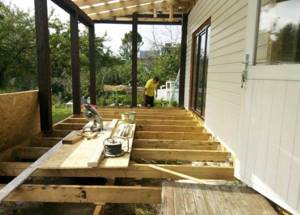
Wooden frame outdoor gazebo
The most economical and common design for large-scale projects is a wooden frame. The sections used are small and assembly with nails, screws and metal connectors is easy to use. These load-bearing walls consist of porticoes installed on the ground and then erected and connected to each other. The frame consists of several rafters, if required by the span.
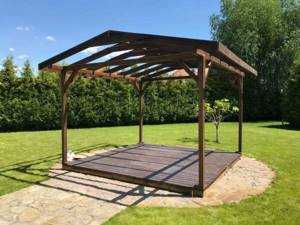
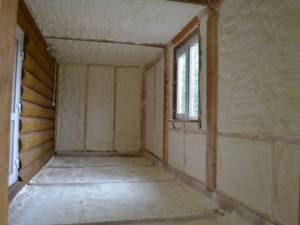
Studs and rafters are spaced approximately every 60cm to allow any insulation to be integrated and internal paneling (eg 12mm thick slabs) to be placed. Very often, a lightweight roof consists of shingles (bitumen shingles). The wooden frame serves as support for the external cladding.
The interior can be left empty or arranged as a second room by insulating and covering the walls from the inside. Shingles (shingles) are especially suitable for roofing lightweight structures. The tiles are available in many colors and are an economical covering.
Required materials and tools
On the Internet you can find a large number of different ready-made designs for gazebos, which are not difficult to build even for an inexperienced owner of a country cottage. If you assemble the structure yourself, the price of the gazebo will be half the market price. The simplest one can be assembled in 2-3 days of leisurely work.
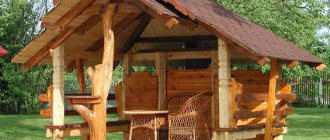
The cheapest and simplest option is a wooden gazebo. Such structures look beautiful, and the material for manufacturing is easy to process. If you take proper care of it, it will last for many years. Moreover, a wooden gazebo can be built in three days, and this greatly simplifies the process.
This exterior element can also be made of metal. If the frame is made entirely of profile pipes and angles, it can last for many decades. Making such a gazebo at the dacha with your own hands is more difficult and a little more expensive, but also more reliable.
To build a gazebo at your dacha you will need the following tools:
- shovel;
- roulette;
- twine;
- pegs;
- beam;
- wooden planks;
- hammer;
- crushed stone;
- nails;
- self-tapping screws
It is advisable to choose a place for the gazebo in the shade, so that it is pleasant to be in it in hot weather. If there is a body of water nearby, then it is necessary to install a gazebo near it. This is guaranteed to add a good mood.
First you need to decide on the size of the gazebo. Mostly 2x3 meter structures are installed. But if the garden area and financial condition allow, then you can make 2.5−3×4−5 meters. When creating a gazebo project, you need to consider the space for the passage.
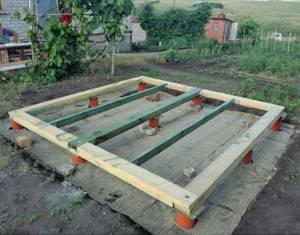
If the design requires the lower beams to be in the ground, they need to be treated with bitumen, and the rest of the wooden parts with an antiseptic. Oak or larch beams are perfect for pillars.
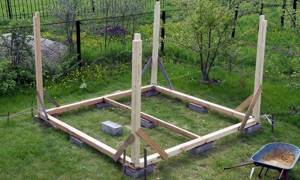
The base of the gazebo can be made in different ways. Alternatively, from 9-12 cut cube-shaped bars, you can lay out a square on flat ground, and only then put 4 long beams on them, which will serve as the base. Of course, we place these 4 beams around the perimeter of the previously laid out square of wooden cubes. Or you can use concrete blocks as a basis. They need to be placed in the same way as wooden cubes, along the perimeter of the square. On flat ground, you need to dig special holes for such blocks.
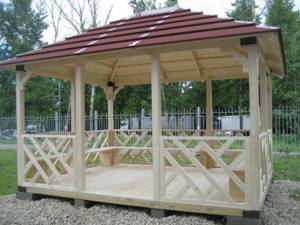
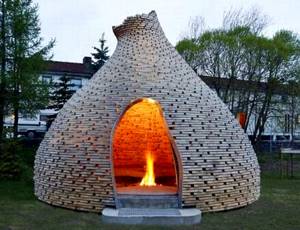
Gazebo with original frame
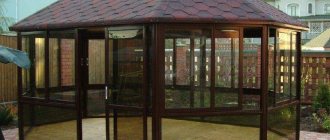
In the photo of the economy class gazebo you can see a hexagonal shaped gazebo, which is supported by six high-section pillars connected by a belt of six panels on the roof. The connection is reinforced by twelve links located at an angle of 45° on each side of each post. The roof is supported by six trusses, similar to those usually installed on sheds: without an entrance they become a crossbow, post and strut.
The assembly is original: the rafters are assembled halfway through the beam and are arranged alternately with grooves at the top and grooves at the bottom. Given the hexagonal shape, these notches are not square, but are inclined at 60° (both ends at opposite angles). The top of the posts are largely cut to accept these purlins.
The links are assembled with a tongue and groove. If the purlins are cut accordingly, the connection with the posts will be specific: due to the lack of tools to machine inclined grooves in such strong parts, it is necessary to transfer them to supports screwed on both sides of the posts. Hence the nickname “ear poles.” The trusses are assembled using a conventional system of conventional tongues and grooves cut into the mass at appropriate angles. The truss posts are bolted to corresponding surfaces in opposing pairs, with four strong threaded rods at each connection. The holes are offset in height from one pair to another so that the rods intersect. All nodes are fixed with lag screws.
The gazebo is covered with bitumen shingles. Alternating tiles in two shades of green creates a herringbone pattern, which is the most successful effect. There are no shore boards or gutters in the gazebo.
Note!
DIY metal bench: instructions with step-by-step guide (100 photo ideas)
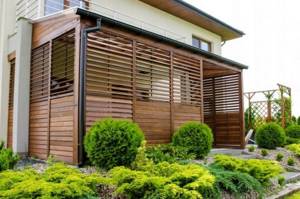
Blinds for gazebos: wooden, metal, bamboo. Instructions for installing blinds yourself
- Adding a terrace to your house with your own hands: step-by-step instructions on how to easily and quickly add a veranda or terrace (100 design photos)
In terms of finishing, the Douglas fir structural elements were pre-varnished in the workshop to ensure a perfect application. The heads of the bolts and nuts are hidden under wooden cabochons.
Which gazebo shape is best?
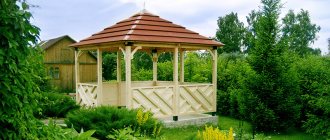
One of the important decisions you need to make before you start building a wooden gazebo is the shape of the gazebo. Today you can see round, square, hexagonal and even octagonal gazebos. Which one should you prefer?
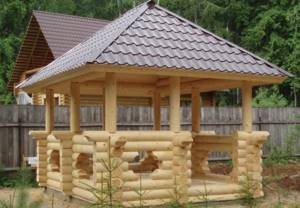
It’s worth starting with the fact that the square shape of the gazebo is the easiest to build. If you are determined to build a gazebo with your own hands, then this factor should definitely be taken into account. Many people, without serious construction skills, simply will not be able to assemble a more complex gazebo.
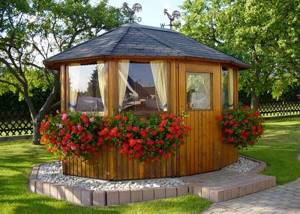
But round gazebos look much more sophisticated and elegant. They easily fit into the design of a summer cottage, making it more sophisticated and attractive. Alas, such a gazebo can only be built if you have the appropriate skills. Of course, you can buy a ready-made gazebo, but in this case you will have to pay a decent amount.
People who are interested in inexpensive wooden gazebos will probably not be happy with this option. A hexagonal gazebo is more attractive than a square one, and an octagonal one is more interesting than a hexagonal one. However, both of them are inferior to round shapes. Many experts believe that with an increase in the number of angles, the shape of the gazebo approaches a round one, which is ideal from the point of view of human psychology. Building them, of course, is more difficult than a square gazebo.
Therefore, you should seriously think about what is more important to you – the beauty of the gazebo or the ease of its manufacture. Having made an exact decision, you can begin planning, and then construction. But not before. After all, the built gazebo will stand near your country house for many years, having a significant impact on the design of the site.
Foundation preparation
Despite the use of tiles, this structure remains heavy. Two options: dig a concrete block under each rack, or make a foundation. In this option, a concrete foundation covering the entire surface is chosen. Therefore, work begins with digging out the ground to about 20 cm. After installing the formwork boards, the materials are mixed: concrete and brick.
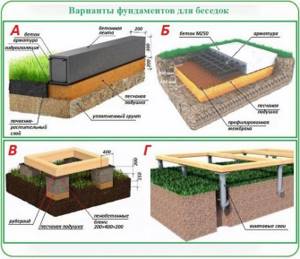
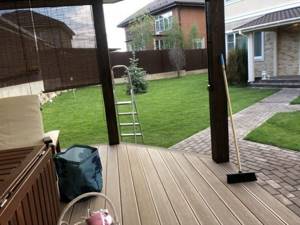
The concrete foundation is poured, leaving reserves in place of future pillars. They will be sealed there using metal plates embedded in cement after the frame is assembled. The access road is paved with paving stones. Its opposite end is adjacent to the terrace of the house. The foundation conducts electricity to the gazebo: it comes out at the base of one of the pillars.
Where is the best place to build a gazebo?
This is a crucial moment on which all future events in the dacha gazebo depend. By placing it in the sun, you will acquire a natural oven, which will not be comfortable to be in - and that’s at a minimum. The place for the gazebo should correspond not only to the general design and layout of the summer cottage, but also be sufficiently shaded, for example, by the crowns of garden trees.
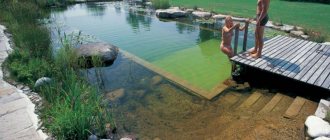
The correct location for the gazebo would be close to a natural or artificial reservoir, which provides natural coolness and freshness. In addition, contemplation of the water landscape has a calming effect, bringing a feeling of peace. And, of course, there should be no active sources of noise near the future gazebo.
Which design of a country gazebo is preferable?
In general, gazebos are divided into two types of construction - temporary and permanent. Country gazebos, belonging to the first type, are installed at the beginning of the warm season and before the onset of cold weather they are dismantled, putting them away for storage in a room protected from bad weather.
The second type of gazebo remains in place all year round, so their creation requires a stable base, which can be a hard covering of asphalt, concrete stone or support on stilts. Connection to the ground is provided by a light foundation or buried sections of pipes made of concrete or metal.
The advantage of a temporary gazebo is the ability to move it from place to place, but installation/dismantling work also has to be done twice a year.
A permanent gazebo is more substantial; it is a permanent element of the estate’s landscape.
With any choice, all structural elements of a country gazebo and its interior items require reliable protection from climatic influences: impregnation with antiseptic compounds, reliable waterproofing, application of several protective layers of enamel or varnish.
If you have already decided on the location of the gazebo, its size and type of construction, you need to prepare a drawing of the gazebo. Then proceed to foundation work and the main supporting structures - the optimal solution would be wooden, concrete or stone pillars reinforced in the foundation (from now on we are talking about permanent gazebos).
But before you begin marking and foundation work, you need to find out what the condition of the soil is in your summer cottage - the main reason for partial or complete deformation of the object is due to ignoring the characteristics of local soils.
Wood processing
The wood must be processed with a log saw. A planer was used to assemble the strong parts of this frame. The circular saw is tilted at a 30° angle using a cardboard template. The spikes (posts, links, top) are not located at right angles. If you don't have a router, you can traditionally cut with a saw and adjust with a plane. You can also make a tenon using a template. The only adjustment needed is to tilt the fence at the correct angle, not at a right angle.
All grooves are straight: in fact, the racks are transferred to screw supports. Therefore, processing with a router, drill or manually becomes easier. The supports are preferably made from a single piece of wood: a groove is made throughout the entire part, and the recess is cut with a circular saw with an inclination angle of 60°. The brackets are immediately screwed to the racks.
Note!
How to attach a veranda to your house with your own hands - step-by-step instructions from A to Z + photos of new designs
Do-it-yourself columnar foundation for a gazebo: detailed instructions from A to Z + photo
Do-it-yourself garden path using a mold: a review of original and inexpensive ideas + step-by-step instructions with photos

Various notches and shapes (post tops, diamond tips, post ends, base notches) are made if necessary using a circular saw or jigsaw, or a band saw. Gouges in the purlins that are too deep for the router can be made by making a series of parallel cuts with a circular saw, removing the offcuts with a chisel. Then it's a good idea to make a 60° tee to guide the saw efficiently. Holes are made with a milling cutter into the pre-processed bodies of the intermediate purlins.
Frame assembly
The construction of the frame begins with the installation of pillars, carefully wedged horizontally and vertically. An original idea: support is provided by large panels, which can be removed after installation. Field assembly requires several people. First, the pillars are installed and supported. Their location is precise: otherwise the purlins would not fit together. Once they are installed and secured, the pole supports can be removed.
Farms are assembled on the ground. Installing the first two is a delicate task: you need to lift one, hold it at the top of the rack, temporarily support it, install the threaded rods (with washer and nut). Then they must bring in the opposite truss, hook it with the other end of the rods and screw in two more nuts and washers. Suffice it to say that every pair of hands counts. The other two threaded rods are laid in a similar manner and then the other two pairs of trusses are added.
The link supports were screwed to the posts in advance and then simultaneously varnished. Therefore, it is necessary to raise the purlins again to match the tenons of the links.
Each opposing pair of trusses is held in place by four threaded rods. They should not intersect; the holes are shifted in height at three levels. Installation of rafters requires the addition of six intermediate purlins. The smaller part, they are placed in the middle of the crossbowmen. Upon request, rafters are cut to the required length. Curly sheets covered with water-repellent plywood are used as lathing. All elements are pre-varnished so the underside of the frame looks great. A small detail that makes it perfect: the hex plugs hide the nuts on the punch.
Note!
Do-it-yourself gazebos for a summer residence - 300 photos of exclusive ideas. Instructions for building a beautiful gazebo (diagrams, drawings, foundation, roof)
How to insulate a veranda for winter living: floor, ceiling, walls. Examples of insulation from the inside and outside (instructions + photos)
- Do-it-yourself wooden veranda: step-by-step instructions with photos and descriptions. Open and closed options + new designs
Step-by-step instructions for creating a gazebo with your own hands
The construction of such a structure occurs sequentially:
- drawing development,
- purchase and preparation of materials, tools,
- cleaning, marking the area,
- frame installation,
- roof decking,
- decoration.
Most often, summer gazebos are made of wood.
Let's consider the construction of such a structure from timber. The work order is as follows:
- The material is thoroughly dried. Apply several layers of antiseptic. The coating is allowed to dry.
- The site is being marked. For convenience, you can install pegs around the perimeter and pull a rope.
- Creating the bottom trim. It will be enough to take 4 beams, each 3 m long. Make grooves on them so that as a result of their connection you get one plane.
- Installation of poles. Load-bearing supports are placed in the corners. If you plan to decorate the gazebo with climbing plants, you need to install intermediate columns and attach trellises to them.
- Creating the upper part of the frame. The supports are connected by maeurlat. After that, rafters are mounted to them, and the roofing material is laid.
The wooden gazebo needs maintenance. It is recommended to check its parts for the presence of fungus and wormholes. If traces of damage by insects or mold are visible on the surface, it is necessary to immediately treat the problem areas with antiseptics.
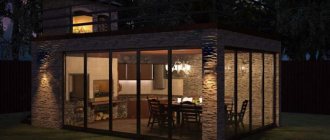
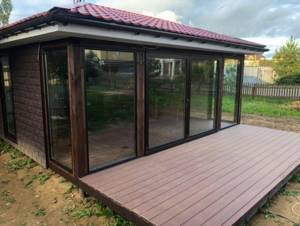
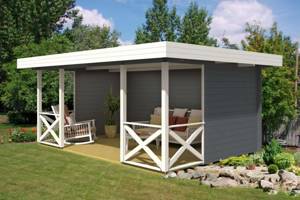
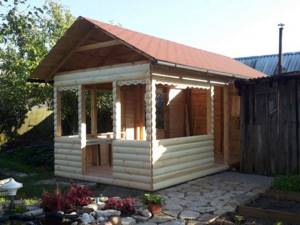
A closed gazebo in the form of a house (chalet).
The traditional chalet building technique is done using planks (or logs) folded and assembled halfway across the timber (notched at an angle). Getting started with this type of raw wood building requires a good command of wood. A particular difficulty arises from the gradual settling of the boards, which makes it necessary to design joinery that can accommodate changes in the height of the openings. Many industrial models are sold as a set, and the quality of these chalets depends primarily on the thickness of the boards.
Sustainable wood species include larch (traditional in Russia) and chestnut. Economical models are made from pine, fir or spruce, the wood of which requires special treatment in an autoclave. The principle of construction with laminated boards is both traditional and modern, and is suitable for the chalets supplied as a set because the installation looks like child's play.