Design features of canopies
Carports can be structurally divided according to two main criteria:
- roof type;
- type of construction.
Everything is simple with roofs. Here, as for ordinary houses, you can use forms known to everyone. Namely: single or gable, arched, spherical and others. The most common are the first three. They are easier to construct, do not require large material and labor costs, and also easily fit into the landscape design of the site. For example, if a carport is being built for one car, then the best option is a pitched or arched roof. If a large structure is required for several cars, then it is better to install a roof with two slopes. Although the options may be different, even combined.
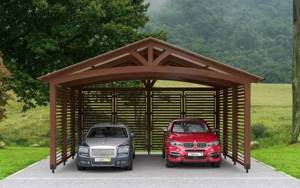
Carport with a gable roof for two cars Source ledamebel.ru
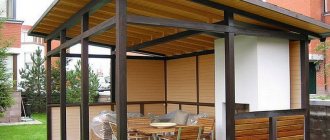
As for the design of the canopy itself, there are two types: open or closed. The latter will somewhat resemble a garage. But the first one is a pure type of canopy, which consists of racks, usually 4-8 of them, on which the roof is installed. We will talk about it further. In fact, it turns out that an open-type carport is a structure that covers the car only from above. This, in principle, is more than enough at the dacha.
You can add the construction site to the classification, which is also the location:
- standing separately;
- attached.
The first is a structure that is erected in the yard, and it is located at some distance from other buildings. The second is a structure, one part of which is the wall of a house or other utility structure. The photo below shows just the attached version.
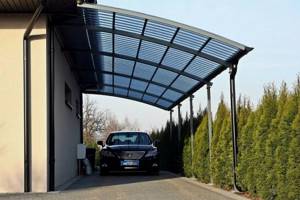
Carport attached to the house Source yandex.net
By the way, you can offer the option of an attached canopy to the garage. Convenient opportunity to use the area for two cars.
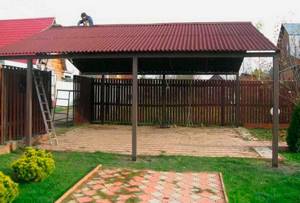
Construction
Now directly about the construction of the canopy itself.
- Initially, the site is prepared;
- After this, the supporting racks are installed. Their number is determined from the size of the building. To reduce the load on the structure, it is necessary to install a stand every 2 m of the length of the canopy. That is, a building 4 m long should have 3 racks on one side, and there will be 6 in total;
- Before manufacturing the roof frame, its shape is determined. The roof can be straight with a slope on one or two sides, wavy, in the shape of an arch, etc. It all depends on the imagination and the material of the shelter.
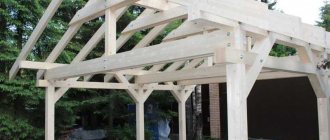
Let's look at the simplest design - a separate wooden canopy for one medium-sized car with a polycarbonate coating and a slope on one side. Canopy length – 5 m, width – 3.5 m.
So, first the site is prepared - leveled, concreted or asphalted, but you can simply fill it with crushed stone.
Since the length is 5 meters, it is better to install 4 racks with a distance of 1.25 m. This will distribute the load as much as possible, but if there are 3 racks on each side, then you will have to use massive wooden columns so that they can hold the load.
On one side, the racks should be 10-15 cm higher than on the other to ensure a slope.
After installing the racks on top of them, load-bearing beams are fixed along them. Each beam must be equal to the length of the building. To give strength to the structure, braces are made between the posts and beams.
Logs from boards are laid transversely on these beams and secured. All that remains is to correctly lay the polycarbonate sheets on the joists and secure them with self-tapping screws.
The final stage is decorative finishing, treating wooden elements with water-repellent and protective agents. If necessary, walls are made from polycarbonate sheets, attaching them to the racks on the required sides.
This is the simplest of the sheds that can be built on a summer cottage. If properly organized, such a building can be erected in just a day, provided the necessary materials and tools are available.
Materials for building a canopy
In principle, you can build a canopy from any building materials that are used in the construction of buildings and structures. That is, it can be brick, various blocks, lumber, metal profiles, etc. More often today, timber and a profile pipe are used for this.
As for the roof, there are no serious restrictions here either. This can be slate, corrugated sheets, tiles, metal tiles, polycarbonate, etc. Today, transparent polycarbonate is used for lightweight structures, which allows sunlight to pass through but does not allow ultraviolet rays to pass through.
So-called awnings have also appeared on the market. They can be classified as temporary structures. They are folding, easy to assemble and disassemble, so they are often used by summer residents in the summer season. Let us add that the awning is made of very durable material that will last at least 7 years.
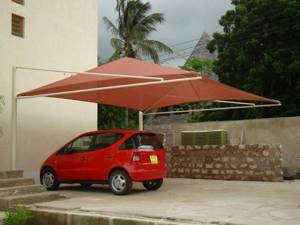
Tent canopy for a car Source yandex.net
As for the most popular materials, which are profile pipes and wooden beams, their popularity is ensured by their availability, low price and ease of use. At the same time, the correctly selected cross-section of materials makes it possible to build a truly strong and reliable structure.
True, both materials require constant maintenance, because the canopy is located outdoors and is subject to natural stress. But this is not a problem today either. Painted metal or wood treated with antiseptics will last no less than brick or concrete.
So, let's look below at how to make a carport from wood or metal.
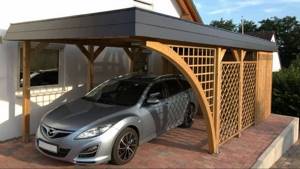
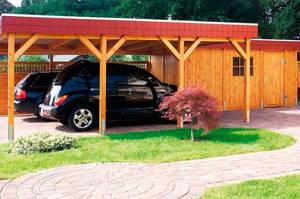
Original closed wooden canopy Source twoidvor.com
Types of covering material
Fabric awning.
A variety of materials are used for covering. The cheapest and simplest is a canvas or fabric awning.
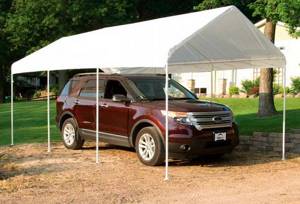
Overall, making a tent canopy can be very simple. It is enough to make a collapsible frame, put an awning on it and the canopy is ready.
The advantages of the awning are the speed of construction, the possibility of changing its location and dismantling, for example, for the winter period.
But the reliability of such a design is low; the material will age over time and begin to tear.
Such an awning requires periodic costs for the purchase of a new awning. But there is an opportunity to periodically update the canopy, given that now awnings are made with patterns and different colors.
Profiled sheeting.
It is one of the popular materials for canopy covering. In terms of cost, it belongs to the middle price category. It does not require any maintenance; it is enough to install it correctly on the frame. Excellent for permanent canopies; you can choose any color that fits well into the overall ambience.
But corrugated sheeting is a metal material, so the frame must be strong to hold the coating.
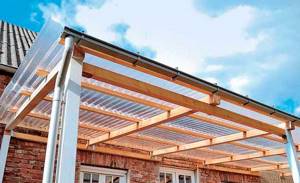
Polycarbonate.
One of the most popular covering materials for such buildings. Relatively inexpensive, quite durable and lightweight. It is used to cover canopies of various shapes, since the polycarbonate sheet can be easily bent. For covering, both sheets of cellular polycarbonate and monolithic are used.
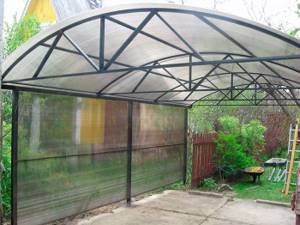
Cellular polycarbonate is lightweight, more flexible, but less durable. It is required to lay it correctly so that moisture drains from the honeycombs. Monolithic polycarbonate is not very flexible, but it is stronger. Sheets of monolithic polycarbonate can be placed in any position.
The peculiarity of polycarbonate as a covering material is the correctness of its fastening to the frame. If the rules for fastening polycarbonate sheets are violated, cracks and rapid destruction of the sheets may occur.
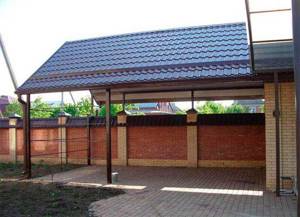
Metal tiles.
Also used as a material for covering carports.
But this material is one of the most expensive and it is advisable to use it only when making a structure as an extension to a house, if the house is also covered with this material. In this case, the flooring will harmoniously fit into the overall look.
Rules for constructing a wooden canopy
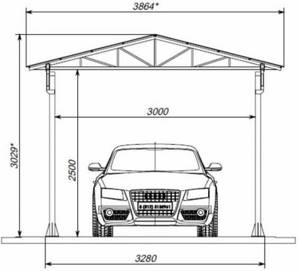
Regardless of the chosen material, the dimensions of the carport are first determined. This takes into account the height, which depends on the height of the car itself. But there is a so-called standard parameter that is suitable for all types of vehicles, even trucks. This is 2.5 m.
As for the width, the minimum parameter is the width of the car plus 1 m. It is believed that half a meter on each side will make it possible to park without problems. The length is chosen in the same way. That is, the length of the car plus 1 m. If you are concerned about the possibility that slanting rain will still fall on the car, then there are no restrictions on making the canopy wider and longer. But if the site does not allow this, then take these minimum parameters as a basis.
Now we move on directly to the construction of a wooden carport. We need to start by laying the foundations. Their number is determined by the number of pillars that will support the roof. Typically, foundations for beams are concrete mortar poured into prepared pits. They can be round or rectangular. It is important to choose the right depth. It is believed that this should be below ground freezing. But not always. Much will depend on the weight of the canopy itself. The greater the mass, the deeper the foundation is laid.
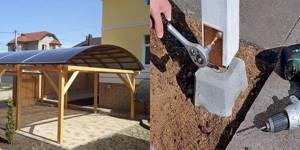
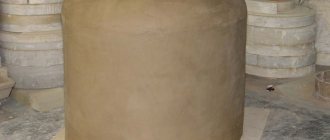
Foundation for a wooden canopy Source stroykarecept.ru
See also: Catalog of companies that specialize in the design and construction of small architectural forms, including carports.
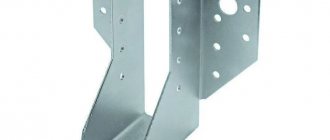
A wooden beam is not a metal pipe, so an embedded part is needed to attach it to the foundation. The photo above shows one of the varieties of such parts. It is laid at the concrete pouring stage. Please note that all mortgages are set level and in the same plane. And although the support pillars can be leveled in height by trimming, the foundation for the canopy must still correspond to a certain levelness.
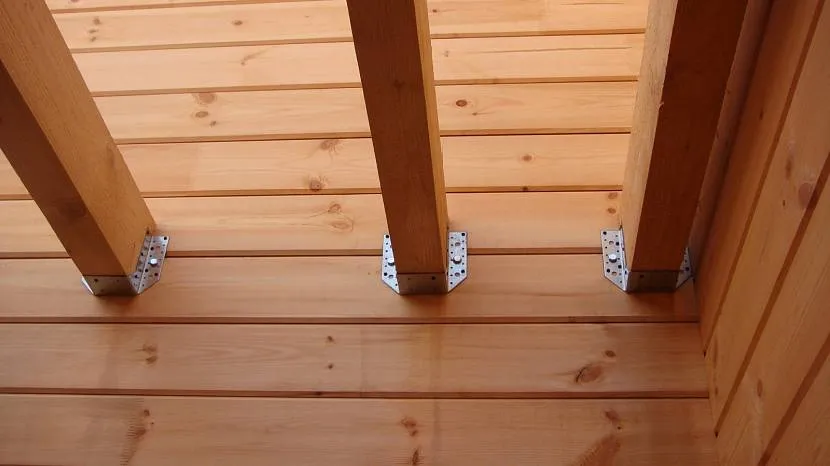
The next operation is the installation of beam supports. They are simply installed vertically and attached to the embedded parts using self-tapping screws or bolts through and through. Next, the strapping is made along the upper edges, for which the same timber of the same section is used. Fastening is carried out with self-tapping screws and special metal parts in the form of corners, as shown in the photo below.
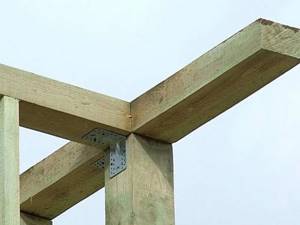
Connection of support posts with the upper trim Source banya-expert.com
After installing the top frame, they proceed to the construction of the roof. Standard technology is used here, depending on the chosen form. That is, a frame is assembled from rafters and sheathing, on which the roofing material is laid. The ceiling is usually not hemmed, although this can make the structure more beautiful.
The very last stage is the formation of the floor. There are no restrictions here either. More often concrete floors are poured, less often asphalt floors. The floor is often covered with paving slabs or paving stones. A stone will do. It all depends on financial capabilities. The only thing that should be noted is that if the canopy is part of the composition, then both its roof and its floors are covered with materials that were used throughout the entire site.
For example, the roofing material that covers the house must also be laid on the canopy. If the garden area and alleys are laid with stone tiles, then you should not highlight the floors by covering them with some other building material.
Attention! Wooden elements of canopies must be treated with antiseptic and fire-retardant compounds. The former fight microorganisms, the latter resist fire for some time. Paint is also often used for decoration.
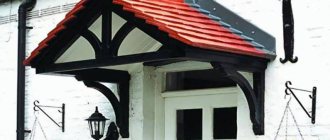
Roof of a house and canopy in the same style from the same roofing material Source remont-book.com
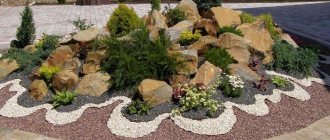
How to lay out a platform for a carport
When making a carport, you also need to make a platform under it. The cheapest and easiest option is to fill it with crushed stone. To do this, simply remove the turf, dig in the curb, then pour in crushed stone and compact it. This way you will achieve a rigid platform in which ruts do not form.
The second option is to lay paving stones and paving slabs under the canopy. As a result, you will get a durable and beautiful coating, but you will have to spend a lot of money on it, as well as a lot of time and effort.
Work order:
- Dig a pit 20-25 cm deep;
- Pour crushed stone onto the bottom and compact it thoroughly (you can use a tamping plate for this);
- It is recommended to lay a layer of geotextile on the crushed stone, which will prevent sand from penetrating into the crushed stone, thereby reducing the chance of the foundation subsiding under the wheels of the car;
- Place a layer of sand on the crushed stone or geotextile and compact it thoroughly;
- Lay paving slabs or their equivalents in the sand.
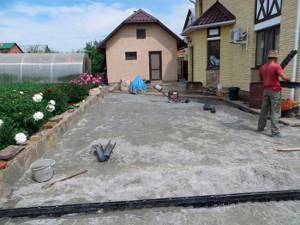
The last option is pouring concrete. This site is less attractive than the second option and more reliable than the first. In terms of price and time, pouring concrete will be much cheaper than paving slabs.
It is done as follows:
- Prepare a base of crushed stone as in the previous version;
- Make formwork and lay wooden boards on the crushed stone at a distance of 1 m;
- Make a mesh with a 10 by 10 cm cage from wire 3-4 mm thick;
- Lay the mesh between the boards and fill with concrete of at least M 250 grade.
Don't forget about the slope if you need water drainage. The thickness of the concrete layer should be at least 7 cm, but there is no point in making it more than 10 cm.
Rules for constructing a metal canopy
In principle, the technology here is the same. But there are some differences. For example, there is no need to build separate foundations. Pipes are simply inserted into the dug holes and filled with concrete. The main task of the work contractor is to adjust the height of the steel supports.
After which the upper piping is made from the same profile pipes. The connection is made by electric welding - the simplest and most reliable option. As for the roof, it is with the help of a metal profile that it is possible to make an arched canopy. It can also be made from wood, but it is much easier from profiles.
As for laying and fastening polycarbonate, there is one subtlety. For fastening to a profile pipe, ordinary roofing screws are often used. If special washers are not placed under them, the roofing structure will not last long due to the deformation of the polycarbonate and its rupture at the attachment point.
The nuances of constructing attached canopies
There are two types of attached structures:
- with the roof fastened to the wall of a neighboring building;
- with the installation of all racks.
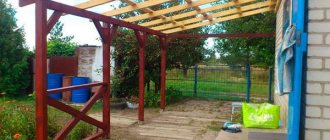
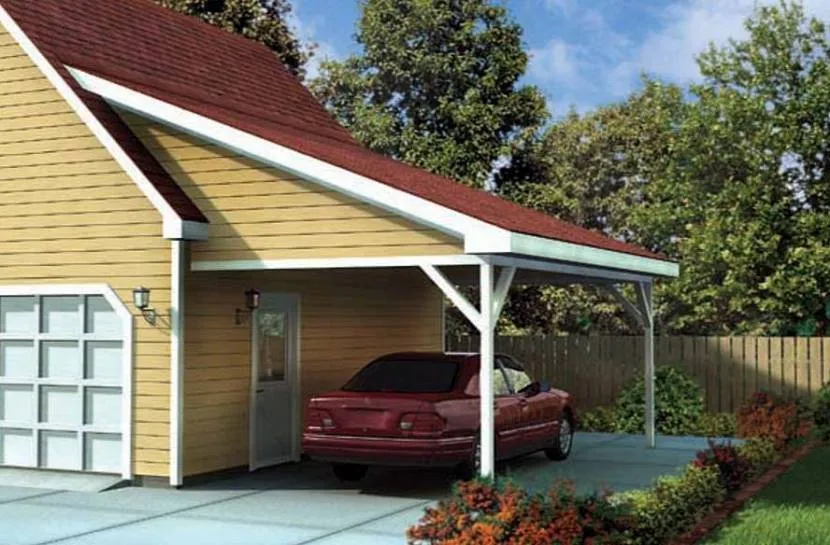
The last option is a canopy built using free-standing technology. Only one side of it is pressed against the wall of a house or other object. For example, in the photo below this is clearly visible - six support pillars on which the roof rests.

Canopy attached to the wall of the house Source yandex.net
A canopy, the roof of which on one side rests against the wall of the house, is constructed a little differently. First, everything must be done to somehow attach the roof rafters to the wall. There are tons of options to choose from.
For example, attach a wooden beam to the wall, laying it horizontally. Fastening is carried out with studs, anchors or long screws. And the rafters are laid on this beam. The photo below shows this option well.
A beam attached to the wall on which the rafters of the canopy are laid Source stroyfora.ru
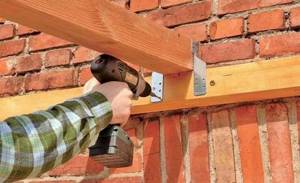
If the house is wooden and a carport made of wood is attached to it, then metal perforated fasteners can be used to secure the rafters. This is clearly visible in the photo below.
Attaching canopy rafters to a wooden wall Source pinimg.com
If the canopy is constructed from metal profiles, then the attached structure is attached to the wall using either embedded parts, or special devices, or fasteners. The first option is usually used if a house with a canopy is being built initially. To do this, steel mortgages are placed in brick or block masonry. Usually this is a corner. After the construction of the house and during the construction of the canopy, steel rafters are welded to these mortgages.
To use the second option, you need to prepare these devices. Their shapes and sizes are presented in a wide range. In essence, these structures are stands on which the profile pipe is laid. The products themselves are attached to the wall. The photo below shows one of these devices, which consists of two corners between which the edges of the canopy rafters are inserted. It is attached to them by welding.
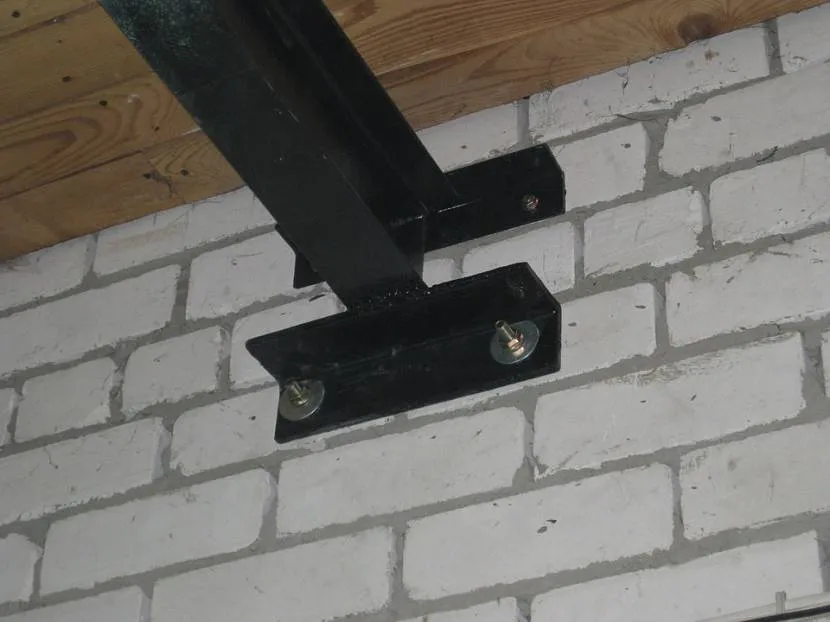
Fastening a steel canopy rafter to a metal corner stand Source ad-cd.net
Briefly about the main thing
Carports in a private house are presented in two design types: free-standing and attached to the wall of a house or other building on the site.
They are constructed from different materials, most often from wooden beams or profile pipes.
Roofs have different shapes, most often single or gable, arched.
Roofing material – any available on the market. Polycarbonate has gained great popularity today.
Ratings 0