Advantages of awnings
- The design is lightweight and easy to install.
- The structure is strong, but not as fundamental as a gazebo or building.
- A stationary roof, unlike an awning, is more durable. It will serve its owners for many years.
- Much cheaper than other similar structures, but it performs the function of protection from bad weather perfectly.
As for the shortcomings, we can name only one. This building is open to all winds and is well ventilated. You need to remember this during construction and make sure that your creation stands firmly on the ground, is especially durable, and can withstand any weather conditions. This condition is not difficult to fulfill; you, of course, can cope with it if you decide to build a shed at your dacha. First, we decide on the type of structure and the necessary materials.
Types of canopies
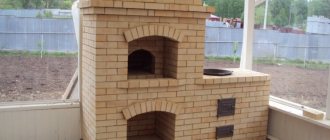
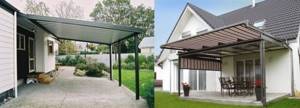
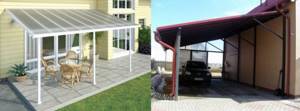
- As a continuation of the roof, attached canopies are built - canopies. On one side of such a structure there is a wall (part of the house), the other sides are open. Used to cover porches, stacked firewood, verandas, barbecues.
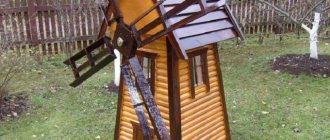
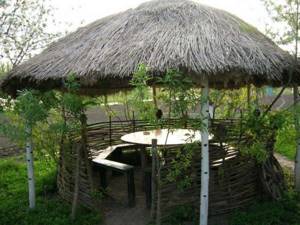
- Free-standing structures are the second type of such structures. In the countryside, at the dacha, an “umbrella” covers wells and summer kitchens; in the city limits, there are transport stops, parking lots, cafe areas, sports facilities, bus stations, and market stalls. At the dacha, a green hedge is planted near such sheds. The result is a wonderful garden gazebo. The universal building protects the population from scorching sun rays, pouring rain, unpleasant wind, and snowfall.
The roofs of buildings also come in different types - straight or inclined.
- Direct. The simplest option is direct coating. Used for parking.
- Inclined. There are single and double slopes. Due to the fact that the roof has an angle of inclination, water drains from the roof in a timely manner.
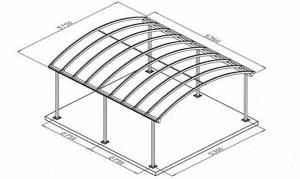
- Complex. Sometimes in design projects non-standard, unusual, or original shapes are chosen. For example, with a semi-arch. It will also be easy to make such a canopy with your own hands.
What is a canopy
According to the online directory, this is a roof that is located on supports, has walls, or is completely open. It can be attached to a common facility, have one rafter system, or be an independent structure. The following materials can cover a wooden frame as a roof:
- Polycarbonate. There are two types - cellular and monolithic. For the roof, it is better to use the first option, since the sheet has stiffening ribs, which increases the strength to loads.
- Metal sheets – ondulin, corrugated sheets, metal tiles. Durable, easy to install, but susceptible to corrosion.
- Flexible materials - rubber or bitumen shingles. For such coverings, the canopy slope must have a significant angle of inclination, otherwise precipitation will linger on the roof and rot over time.
It is not difficult to build a canopy for a bathhouse with your own hands - the simplicity of the design does not require any special knowledge. But it should be remembered that construction will be carried out from the most capricious material, and, therefore, will require a responsible approach.
What to make a canopy from
The structure uses hard coniferous timber - pine, cedar. It is important that it is free from any defects - cracking, knots. This is especially important for load-bearing elements - racks, rafter system.
The cross-section for a lightweight structure must also meet safety conditions and be at least 100 mm. You will need fasteners and tools - handling skills are minimal.
Materials for hanging structures
Structures of this type are built from available materials that are sold everywhere.
- For the frame they use wood or metal, or combine wooden parts of the building with metal ones.
- Plastic pipes have been used more and more often lately as a base.
- For the roof, choose, at your discretion, a covering from the list: metal tiles;
- modern polymer material - monolithic polycarbonate, fiberglass, other durable coating;
- corrugated sheeting;
- slate;
- special fabrics intended for awnings;
- durable glass, plexiglass;
- durable polyethylene.
Preliminary work before construction
- We think over the canopy diagram, draw a drawing.
- We choose a place for the extension, clean and level it, and make markings for supports.
- To protect wood from mold and rot, we treat wood parts with an antiseptic. With a ready-made composition or, for example, we paint it with a primer and then with paint.
- Let's prepare supports for the structure. We take 5 blocks of wood (90x90 mm). Since the roof is planned to be sloping, the bars intended for the front supports should be 40-50 cm less than the height that is measured on the wall of the house. We prepare the rafters and blanks for the sheathing.
- We fix the vertical distance on the building with a horizontal block (2.4 meters).
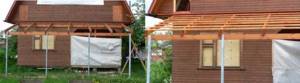
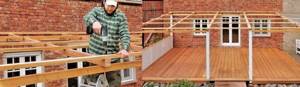
How to build a canopy out of wood
Agree, working with a welding machine is a serious problem for about half of the people, and metal profiles are expensive nowadays. It’s much easier to collect all the available lumber in the barn, buy what’s missing, and attach a simple but quite practical wooden canopy to the house. Under such a canopy you can rest no worse than under a structure with a metal frame, and maybe even better.
The first thing you need to do is generate an idea and sketch a sketch. We think that after reading the first paragraph of this publication, there will be no problems with ideas. And everyone can also draw a sketch, even if it is not a very beautiful drawing, the main thing is that it is understandable. But problems may arise with the drawing; not everyone will do it correctly. However, a wooden canopy for a private house is quite simple in design and you can do without a drawing at all, the main thing is to calculate everything correctly and paint the material.
We prepare everything you need
Having drawn a sketch and put down all the necessary dimensions of the building, you can begin to calculate the material. We expect to make a wooden canopy with our own hands, 2 m wide, 6 m long and 2.4 m high, and for it we will need the following material.
- Beam 150x150 mm, 2.4 meters long – 4 pieces, which will go to the vertical supports.
- Two long (6 m) boards 150x50 mm, which we decided to use as longitudinal beams.
- Boards 150x50 mm, length 2.5 m – 7 pcs. to the rafters.
- Six-meter boards 100x25 mm - 7 pieces will be used for the sheathing.
- Metal mounting bracket and long screws and bolts. With their help we will fasten the load-bearing elements of the structure.
- 3 six-meter sheets of corrugated sheeting 0.9 mm, width 1000 mm.
- 4 thrust bearings for anchors of vertical supports, mounting width 150 mm.
- Bolts with washers and nuts for thrust bearings, special self-tapping screws for corrugated sheets.
- Primer for wood processing.
- Cement 4 bags, sand 3 bags, crushed stone 1 bag.
- A piece of roofing felt 2x1.5 meters.
In addition to the material, let's take a tool:
- screwdriver;
- drill;
- hand saw;
- perforator;
- furniture stapler;
- a set of open-end wrenches, a set of screwdrivers;
- bayonet shovel;
- trough;
- bucket;
- pencil, building level, ruler;
- laser tape measure;
- knife.
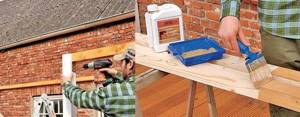
Assembling the frame and roofing stele
Let's start construction. To make the frame of a wooden canopy for a private house, you need to prepare the site and make anchors for the vertical supports. Without preparation, the construction of even such a simple structure is impossible. We clear and level the area in front of the wall of a private house, install cast-offs, and pull the rope to determine the boundaries of the area under the structure.
For your information! In order to properly level the area under the canopy with your own hands, it is necessary not only to remove debris and foreign objects from it, but also possibly excess soil.
Next, using a laser tape measure, we carefully measure the site and mark the locations for installing anchors. We dig 4 holes to a depth of 1.5 meters, approximately 40x40 cm wide. We line the holes with roofing felt, fastening the pieces of material with a furniture stapler. Fill the molds with concrete mixed with small crushed stone. We still install the thrust bearings in the wet concrete so that the fasteners stick out strictly vertically (you need to check with a level) and wait until the concrete hardens. Next we do the following.
- We take 4 pillars 150x150 from a 2.4 meter long timber, install them vertically in the mountings of the thrust bearings, drill through holes for the bolts with a drill and attract the vertical supports to the thrust bearings.
- We take two six-meter boards of fifty, we screw one with our own hands level to the wall of the house 30 cm above the ends of the vertical supports. We screw the second one using self-tapping screws and angles strictly horizontally to the vertical supports. These boards will be the horizontal supports.
- We take seven fiftieth boards 2.5 m long and lay them across the canopy on an edge in increments of 1 m, fastening them with corners and self-tapping screws.
- Now run through the bed. Let's take 7 boards 100x25 mm and lay them across the rafters. We attach it to the fifth screws.
- We go over the entire wooden frame with soil several times so that the wood is saturated.
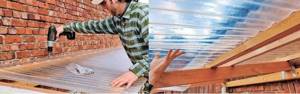
- Now it's time for the roof. We cut the corrugated sheet into sections of 2.3 meters and lay them across the structure with an overlap of 2 ribs. You will have to lay 8 pieces and secure them with special screws. At this point, construction can be considered completed.
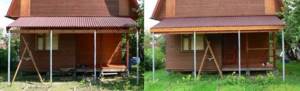
In conclusion, we note that when making a house with a canopy with your own hands, you must balance your desires with your capabilities. You can plan a beautiful steel wall canopy with a glass roof like your neighbor’s, but at the same time do not have the funds to implement the project. Or you can build a canopy with your own hands from scrap lumber for pennies and be happy. Good luck!
We build a wooden canopy with a polycarbonate roof with our own hands according to the instructions
- We drill holes for installing a vertical beam. If there is no drill, we simply dig holes 0.5 meters deep.
- Pour sand and crushed stone (10 cm) into the holes to create a pillow. Then we insert the supports strictly perpendicularly, checking the correct installation with a plumb line and level.
- Fill the holes with concrete.
- We connect the horizontal beam and the corners of the support to each other.
- We mount the rafters on horizontally attached slats and the sheathing of the structure.
- We connect two polycarbonate sheets (1000x3000 mm) 8 mm thick to obtain the intended roof size (2000x3000). We suggest using an HP profile for this. To prevent the plastic from cracking during operation, use self-tapping screws with rubber washers.
- We install the roof on the sheathing. Due to the difficulty of access to the top with large plates, preliminary work can be done at the bottom, and then lifted, say, with an electric hoist and secured.
- The canopy for the cottage is ready. The result was something like a canopy, an extension of the roof of the house.
Polycarbonate is a translucent, lightweight and durable plastic. A summer cottage canopy with a plastic roof provides good protection from rain and snow. It does not deform, although it is easier to bend the required shape from it than from other materials. A modern polycarbonate roof will last you for many years.
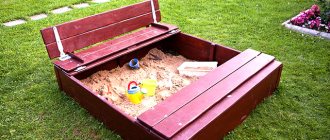
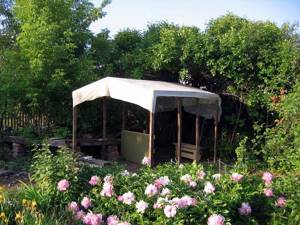
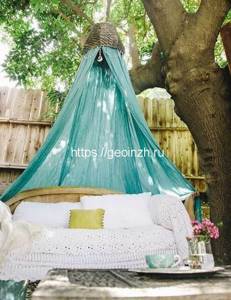
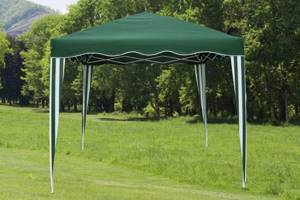
Simple DIY fabric sun canopy
Typically, summer cottages have rather limited space and such a fabric canopy will be an excellent addition to a summer vacation.
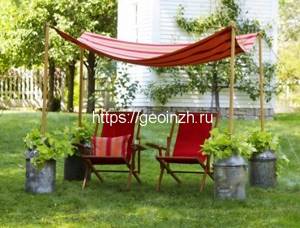
Moreover, any available materials are suitable for the implementation of this idea.
- To quickly build a sun canopy, you will need 4 supports (long sticks 2 - 2.5 meters), 4 containers for installing supports and any material for the awning.
- Instead of sticks, you can use wooden beams, bamboo sticks, metal supports for climbing plants, and even PVC pipes.
- Containers in the form of buckets, flower pots, etc. needed for installing and securing supports.
- For an awning, an old bedspread, tablecloth or regular sheet will do.
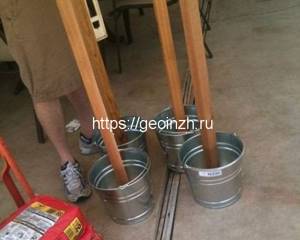
We build a canopy - quickly and easily
The idea of building a fabric canopy is incredibly simple and it’s surprising why it’s so rarely used! But everything is very simple.
You need to install supports in the prepared containers and fill them with any material at hand - soil, sand, crushed stone. Ideally, it is better to use cement mortar. Then you will be sure that the supports are securely fastened.
Then everything is simple - depending on what you will use as an awning, place the supports at the selected distance and stretch the awning between them, tying the ends with rope.

That's it, the improvised fabric canopy for the dacha is ready. Its special advantage is that when leaving for the city, you can fold and store the canopy in the pantry.
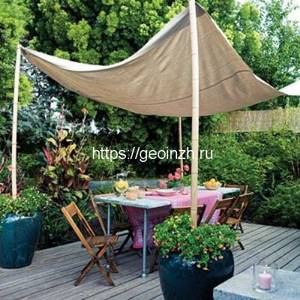
If it is possible to attach a tent to a tree branch, then this will be an ideal place to relax.
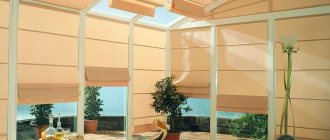
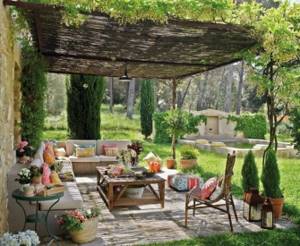
Canopies with fabric covering
Its advantage is the variety of colors and shades, fabric patterns. A fabric awning can become a work of art. It is chosen in cases of manufacturing exotic designer canopies. A roof made from this material will decorate your summer cottage and please the eye. Most often used for summer cottages. The peculiarity of this design is that the fabric, in any case, is a short-lived material. During autumn bad weather, winter snowfalls, and during non-resort periods, it can become unusable and tear. Therefore, the fabric covering from such structures is removed for the autumn-winter period and put on in the spring, before the next summer season. This canopy is built in the same way as the previous options.
What types of canopies are there?
Sheds attached to a house can be classified according to various criteria, for example, by shape and design, by materials of manufacture, as well as by their purpose. Based on their design features, canopies can be divided into stationary and sliding. Stationary canopies are structures whose elements are welded or securely connected with bolts and screws without subsequently unscrewing them.
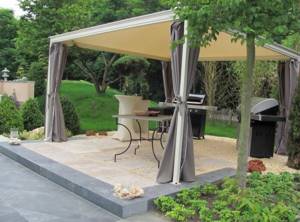
Sliding canopies are distinguished by the fact that their mechanism allows you to extend the roof whenever you want. This is done mechanically using a cord or automatically using a control panel. Retractable awnings have a fabric roof and are often called awnings. They are easy to attach to the wall of the house with your own hands.
According to their shape, all canopies near a private house can be divided into:
- single-pitched;
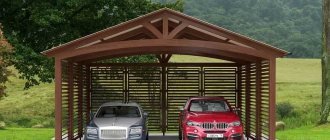
- gable;
- arched
To cover a large area near a private house, for example, above a terrace, it is better to erect lean-to and arched canopies. The design of a lean-to canopy is simple, and therefore should not cause difficulties when building with your own hands. For an arched canopy, you can generally buy some of the elements ready-made; you just have to assemble the canopy, like a Lego set.
A gable canopy is more suitable for a small canopy over the porch to the house. Such a visor will be reliable. Snow will not stay on it in winter.
As for materials, both wooden beams and metal pipes are used to make the frame of the canopy and its supports. And sometimes stone or brick columns are erected for the canopy, which gives the structure majesty and scale.
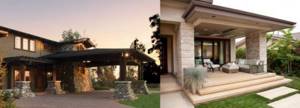
The roof is made of metal tiles, corrugated sheets, polycarbonate, euro slate. The material is selected the same as the roof of a private house, so that the entire structure looks in the same style. A metal canopy with a corrugated roof will be more reliable, but it is also more expensive than a wooden canopy. A wooden canopy will look better next to a wooden house, so be sure to take this into account when building. And if you need to create an arched canopy, polycarbonate is suitable, because only it has good flexibility.
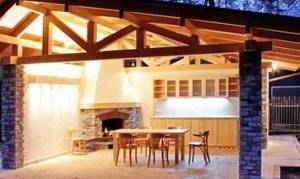
And finally, the purpose of awnings for a house can be different. Small awnings are designed to protect the porch from precipitation. A canopy can be built to create a cozy terrace. Often carports are built near a house for a car; this happens if the yard area does not allow the construction of a separate carport.
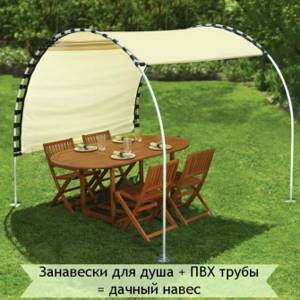
The simplest do-it-yourself canopy made from the simplest materials
If you urgently need to build a hanging structure for your dacha with your own hands, you can do it in a very simple way. To build a canopy, take
- 2 five-meter PVC pipes (vinyl);
- 2 pieces of thick polyethylene (shower curtains are suitable);
- braid, strong threads.
Build the canopy according to the instructions:
- Sew the curtains into one large sheet.
- From the braid, make 40 loops on which the awning will be held (cut 40 suitable pieces).
- Sew the loops to the polyethylene.
- Place loops on the pipes.
Then decide on the installation location of the structure. Mark with pegs on the ground the points where you will insert the awning pipes. Place your structure by digging PVC pipes into the ground. Your canopy is ready! Your imagination will tell you the colors of the curtains - and the awning will come out wonderful. Modern materials also suggest other design solutions. Take plastic pipes and, using clamps (also PVC), assemble a rectangular frame (after drawing its diagram). Attach thick fabric or polyethylene on top. You will get a wonderful carport. In the same way, you can make a universal structure from thin plastic pipes and durable polyethylene. Such pipes bend easily. Experiment with arched shapes. You will get a collapsible portable canopy. Put in a little work and patience - as a result, you will have the much-needed canopy at your dacha.
Article Rating
We make a canopy ourselves
A canopy for a veranda or terrace at a dacha is of a simple design; you can build it yourself. If you have the desire and time to work, then you will succeed. Let's look at the construction of a canopy using the example of a polycarbonate structure. The whole process can be divided into two stages: the construction of the frame and the fastening of the roof. They are preceded by the preparation of tools and materials. So, to install a canopy over the terrace you need:
- Dig concrete blocks into the ground with a hole for mounting for support.
- Attach metal fasteners to concrete blocks.
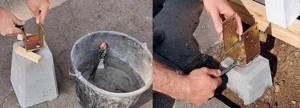
- Next, you need to cut blanks for cladding from wooden blocks according to measurements and markings.
- Now you need to fix one of the beams on the wall of the house at the required height, usually just above the window. Fastening is carried out using dowels and bolts.
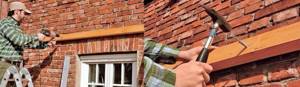
- Then vertical supports are installed. Their height should be slightly lower than the height at which the beam is fixed to the wall. This will allow you to make a canopy at an angle to drain rainwater.
- The timber is attached to the racks using corners.
Important! All wooden workpieces must be coated with protective varnish or drying oil.
- Now the canopy frame is assembled from the logs. The logs are attached to the timber using self-tapping screws.
- Then they take polycarbonate sheets and secure them to the frame using self-tapping screws with a rubber washer.
- A gutter can be secured along the edge of the roof.

- The final touch is the arrangement of the terrace. You can place furniture under the canopy and also decorate the place with flowers. Show your imagination by creating a cozy environment.
Important! The film from polycarbonate sheets is removed only after installation is completed, so as not to damage the material. In addition, the edges of the canopy must be sealed with foil or other special material so that moisture does not get into the “honeycomb” of the polycarbonate and lead to deformation of the roof.
Even a novice master can carry out such construction. The main thing is not to make mistakes. For example, do not overtighten the screws, this can lead to cracks in the polycarbonate sheets.
It is much easier to secure a small fabric canopy suitable for a summer house. Thanks to this canopy you can create a relaxation area on a hot day. All you need for this is a fabric awning with a mechanism and fasteners. But such a mechanism, as it may seem, is not cheap. The automatic folding mechanism of the fabric sheet is attached to the wall using brackets. At this point, the arrangement of the terrace under the canopy near the house will be completed, all that remains is to place a table and chairs. Here's a cozy place to have a cup of tea.
Thus, there are a lot of options for awnings over the terrace. It is important to calculate everything correctly, select the necessary material, and only then begin construction and arrangement of the terrace. You can save a lot of money at work, but if such work is beyond your capabilities, then professionals will do everything in the best possible way according to an individual project.