Winter design options
You can make winter gazebos with your own hands in different designs. This could be an extension to the house - very convenient, because then the path for the owners from the kitchen to the resting place is minimized.
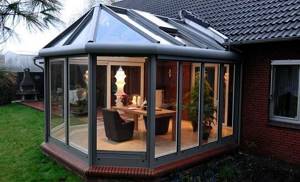
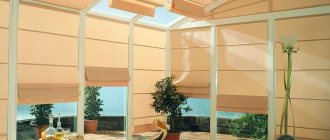
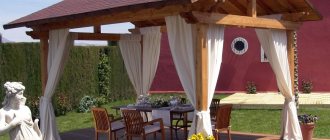
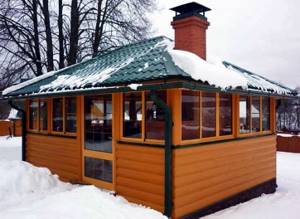
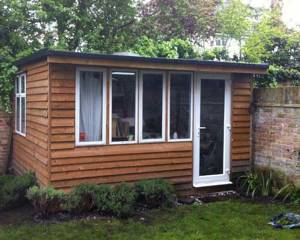
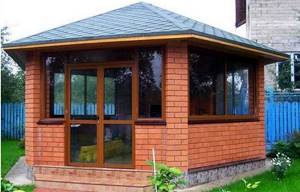
Photo: veranda with panoramic glazing
This can be a separate building in which an oven, barbecue or barbecue is built. If there is already a summer pavilion on the site, you can insulate it and use it for relaxation in the winter. If a permanent structure is being built, you can combine its functions with those of a guest house.
Thematic material:
- Gazebo attached to the house
Variety of warm gazebos
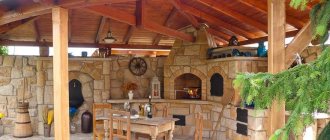
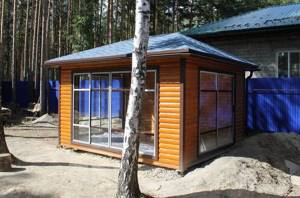
Separate building
Initially, the gazebo may be conceived as a summer or winter option for relaxation. Since the desire to relax in the warmth usually comes after the room has already been built, it is necessary to make constructive changes to the completed project.

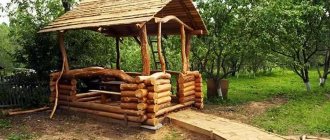
Warm gazebo made of round logs
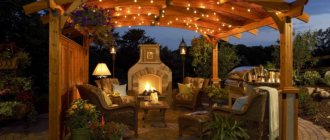
It’s another matter when the structure is initially conceived as insulated. In summer, such a building does not cause much delight, since oxygen access is minimal and the space for rest is closed, but in winter everything falls into place. Undoubtedly, such a design is much more expensive than the “cold” version, since it requires additional investments: glazing, closed structure, electrics, and so on. We talk about this in detail in the section on arrangement.
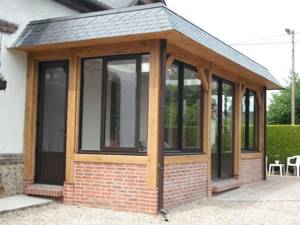
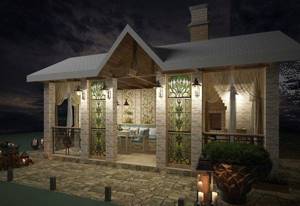
Attached to the house
A very common option among Russian summer residents. In this case, the gazebo is a veranda that is connected to the main country house.
Due to the fact that at least one wall does not face the street, the heat inside is better retained. In addition, much less building material is needed to build an extension.
Another thing is that then the “charm” of the holiday is lost. The attached gazebo is still just another room in the dacha that can be warmed up.
Therefore, if for some reason you do not want to go to the dacha, but are considering relaxing in a separate room, then an enclosed house or a Finnish grill is better for you.
Finnish grill
A most interesting approach to country holidays. A team of professionals assembles a separate wooden structure with a fireplace in the center, which is used for cooking over coals.
The gazebo is equipped with furniture, and in some cases even reclining couches. Everything for a comfortable stay under one roof from 200 thousand rubles!
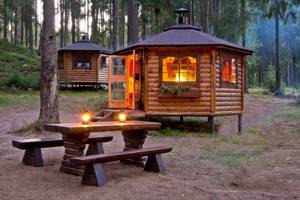
Compared to the light summer gazebos, this design looks very expensive and massive, but in reality this is far from the case. If you count the price of building materials, a fireplace, a chimney and the opportunity to relax even in the cold season, it’s not that expensive, would you agree?
Peculiarities
A warm gazebo is distinguished from the rest by:
- A closed design is required.
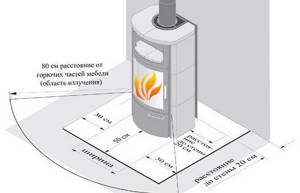
- The presence of a stove or barbecue that will simultaneously perform heating functions. In the gazebo attached to the house you can install a heating system and install a radiator; in the remote one you can place heated floor systems and electrically heated pipes.
- It is better to design winter gazebos in such a way that a lot of light penetrates them - with large windows, but at the same time so that the heat is retained as long as possible.
Arrangement of the premises
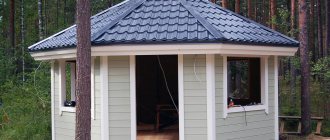
Closed type
It is impossible to create a comfortable temperature in a room where there are open openings or ventilated gaps in the casing. Therefore, the first step in creating a warm gazebo should be the creation of a closed structure.
Various examples can be found in the publication about ideas for closed gazebos.
Full glazing
Ideally, this should be “warm” double-glazed glass (Euro-window).
Since plastic windows are still expensive, and most country houses are equipped with classic windows with glass and glazing beads, it is important to use at least some kind of glazing in principle. It is necessary to close window openings from drafts and excess air.
An interesting option for glazing using PVC film and heating the gazebo using a potbelly stove is shown in a video on Youtube from an unknown author.
Insulated roof with steam and waterproofing
A highly recommended job that needs to be done to maintain a comfortable temperature. Insulating the roof will eliminate the possibility of excess air entering the room, and will also allow for more efficient heat retention.
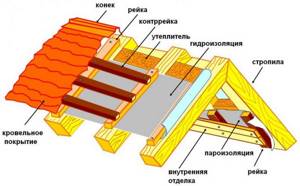
Installation of an insulated roof
As a last resort, it is advisable to use the most dense roof possible, for example, bitumen shingles. To install it, it will be necessary to create a dense sheathing, and the roof itself fits perfectly to the roof.
Design
The shape, size and style depend only on the taste preferences of the owners. DIY gazebos can be rectangular, multi-faceted and even round. When designing, it is necessary to correctly evaluate the location of the stove, benches and tables so that the design does not come at the expense of functionality.
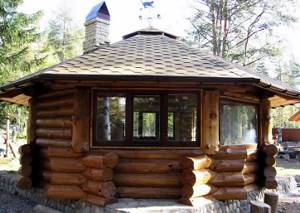
Photo: hexagonal log structure
The style is chosen depending on the landscape or architecture of the house, if the building will be located next to it. The gazebo can be made in the classical style, English, Chinese, etc. In the modern style of landscape design, polycarbonate structures can be used.
The traditional material for the construction of warm gazebos is wood, which has low thermal conductivity. In the style of a Russian estate, buildings made of rounded logs or profiled timber look good.
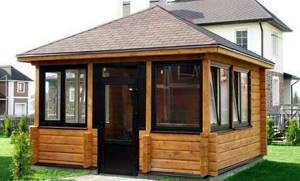
Photo: square gazebo made of timber
Brick buildings are distinguished by their solidity and monumentality. Brick minimizes the possibility of fire from sparks or smoldering embers on the structure of the building. However, the same effect can be achieved if, before starting construction, the wooden elements of a timber or log gazebo are soaked with fire retardant liquid.
Advantages and disadvantages
A fireplace-barbecue or other additional devices made of brick is a fairly heavy structure, so to implement it you will need a solid foundation at the base of the gazebo. When preparing it, it is necessary to ensure that settlement and distortion do not occur, otherwise this may lead to deformation of all elements of the structure.
Safety requirements when installing a fireplace
Among the many advantages of a fireplace with various functions are:
- Cooking at any time of the year, regardless of weather conditions.
- Complete absence of smoke.
- High level of fire safety.
- Cooking while watching the flame
- Reliability of the structure.
- Strength.
- Long service life.
For a comfortable stay, the gazebo is equipped with special furniture and kitchen utensils.
But despite this, there are also disadvantages:
- Quite a high price for materials.
- Heavy weight of the device.
- The device must be equipped with a chimney.
What to consider when designing
When designing, you should be guided by the following data:
- dimensions: length, height, width;
- material and features of construction of the power frame;
- building materials for walls;
- roof type;
- location of the furnace (depending on the building material of the structure itself);
- ventilation system: presence of valves and a smoke exhauster. The air in a small room is burned by a stove quite quickly;
- To build a warm gazebo with your own hands, you should complete a preliminary drawing or order a project from a specialized company.
Roof
There are a huge number of roofing materials available these days. For the gazebo, you should choose the lightest roofing: it can be flexible tiles, ondulin, corrugated sheets. When choosing a roof shape, it is necessary to take into account the snow load in the region so that the snow does not stagnate on the roof, but calmly slides down.
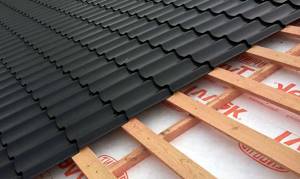
Photo: metal profile flooring on the sheathing
Layout options and ideas
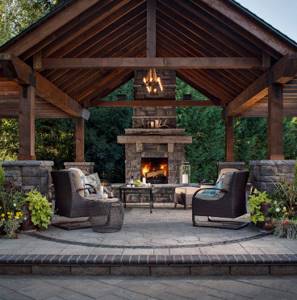
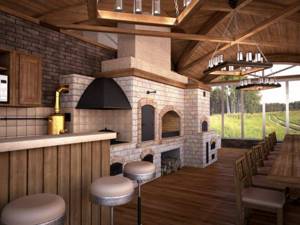
A gazebo on the site can be built completely open, organizing a resting place by the fireplace under one canopy, half-open and closed. When choosing an option, you need to take into account the time and financial costs of each. If the dimensions of the building allow, the stove is placed along one wall. A permanent structure can even replace it. In a small area, a corner location would be appropriate.
For several sources of fire they make a common hood, so they are located in close proximity to each other. The chimney must be designed in accordance with all the rules that exclude smoke in the direction of residential buildings.

The central place of the gazebo usually remains empty or occupied by a seating area. There is a table, chairs, and a sofa. If the building requires a portable brazier only for shish kebab or barbecue, it is installed in the middle, ensuring a good flow of smoke.
Glazing
For the construction of winter gazebos, sealed double-glazed windows are usually used. Profiles can be used from traditional PVC, more expensive wood or from functional and durable warm aluminum. The windows can be fixed, or they can be tilt-and-turn, which will allow you to use the gazebo on hot summer days. It is advisable to provide for the possibility of dismantling windows in the summer.
Construction stages
- Selecting a site for construction and preparing a project or drawing.
- Choosing a place to lay future paths.
- The construction of a foundation for warm gazebos will require a more massive foundation than for lightweight structures. A screw foundation will handle the load perfectly, will be cheaper and will last a long time. Separate reinforcement should be provided under the place where the stove, fireplace or barbecue will be located.
- Construction of the basement and walls. When erecting walls, it is necessary to take care of high-quality waterproofing so that in the spring, when the snow melts and groundwater rises, moisture does not penetrate into the walls.
- Do-it-yourself roof construction. The roofing is laid on rafters, which are made of timber. Since a winter gazebo necessarily has a stove in its design, care should be taken to protect the roof from overheating. Typically, a material such as OSB, which has low thermal conductivity and high strength, is used for this.
- At the final stage of construction, flooring, installation of windows and doors, installation of communications, and interior finishing are carried out. Building a warm gazebo with your own hands usually takes about a month and a couple of weeks if a specialized team was involved in the construction. Even faster, you can build a resting place from a purchased ready-made set of timber, which is assembled like a construction set.
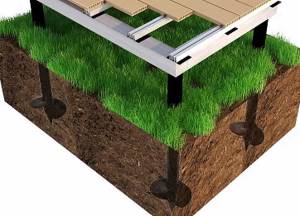
Photo: Foundation on screw piles
A closed, warm gazebo, built with your own hands, will decorate your site and serve as a wonderful place for relaxation, winter picnics and even to celebrate Christmas. A warm and cozy fireplace and large windows will allow you to enjoy beautiful views of snow-covered nature in warmth and comfort.
Creating a gazebo step by step - saving on builders
Most construction teams charge up to 50% of the cost of materials for work - taking into account rising prices, this entails a serious increase in costs. Isn't it better to think about how to build a gazebo with a barbecue without the participation of strangers? The time spent is worth it, and the help of friends will not hurt, especially if you decide to build a wooden frame structure. This option will cost less than stone, although it will require more careful maintenance in the future. You can settle on the golden mean, combining both materials.
For a wooden gazebo, we recommend a lightweight metal barbecue with a hood - in this case, it will be enough to make a standard columnar foundation. If you want to equip a permanent brick barbecue, you should make a high-quality strip base specifically for it, but the gazebo itself can be left on a columnar one. A strip foundation will definitely be required if your area has unstable soil or you decide to build a completely brick building. In all cases, we recommend that you read the article on foundations for gazebos - everything is described in detail there.
Standard column foundation
The construction of wooden gazebos with barbecues does not require much experience and special skills, which are indispensable when constructing permanent stone buildings. This is a definite plus - almost all the work can be done independently, except that when it comes to the top trim and construction of the roof, you will have to use someone’s help. First things first.
5b5cf1132285e2344cfb015a406394b5.jpe
5de1ebbcfd296753df5635932396dfc7.jpe 77c4ba9fa13ed2b62bc89de4353005fb.jpe 1fabd781bee81a1c6f8af59e01904f1c.jpe
47b316b65be28d2ea736b684157885d4.jpe
Step 1: Bottom Trim
When the foundation has gained strength (5-7 days in the case of reinforced concrete structures), it is time to begin assembling the frame. In all wooden structures, the frame can be divided into 5 main elements: lower frame, risers, joists, top frame, rafters. This is the skeleton of your future gazebo. The first to appear is the bottom trim - a rectangle or square made of 100*100 mm beams
It is important to isolate the beams from moisture and the development of fungus, for which they are treated with an antiseptic, and roofing felt or plastic film is placed on the foundation. If the area of the gazebo is large, the frame is reinforced from the inside with a cross made of the same timber
Assembling the frame of the structure
Step 2: Risers and joists
When the lower frame is completely ready and fastened, we install corner and intermediate risers, for which we take the same beam. Use temporary jibs to secure them in position. After the risers, logs are made - 100*50 mm bars, which are laid on the edge on top of the bottom frame. They will support the weight of the floor and people. They are installed at a distance of no less than 50 cm from each other. For the convenience of further work, boards are laid over the fixed logs - this will make it easier to install the bars of the upper trim.
Step 3: Top Trim
Fundamentally, there are no differences between the lower and upper frames - all the same timber, all the same fastening methods, which are described in detail in the article on the construction of wooden gazebos. True, it will be more difficult to work at heights - here you will need the help of a friend, as well as a good ladder or stepladder.
Attaching the top frame beam
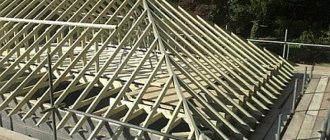
Step 4: Rafters and Roof
To avoid troubles with the weather, try to complete the construction of the frame as early as possible, completing the first stage of construction by installing rafters and laying roofing material. The roof is made of 100*50 mm timber and boards. First, identical structures from prepared rafters are assembled on the ground, then the finished “cocked hats” are lifted onto the roof and secured. If you want to make the room warmer, we recommend laying a continuous plank sheathing on top of the rafters, which is covered with waterproofing and wind protection. A thinner counter-lattice is placed on top of these materials to install roofing sheets.
From this stage, a large number of variations begin with the decoration and area of the walls - you can make both a closed and open or semi-open structure, insulate it from the inside for a comfortable stay at any time of the year, or leave it as is. The construction of various gazebos with and without barbecue is covered in detail on our website, you just have to choose the right direction.