Landing dates
The most optimal time for planting thuja is early spring, even before sap flow begins. As for the exact timing, you can plant in spring immediately after the earth warms up a little, that is, already in March-April, depending on the weather conditions of your region.

This is explained by the fact that it is at this time that the active growth phase of both conifer shoots and its roots begins. Moreover, the root ball will likely be slightly frozen and remain intact when planted. In addition, the plant will have time before winter to take root and grow strong roots.
In this case, the following conditions must be met to help the plant take root:
- You should not delay time when planting in spring; it should be done as soon as weather and temperature conditions allow.
- When planting, it is necessary to preserve the earthen ball around the root shoots in which the seedling grew in a pot.
- Simultaneously with planting, complementary feeding is carried out with a mixture consisting of turf, peat and sand.
- It is recommended to add about 50 g of nitroammophoska to the soil during planting. The dosage can be increased depending on the number of bushes planted.
Thuja tolerates autumn planting well, but when implementing it, you need to take into account some features:
- Planting in open ground should not be carried out in late autumn; it is usually carried out from early September to mid-October, since then the first persistent frosts begin. A bush unprepared for new conditions may not survive them.
- The soil near the tree trunk should be insulated with fallen pine needles or a layer of compost, which will protect it from the first frosts.
- Fallen snow will need to be removed from branches that are not yet strong, as they may break under its weight.
The choice of the season when it is better to plant thuja - in spring or autumn - depends on local climatic conditions. If you plant a tree in August, then at least 2.5 months must pass before the onset of cold weather.
Depending on the growing region, the timing of autumn planting of thuja differs slightly:
- in the south, where autumn is usually warm and long, you can start working in mid-October;
- in the central zone it is better to do this no later than September.
Some gardeners plant thuja in the off-season, at the beginning or end of summer. In principle, this is a completely acceptable option, but provided that the seedling is provided with regular watering. Otherwise, it will simply dry out from the heat.
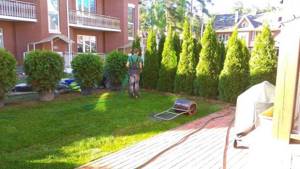
The nuances of using thuja in landscape design
In most climatic zones of Russia, numerous groups of eastern and western thuja are successfully grown. Their high cold resistance helps them withstand frosty winters. Some European varieties need shelter. But such representatives of coniferous culture are not widespread in the country, especially when landscaping in summer cottages. They require certain conditions, the creation of which is usually done by collectors who are passionate about thuja breeding.
Representatives of the western thuja are planted to decorate gardening areas and household plots. Ephedra comes from Canada, where agroclimatic conditions are similar to those observed in the central regions of Russia. The eastern variety was brought to temperate latitudes from Asia - the culture is more demanding. The plant reacts sharply to the north wind. If the owner of the site decides to use varieties of oriental beauty, places for them are looked for on the windward side of the house.
Rules for planting thuja
Thuja has a number of features regarding its planting. Attention should be paid not only to the choice of location, but also to the quality and composition of the soil, the depth of the planting hole and the correct sequence of actions during planting.
How to choose a place
To choose the right place, you need to consider the following:
- Pay attention to where the area is illuminated during the day. It is there that it is not recommended to plant thuja, since in the summer it will be severely dehydrated from the scorching rays. The tree needs morning and evening sun.
- Too dark places are also undesirable, since in them the thuja quickly loses its visual appeal; the ideal option would be partial shade.
- Drafts. The plant does not like them and reacts with weak shoots, sparse branches, and yellowing.
- Where water stagnates. Roots flooded by groundwater rot because breathing and the supply of nutrients to the tissues are disrupted. The greens turn yellow and dry out.
Errors in correctly determining the location for planting are not critical, since this plant tolerates replanting well and, if necessary, can be easily moved to more suitable conditions.
Soil requirements
The main guarantee of healthy development, rapid rooting and good health of thuja is not only the right place for planting, but also a suitable soil mixture.
You can prepare the soil yourself or use a ready-made option by purchasing soil for conifers (coniferous plants) at a specialized gardening store.
If you couldn’t find a suitable ready-made soil or you thought it would be cheaper to make it from separate components, then you can use the following recipes for preparing soil for planting thuja yourself (for heavier soil it is better to use recipes containing sand):
- 2 parts turf soil, 1 part peat.
- 2 parts turf soil, 1 part humus, 1 part peat.
- 2 parts turf soil (or leaf), 1 part peat, 1 part sand and 50-100 grams of superphosphate or nitroammophosphate.
- 2 parts leaf soil, 2 parts sand, 1 part peat, 3 parts humus.
- 3 parts turf soil, 2 parts humus and 1 part sand.
Mix all components thoroughly and preferably (for quick rooting) add another 50-100 grams (2-3 handfuls) of superphosphate or nitroammophoska to the soil mixture (if you chose a soil composition without mineral fertilizers). Moreover, it is especially important to mix the superphosphate well with the soil so as not to burn the roots of the young plant.
If the soil at your summer cottage is heavy and clayey (or groundwater is too close), then in addition to digging the largest possible hole, it is very important to lay good drainage at the bottom of the planting hole. The required thickness of the drainage layer is about 15-25 centimeters, depending on the degree of lightness of the soil (for very light soil, even 10 centimeters can be used). For drainage, you can use gravel, expanded clay, crushed stone or broken brick.
Planting hole depth and spacing
The size of the planting hole should correspond to the size of the thuja root system and vary depending on the composition of the soil. As a rule, the diameter of an adult plant crown is about 1 meter, so the diameter and planting depth should be about 80-100 centimeters. If you have light soil, then you can dig a hole measuring 80 by 80 centimeters. If the soil is heavy, then 1 by 1 meter is better.
Even if your seedling is small, the hole should still be large, because... we must proceed from the average dimensions of an adult plant.
If you are planting not just one, but a whole series of bushes at once, then additional rules must be taken into account:
- A free space of at least 1 meter must be maintained between planted miniature species.
- The distance between large rocks should be increased to 5 meters, since over the years they grow greatly and increase in diameter.
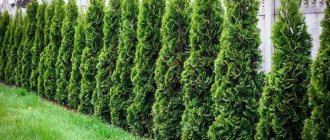
- When creating hedges, the distance between bushes is no more than a meter, regardless of their species and expected size.
The distance between thujas when planting should be determined according to the characteristics of the variety, since thujas can be very small and, conversely, very tall. Small trees can be planted a meter apart from each other, large ones - about 4-5 m. Some varieties of thuja reach 15-20 meters in height, and their crown grows in width up to 3-4 m (for example, thuja occidentalis Brabant). For full development, such a tree needs space, but when designing alleys, green corridors, and hedges, thujas are planted at a distance of 1 meter, regardless of the variety and type.
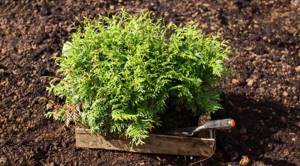
Planting thuja: step-by-step instructions
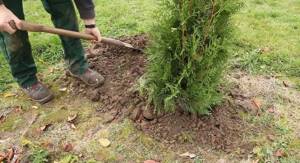
Prepare in advance everything you need for planting thuja (2 buckets or watering cans of water, a shovel) so as not to waste time. You should remove the thuja from the pot only after you have made a hole and a hill from the soil mixture, and also tried on how it stands in it. This requirement is explained by the fact that the root system of the conifer dries out very quickly (in 10-15 minutes), and this is undesirable.
Planting thuja in open ground is carried out in several stages:
- The optimal location on the site is selected.
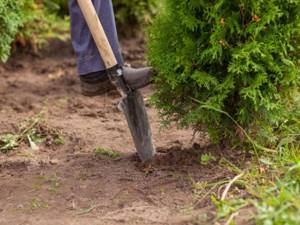
- A planting hole is dug and drainage is laid.
- The soil mixture is prepared according to one of the recipes, or ready-made soil for coniferous plants is used.
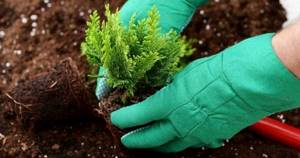
- 30 minutes before planting, it is recommended to water the pot with the plant with a root formation stimulator (preferably Kornevin or Heteroauxin, although you can use Epin or Zircon). This procedure will help in the future to more conveniently and accurately remove the earthen ball with the seedling.
- Such an amount of soil is placed in the hole so that the root collar is 3-4 centimeters above the ground level. Remember: if you deepen the root collar too much or raise it too much above the ground, the plant will dry out and die.
- The seedling is placed on a mound in the planting hole.
- The hole is filled halfway with the remaining soil mixture and compacted well.
- The planting hole is watered with a bucket of water for better soil shrinkage.
- As soon as the water is absorbed, you need to fill the planting hole to the top, compact it again, make a hole for watering and pour out another bucket of water.
- The hole is mulched to better retain moisture in the soil by 4-6 centimeters. Peat, compost, shredded bark or wood chips can be used as mulch.
Thuja, especially young ones, lose a lot of moisture, so after planting it is recommended to shade it with an awning made of camouflage mesh or a spunbond frame. Just make sure that it does not fit tightly to the plant to avoid rotting. If the thuja is planted in the fall, it is advisable to leave the shading cover until spring so that the conifer does not get burned in the last month of winter.
Technology of planting seedlings
Planting thuja is not much different from planting ordinary bushes and trees, but has some features. When planting, some criteria should be taken into account:
- It is better to place large varieties at a distance of at least three meters from each other. For dwarf varieties, it is enough to leave a distance of up to a meter between the bushes.
- Plantings along the alley are placed at a distance of three meters between seedlings.
- If the roots dry out, you should keep the roots in water for some time before planting.
- When preparing a planting hole, you should focus on the size of the root system. You can measure the earthen lump and dig a hole larger than it in width by 40 centimeters and in depth by 30 centimeters.
- The bottom of the pit must be lined with drainage and manure.
- The planting hole is filled with fertile and nutritious soil made from sand, turf and peat. They take out a fathom and straighten its roots. The bush is placed in the hole so that the root collar is at ground level.
- After planting, the soil is lightly compacted and the plant is watered abundantly.
- Start mulching the soil. For these purposes, you can use pine bark, compost of mowed grass or peat chips. The mulch layer protects against temperature changes and helps retain moisture in the ground.
- To increase survival rate, it is permissible to carry out root and foliar treatments with stimulants “Super Humisol” and “Zircon”.
Caring for thuja after planting
Caring for thuja after planting in open ground consists of proper watering and fertilizing, as well as periodic pruning, preparation for wintering and preventive treatments.
Watering and fertilizing
Thujas love abundant watering; with a lack of moisture, the quality and appearance of the needles first deteriorate. In this case, the plant responds best to natural moisture and rainwater, but during hot and dry periods additional artificial watering is required.
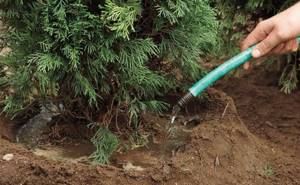
Watering thuja should be done systematically, especially in the first month after planting. The average watering requirement of a plant is about 2-3 buckets per week. When you water a newly planted thuja, the soil will settle, so you should fill it up.
Overfeeding with fertilizers and excessive watering is not recommended, since such measures can unnecessarily stimulate growth. In this case, this will be a negative phenomenon, since it will affect the shape and appearance of the thuja.
Fertilizing can begin in the first days of spring; nitrogen varieties of fertilizers are used for these purposes. In June, they are replaced with products containing a high potassium content; when growing thuja on infertile or rather poor soils, additional phosphorus addition to the soil is required.
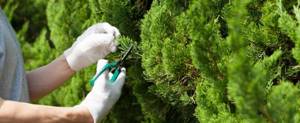
Trimming
In the spring, it is necessary to remove all dried shoots, as well as too long branches that disrupt the shape of the crown. Start cutting thuja in April: remove damaged branches, thin out the thick crown. Such actions improve air circulation between the branches and reduce the risk of fungal diseases.
To properly trim a thuja, read the approximate description of this procedure:
- trimming the top of the bush is necessary to correct the direction of the branches;
- when forming a dense spherical bush, cut off those branches that are more different from the rest of the shoots;
- systematically remove annual growth to maintain basic shape;
- Perform complete pruning when many old branches form;
- if adjustments to the thuja occur frequently, reduce the amount of fertilizing applied.
Plants located in the shade do not need to be thinned.
Wintering
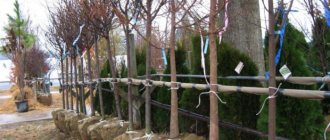
Before the onset of winter, the bush must be tied up; young plants need additional insulation, which is provided through the construction of shelters.
For colder regions of the country, frost-resistant varieties of thuja (western) should be chosen. Despite their unpretentiousness, they also require preparation for the cold season. In autumn, it is necessary to provide the trees with abundant watering, since even in winter the thuja continues to develop, albeit slowly.
How to care for thujas in winter? In the first years of life, young representatives must be insulated. Using thick polyethylene film, non-woven spunbond or other suitable covering material, a kind of cocoon is formed that will retain heat and let in the sun's rays. You can even purchase special covers designed specifically for this purpose; they are sold in the garden departments of supermarkets or in online stores.
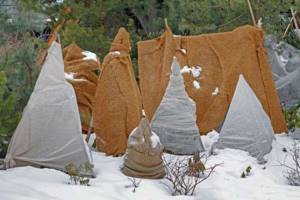
For the winter, the roots are covered with fallen leaves, which are removed with the onset of spring, as soon as the upper layer of the earth thaws. The overgrown crowns of adult thujas are carefully tied with a wide ribbon to prevent snow from accumulating on the branches.
Preventative treatments
In early spring, when the first buds have not yet appeared, as well as in the fall, at the beginning and end of summer, preventive treatment with karbofos is carried out. It helps remove a specific pest - thuja aphids, and also provides reliable protection against false scale insects, which are very difficult to get rid of once they appear.
Rust can often be found on thuja leaves. To prevent its occurrence, you should use copper or iron sulfate. It is necessary to process both the inner and outer parts of the crown in early spring or even autumn. Moreover, treating thuja with iron sulfate in the fall will increase its resistance to spring burns, which often occur due to snow.
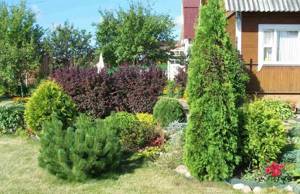
Planting scheme on the site
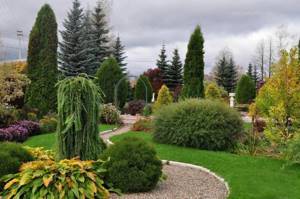
The answer to the question of where and how to beautifully plant thujas on a site depends on the design concept and personal creativity.
Thujas are often used as a picturesque hedge to decorate a site. If the plot is rectangular, then the seedlings are placed along the fences so that, when they mature, the trees do not interfere with each other. It is the size and shape of the crown of an adult thuja that determine at what distance neighboring plants should be located (usually from 1-1.5 m). But, if an alley of large columnar trees is planned on the site, then the distance when planting seedlings increases to 3.5-4.0 m.
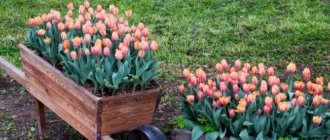
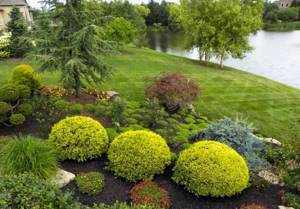
Look impressive in flower beds
Single plants, for example, dwarf varieties in the form of fluffy balls, beautiful shrubs with spreading openwork branches, look impressive on stone hills and flower beds. Deciding which thuja is best to plant in a dacha or plot is not easy; currently there are too many beautiful varieties and varieties on offer.
Mistakes when planting thuja
When planting thuja, the same typical mistakes are made as when growing most other varieties of coniferous bushes.
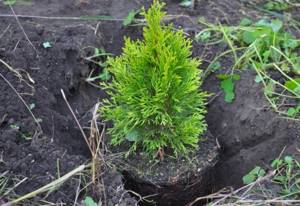
Often the earthball is damaged during transplantation into open ground, but abundant watering of the soil the day before work will help to avoid this situation. It is also recommended to wrap the earthen ball in burlap or any other non-synthetic material, and then securely tie it with wire to fix the shape. In this case, when planting, it will be enough to remove only the wire; the burlap will still rot after being in the ground for a long time.
The second common mistake is incorrectly determining the size of the planting hole and deepening the root collar. The earth ball should fit in the hole without any problems, in addition, there must be free space. When deepening the root collar, it is recommended to dig up the thuja and raise it higher with the help of additional drainage.
In order for the thuja to be healthy, planting and care in the open ground must be done correctly and in a timely manner. The culture is quite unpretentious, but requires certain rules to be followed when planting on a site.
Types of thuja, their differences
There are two main types of thuja:
- Western;
- Eastern.
They differ in the following external characteristics:
- Thuja occidentalis tree is single-stemmed. The branches are turned from the trunk in different directions, which is why the plant looks lush and “curly”.
- In the flat branch, the branches branch, thereby forming several trunks. The shape of the branches is flat and resembles plates.
In addition to appearance, western and eastern thujas have their own characteristics in cultivation:
- Thuja occidentalis was brought to Europe from the USA and Canada. This species is hardy and frost-resistant; it can be grown in a country house or garden. It will most likely not be possible to cultivate it as a houseplant, since it requires a cold winter.
- Thuja orientalis (another name is oriental planum) is grown in countries such as China, Korea, and Japan. The plant is considered a more heat-loving crop than the western species, so its cultivation in open ground in areas with harsh climates is not practiced. The tree is cultivated as a houseplant for home winter gardens.
Interesting! Each species has many interesting varieties, which allows you to choose and decorate your summer cottage with a tree of any shape and color palette.
Description and characteristics
The genus of perennial conifers is represented mainly by shrubs, less often by trees. The latter can reach a height of 70 meters in nature, while the crown diameter does not exceed 6 m. Representatives of the Cypress family at the beginning of development have soft, needle-like foliage. The latter becomes scaly over time. The location of the needles on the branches is supratative.
The widespread use of ephedra in landscaping explains the variety of crown shapes. There are five types:
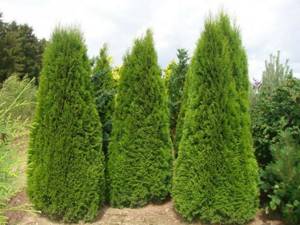
- Pyramidal. Conifers with this crown shape grow up to 2-3 m. Suitable for group planting or as a tapeworm.
- Columnar. The crown shape can be of both tall and short growing varieties. Instances are often used to frame alleys or garden paths.
- Umbrella-shaped. The type of crown is typical for medium-sized conifers with which ridges are decorated.
- Pin-shaped. The shape is similar to a pyramidal one, but more rounded and dense. Due to their excellent tolerance to pruning, plants are planted as future art objects.
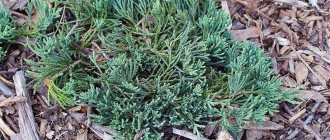
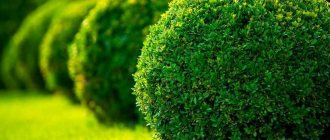
- Globular. The type unites a group of low-growing varieties with slow growth rates. The latter allow you to maintain this crown shape throughout the entire life cycle.
For your information!
Dwarf arborvitae combine well with small fountains, ledges and ponds, allowing them to be used in various parts of the garden.
Aftercare
It is not enough to plant the thuja correctly. Aftercare is also important, which includes:
- Abundant watering. With a lack of moisture, the needles fade and turn yellow, losing their decorative effect.
- Regular fertilizing (in spring - with nitrogen, in summer - with potassium, in autumn - with phosphorus). But do not overfeed the plant, which will lead to excessive stimulation of growth.
- Preventive treatments against pests.
- Removing dry and damaged branches.
When cold weather sets in, the bush is tied, and young plants are additionally insulated.
If you have little experience in growing coniferous crops, contact the Fantasy Garden landscape workshop. Our specialists will perform all the necessary work, taking into account the requirements of the plants and your wishes.