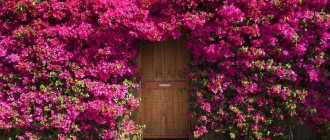
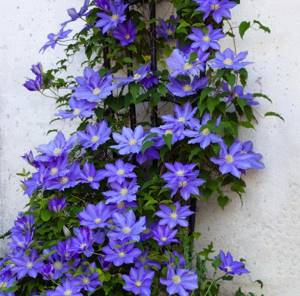
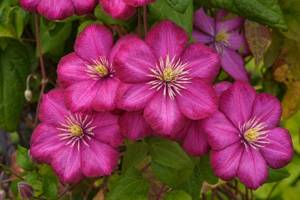
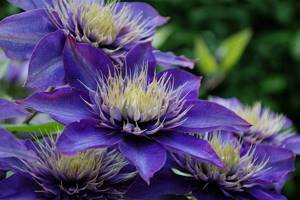
There is an opinion among flower growers that the rose is the queen of the garden, and clematis is the king. Looking at its luxurious and bright flowers, it’s hard to disagree with this, isn’t it? The plant is also called “Clematosis”, “Knyazhiki”. Reproduction of clematis is possible in several ways: cuttings, seeds, layering, dividing the bush. Large-flowered species can only be propagated vegetatively; seed propagation is suitable only for small-flowered species. It is very easy to plant a perennial climbing plant; if you want to please yourself with a new flower or expand your flower “plantation,” I advise you to pay attention to this crop.
How to save a clematis seedling before planting
In order for the planting material to be in good condition at the time of planting the soil in a permanent place, you need to take care of its storage at home (in an apartment or private house).
To begin with, it should be noted that clematis planting material can be found in different forms:
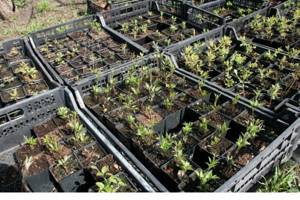
- One-year-old seedlings with a closed root system (Z.K.S.) . They are often sold in cardboard boxes. The photo shows a specimen in a pot:
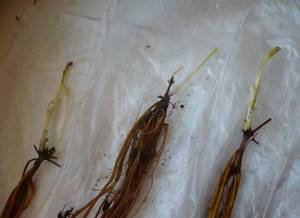
- Annual rooted shoots with an open root system (O.K.S.) . Most often they are sold in a bag in a peat substrate. In the photo they are without the package:
Advice! It is better to buy one-year-old large seedlings with Z.K.S., they will take root faster and begin to grow, they will develop more intensively.
The rules for storing rooted clematis cuttings until spring planting in a permanent place are very simple . First of all, you need to take it out of the bag of peat and carefully examine it. If there are damaged or rotten roots, then they need to be cut to healthy tissue, and then soaked in some fungicide, for example, Maxim, Fitosporin-M (according to the instructions).
The rooted cuttings need to be transplanted from a bag of peat into a two-liter cut plastic bottle (drainage holes need to be made at the bottom). It is necessary to use fertile soil. Then, when the optimal planting time arrives, you need to bury the cutting directly in the bottle in the garden plot. In this form it must be kept for a year. During this time, the rooted cutting will grow a root system, develop, and the very next year you can dig it up, take it out of the bottle and plant it in a permanent place in its normal form. Don't forget to take care of it and water it.
Note! But you can also, after transplanting and storing it in a bottle, immediately plant the cuttings in open ground without a container. In this case, you need to care for it more carefully and thoroughly.
But a clematis seedling with a closed root system in a pot no earlier than 3-4 weeks before planting it in a permanent place. To successfully preserve a purchased clematis seedling until spring planting in open ground, you must follow the following rules:
- Immediately after purchase, you cannot place the seedling in the sun, it is already weakened and it does not need extra stress and sunburn. Let the plant stand in a room with diffused sunlight for 3 days. And then you need to put it in the sunniest place in the house. The recommendation is also relevant for cuttings.
- If you see buds on a seedling, then after purchase you need to trim them at home with a clean, disinfected knife. If the buds are left, this will be an additional burden for the seedling and it will be more difficult for it to adapt to a new place after transplanting into open ground.
- Water regularly, maintaining moderate soil moisture. Remember to check the soil moisture daily.
- It is recommended to water the plant with a fungicide solution, for example, Fitosporin-M. Watering should be done once every 7 days. Manipulation will help to avoid diseases and mold of the seedling. It is also recommended to spray the root zone with a solution. The advice should also be applied to cuttings.
- If you bought a seedling, and the recommended planting time is not yet soon, then you can transplant the seedling into a larger container (for example, a cut 2 liter plastic bottle with drainage holes or a tall pot). The soil must be fertile. Transplanting into a larger container will make holding the seedling more comfortable.
- If your seedling is completely sad - weakened, drooping, then you can cheer it up by feeding it. As a fertilizer, you can use a complex preparation, for example, Agricola, Fertika-Lux, Biohumus (you must follow the instructions). Also relevant for cuttings.
Important! After purchasing, read the information on the packaging. Be sure to remember which group the plant belongs to - 1, 2 or 3. This information will be needed for subsequent care, and more precisely, for pruning.
Do clematis need to be covered for the winter?
In order to prevent freezing of the lower bud and roots, clematis need to be protected from frost. Therefore, before covering the shoots, we remove all the leaves from them to prevent rotting. Then we remove the mulch at the base of the bush and fill the neck of the clematis with compost or peat. After this, we lay out the stems in a circle in a ring, fasten the stems to the ground with thick wire clips, cover the top with mulch and cover with waterproof material, leaving holes for ventilation. In early spring, we free the clematis and tie it to a support.
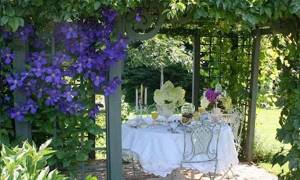
For all their beauty, clematis frighten some summer residents with the difficulties of growing and caring for it. But, if you care for this amazing liana correctly, then you will be able to grow wonderful and luxurious clematis in the country, which look especially beautiful paired with climbing roses.
Clematis is a very beautiful climbing perennial plant that will delight the eye with its flowering all summer long.
If you decide to decorate your site with this amazing plant, I suggest you start by reading an article about planting it, caring for it and varieties. And also listen and watch videos from our selection. In them, experienced gardeners and flower growers share their experiences, secrets and give recommendations on planting clematis, caring for them and the intricacies of pruning.
When to plant clematis in spring: optimal timing
When is it better to plant clematis in open ground in the spring, in what month? Suitable planting dates are April and early May . But since climatic conditions on the territory of our country can vary greatly, it is impossible to give a universal answer to the above question. For example, in the South (North Caucasus, Krasnodar Territory (Kuban) - you can perform the procedure in early April, in the middle zone (Moscow region) - you can plant in mid-April, in the Leningrad region, Siberia, in the Urals - it is better to plant in early May.
When is it better to plant flowers - in spring or autumn? A seedling with a closed root system can be planted in autumn, spring, and even summer. But planting material with an open root system - in the spring before the buds swell.
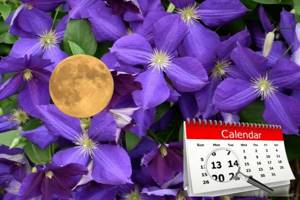
Do you want to perform the procedure more efficiently? To do this, you need to know the most and least suitable time, and you can determine it by the cycles of the moon. Thus, the planting dates according to the Lunar calendar 2021:
- Favorable days: in February: 17, 18, 22, 23, 24;
- in March: 1, 3, 4, 20, 21, 29, 30;
- in April: 9, 10, 15, 16, 17;
- in May: 6, 7, 8, 9, 12, 13, 14;
- in June: 4, 5, 8, 9, 11.
- Unfavorable days: in February: 11, 27;
- in March: 12, 28;
- in April: 11, 26;
- in May: 11, 26;
- in June: 10, 24.
Preparing the soil for seedlings
So, you have already chosen the place where the clematis will grow, and now you need to prepare the planting hole. For one seedling, the dimensions of the hole should be 60 X 60 X 60 cm. If there are a lot of seedlings, you can simply dig a deep and wide trench. At the bottom of each hole, lay a layer of broken brick, expanded clay or crushed stone, approximately 10-15 cm, to ensure drainage.
Clematis prefer structured, breathable, nutritious soil, so you need to prepare a soil mixture before planting. Take some soil from the hole, clear it of weeds, add peat, manure and sand. The ratio should be 1:1:1:1. Add the missing components depending on the composition of the soil on the site. Add about a liter of ash and 100 g of complex fertilizer to the prepared mixture.
Seedlings prepared for planting
Fill the clematis hole about halfway with the soil mixture, making a small mound of it. Place a clematis seedling on top of the mound, carefully straighten the roots, and sprinkle with the remaining soil. After planting is completed, sprinkle the root collar with sand: this will prevent it from rotting and subsequently retain the required amount of liquid.
Clematis should be planted with a slight depth, so over time it will be possible to form a powerful, healthy bush. The depth of planting depends on the size of the cutting: adult bushes need to be buried 15-20 cm, young bushes - 6-12 cm. This will prevent the plant from freezing in winter and overheating in summer.
When planting several clematis in a row, maintain a distance between seedlings of approximately 1-1.5 meters.
Caring for clematis after planting
Caring for this flower crop is not difficult at all. However, in the first year after planting clematis in open ground, you need to be a little more sensitive and attentive as a gardener, and take proper care.
Important! The plant in a new place is under stress, and you need to help it survive it safely. The first time (about 3-4 weeks) after planting in open ground, you need to shade the plant until it adapts and takes root.
To do this, it is recommended to install arcs on the sunny side and stretch agrofibre . The manipulation will protect not only from the active sun, but also from wind and bad weather.
- In the first year after planting in open ground, you need to be very careful about watering clematis. Moisture must be introduced into the groove. The soil should not be allowed to dry out. Water regularly, maintaining moderate humidity. But it is also very important not to overwater the plant, because overwatering is dangerous and critical for this crop. Approximately, you need to water once a week, and in hot and dry weather - 2-3 times a week. In autumn, watering is reduced.
- Immediately after planting and subsequently, it is recommended to mulch the area around the plant. Mulch performs the most important function - it retains moisture in the soil. It also protects the root system from overheating on hot and dry days. Peat, rotted sawdust, straw can be used as mulching material; the optimal layer thickness is 5-7 cm.
- to plant marigolds next to clematis on the site . Such good neighbors not only look beautiful together, but they can protect the plant from pests (in particular, nematodes).
- The soil around the flower must be loosened regularly after each watering or rainfall . Loosening improves the supply of oxygen to the roots and improves the structure of the soil.
- Weeds cannot be ignored . At the slightest sign of weeds, it needs to be weeded.
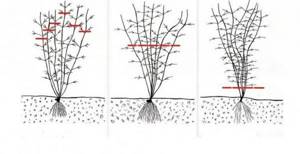
- In the first year after planting in open ground, it is necessary to prune clematis in the fall as follows: all shoots must be cut off, leaving 30 centimeters above the ground surface. In subsequent years, after flowering and before the onset of winter, pruning is necessary. But the procedure must be carried out depending on the clematis group (and there are three of them). The picture shows a diagram of clematis pruning: group 1 on the left, group 2 in the center, group 3 on the right.
- In autumn, before the winter cold, you need to take care of shelter from the cold and winds. Shelter for the winter should be done just before frost. This element of care is especially important when growing clematis in regions with cold winters, for example, Siberia, the Urals, the Leningrad region, and the Moscow region.
How to propagate clematis by cuttings and shoots.
There are three ways: cuttings, shoots and dividing the bush.
Clematis Hagley Hubrid
Propagation by cuttings. We prepare cuttings at the moment of bud formation, place them in Kornevin’s solution and, when roots appear, plant them in loose soil. Keep in mind that the average percentage of root rooting ranges from 10 to 60%, depending on the variety.
The method of propagation by shoots gives a higher percentage of rooting. Some of the vine branches, falling to the ground, begin to form roots. If at this time, without cutting off the shoot from the branch, you place it in the soil in a peat pot, then in a month you will be able to separate a healthy rooted seedling from the main bush. It is important to water the seedling in the pot abundantly.
Dividing a bush involves breaking an old bush with a shovel into several parts and planting each part in a new place.
Features of growing clematis from seeds
Growing clematis is also possible from seeds. To do this, you need to plant the seeds of the crop for seedlings at home. However, you can only grow a plant from seeds of specific flowers, but this propagation method is not suitable for hybrid varieties and large-flowered plants!
Before sowing seedlings, it is recommended to stratify the seeds. To do this, you need to sow them on a coconut substrate or universal soil for seedlings, lightly press them into the soil, moisten them, sprinkle the substrate on top, water them again, put them in a bag and put them in the refrigerator for 1-2 months. Caring for seedlings is the same as for other crops.
Video: features of growing clematis from seeds.
Planting clematis in open ground in the spring is very simple. If you follow the diagram, rules and instructions, then even a novice florist and a novice in gardening can cope with the task. Subsequently, it is very important to properly and fully care for the plant, following the recommended agricultural cultivation techniques. The plant will show all its beauty only after three to four years, so do not be discouraged when at first it is not as beautiful as in the photographs. But then it will show all its beauty, which can charm even the most inveterate garden cynic.
How to feed clematis.
Clematis Hania.
Large flower, bright, abundant bloom. Clematis produces a large mass of flowers over the course of a season, so the bush cannot do without serious feeding. Once every 10 days, clematis should be supported with fertilizers that promote lush flowering. These are Agricola for flowering plants, Agricola Fantasy, Grow-Up, Effecton for flowering plants.
In the fall, be sure to feed clematis in the winter: 1 tbsp. spoon of superphosphate and 1 tbsp. spoon of potassium sulfate per 10 liters of water - move carefully. Water one bucket of this solution on one adult plant, then next spring the clematis will come to life early, bloom faster and will delight you until the fall.
Clematis Yusta: variety description
The clematis variety Justa is distinguished by rather large inflorescences. The flower shape is standard. They gather in groups of 3. The girth of clematis is about 10-15 cm. The edges of the flower are wavy. The petals come in a wide range of colors from purple to pink. The anthers are light yellow in color, located on white threads. Clematis Yusta blooms from June to September.
The shoots stretch up to 150 cm and grow very rapidly. Leaf petioles cling to supporting structures. The plant can decorate any vertical surface. Clematis Justa also decorates small fences and containers.
Clematis Yusta: photo of the variety
The flower loves a sufficient amount of light, so it is worth choosing the right seat. Clematis Yusta grows best in fertile or humus soil. Soil moisture should be average. The plant will also grow well in sandy and loamy soil. The acid content should not exceed 7 points. Clematis Yusta can withstand frosts down to -30 degrees.
The clematis variety Justa is classified as pruning group 3. Only new flowers of the current year appear on the shoots. Clematis is pruned annually, leaving 3 buds.
Tip: It is best to remove one shoot up to 100 cm, then remove it completely the next, leaving 3 buds. Repeat this throughout the entire bush. Thus, the bush will rejuvenate.