Some people are skeptical about finishing the pool bowl in this way. The main arguments against the use of PVC film are its insufficient strength, the visibility of seam joints and the gradual loss of the original color. However, pool films have many more advantages - ease of installation with your own hands, the coating performs a dual function (decorative and waterproofing), and, importantly, the low cost of the material.
The main thing is to install it correctly. And this is not difficult to do if you understand all the features of such work.
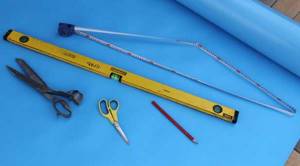
What you will need when installing a pool liner
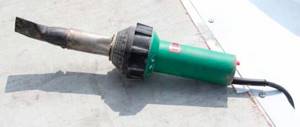
- Hair dryer. Moreover, it is special, construction (it is also called industrial). Without it, it will not be possible to properly glue individual fragments of the film. There should be several nozzles for the electric tool - with different widths of the outlet pipe and directions of the hot air stream.
- "Metal" brush. To remove carbon deposits on the working part of the hair dryer.
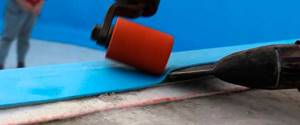
- Pressure roller. It is necessary for rolling the joint after welding the film strips.
- Electric drill (perforator) with a set of drills or drill bits for concrete. Will be needed when installing the substrate.
- Screwdriver. Installing fasteners using a screwdriver is not only time-consuming, but also ineffective. There is no guarantee that all screws will “go” strictly perpendicular to the plane of the base. This means that there will be distortions in the fastening tapes, and this will cause difficulties when forming the joints of the pool film strips.
- A cutting tool (scissors or a sharp knife) for cutting the coating material.
- Plumb (for leveling vertically installed fragments).
- Solvent, glue (but only elastic after drying).
The main types of pool film, its structure and composition
Let's start with the fact that there are now three main types of films for swimming pools, and let's get acquainted with the features of each of them.
- Option #1. We are talking here about a sealed liner, the thickness of which ranges from 0.65 to 0.8 millimeters. Ideal for collapsible pools, this film is simply hung on a previously prepared frame, after which it takes on the entire load of the bowl of water. What is typical is that all the parts of such structures can be folded, thanks to which they acquire compact dimensions. Moreover, such a film weighs a little - a maximum of 1 kilogram.
- Option number 2 . To the touch, such a film is very reminiscent of hard linoleum and is at the same time a multilayer material, the thickness of which is 1.5 millimeters. A layer of polyester fabric containing Kevlar fibers is sandwiched between two layers of polyvinyl chloride and joined to them by welding. As a result, the result is a very durable coating. This film is widely used for arranging stationary swimming pools. You can often find PVC membranes coated with acrylic or varnish; Also, the outer layer can be either glossy or embossed, that is, non-slip.
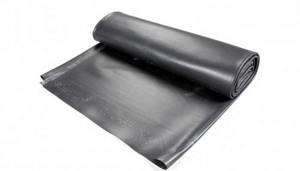
- Option number 3 . The last material used for lining the inside of swimming pools is a two-layer membrane made of butyl rubber (no reinforcement). This membrane has excellent strength characteristics and increased resistance to high/low temperatures. Typically used for the largest pool bowls, it is easy to cut and subsequently glued together during installation.
Note! Collapsible pool models are initially equipped with liner bowls. If a stationary pool is being installed, the film must be cut and then welded at the installation site.
However, there are exceptions when both coverage options are used simultaneously. We are talking about cases when the capacity of a collapsible pool is quite large. To increase the strength of the structure, the liner included in the package is first suspended, after which an additional “bag” made of a reinforced membrane is placed on top of the frame. This “bag” is welded and then secured around the perimeter using bandage tape.
Technology of finishing the pool bowl with film
Preparatory activities
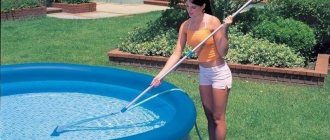
Cleaning the surface of the bowl. It is advisable not only to remove all debris from the pool, but also to literally “lick” it. This will reveal all defects in the base on which the film will be laid.
Elimination of defects. What could it be?
Firstly, the unevenness. This is typical for concrete pools. The slightest bulge will eventually cause abrasions, scratches on the film or its damage, and therefore leaks. The same goes for shells. If the “bumps” are easy to knock down and sand with your own hands, then the “notches” just need to be sealed with cement mortar, putty and leveled.
Secondly, partial peeling of the tiles, if they were used in the initial design of the pool, and the film is supposed to be laid on top. And such defects are also relatively easy to eliminate.
If necessary, in case of obvious damage to the bowl, it is advisable to lay a leveling screed on it. The technique for this work is simple, and there is a fairly large assortment of appropriate dry mixtures or liquid formulations on sale. There are plenty to choose from.
Drawing up a diagram for installing fastening strips and substrate fragments. There is no standard one, since all pools differ in many linear parameters and configurations. You can only give one hint based on the size of the stripes: length – 200, width – up to 8 (in cm), thickness – 2 (mm). The layout of their placement in the pool is chosen independently, depending on the characteristics of its geometry and the number of installed film fragments. Here specific recommendations are meaningless; you will have to do everything yourself - both measurements in the bowl and drawing up a diagram for arranging fasteners for geotextiles. The film will be fused onto them.
Read about how to make a concrete pool here.
Substrate arrangement
While using the pool, the film placed in the bowl is subjected to dynamic loads. This leads to increased wear (abrasion) and reduces its service life. The geotextile substrate not only prevents this, but also serves as a kind of insulating layer. The water in such a pool will cool down more slowly due to reduced heat loss through its concrete bottom and walls.
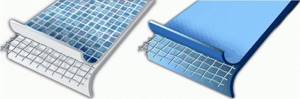
The non-woven material is fixed in the bowl using a metal tape, which is attached to the inner surface of the pool, securely “fastening” the geotextile to it. The peculiarity of this fastener is that one side is covered with plastic. This is where the film is “welded” to it. During the installation process, you need to take this into account and not confuse where the “bottom” and “top” of the metal strips are.
Some practical tips
- It is worth suggesting the desired distance between the screws. Optimally - no more than 10 - 12 mm. Such a tight fit of the fasteners will ensure reliable pressing of the film to the inner surface of the pool over its entire area.
- If there are steps in the reservoir, then on their “edges” instead of strips, corners are used to fix the film.
- Installing fastening strips on the rounded areas of the bowl will be greatly simplified if triangular cuts are made in the metal in several places. Their number is easy to determine based on the radius of curvature of the surface.
Specifics of fixing geotextiles
- In accordance with the diagram, holes are drilled in the concrete and dowels are installed for the screws.
- The installation of geotextile fragments is also carried out according to a do-it-yourself scheme. It is necessary to pay attention to the reliability of the joints of all its strips and the maximum density of contact with the concrete base. No folds, gathers, gaps, etc. are allowed.
To ensure that the pieces of non-woven material do not move during operation, it is advisable to apply several adhesive “dots” to the reverse side of each (that’s what you need, an elastic adhesive composition). But not along the cuts! After leveling, the geotextile is pressed in these places to securely fix it to the concrete of the pool.
All that remains is to bend the edges of the material, see where the dowels for the screws are installed, and make holes for them. Otherwise, it will be quite difficult to find them after the pool bowl is completely finished with geotextiles.
The last technological operation at this stage of work is the installation of fastening strips and their tight clamping with the help of screws.
Main types of PVC film for swimming pools
There are 3 types of PVC films:
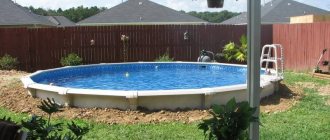
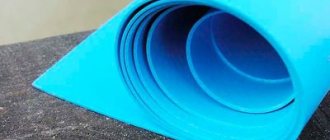
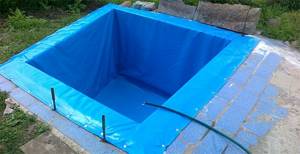
- Single-layer 0.8-1 mm thick. This film is usually used to cover prefabricated frame tanks. The material is not intended for “freezing” the pool for the winter. But, nevertheless, it is quite strong and elastic, making it easy to pull it onto the frame. Single-layer PVC film retains water perfectly and does not deform. If necessary, you can easily remove it and replace it with a new one. Moreover, you can purchase a liner that is already a standard size and does not have to solder the edges. Another advantage is the low purchase price. As a rule, PVC pool film is blue, which is ideal for creating the effect of the purest clear water.
- Multilayer (three-layer) 1.5 mm thick, reinforced with polyester or Kevlar threads. Such liners can be reinforced or non-reinforced, with a varnished or matte ribbed structure (to reduce the risk of injury). Multilayer PVC films are used for stationary swimming pools, in particular for children. They are perfect for “preserving” an artificial reservoir for winter, are resistant to temperature changes, and do not crack.
- Another type of PVC liner is a butyl rubber membrane film, reminiscent of high-quality linoleum. Excellent bending and cutting. It has a very strong structure. Anti-vandal. Such liners are used for finishing large artificial reservoirs and public swimming pools.
Please note that the 1mm thick liner width can be 3.05m, 6.1m, 9.15m, 12.2 or 15.2m. The length is usually 15.2m, 30.5 m, 45.75 m or 61.0 m.
Laying film in the pool bowl
Cutting PVC sheets
This is one of the most important points when finishing an artificial reservoir. It is necessary to take into account that after filling it with water, the film will stretch, and the stronger the steeper the walls of the bowl. Therefore, when determining the geometry of the fragments, it is necessary to take into account that the strips are laid with an overlap (about 6 ± 2 mm, depending on the thickness), and they must lie freely in the bowl, without excessive tension. For corner joints (for example, at the junction between the bottom and the wall of a pool), the value of this parameter is doubled. That is, at least 12 mm.
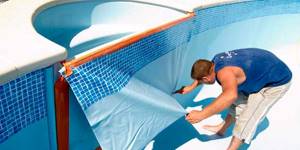
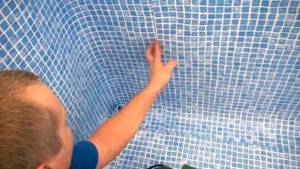
Film installation
- You should start by finishing the bottom of the pool. The quality of all other operations depends on how accurately this work is performed.
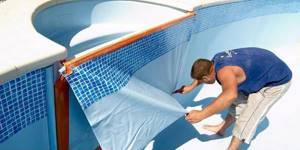
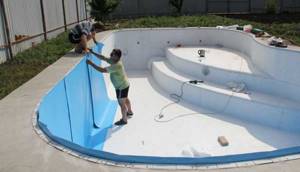
- Installation on walls is done from bottom to top. The main assistant at this stage is the plumb line. It is along this that the film fragments should be aligned.
Welding of film sheets
One of the most difficult aspects of installing a film in a pool. It will no longer be possible to transfer something by correcting the mistakes made - you can only replace a piece of coating material.
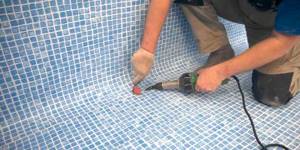
- Adjacent strips should be laid first. After alignment, they are “tacked” to prevent their possible shift during the welding process. This can be done in two ways. If the film is thin, then it is enough to organize “point” connections with a solvent. It will melt at the places of application, and their gluing is ensured. The second option is to briefly heat the film with a hairdryer in certain areas and fix it. The work is painstaking, but everything else depends on its quality.
- After such preparation, direct welding of the film pieces is carried out. The strips at the joints are heated by hot air. Depending on the location of their installation, the appropriate nozzle for the hair dryer and its operating mode (jet temperature) are selected.
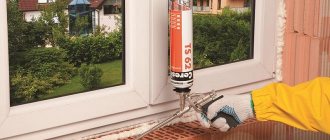
Processing the seams of the installed film
Since pools are not finished with your own hands every day, therefore, most of us have no practical experience. Therefore, small defects in welded joints are inevitable. To seal them more reliably, it is advisable to treat them with a special composition of liquid consistency - seam sealant (available for sale). It’s easy to choose the shade to match the film, and it’s easy to work with. “Jelly” is squeezed out of the tube, and after application along the joint it hardens in about half an hour (at room temperature), maintaining its elasticity.
The quality of the seam largely depends on the uniformity of heating. Therefore, a number of conditions must be met:
- try to maintain the distance between the cut of the nozzle and the seam being processed;
- ensure that the voltage supplying the hair dryer remains constant. In the private sector, this is one of the problems of power supply, so when installing the film in the pool, it is advisable to switch it on through a stabilizer;
- during the welding process, it is necessary to periodically remove carbon deposits from the nozzle (the brush has already been mentioned), otherwise the jet will gradually “play” (deviate), which will affect the reliability of gluing the film;
- Lastly, the inner corners of the pool are treated with a hairdryer. At this stage, you can make some adjustments - straighten the remaining strips, trim off the excess, and then glue them together.
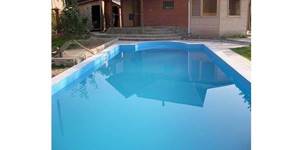
It remains to add that after installing the PVC film, you need to fill the pool bowl gradually, and always with warm water. Under such conditions, the material becomes more elastic and stretches better.

Service life of PVC film for swimming pools
Alas, despite numerous advantages, airliners also have disadvantages, which we briefly highlighted above. This material lasts only 6 years. In addition, it is easy to get dirty. PVC film for pools fades and may lose its original appearance. When the external waterproofing on the inner wall of the pool is broken, bubbles appear under the film.
If a skimmer liner is used for finishing, then after 2-3 years you will notice that under the influence of sunlight, the color of the coating under water and above the surface is significantly different. In addition, the film cannot withstand sub-zero temperatures and begins to deteriorate. Because of this, the owner needs to look for options on how to “mothball” the pool for the winter.
But there are also high-quality PVC films that last up to 20 years. The elastic and highly stretchable material is quickly and easily applied to the pool frame, perfectly following its contours. During production, such PVC film is saturated with special substances, thanks to which it becomes resistant to biological and chemical influences.
Recommended articles to read:
- Awnings for terraces: convenient, compact, original and profitable
- An artificial pond in the country - easy and simple!
- Relaxation tent: types and selection criteria
Recommendations for choosing a film for a pool
By thickness
The geometry of the canvas does not matter, it is standard (in cm): length - 2,500, width - 240 or 680. But with thickness, not everything is so simple. To optimize material costs and ensure sufficient strength (and therefore durability of the coating), it is necessary to take into account the depth of the pool bowl.
- If it is within 2 m, then you can install a film thickness (in mm) in the range from 0.7 ± 0.2.
- In other cases – no less than 1.0.
- The bowls of large pools of complex configuration (embossed) are finished with a thicker, two-layer film - from 1.5.
By execution
- Regular film. The cheapest modification, which is not characterized by high strength, is therefore used to a limited extent for finishing bowls. As a rule, they are purchased for installation in prefabricated pools.
- Film with reinforcement. The most popular product modification in the private sector. Such canvases can withstand significant loads, so they can be used for DIY installation with virtually no restrictions.
- Film with anti-slip coating. It costs significantly more, but in terms of safety of using the pool (due to the ribbed surface) it significantly outperforms its analogues.
- Acrylic coated film. The main purpose of this layer is to provide bactericidal protection of the water in the pool. It does not bloom, bacteria, rot, and the like do not multiply in it. The service life of such canvases in an aquatic environment is 1.8 times higher than samples without acrylic painting.
If you understand all the features of installing the film in the pool bowl, then doing this work yourself will not cause much difficulty. The main thing is accurate calculations, extreme accuracy, attentiveness and strict adherence to the recommendations of specialists.
Advantages and disadvantages of PVC film for pools
PVC film has a number of advantages, including:
- acceptable price;
- quick installation;
- resistance to temperature changes;
- ability to withstand pool cracks several centimeters thick;
- reliable waterproofing;
- durability.
But there are also disadvantages:
- noticeable seams at the joints;
- instability to cuts;
- gradual fading;
- inability to use complex round bowls.
Installation technology
PVC film for the pool has a slightly rough (relief) surface, and therefore does not slip.
In order to install a PVC film on a pool with your own hands, you must carefully carry out the preparatory work and lay the coating correctly.
The film pool can be constructed at a temperature not lower than 14-16°C to ensure the necessary elasticity of the material and better adhesion (the higher the air temperature, the better). When preparing the base for installation, the following recommendations should be observed:
- It is necessary to thoroughly clean the pool base from debris and dust.
- Any loose tiles and any damage to the plaster should be removed.
- All irregularities in the form of cracks, dents, and potholes must be filled with putty; If the walls are lined with brick, then they should be plastered.
- Particular attention should be paid to sharp irregularities: they should not exist at all.
- You should carefully align the corners of the junction of the walls and the bottom, avoiding sagging of the solution.
After this, the substrate is applied. To prevent abrasion of the coating on the concrete surface, it is recommended to lay a backing. The most suitable material for this is a geotextile fabric made of non-woven material. In addition to reducing friction, such a substrate plays the role of an insulating layer. The canvas is attached to the walls of the pool using special metal strips, the upper surface of which is covered with plastic (PVC is then welded onto it). Fastening is carried out with screws screwed into dowels in increments of 12-18 cm. The standard strip has a width of 5-7 cm and a thickness of 2 mm. The lower edge of the canvas extends 15-20 cm to the bottom.
If necessary, additional gluing of geotextiles to the concrete surface is carried out using an elastic waterproof adhesive composition.
One of the most important rules for installing a film pool is to carefully lay the film, since any gaps, folds, or wrinkles will cause further depressurization of the container. Installation includes the following operations:
- Cut the PVC film, taking into account all the irregularities of the inner bowl and its shape.
- Laying sheets on the bottom of the bowl. The sheets are laid with a distance from the wall within 15-25 mm and with an overlap of 6-9 cm at the joints. If there is a significant bottom slope after laying, some time is allowed for the film to shrink under its own weight.
- Installation of wall PVC sheets. The verticality of the installation is checked with a plumb line, the following overlaps are recommended: surface joints - 6-9 cm, joints in the corner between the walls - 13-16 cm. The lower end of the film is wrapped on the bottom and overlaps it by 14-18 cm.
Sealing the pool bowl involves welding PVC sheets together and welding them to the fastening strip. To carry out high-quality welding, a special apparatus is used - a construction hot air gun, for example, “Leister”. The connection is made by straightening the plastic with a controlled stream of air heated to 500-550°C. When the operation is carried out correctly, the strength of the seam is not inferior to the characteristics of the base material.
First of all, the sheets are welded together on the walls and bottom of the pool without tension. The film is then welded to the plastic covering of the fastening strips. When carrying out this process, it is important to ensure uniform tension of the canvas to avoid sagging, folds and other defects. The next step is to weld the wall covering to the bottom covering. The welding work is completed by attaching the PVC to the sides of the pool.
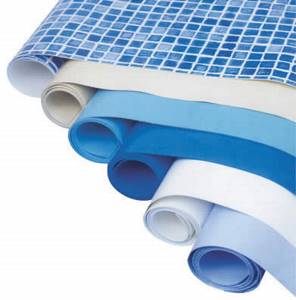
Film prices
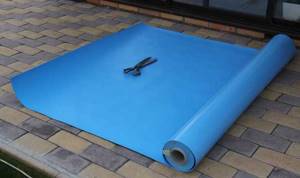
PVC films for swimming pools are supplied in rolls. In stores they are sold per linear meter or square meter.
Recent Entries
Chainsaw or electric saw - what to choose for the garden? 4 mistakes when growing tomatoes in pots that almost all housewives make Secrets of growing seedlings from the Japanese, who are very sensitive to the soil
The average cost of a high-quality liner ranges from 500 to 1,500 rubles per sq. m. m. depending on the color and manufacturer.
Recently, they began to produce liner in different colors, even with ornaments. Anti-slip films have also appeared. Their price is twice as high as regular ones.
Requirements for pool films
A good pool film should be:
- durable, does not crumble , does not wrinkle;
- resistant to high and low temperatures, ultraviolet rays;
- able to withstand enormous pressure;
- resistant to mechanical damage.
When choosing, you should pay attention to the following qualities:
- film thickness , it must be at least 1.0 mm;
- number of acrylic layers , there should be 2-3, some manufacturers do not apply acrylic at all, such a film should not be taken;
- quality of reinforcement , with poor quality reinforcement, the mesh tends to peel off from the main mass, this will be noticeable when cooking the film;
- protection from UV rays - the liner without adding a stabilizer quickly loses its appearance and becomes discolored.
The most popular is the pool film from the German company Alkorplan.
Why do you need film finishing?
Marble, tiles, mosaics, of course, due to their decorative properties, look expensive in contrast to PVC film, but they are inferior in density and reliable waterproofing. If your goal is not to make a work of art out of your pool, then you can safely choose film. It is impregnated with a special solution, which prevents the development of dangerous microorganisms. As a result, the pool does not require frequent cleaning with chemicals.
The film is made of polyvinyl chloride, between two layers of which a reinforcing layer is laid. The film contains acrylic, polyester fiber, and a stabilizer that provides protection from the destructive effects of ultraviolet rays. Most often, finishing pools with film is used for structures located on the street. Therefore, if you want to protect your pool from leaks and provide high-quality waterproofing, then choosing PVC film will be the best available solution.
The film is a very durable material, otherwise called a liner, which is suitable not only for lining new pool bowls, but also for reconstructing old ones.