Every year I grow strawberries from seeds for seedlings at home, which I plant in open ground in the spring. A neighbor in the garden asked me to teach me how to grow strawberries. This is how this article appeared, in which I share my many years of practical experience.
As a child, I loved Victoria, now it is my son’s favorite berry. Every year I plant two or three new varieties of strawberries, because each variety has a unique taste and aroma.
I have something to compare with, both in terms of yield and taste. A ripe, dense berry, freshly picked from a bush, cannot be compared with the watery mass that fills the markets and shops of our country every spring.
Why grow seedlings from seeds
Garden strawberry is a perennial plant from the Rosaceae family and is not found in the wild. With age, productivity decreases, diseases accumulate, and the soil becomes depleted. By growing seedlings from biological seeds, the population is renewed and the beds are made healthier.
In the first year, strawberries gain strength, and in the second and third years they bring the greatest harvest. In the fourth year, the harvest begins to decline. In the fifth year, the strawberries are removed and the bed is freed up for other crops. To maintain the cycle, plant young plants regularly.
Gardening stores offer ready-made strawberry seedlings at a price of 250-300 rubles per plant. Pensioners, who make up 80% of summer residents and gardeners, cannot afford such expenses.
Grandmothers selling inexpensive seedlings on the market will not guarantee that the strawberries are varietal and have not degenerated, that this is the first shoot from the mother plant. Buy a pig in a poke, waste time without getting the desired harvest.
My costs for planting seedlings were:
- Soil – 50 rubles, 10 liters
- Set for seedlings – 200 rubles, 2 pallets and 20 pots
- Seeds "Strawberry Aroma of Summer F1" - 68 RUR, 4 pieces per pack
- Seeds “Strawberry Nastenka F1” - 68 rubles, 20 pcs. packaged
- Seeds “Strawberry Sweet Tooth F1” - 29 rubles, 10 pcs. packaged
- The atomizer and phytolamps are reusable, left over from previous seasons.
Total 415 rubles, of which 200 are for reusable pots. The price of one strawberry seedling is 250 rubles as of 2021 in Novosibirsk. Even if you only manage to grow a few plants, the costs will more than pay off.
When planting seedlings with seeds, it will be known what kind of variety it is and with what characteristics. You can choose the types of strawberries so that drought-resistant and moisture-resistant varieties grow at the same time. Then it doesn’t matter whether the summer is hot or rainy. You won’t be left without a berry harvest.
Novice gardeners are stopped by the horrors that are written on the Internet about growing strawberries. Seed selection, soil preparation, stratification, sowing under snow, cotton swabs with seeds in the refrigerator...
In fact, to achieve results you need only three components:
- humidity
- warm
- light
Seed preparation
Strawberry seeds will sprout amicably only if pre-sowing preparation has been carried out, which includes soaking and stratification. Stratification is the creation of artificial conditions close to natural for seeds. This is necessary in order to stop the action of growth blockers - special substances that keep the seeds dormant. Stratification is quite simple.
Strawberry seeds
Step 1. The seeds are laid out on pieces of natural fabric or cotton pads, slightly moistened with water, and then covered with a second damp cloth and placed in a container with a lid with ventilation holes.
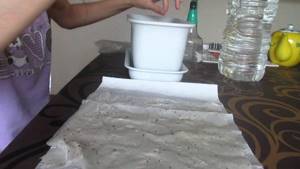
Seeds are laid out on a piece of natural fabric
Step 2. In this state, the seeds are kept for about 3 days at a temperature of +16-18 degrees.
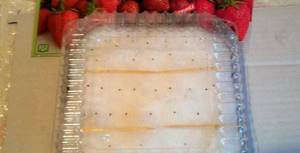
Strawberry seeds are kept in a container
Step 3. Place the container in the refrigerator for 14 days.
Step 4. Remove the container from the refrigerator and place it in a room where the air temperature is about +18 degrees.
Step 5. Check the seeds every couple of days and wait for germination.
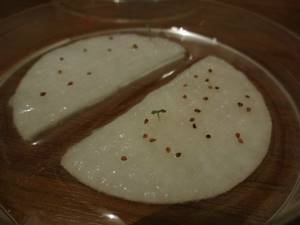
Germinating strawberry seeds
Where to buy and how to choose seeds by variety
Seeds are sold in specialized stores and garden departments in large hypermarkets. Branded garden stores usually sell products from only one agricultural complex, which reduces the choice of options.
Large manufacturers and suppliers deliver seeds and seedlings by mail, which is convenient for residents of remote areas where there is no choice of specialized stores. When choosing seeds, read the description of the variety, paying attention to the following details:
- Date of manufacture and shelf life of seeds: In old seeds, germination tends to zero.
- Berry weight, from 2.5 to 25 grams. There are varieties with a berry weight of 40 grams.
- Fruiting period
- Beardless strawberry
- Mustachioed strawberry
The larger the berry, the fewer seeds in one package and the more expensive one package of seeds costs. But picking large berries is much more interesting.
Early, mid-ripening, late-ripening - by combining varieties, the berries will be in your beds all summer.
Remontant strawberries - bear fruit evenly throughout the season, until autumn frosts. When wild strawberries disappeared, grandmothers selling berries in cups disappeared from the markets, you will have fresh large berries from the bush. My practice shows that growing large-fruited remontant strawberries is no more difficult than ordinary ones.
Strawberries without mustache require less care; you do not need to trim the mustache regularly. For propagation, an adult bush is transplanted to a new place in the third year and, when transplanted, is divided into parts, each of which will grow into an independent plant.
Weeding of the mustache is required to avoid thickening of the plantings. Already in the second year, thanks to the children, the bed will grow three times its original size. Only first-order rosettes, those closest to the mother bush, should be left for divorce.
Problems and difficulties when growing strawberry seedlings
Difficulties arise not only for beginners, but also for experienced gardeners. There is only one reason: non-compliance with the prescribed instructions and recommendations.
Most difficulties and problems can be fixed.
Seeds don't germinate
Identification of this problem occurs at the initial stage - stratification. Solution: purchase new seed material and report problems with sold strawberries to producers.
Causes:
- expired expiration date;
- low-quality and counterfeit goods;
- and also, they forgot to make a shelter for the seeds;
- the temperature regime was not observed.
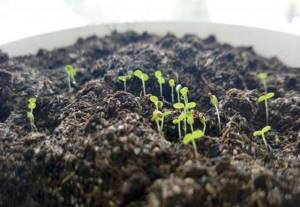
Seedlings fall and rot
This happens only in one case: waterlogging of the soil. Strawberries should not be kept damp.
It is recommended to plant on a dry piece of land. Also treat with growth stimulants and disinfect for preventive purposes.
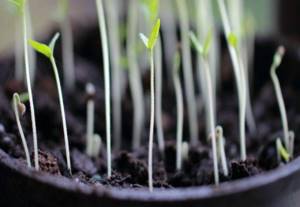
Strawberry stretches out
Due to the small amount of light and solar heat, the seedlings begin to stretch.
To improve the condition of strawberries, it is worth normalizing the light supply, restoring the temperature and humidity in the room where the seedlings are kept.
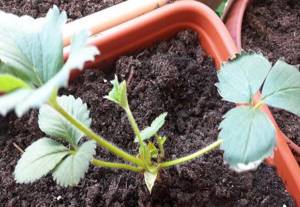
The seedlings dry out
If strawberries dry out, there are two reasons: excessive sunlight or lack of microelements.
You can find out what exactly influenced the drying out of seedlings by eliminating the root causes. First, the strawberries are shaded. If this does not help, select a complex fertilizer containing nitrogen.
Timing for planting strawberry seeds for seedlings
Strawberry seedlings are sown from mid-February to early April, 2-3 months before the end of the threat of return frosts. When you don't have additional lighting, it's best to plant a couple of weeks later.
Strong bushes are planted in open ground at the end of May, beginning of June. For the regions of central Russia, the Urals and Siberia, the optimal time for planting in open ground is June 10.
When planting earlier, to protect strawberries from return frosts, cover the seedlings overnight with covering material or sprinkle them with hay and straw.
The second time the seeds are planted for seedlings is in June, for the autumn planting of strawberries in open ground. Strawberries that were planted in August-September will have time to take root before frost and will safely overwinter.
In the conditions of Siberia, autumn strawberries did not show any advantages over spring planting and begin to bear fruit the next year, so I refused to grow a second layer for autumn planting.
When to plant strawberries in the ground?
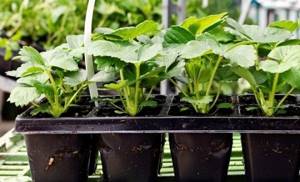
The timing of planting strawberry seedlings in beds depends on the climatic conditions of the region. In any case, the soil on the site should warm up to +12 degrees. As soon as the weather is warm and there are no sub-zero temperatures even at night, it’s time to plant strawberries in open ground.
About 10 days before this, the seedlings should begin to harden. It is taken out to the site or balcony and left for several hours in the fresh air. By the planting date, the plants should have fully adapted and be outside for 24 hours.
Site preparation
It is recommended to plant strawberries after legumes, root vegetables, garlic, onions, and green manure.
The soil should be sandy loam or loamy, well fertilized and neutral. If the soil in the place chosen for strawberries is acidic, then a year before planting the crop it should be neutralized.
The bed should be prepared for planting strawberries in the fall. To do this, they dig it up and fertilize every square meter:
- humus or compost – 3 kg;
- double superphosphate – 30 g;
- potassium sulfate or potassium chloride – 20 g.
In the spring, the soil in the garden bed is loosened and the same amount of humus or compost is added. Loosening is done using a hoe to a depth of ten centimeters.
Planting strawberries
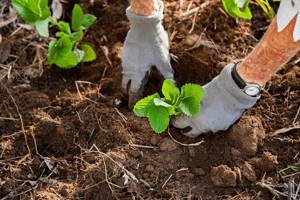
It is recommended to plant plants in open ground in cloudy weather or in the evening. Depending on the variety of strawberries, holes should be made in the area prepared for planting the berries with a distance between rows of 40 to 70 cm. The distance between strawberry bushes should be from 20 to 40 cm.
A nutrient soil mixture should be poured into each hole, after adding a couple of glasses of wood ash. A seedling is placed on a hill of soil and its roots are straightened, which must be covered with soil. To prevent air from remaining between the roots, the soil is poured in parts and watered immediately.
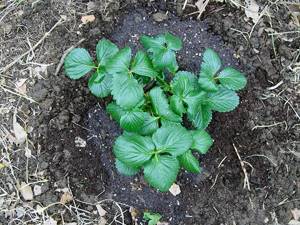
The bushes should be buried so that the heart is flush with the ground. You can see the correct planting of strawberries in the photo. If the heart is too high above the soil, the roots will become bare and begin to dry out, and if it is immersed in the ground, the apical buds will dry out and die.
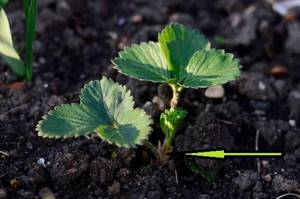
Planted plants must be watered and the soil around them must be sprinkled with mulch in the form of peat. A 3-5 cm layer of mulch will prevent moisture from quickly evaporating and the soil will not become crusty.
Sowing strawberry seeds according to the Lunar calendar, proper care of seedlings and competent planting in open ground are the most necessary conditions for the growth and development of strawberries at the initial stage of growing a crop, which, if sowed early, will yield a harvest this year. You can learn how and when to plant lobelia, viola, petunia, cucumbers, tomatoes, peppers, and eggplants if you follow the highlighted links.
How to plant strawberry seeds correctly
To better understand what we are talking about, watch the five-minute video filmed for this article, where I sow strawberries for seedlings.
Fill the pot or glass with soil to a height of one cm from the top edge. Lightly compact and water thoroughly. Use settled water for irrigation at room temperature.
The soil can be either ready-made soil from the store or from your own garden. The main condition is that the soil is loose and homogeneous.
Sprinkle dry strawberry seeds onto a moistened surface. As needed, use a toothpick to distribute the seeds evenly over the surface.
It is strictly not recommended to water, bury, deepen or sprinkle seeds with soil immediately after planting. The plant will take root on its own, and watering at first will only wash away the seeds.
To create a microclimate, the pots are covered with cling film. Condensation will form on the surface of the film in the morning and evening. This is how natural hydration occurs. The film should be removed only after the first shoots appear.
In the video I showed how to wrap cling film around pots; it is much more convenient to fix the film on the pot by pulling a money elastic band on top.
Make sure that the soil does not dry out; if natural moisture is not enough, lift the film and gently water without pressure so that the seeds and soil are not washed away by water. Excess moisture is also detrimental to strawberries.
Sowing in the ground
In addition to the method described above for sowing seeds in the ground, there is another one. For it you need to prepare the soil - sift it and pour it into a box, level it, compact it and make furrows. We will place the seeds in them using tweezers or a moistened match at a distance of two centimeters from each other. Don’t be shy about laying out more seeds - they may not be the most germinating, so increasing their number increases the chances of increasing the number of future plants. It is better to pre-stratify the seeds, although again, as you like.
Don’t forget to mark the names of the varieties sown in each furrow with the help of beacons - this way you can clarify for yourself which varieties have the best germination, which grow faster, and which will then give the best harvest.
You need to water the seeds carefully so as not to wash them away along with the soil. A spray bottle is best suited for this purpose. Spraying should be done liberally so that the soil does not dry out.
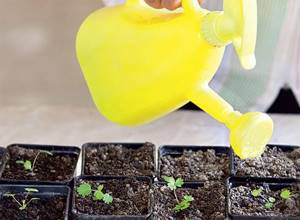
Regular watering of seedlings
Strawberry cotyledons
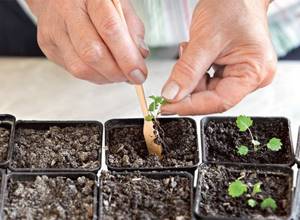
Picking strawberry seedlings
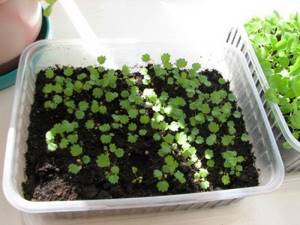
Young strawberry seedlings
The box or container used for germinating seeds is covered with glass or film on top to reduce evaporation and retain heat. Every day you will need to open the box for ventilation and watering.
How long does it take for strawberry seeds to germinate?
The strawberries were planted on February 21st and the shoots did not take long to appear; ten days later, on March 3rd, the first green shoots appeared under the film. The seeds did not germinate evenly; the last shoots occurred at the end of April, two months after planting.
The seedlings are easily mistaken for weeds. The cotyledon leaves are not similar to the usual tridents of adult seedlings.
The leaders of the informal competition were the varieties “Sweet Tooth F1” from Sedek. The strawberry seeds “Aroma of Summer” and “Kyrgyzka” did not grow green, but the roots have already begun to hatch.
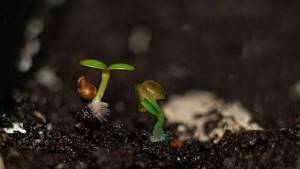
Every variety of large-fruited remontant strawberry has hatched. “The Aroma of Summer” has a germination rate of 100 percent; all 4 seeds in the capsule of the seed package sprouted. The good news is that the variety reproduces with a mustache. The varieties “Sladkoezhka” and “Nastenka” have partially sprouted, “Kirgizka” has sprouted well
The “Kyrgyz” variety does not exist; I named the strawberries that way because the berry from which I picked the seeds was bought at the market from a Kyrgyz woman last summer.
After the seeds have sprouted, caring for strawberries involves ventilating the seedlings daily and removing the film from the pots for a day. In the evening the film is returned to its place until the morning. Ten days later, on March 13th, I completely removed the film so that the plant stems would not rot due to the increased humidity.
Every plant needs light to grow, strawberries are no exception. Agronomists recommend a 16-hour daylight hours, which is achieved by illumination with phytolamps. Phytolamps are sold in specialized stores and online stores.
In the first years I didn’t have phytolamps, the seedlings also grew. Without lighting, it is recommended to sow a couple of weeks later, when daylight hours increase.
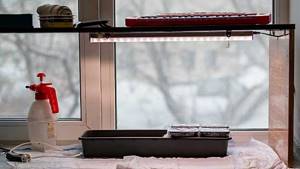
The second prerequisite is control of soil moisture. The soil should not be allowed to dry out. Water the soil carefully, drop by drop, so as not to damage the young plants with pressure.
A pipette or rubber bulb from a pharmacy is suitable for these purposes. I water it myself with a garden sprayer, which has no pressure and the water barely drips.
When to sow seeds
After strawberry seeds have been purchased, you need to decide when to plant them as seedlings. It makes no sense to do this too early, since grown plants can only be transplanted into more or less warmed soil. And if you sow late, you may not have time to wait for the harvest.
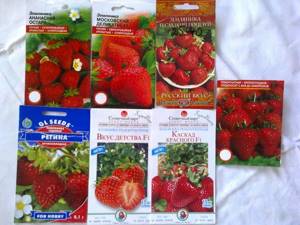
Garden strawberry seeds for seedlings
The usual time for sowing strawberry seeds is February and March. This way you will get the first harvest early enough. Some sow in May, but then their seedlings overwinter at home on the windowsill, and not in the country. You shouldn’t sow seeds before February, otherwise the seedlings will need additional lighting to grow and develop. Daylight hours for young strawberry bushes should not last less than 12 hours.
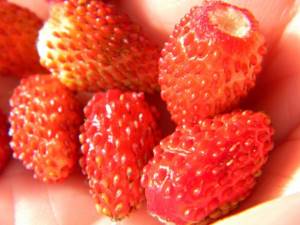
It is recommended to sow seeds of several varieties of strawberries at once.
On a note! It’s better not to choose just one variety – buy several different ones and try to sow them all. This way you will protect yourself from the fact that one of the varieties will not sprout at all, and you will be able to choose the one you like the most.
When to pick strawberries
Strawberry seedlings are picked when 2-3 true serrated leaves grow. The seeds do not germinate evenly, so picking is carried out as the seedlings grow.
Water the day before picking so that the soil dries out and the strawberries can be dug up and removed along with a lump of earth. During this period, the root system is poorly developed and easily damaged, so when replanting, try not to expose the roots.
Strawberries are picked twice. First time using small volume cassettes. Within a month, the roots will grow and are transplanted into half-liter pots a second time. If you immediately plant in large containers, the roots will not have time to occupy all the space, moisture will stagnate in the ground and the plants will begin to rot.
In order not to confuse which variety grows where, I glue strips of adhesive tape onto the pots, on which I sign the name of the strawberry.
When picking strawberry seedlings and planting them in a permanent place, be careful not to cover the growth point with soil - the middle of the plant, from where the leaves spread out to the sides. Otherwise, the plant will die.
Video clip of how I pick strawberry seedlings:
Diseases and treatment of strawberry seedlings
What can cause seedlings to get sick and how to cure them?
Blackleg
First of all, you should be wary of the “black leg” disease, the causes of which we wrote above. Plants grown in high humidity can become infected with fungi, resulting in soft stems that soon begin to turn black. After a few days, the bushes die as the stems break. Such seedlings cannot be saved, and the plants that have not yet been affected should be transplanted into new soil and watered with a solution containing a fungicide.
The seedlings are rotting
Stagnation of water in the roots can lead to their rotting. After some time, the plant itself will begin to turn yellow, blacken and rot. This can happen not only due to frequent, abundant watering, but also if the drainage hole becomes clogged. In this case, excess water will not be able to pour out of containers or pots and will stagnate in the roots, which will begin to rot.
To save strawberries, the bushes should be removed, their roots should be washed in a solution of potassium permanganate or Fitosporin and the plants should be planted in new soil.
Strawberry seedlings dry out
If you water the plants rarely or often, but little by little, only the top layer of the substrate will be wetted. As a result, the soil in the root area will be dry almost all the time, and the strawberry bushes will begin to dry out.
In this case, containers with seedlings are placed in a basin of water so that the soil is saturated with water through the drainage holes. After a few minutes, the plantings are placed in their place and subsequently watered not too often, but abundantly.
If the color of the leaves has changed
Leaves on seedlings can change their color for several reasons:
- marble color appears due to a lack of magnesium in the soil;
- chlorotic spots - due to iron deficiency;
- the tips of the leaves turn yellow and curl if there is not enough potassium;
- the underside of the foliage turns purple due to lack of phosphorus;
- pale green, small and thinned leaves indicate a lack of nitrogen;
- Leaves can change color even if there is an excess of fertilizers, so when feeding seedlings, solutions with a lower concentration are used than for adult plants.
You might be interested to know: Preparing strawberries in the garden for winter in the fall
Strawberry seedlings stretch out
To prevent seedlings from stretching, they are provided with sufficient lighting and grown in a room where it is not hot. Seedlings planted in winter and early spring definitely need additional lighting and an air temperature within +20 degrees.
Oversaturation of the soil with nitrogen can also lead to stretching of seedlings. In this case, watering is reduced, fertilizing is stopped completely, and the plants are placed in a well-lit place with a lower temperature.
If the seedlings are dense, they need to be thinned out. Otherwise, the bushes will begin to shade each other and stretch out.
Soil and pots for growing strawberries
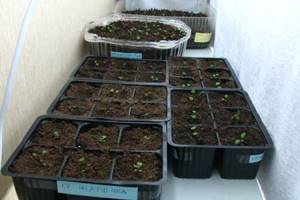
I used to use plastic sour cream cups and disposable cups. This year I purchased reusable containers with a squeeze-out bottom and a common tray for strawberries. Now I place a pallet with ten pots on the shelves and window sills at once.
The difference between pots and disposable cups is ease of care. He pulled out the tray with the plants for quick watering, then turned it around so that the seedlings that were in the shade at the edge of the window sill were exposed to the light by the window.
The cups included in the set have drainage holes. When the seedlings have grown up, for quick watering I pour water directly into the tray with cups, to a level of 1 cm. The soil absorbs moisture well.
If you use disposable cups, then before planting, pierce the bottom (with an awl, a pin) for drainage so that excess water does not stagnate.
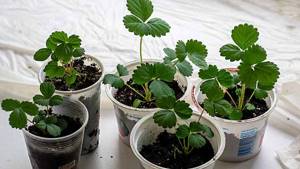
According to my observations, strawberries planted in a 0.5 liter glass grow 2-3 times larger than their counterpart in a 0.2 liter glass. Strawberries in 0.1l cups stopped growing until they were transplanted into a larger container.
I didn’t notice any difference between the finished soil and the garden soil. The strawberries grew the same. The choice depends on your personal preferences: what is more convenient to prepare soil in the fall or go to the store in winter.
In the northern regions, garden soil is disinfected by low temperatures; the soil in bags is left outside in the fall until the end of Epiphany frosts. Two weeks before planting, the bags are brought into the house so that the earth warms up.
Personally, I liked using store-bought soil better. Store-bought soil is already ready for planting and does not require additional manipulations for disinfection and fertilization.
Caring for strawberry seedlings at home
Conditions for growing seedlings
Before the first shoots appear, which may appear in 2-3 weeks, the strawberry crops are kept at a temperature of about 25 ºC, and as soon as the first greens appear, the container is moved to the brightest place, and the temperature is lowered to 18-20 ºC. The covering from the crops has not yet been removed, but they continue to ventilate the seedlings daily and, if necessary, remove condensation from the film.
As soon as the seedlings begin to develop their first true leaves, you need to increase the duration of daily ventilation, accustoming the seedlings to the conditions of your home.
To speed up the adaptation process, make several holes in the film.
If the seedlings in the container have sprouted too densely, it is better to thin them out.
Growing remontant strawberries - planting and care
The grown and strengthened seedlings growing in a common container are planted in pots, and those seedlings that were immediately sown in separate containers are transplanted into larger containers as soon as their rosettes grow to 5 cm in diameter. after transplantation, the plants are kept at a temperature of 18 to 25 ºC.
Watering
Strawberry seedlings at home can survive for a long time without watering - as long as condensation appears on the surface, there is no need to moisten the soil with the seedlings. Then, as the top layer dries, the substrate is watered with melted water or, in extreme cases, water at room temperature that has stood for 24 hours.
Excessive moisture creates a risk of seedlings becoming infected with blackleg. Lack of moisture can also lead to the death of seedlings.
- Red currant: cultivation, types and varieties
When watering, do not allow water to get on the leaves - this will cause stains on them.
Do not water the seedlings from a watering can; it is better to use a fine spray or syringe to moisten the seedlings at the root.
Top dressing
At an early age, strawberry seedlings are not fed, since they have enough nutrients in the substrate, but when the seedlings have formed four true leaves, they begin to apply fertilizers, which should contain nitrogen, potassium and phosphorus. To fertilize strawberry seedlings, it is better to alternate different formulations every 10-12 days - Kemiru Lux, Aquarin and Mortar, for example, to which it is good to add a two percent solution of the necessary microelements. When preparing a nutrient solution, keep in mind that for seedlings, the dosage indicated in the instructions must be halved.
Seedling lighting
If you sow strawberry seeds in winter or early spring, you will have to organize a source of additional lighting for the seedlings in the form of a phytolamp, LED or fluorescent lamp. This is necessary to ensure that the seedlings do not stretch.
Do not try to get out of the situation with a regular incandescent lamp - it emits the wrong rays that plants need, and also heats the air.
The lamp is installed above the seedlings at a distance of 20-25 cm. For the first 2-3 days, when mass emergence of seedlings begins, the lamps are operated around the clock, and then artificial lighting should work 13-14 hours a day. For convenience, we recommend purchasing a timer socket that turns lights on and off automatically.
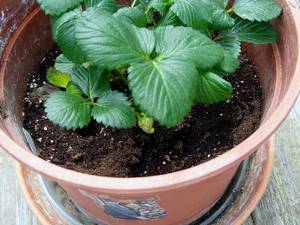
Picking strawberry seedlings
At the stage of formation, the seedlings have 2-4 true leaves; seedlings growing in a common container are planted in separate cups. Before the procedure, the substrate in which the seedlings grow is abundantly moistened, the plants are removed from the soil by the cotyledon leaves, the central root of each seedling is pinched and transplanted into a pot with soil, in which a deep hole must first be made. The seedling is placed so that the root does not curl up when planting. They deepen the seedlings to the same level at which they grew before picking, and then add enough substrate to the pot so that the seedling is immersed in it up to the cotyledon leaves. After picking, the soil around the seedlings is pressed and watered.
Growing strawberries in peat tablets
A year has passed since the publication of this note, strawberries in the garden have taken root 100%, and summing up the season, I want to say that the sweetest berry is the Aroma of Summer F1 variety.
I like to grow large-fruited strawberry varieties. This February, 2021, I again bought hybrid seeds Aroma of Summer from Gavrish, Pink Dream from Sedek (the strawberry variety Pink Dream is new to me, I haven’t grown it before) and decided to conduct an experiment - grow seedlings in peat tablets.
For the purity of the experiment, in order to determine which method is better, I will sow some of the seeds from each package in the usual way, as described above.
As the strawberries grow in peat tablets, I will regularly talk about the progress of the experiment in this post. If you want to stay up to date, bookmark the page and update it every week.
- February 23, 2021, seeding
- March 03, 2021, the strawberries have sprouted, but not all of them yet
- March 04, first watering
- May, end of the experiment - I did not see any advantages of growing in peat tablets. Next year I will fill the greenhouses with purchased soil for seedlings and will grow them in my usual way. The only plus is a convenient lid to cover the seeds until they germinate.
I bought two mini-greenhouses with a tray, a lid, a cassette block with 12 cells and peat tablets, in Novosibirsk the price range is 50-55 rubles for one greenhouse. According to the instructions on the package, I filled the cassettes with water and waited until the water was absorbed.
After 30 minutes, I unpacked the packages of seeds and immediately placed them in the center of the peat tablets, deepening them literally half a millimeter and closing them with a transparent lid. Much more convenient than covering with cling film, as I did last year. I did not sow thickly - one cell, one cell
Gavrish pleased me this time, the capsule from the Aroma of Summer package contained 8 seeds and the second 7 instead of four standard seeds.
10 days have passed and the first shoots of strawberries have appeared, there is no difference in germination time compared to sowing in soil, and on the tenth day the strawberries begin to sprout.
Now during the day I open the greenhouses for ventilation for several hours and turn on the illumination with a phytolamp. I don’t specifically regulate the temperature; the thermometer on the windowsill shows 23 degrees.
The strawberries are watered with settled water at room temperature, so as not to wash away the peat and roots of the seedlings; I water them with a teaspoon. One teaspoon of water at the edge of the cell, so you will not damage the strawberries growing in the center of the cassette.
Peat tablets contain enough nutrients necessary for seedling growth, so strawberries do not need additional feeding.
Growing strawberry seedlings at home
Soil for seedlings
The soil for growing strawberry seedlings needs light, loose, not very fertile, for example, a mixture of garden soil with sand or ready-made soils Universal, Begonia or For violets. Well-proven soils for strawberries have the following composition:
- vermicompost, non-acidic peat and coarse sand in a ratio of 1:3:1;
- peat, turf soil and sand in a ratio of 1:1:2.
Before sowing, the soil mixture must be disinfected using any of the following methods:
- spill with a strong solution of potassium permanganate;
- steam in a water bath;
- heat for 5 minutes in the microwave;
- fry for half an hour in the oven at 150 ºC.
After treatment, the soil is placed in a warm place for 2-3 weeks.
Preparing seeds for sowing
Growing strawberry seedlings must begin with preparing the seed. If you bought seeds, carefully read the instructions - some manufacturers sell material that is ready for sowing. Self-collected seeds should be placed for 30 minutes in a half-percent solution of potassium permanganate, then rinsed in clean water. Then the seeds are laid out on a damp cloth, covered with another damp cloth, rolled into a roll, placed in a perforated plastic bag or in a box with holes for air exchange in the lid and kept warm for two days, and then stratified in the vegetable drawer of the refrigerator for two weeks. Check the condition of the seeds from time to time and moisten the wipes.
As soon as the seeds swell, they are ready for sowing, but do not miss the moment: you must not allow small sprouts to appear on the seeds - they easily break off, and nothing will grow from such seeds.
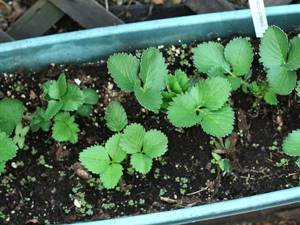
Growing seedlings from seeds
As a container for growing strawberry seedlings, it is better to use not very deep transparent containers, for example, plastic food boxes in which drainage holes must be made.
Growing strawberries from seeds in open ground
Treat the container with a strong solution of potassium permanganate, place a layer of drainage material in it, then damp soil, compact it, spread the seeds on the surface of the soil using a damp toothpick at a distance of 3-4 cm from each other, cover the container with a transparent lid or plastic wrap and place in a warm place. bright place, protected from direct sun. The window sills of western and eastern windows are most suitable for germinating strawberry seeds.
There is a method in which strawberry seedlings are planted simultaneously with the stratification of the seed: the warmly swollen seeds are not placed in the refrigerator, but are laid out in the manner already described on the surface of dry soil. A layer of snow about 2 cm thick is placed on top of them, the container is covered with a lid or film and kept on the bottom shelf of the refrigerator. The snow will gradually melt and draw seeds into the soil with it - this is exactly how everything happens in natural conditions. After two weeks, the lidded container is moved to the windowsill.
Planting strawberry seedlings in peat tablets
Strawberry seedlings from seeds develop well in peat tablets.
- Firstly, the tablets contain all the macro- and microelements necessary for seedlings.
- Secondly, you don’t have to bother with preparing the soil and sterilizing it.
- Thirdly, growing seedlings in tablets allows you to avoid the picking procedure, which traumatizes the roots of seedlings - if necessary, they are transplanted directly into peat pots with the tablets.
Tablets are made from a pressed peat mixture and enclosed in a mesh shell impregnated with a fungicide that protects seedlings from blackleg and other fungal infections. The diameter of the tablets can be different - from 24 to 44 cm. For strawberry seedlings, tablets with a diameter of 24 or 33 cm are suitable. The tablets are placed in a container with high walls and filled with warm water. When the tablets are saturated with moisture and increase in size, the excess water is drained.
Using a damp toothpick, strawberry seeds are placed into the pits located on the surface of each tablet, after which the container is covered with a transparent lid with holes for air exchange and placed in a warm, bright place where direct sunlight does not reach. If there is no lid, cover the container with plastic wrap, but in this case you will have to ventilate the crops daily and remove condensation from the film.
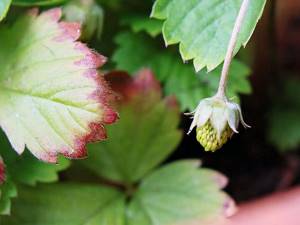
Growing seedlings in a greenhouse
Strawberries are also grown indoors, but it is not the seeds that are planted in the greenhouse, but seedlings that are grown at home or purchased from nurseries.
How to grow frigo strawberry seedlings
Frigo strawberry seedlings are becoming increasingly popular. Countries such as Holland and Great Britain have almost completely switched to growing strawberries using this method. What are frigo seedlings, what are their pros and cons?
- Strawberries Elizabeth the Second: all about the royal variety
Planting strawberries in autumn and caring for them
In late autumn, developed rosettes of the first and second order are dug out in the garden and stored until planting in open ground or in a greenhouse in comfortable conditions - with an air humidity of 85-90% and a temperature of 0-1 ºC.
The advantage of this method of storing seedlings is that during the winter the rosettes are not exposed to adverse factors, and therefore subsequently produce a high and high-quality harvest. In addition, planting frigo in the ground at different times allows you to obtain berries almost continuously throughout the season. Frigo seedlings tolerate transportation well and quickly take root, and all the nutrients that the rosette has accumulated over the past season are not spent on the development of the bush, but are used to form more berries.
There are three categories of frigo seedlings:
- class A - these are rosettes with a diameter of 12-15 cm, which form no more than two flower arrows;
- class A+ - rosettes with a diameter of more than 15 cm with a shortened shoot, forming 2-3 flower arrows;
- class A+ extra - the diameter of the rosettes of this category is more than 20 cm, they have lateral horns and at least 5 peduncles are formed.
However, it is difficult for amateur gardeners to use the frigo method, since it is difficult to determine exactly when to dig up rosettes, and creating the necessary conditions for storing seedlings is also not easy - the temperature in the storage must be constant, since the slightest deviation can lead to either premature germination of buds or to root freezing. In addition, expensive equipment is required to process seedlings before storing them, so it is better not to grow frigo seedlings, but to buy them.
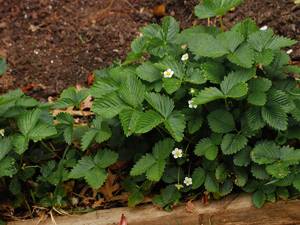
Beginning of May, gardening
Last year, the beginning of May turned out to be warm and I went to the garden to check my plantings. That year I grew two varieties of remontant strawberries from seeds - “Irishka” and “Lizonka” from agro
Both varieties overwintered well, without additional shelter. Let me remind you that I grow strawberries in Western Siberia. The bushes planted in the spring grew well over the year. The seedlings planted in the fall are all rooted, but the bushes are not large in size compared to those that are six months older.
“Irishka” is a beardless variety; I used scissors to trim old dry leaves and stalks. “Lizonka” is a mustachioed variety; I left only the children of the first order, those closest to the parent bush. All the same, the children grew onto two more identical beds. He quickly dug up the garden bed, used a garden shovel to dig up the strawberry plants and soil - and off to a new place of residence.
The children were not inferior in size to the mother bush and had a powerful, well-developed root system. It is recommended to leave the very first shoots from the mother bush, because on the children of the second and third order, degeneration begins and the properties of the mother bush are lost.
Afterwards I watered the plantings well, old and new. 5 liters of water per bush. Strawberries now need moisture, because the bushes are beginning to lay down the future harvest.
By May 5th, flower stalks began to appear on both varieties. If you compare the berries “Irishka” and “Lizonka” with each other, then the berries of “Lizonka” are dark red, denser and twice larger than those of “Irishka”.
The most important difference made by my son is that “Lizonka” produces sweet, juicy berries, while the “Irishka” variety produces smaller, pink, sour berries. In this connection, Kirill rejected the “Irishka” variety, saying that it was necessary to plant “Lizonka”
I don’t like weeding, and secondly, I’m just too lazy to do it. I tried to solve the problem of weeds in strawberries in two ways - I treated one area with herbicides, in the second I carefully weeded everything and covered it with sawdust. Pine, 4-5 centimeter layer. I poured it carefully under the leaves and around, so as not to cover the growing point. Sawdust - where wood is cut into boards, is distributed free of charge.
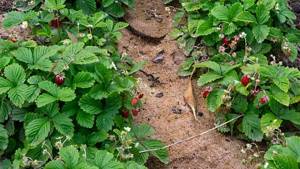
In the spring, the area treated with herbicides is all green, there is nowhere to hide the grass. You can’t even see the strawberry bushes, everything is overgrown. The area covered with sawdust is clean; several dandelions appeared, which were quickly pulled out.
My mistake was planting too often. The overgrown bushes have become crowded and there is not enough space for ventilation. This time I planted the berries in the garden in two rows, alternating them in a checkerboard pattern.
Preparing soil for strawberry seedlings
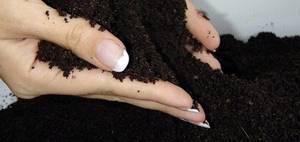
The main properties required for soil for strawberry seedlings are lightness and water permeability. To achieve the desired quality, some gardeners advise sifting the soil mixture through a sieve. The following mixtures are best suited for strawberry seedlings:
- Option 1: 3 parts garden soil, 3 parts humus or compost, 1/2 part wood ash. Option 2: 4 parts vermiculite, 3 parts peat, 3 parts sand. Option 3: 1 part coconut fiber, 1 part humus or vermicompost. Option 4: 3 parts sand, 5 parts humus. Option 5: 2 parts turf soil, 1 part sand, 1 part peat. Option 6: 3 parts sand, 1 part garden soil, 1 part humus.
To disinfect the soil as much as possible, it is either calcined, frozen, or spilled with a solution of potassium permanganate in advance.
Is it possible to plant different varieties of strawberries next to each other in neighboring beds?
When I was just gaining experience in growing large-fruited garden strawberries, on the Internet on large sites I came across the opinion that different varieties of strawberries cannot be planted next to each other.
The main argument was that bees would cross-pollinate different varieties of berries, which would negatively affect the harvest. All plantings will lose their varietal characteristics.
Interested in this theory of cross-pollination, I turned to local beekeepers and asked how far bees fly. It turns out that a bee’s flight from the hive is up to 5 km; during honey collection, bees collect pollen at a distance of up to three kilometers.
It turns out that to avoid cross-pollination, different varieties need to be planted at a distance of 3 kilometers from each other. Who can afford three-kilometer-wide row spacing in their garden?!
Strawberries are a bee-pollinated plant. No bees - no harvest. I sow literally a square meter of land along the edges of the bed with honey plant - phacelia. I sowed in three terms. The phacelia also bloomed in three periods. And all summer my garden beds were buzzing with bees and bumblebees.
Whether there was cross-pollination or not, I don’t know, but different varieties in neighboring beds did not affect each other in any way.
And my main counterargument in favor of the proximity of different varieties of strawberries is that we plant HYBRIDS. The letter "F1" on the seed package means it is a hybrid. The seeds from the resulting harvest will not have the properties of the parent bush. It makes no difference whether there was cross-pollination or not.
Content
- 1. How to sow strawberry seeds correctly? 1.1. Determining the sowing time
- 1.2. Planting strawberries with seeds: preparing the soil and choosing a container for sowing
- 1.3. Sowing strawberries with seeds: tips for germination
- 2.1. Mistakes made when caring for strawberry seedlings
- 3.1. How to pick strawberry seedlings
- 5.1. New: Decorative strawberries
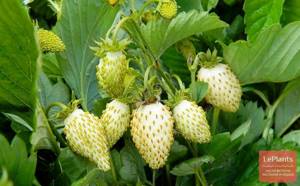
Some people believe that strawberries cannot be grown from seeds. Actually this is not true. You just need to know that planting strawberries with seeds is successfully used for beardless varieties . High-quality seeds of small-fruited alpine strawberries are available for sale: 'Baron Solemacher', 'Weiss Solemacher', 'Alexandria', 'Yellow Miracle', 'Ruyana'. By choosing any of the listed varieties of remontant alpine strawberries and knowing the specifics of how to plant strawberries with seeds, you can easily grow seedlings of this popular fragrant berry.
Harmful tips for growing strawberries
My neighbor and I talked about at the beginning of the post, we went to the store together, bought soil and seeds from the same counter. I told him for an hour, the information that you read above.
However, that same evening my neighbor called me and it turned out that I was growing strawberries incorrectly. He read it correctly on the Internet, and now his harvest will be ruined.
And I planted the seeds in my own way. My strawberries grew quickly and brought a harvest in the first summer. The neighbor waited until the fall and gave up - not a single seed sprouted.
I was wondering what my neighbor found about strawberries on the Internet. It turned out that I didn’t do a lot of things that my neighbor did:
- didn't put the seeds in the refrigerator
- I didn’t germinate the seeds first
- did not cover the surface of the earth with a layer of snow
- did not spread the seeds on the snow
- did not sprinkle the snow with seeds with a layer of sand
As practice shows, strawberries grow well without all these dances with tambourines. It is recommended to cover it with snow so that the seeds can be better seen and that this is exactly what happens in nature. But the seeds are already different in color from the soil, and garden strawberries do not grow in nature.
Another popular, but very harmful piece of advice is instructions for preparing seeds yourself. I have prepared the seeds myself several times. It's not difficult and germination is good. Only an incomprehensible grass grows, very powerful and without berries.
“Kyrgyz” is my last experience; I won’t waste any more time and effort on my strawberry seeds. It’s a shame that my “Kyrgyz plant” grew twice from cheap store-bought seeds.
How to plant remontant strawberries correctly?
Remontant strawberries have gained many fans among gardeners.
Its peculiarity is repeated flowering and fruiting during one period.
On one bush of such a berry you can immediately see flowers, green and red fruits.
The cost of seeds of such strawberries is not high, and with proper sowing and care, the gardener will receive a large harvest of aromatic berries in one season.
Types and characteristics of remontant strawberries
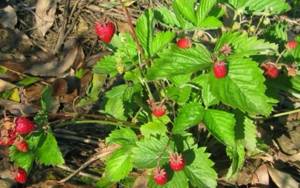
Remontant strawberries come from ordinary wild strawberries. It is exactly like her in taste.
The plant begins to bloom early, at the end of spring, and bears fruit until frost.
Remontant strawberries are a perennial plant, and the largest harvest of berries is observed in the first two years after planting.
After this period, the bushes must be renewed in order to achieve high yields.
Certain varieties of this plant reproduce in different ways. It is possible to grow berries from seeds, tendrils or parts of a bush.
The following types of remontant strawberries are distinguished:
- Small-fruited. This category is distinguished by small berries that resemble wild strawberries in appearance and taste.
- Large-fruited. This type is often confused with strawberries. The berries are large and fragrant.
Important! Remontant strawberries can be not only red. There are many different varieties and the fruits are white, yellow, cream or dark red.
Also, plants of different varieties differ from each other in the method of reproduction, taste, frost resistance and susceptibility to various diseases.
Preparing the soil for planting
The soil for remontant strawberries must meet two requirements: it must be light and allow water to pass through.
There are a lot of specialized soils available in gardening stores. You can also cook it yourself.
It is advisable to pre-sieve the soil so that it is soft and loose.
There are the following soil options for planting strawberries:
- humus and sand in a ratio of 1:2;
- vermiculite, peat and sand in a ratio of 1:1:1;
- turf soil, sand and peat in a ratio of 2:1:1;
- sand, earth and humus in a ratio of 3:1:1;
- coconut fiber and vermicompost in a 1:1 ratio.
It is advisable to calcinate the resulting soil, freeze it, or treat it with a solution of potassium permanganate. This will help disinfect it as much as possible.
Stratification
If you translate the word “stratification”, it will mean “stratification”. Usually this concept is used for those seeds that do not germinate well. Therefore, such seeds are prepared in advance, creating special conditions. But these conditions should be very similar to natural ones. After all, when planting seeds in the spring, they are placed in cold soil. Only then gradually does the warmth come. Therefore, similar conditions must be created artificially at home.
Usually, summer residents disinfect seeds before planting. To do this, you just need to soak the seeds in a solution of potassium permanganate. Then it is necessary to prepare the ground for the stratification process. Collect the moss, wash it and dry it. Mix river sand with moss; peat can be used instead of the latter. As a last resort, you can take soil from the garden and mix it with sand.
It is better to take containers for planting with holes. Then excess moisture can escape. Sowing should be done in February, then you can eat the berries in the summer. Before planting, the soil needs to be slightly dried and shaken well. Now the seeds just need to be placed on the surface of the soil; there is no need to bury them. Otherwise, the seeds will sprout.
The container can now be closed and placed in a place where the air temperature is +5 degrees. Often a layer of snow is laid on top of the ground, and then seeds. The snow will melt and the seeds will fall on top of the wet ground. In practice, they also use the method of laying snow on top of the seeds.
Usually the seeds are stored in the refrigerator. Sometimes you need to moisten the soil with a spray bottle. Under such conditions, the container is stored for 2 weeks. Then it is moved to a warm place; the container lid cannot be opened. This place should be dark. As soon as you see the first shoots appear. You can move the container to a bright place.
This whole process is stratification. Roughly speaking, the seeds are kept in cold and damp soil. This process takes different amounts of time for different seeds. This process can take 10 days, and for some seeds even a year. Find out about the description of the garden strawberry variety Honey here.
Features of sowing remontant strawberries
The best time for sowing is the winter months.
The optimal months are January and February. If it is not possible to create artificial lighting, the seeds can be planted in March.
Later planting can lead to low fruiting in summer and subsequent death of the plant in winter.
Sowing seeds of remontant strawberries includes the following steps:
- Seed stratification. This process is necessary in order to speed up their growth. The seeds are placed in a container, covered with a lid and put in the refrigerator for 3 days. Stratification can be replaced by conventional germination. To do this, the seeds are placed in a humid environment and placed in a warm place until they germinate.
- Preparation of soil and containers. Before planting seeds, you need to prepare small jars into which soil will be poured. It is desirable that they are transparent and made of plastic. They must be thoroughly washed and treated with a solution of potassium permanganate to prevent the appearance of fungus.
- Sowing. It is necessary to remember that strawberry seeds are not sprinkled with soil. They need to be mixed with sand and laid on the surface. For sowing, you can make small grooves in which to place the seeds, but also without covering them with soil.
- After sowing, the seeds need to be sprinkled with water. This way they will sink deeper into the soil. Containers with seeds must be covered with cellophane film and placed in a warm place, but not near the radiator, to prevent overheating.
Features of growing from seeds
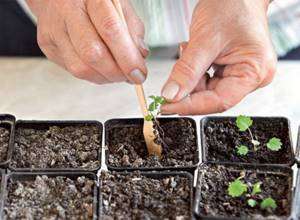
Anyone can grow strawberries from seeds at home. The process is very painstaking. But little tricks will help you succeed. A wide variety of varieties allows you to get ideal berries that will satisfy your taste, size and ripening time.
If you choose the varieties wisely, you can pick berries throughout the season.
Benefits of growing strawberries from seeds
Growing strawberries with seeds is difficult; you should be attentive and careful with the young crop. But this method has a lot of advantages:
- seeds, unlike seedlings, can be stored for a long time;
- At home, you can sow several varieties according to early ripening in order to get a harvest at different periods of the summer;
- seeds are resistant to diseases and pests;
- Many varieties are suitable for growing from seeds, with the exception of strawberries.
Seeds collected with your own hands are a good cheap planting material, however, it is worth collecting it from an exceptionally ripe berry.
Where to get strawberry seeds
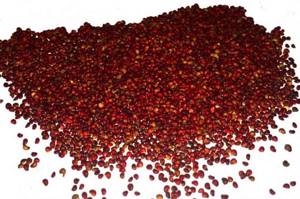
All gardeners know that success in growing strawberries depends half on the variety chosen. You should choose according to personal preferences: taste, early ripening, size of berries, and so on.
Attention! It is generally accepted that remontant varieties (bear fruit all year round) are less sweet and smaller than varieties that bear fruit once a season.
Many people collect the seeds themselves. When properly prepared, your own seeds germinate better than purchased ones. Collect seeds from healthy plants that do not show signs of disease.
The best seed is the part of the seeds located near the stalk. They are the most developed and have a higher degree of germination. The top layer with seeds is cut off from the berries and placed on a napkin. The pulp is placed on a napkin into which the juice will be absorbed.
After the pulp has dried, the dry seeds are separated. They are placed in a container with a lid. These seeds can be stored for up to 4 years.
Which varieties are best propagated by seeds?
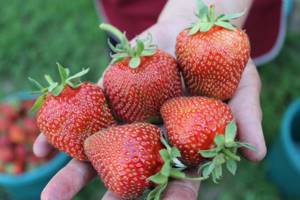
Not every variety of strawberry can be sown with seeds. You cannot grow strawberries from your own hybrid seeds. Today there is a list of the best varieties of strawberries for growing from seeds.
- Gourmand. A very early variety, the maximum yield of which can be achieved in the southern regions. To obtain crops in May, it is worth sowing the seeds at the beginning of winter, and replanting the seedlings in April.
- Mutofavorite. Medium ripening variety. Sowing seeds should be done in mid-winter in order to plant them in the garden in May. The height of the bushes is not too large, the berries are large, sweet, weighing 100-120 grams.
- Bogota. Late-ripening variety with tasty large berries. To get seedlings in the spring, you should sow seeds at the end of January.
- Sakhalin strawberry. Fruit ripening depends on the time of sowing and transplantation. Planting can be done from December to January. The fruits are collected before frost.
These are not all varieties of garden strawberries that are offered on store shelves.
Problems when growing strawberries from seeds
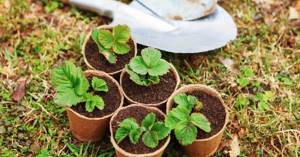
If you decide to grow strawberries for seedlings from seeds at home, you may encounter various difficulties:
- seeds germinate poorly;
- the sprouts are very brittle and tender, any mistake can lead to their death;
- As a result, fruits may grow that do not have the characteristics indicated on the packaging.
But don’t be afraid of possible difficulties. If you approach the growing process correctly, the result will be delicious berries.
Caring for strawberry seedlings
Caring for seedlings at home is difficult. To get strong plants at the time of planting, you need to provide the proper conditions.
Attention! The air in rooms with central heating is already dry, and additional lighting dries it out even more. In such conditions, young shoots can immediately dry out without starting to develop.
For proper development of the crop, a humidity of at least 90% is required. Therefore, young seedlings in the apartment are kept under a plastic cap with holes for ventilation.
Watering
Watering is carried out with melt water, since chlorinated or hard water can lead to the death of young shoots. If it is not possible to collect clean melt water, then the sewer water is left to settle for several hours.
For young sprouts, drops falling on the plant are detrimental. Therefore, watering should be carried out at the root. This can be done using a syringe or a teaspoon. The regularity of watering depends on the speed of drying. After the emergence of seedlings, moisten the soil once a week, and when the first leaves appear, water more often - up to 3 times a week.
Top dressing
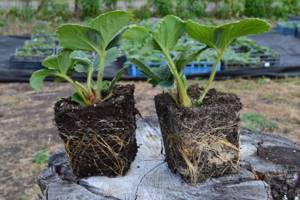
If the seedlings grow slowly, then regular treatment with a growth stimulant is carried out, as well as fertilization. The growth stimulator is used for foliar treatment in the form of spraying.
Every 7 days you can feed with mineral fertilizer complexes. For strawberries, you can use ready-made preparations Aquarin, Kemira Lux, Mortar, and so on.
Picking strawberry seedlings
When the seeds are planted in separate containers, no questions will arise. But for seedlings in one pot they carry out picking, i.e. planting. This procedure is performed after two true leaves appear on the sprout. Replanting must be done very carefully so as not to damage the thin roots and stem.
Containers approximately 9x9 cm are prepared for each sprout. An individual plant is picked up with a spatula or removed with tweezers, and then transferred to a new place.
Attention! Can be planted in a large container, maintaining a distance between plants of 8-9 cm.
Conditions for growing seedlings
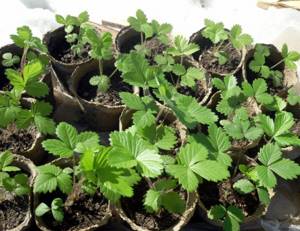
In order to obtain strong seedlings at the time of transfer to a permanent place, comfortable conditions are provided after the first shoots appear.
- High quality lighting. The duration of daylight should be at least 12-14 hours. If there is less natural daylight, then additional artificial lighting is organized.
- Temperature regime. In addition to light, strawberries love warmth, so the room should be at least +20 degrees.
- No drafts. If containers with seedlings are placed on a windowsill, you need to make sure that the wind does not blow on them.
- Humidity. The plant loves timely watering and moderate humidity. At first, the lid will become an assistant. If light condensation collects on it, then everything is in order. If condensation forms droplets, open the lid to evaporate. If it doesn’t come together, then water it.
Difficulties may arise with watering. You should be careful, as strawberry seedlings are very fragile and can be easily damaged. Therefore, it is necessary to use a spray bottle or a medical syringe.
Preparing seedlings for planting in the ground
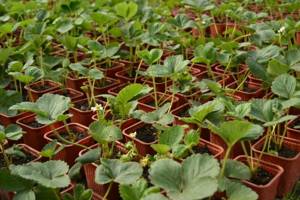
It takes approximately 1.5-2 months to grow seedlings. During this time, the sprouts will turn into strong plants. To prevent young bushes from dying from stress during transplantation and new conditions, they should be prepared. Hardening is performed within 2 weeks.
Containers with seedlings are taken outside. The first days maintain a short period (1-2 hours), gradually increasing the time. In the last days before transplanting, the plants can be left on the loggia all night. The containers should be left in the shade for the first days in order to gradually accustom the crop to the sun's rays.


