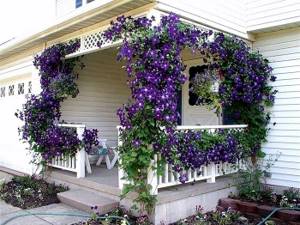
Growing tropical plants at home can sometimes be a difficult task. Many “exotics” require high air humidity, warmth and the absence of drafts. It was this feature of delicate ferns, which were incredibly popular in Europe in the 19th century, that forced the British to look for ways to artificially recreate the climate of the humid tropics. And a solution was found! It turned out to be Ward's box, which is a box with walls made of sheet glass connected by metal strips. Sunlight penetrated Ward's box perfectly, which could not be said about air, the access of which was limited. Due to the fact that the water in the closed vessel did not evaporate outside, but settled on the walls and plants, constant high humidity formed inside. This allowed enterprising Englishmen to grow many exotic plants in their homes: ferns, orchids, bromeliads, etc.
Ward's box allowed the British to grow the most delicate plants in dusty London conditions
The invention of Ward's box turned out to be so successful that it is not forgotten even now. Modern florists, wanting to grow whimsical tropical plants, place them in transparent vessels - florariums. This composition is called a “garden in a bottle,” although the container used is not necessarily an ordinary bottle. Is it possible to make a garden in a bottle with your own hands? Yes, it’s easy - just arm yourself with a suitable vessel and select plants for the composition.
Choosing a “bottle” for a mini-kindergarten
When searching for a suitable vessel, you can give free rein to your imagination. Any container that is large enough, with a tapering neck and a widening bottom, will do. This could be a large bottle of wine or chemical liquids, a round aquarium, or a jar for bulk products. For plants that prefer maximum humidity, you should select a container that can be hermetically sealed.
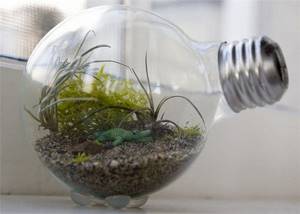
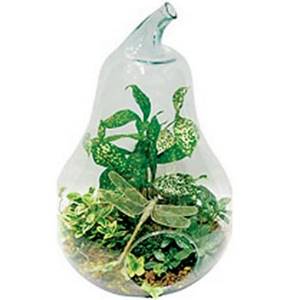
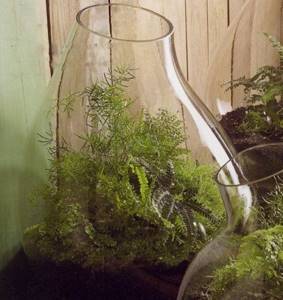
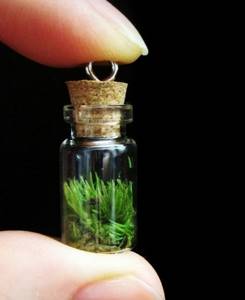
Sealed garden in a bottle-bulb very rarely needs watering
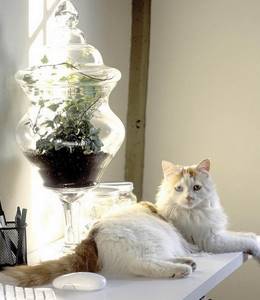
In this case, the narrower the neck, the more humid the microclimate can be achieved. However, the neck should allow you to carry out procedures for caring for the internal contents - loosening the soil, removing dead plants or their rotten parts. Inside a non-sealed florarium (aquarium or bottle without a cork), the humidity will be lower due to constant ventilation.
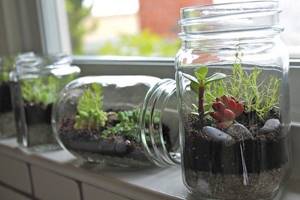
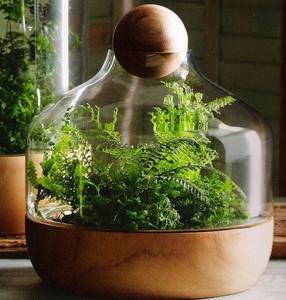
It is easier to grow plants in open florariums - constant ventilation reduces the chances of rotting
Creation of a florarium
To create your own garden in a bottle, you need to visit a specialized store and purchase the necessary components:
- container for creating a garden;
- Activated carbon;
- priming;
- plants;
- cardboard;
- decorations.
The main thing in such a garden is the variety of fantasies. You need to start by choosing a suitable vessel. You can find a non-standard bottle. The main thing is that the neck is wide.
Ordinary objects such as a glass, jar, vase will also work. An aquarium can also be used for this purpose. The main condition is that it must be a transparent glass container.
As a decoration, you need to choose good drainage that will help drain water. Depending on the initial idea, ordinary sand or beautiful pebbles may be suitable.
You don’t need to pour a lot of soil into the container, just fill it a quarter full. activated carbon is used as an antiseptic. Moss, shells, stones, and plant branches are suitable as additional decorative elements. You can use miniature figurines.
Choosing plants for a garden in a bottle
When looking for plants for a mini-garden, you should give preference to small species that are not prone to growth. Otherwise, within a few months the large size will outgrow the capacity and will have to be either trimmed or replaced with a new one.
Since the garden in a bottle serves as a decoration, it is not advisable to fill it halfway with soil mixture. The soil should occupy no more than ¼ of the volume of the bottle, or better yet, even less. Therefore, florarium plants should have a small superficial root system that does not require a lot of soil.
Moisture-loving violets with a small root system are a good choice for a bottle garden
In a glass greenhouse, regardless of whether it is completely closed or not, the air humidity is increased. This means that only moisture-loving plants that are accustomed to tropical downpours or marshy soils can thrive in it. Obviously, growing desert cacti in a bottle garden would be reckless - the likelihood of them rotting is too high.
The easiest way to cultivate decorative foliage plants in a sealed bottle. Flowering species should be grown in a container with an open neck or a round aquarium without a lid, promptly removing faded flowers so that they do not begin to rot. Among such flowering plants for a garden in a bottle, orchids and Saintpaulias have already become traditional. Fittonias, ferns, ivies, chlorophytums, pelleys, royal begonias, bromeliads, some dracaenas and dwarf ficuses, mosses, etc. are also suitable for “green” compositions.

An example of a plant composition in a round aquarium
Making a mini-greenhouse under glass
Step 1. Prepare the substrate for planting
At the bottom of the selected container we place a layer of drainage 1-2 cm thick. This can be expanded clay, small pebbles or crushed stone. Then we pour the soil substrate mixed with charcoal (activated carbon can be used) in a layer of 5-10 cm. Coal is needed as a disinfectant and antiseptic that prevents root rotting. As for the substrate, it should be light and breathable. No clay or heavy soils! The roots of plants in a bottle garden must “breathe”.
Step 2. Planting the plants
Using a teaspoon, fork or spatula, make indentations in the substrate and carefully plant the plants. If the neck of the bottle is too narrow, then it is most convenient to use large medical tweezers to place the plants.
Pour soil into a bottle and plant plants
Step 3. Decorate the bottle garden
Between the plants you can place several unusual stones, ornate driftwood, or garden figurines suitable for the composition. Such an imitation of a natural landscape will make a mini garden in a bottle a full-fledged alternative to a real garden.
Step 4. Caring for a garden in a bottle
After the plants are planted, it is time for the first watering. Carefully spill the soil - in this case it is important to take precautions so that excess water does not stagnate for a long time in the drainage layer.
Plants should be watered by pouring water down the side of the bottle.
Cover the sealed bottle garden with a lid or cork. After some time, condensation may form on the walls of the vessel - this means that waterlogging has occurred. Drops on the walls should be wiped off and the lid of the vessel should be opened for a while. Once the condensation is removed, the bottle garden requires virtually no special care. Sometimes (in summer - about once a week) you will have to open the lid and spray the plants. At the same time, the humid climate will remain.

Drops of condensation on the inner walls indicate the need to ventilate the bottle
If the bottle garden does not close, then it will have to be watered more often. In any case, with the right composition of slowly growing plants, the garden in a bottle will retain its decorative properties for a long time with virtually no effort on your part. Of course, florarium plants will not be as unpretentious as artificial plastic flowers from bottles for the garden. However, you can afford to go away for a week without fear that the plants will die without watering.
We create the world with our own hands
How to make a garden in a bottle? This question opens the door to one of the exciting activities. To create a blooming masterpiece in specialized stores you need to buy:
- glass container;
- drainage, a couple of sheets of cardboard;
- packaging of activated carbon tablets;
- priming;
- plants;
- decorative items.
The more unusual the vessel, the better
One of the key points is the choice of container. This may be a bottle of an unusual shape, with a wide neck and a tight-fitting lid. You can choose a tall, voluminous glass, a decanter, a vase, a jar, or even an old aquarium—any transparent glass container is suitable.
Giving the aquarium a second life
In addition to its direct purpose, drainage in a bottle garden carries a large decorative load. It should be chosen taking into account the overall design idea and aesthetics. Coarse sand looks good, shell rock looks original, you can use expanded clay or brightly colored decorative stones.
Flower soil should be purchased in minimal quantities. The container is only a quarter full. Activated carbon is a good antiseptic; it is useful for compositions planted in a closed container.
When selecting decorative items, we are limited only by our own imagination. The most commonly used are stones, shells, sand, branches, moss, and decorative figurines of people and animals.
Particular attention to “planting material”
We select plants for the garden in a bottle according to the following parameters:
- small root system (space in a confined space is limited);
- minimum sizes;
- love of high humidity;
- unpretentious.
It is better to give preference to decorative leafy specimens. Flowering plants require the removal of faded flowers and fallen leaves, which is quite difficult to do through the narrow neck of the bottle.
Thinking over a composition for a mini-garden
Variegata, or calamus, looks most impressive in glass containers. Its height is 25 cm, grows slowly, and tolerates lack of moisture well. Its creamy green leaves will brighten up any mini landscape.
Royal begonia varieties with small leaves look good in glass. The height of the plants is 15 cm; they are usually placed in the center of the composition.
An ideal plant for mini-greenhouses is the graceful chamedorea. This beautiful, slow-growing palm with graceful leaves and slender stems will brighten up any garden.
Bromeliad cryptanthus is ideal for small containers. Its height is only 8 cm, but it has beautiful rosettes of leaves, green with small white patches at the bottom.
Often, a short, slender Dracaena Sander is used for a garden in a bottle. Its unusual narrow leaves with large white spots immediately attract attention.
Different varieties of ferns look good in low-growing compositions. Particularly popular are Pteris ensiform Victoria, Adiantum Ruddy, Pellea rotundifolia, and Adiantum fine-haired. Their beautiful greenery is ideal for creating “extraterrestrial” landscapes.
Fittonia Verschaffelta is another plant that loves moist air and does well in a closed glass container. It has unusual leaves: olive green with red veins. Her “friend” silver-veined fittonia has white veins on its bright green leaves. Both beauties are very miniature: the height is only 7.5 cm.
The capricious arrowroot feels great in a mini-greenhouse. Its creeping stems and green leaves with black spots look great behind glass.
You can use Spetchley, Little Diamond or Tre Coupe ivy. Its tiny leaves are very decorative in the vertical gardening of a mini-garden.
Beautiful Pellionia is also often found in florariums. Its creeping reddish stems combined with dark green beautiful leaves look very unusual.
Pilea Cadieu has a dwarf variety - Nana. It is valued for its unusual silvery specks on its green leaves.
To decorate the soil, you can plant Salaginella Krausa. Its small leaves resemble moss from a distance. Against its background, the whole composition looks exceptional.
Other plants can also be used. The choice depends on the overall design idea. However, it should be remembered that only low-growing varieties are suitable for growing in the limited space of a glass vessel; the height of the plants should not exceed 20 cm. In addition, the “pets” you choose must love a humid “climate”.
Tool for working in a mini-greenhouse
To make a garden in a bottle with your own hands, you cannot do without the tools at hand. After all, all the work will have to be done through the rather narrow neck of the bottle. We will need:
- a teaspoon fixed on a long handle will act as a scoop;
- a sharp blade fixed on a handle of a suitable size - the plants will need to be trimmed;
- “press” for compacting the earth - an empty spool of thread attached to a convenient handle;
- two long sticks - for picking up, carrying, planting plants;
- sponge for wiping the inside of the vessel;
- small spray bottle.
Florarium creation technology
Take a glass vessel. The more original it is, the more attractive the composition will be.
We pour drainage into the bottom. If an uneven “relief” is planned, then you need to place a horn made of a thick sheet of paper in the neck of the bottle, with the narrow end inward. With its help, you can easily form hills and even real hills.
Now pour a thin layer of charcoal or lay out activated carbon tablets, this will protect our mini garden in a bottle from pathogenic bacteria, mold and waterlogging.
Now add a layer of fertile soil. To be sure that the plants receive all the necessary nutrients, the soil should be purchased ready-made in specialized stores, based on what flowers you will plant. The volume of soil directly depends on how deeply the plants you choose root. In any case, drainage, coal and soil should not occupy more than ¼ of the vessel. We level the layer, lightly “tamp” it using a “press” - an empty spool of thread on a long handle. You need to work as carefully as possible so that the walls of the container remain clean. If that doesn’t work, wet the sponge, attach it to a comfortable handle and wipe the glass thoroughly. Its purity is the key to good plant growth. And the beauty of the composition, of course.
Let's get down to the most important thing - planting flowers and arranging decorative elements. For planting we use an ordinary fork and spoon. We make indentations with a spoon, transfer the plants with a fork and bury the roots. Don't be discouraged if you don't succeed on your first try. A little patience - and you will succeed. A little secret. If the roots of the “seedlings” are too powerful, they should be mercilessly pruned. This will stop the growth of plants and also allow them to be planted with minimal losses. We wet the “plantings” and the soil with a spray bottle. We make sure that the spraying is microscopic; in no case do we use jet watering.
Wipe the walls of the container with a sponge and close it tightly with the lid.
Most often, florarium compositions consist of 1-3 plants. If you want to plant more, take a larger container. For example, an old aquarium. See what the garden in a bottle looks like in the photo below.
Bottle Garden Options
We have selected for you several examples of how you can design a garden in a bottle (photo) - we hope they will inspire you to create your own mini-greenhouse.

The florarium in a glass teapot can be ventilated at any time - just open the lid

Composition in a glass - impeccable taste

Several small bottle gardens are an alternative to flower bouquets on the serving table
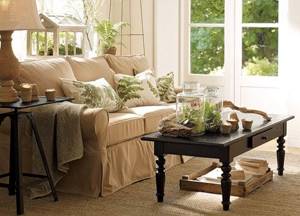
Florariums in living room design