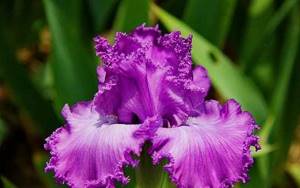
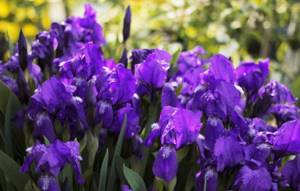
Irises - cultivation and care
The site should be open, but well protected by forest plantings from the prevailing winds, otherwise during the flowering period, with strong winds, tall flower stalks will break or lie down, and in winter there will be problems with snow retention. When protecting the site from prevailing winds, normal air circulation must be ensured. Stagnation of humid air at the end of summer and in autumn contributes to the development of fungal diseases.
Origin story
The mystery of the origin of the iris is covered in legends and myths. According to one of them, the first flower bloomed on the edge of a forest in Southeast Asia and was incredibly beautiful. All living beings and wind and water gathered to admire its beauty. So the seeds were spread all over the world. Another ancient Greek legend says that irises appeared as droplets of a rainbow along which the goddess Iris descended from heaven.

The first image of these flowers was found on the island of Crete and dates back more than four thousand years ago.
It is generally accepted that the iris received its name from the ancient Greek healer Hippocrates four hundred thousand years BC. Subsequently (in the second half of the 18th century) this name was included by the Swedish botanist Carl von Linnaeus in the unified scientific system of plant names.
a brief description of
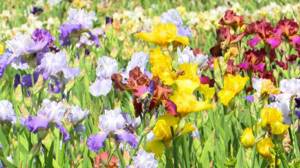
Before answering the question of when to plant iris, it is necessary to talk about this plant. These flowers belong to plants from the family called Iridaceae, or Iris. They are rhizomatous. These flowers can be found everywhere. In total, about seven hundred of their varieties are known, each of which is attractive in its own way.
According to legend, Hippocrates gave the name to this plant. Irises are named after Iris, the goddess of the rainbow. The scientist probably relied on the appearance of the flowers when choosing names for them. Florence got its name in honor of irises, because the fields nearby were sown with them. From the very beginning of our era, these flowers have become widely in demand. Most often they were used as decorative elements, but with the development of the perfume industry they became widespread as raw materials for essences.
Classification of irises
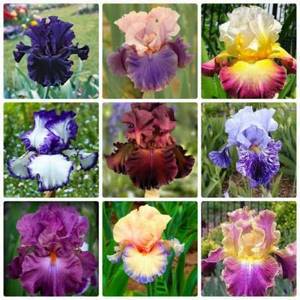
Iris is a genus of flowers in the iris (or iris) family, which has more than eight hundred species. As a result of intensive selection, numerous decorative varieties of irises have been developed.
Rhizomatous and bulbous varieties
Based on the type of root system, there are bulbous and rhizomatous irises. The registration of new varieties of rhizomatous irises is carried out by the American Iris Society, and of bulbous ones - by the Royal General Association of Bulb Plant Growers (Holland).
The Russian Iris Society currently does not officially classify bulbous flowers as irises. However, many bulbous varieties are available for sale on Russian markets, which are very popular among gardeners.
Classification of rhizomatous irises
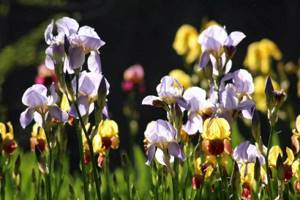
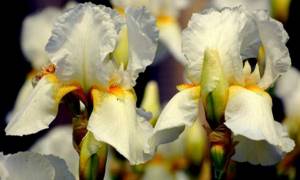
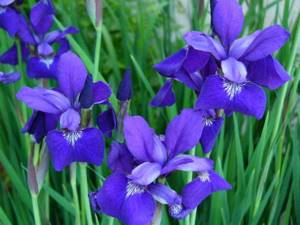
Based on the shape of the flower, bearded and beardless (non-bearded) are distinguished. Bearded irises have shaggy hairs on their flowers, like small beards.
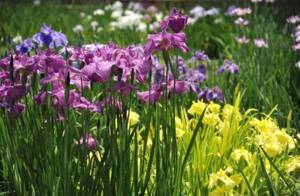
The petals of the beardless are smooth without any hairs. These varieties of irises are most popular in the Russian climate.
Groups of bearded irises:
- high (German);
- petite tall;
- standard dwarf;
- miniature dwarf.

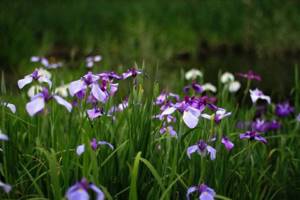
Groups of beardless irises:
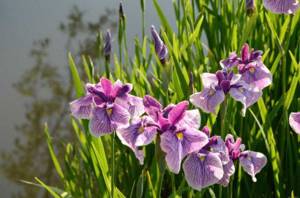
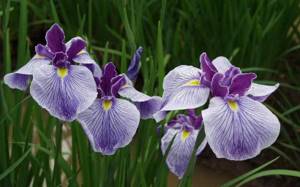
- Siberian;
- Japanese (xiphoid);
- spuria;
- Louisiana;
- Californian;
- swamp;
- others.
Aryls and arylbreds are also classified into independent groups. These species are less popular among gardeners and breeders.
The right place and soil for a flower bed
The unpretentiousness of irises allows them to take root in almost any conditions. But abundant flowering and maximum decorativeness can be achieved if you take into account the “wishes” of the plant:
- Good illumination (open area or light partial shade). A small hill or a place on a hillside closer to the top is suitable for irises. You cannot plant them under tall trees, bushes with a dense crown or next to them - not only the flowers and leaves need the sun, but also the roots. Flower buds do not form in the shade. In general, irises are not picky about their choice of neighbors and get along well with any flowers.
- No cold drafts. It is desirable to have a barrier at some distance that protects the irises, but does not obscure them.
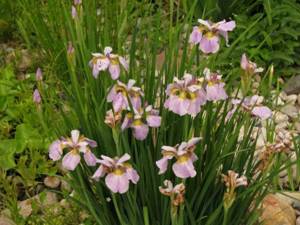
- Groundwater located 1.5 m from the soil surface or below. The root system of irises is superficial; stagnation of moisture will provoke the development of rot. Bearded irises have a particularly negative attitude towards this, but Siberian and marsh irises are an exception; they can tolerate waterlogged soil.
- Fertile soil, neutral or slightly acidic, well permeable to air and water. Bearded irises successfully take root even in rocky substrates.
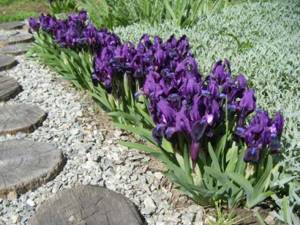
Irises show the most abundant and long-lasting flowering when planted in an open area where they will have enough sun.
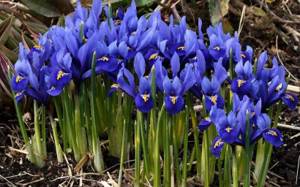
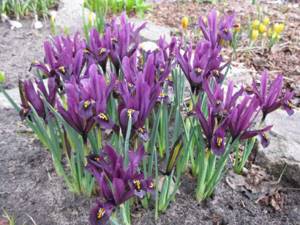
Classification of bulbous varieties
These include the following groups:
- iris reticulum (herododictium);
- Juno;
- xyphium.
Today, dozens of different subspecies and hybrids of the above varieties of iris are offered for sale.
Iris flowering time
Depending on the variety and planting date, you can admire the blooming iris from April to July. Bulbous irises planted in August - September begin to bloom from April - May, and rhizomatous ones from May to July.
To ensure that different irises bloom alternately throughout the warm season, it is better to plan the planting and care of them in accordance with the flowering time of each variety.
Preparing for landing
Every gardener knows that before planting it is necessary to carry out several important manipulations, on which the future fate of the plants in the soil depends. Procedures that affect the survival of irises in soil include the following:
- choosing a suitable territory (different types of irises prefer different places in the flower bed);
- soil preparation (depending on the type and condition, the soil requires its own type of preparation);
- processing of planting material.
Selecting a location
Like most flowering plants, irises prefer well-lit areas, protected from strong gusts of wind. It should be noted that the choice of location is largely determined by the type of irises. For example, Siberian irises do not like direct sunlight too much, which contributes to the fading of their petals and feel quite comfortable in shaded areas. Bearded irises, on the contrary, grow well in sunny hills, when the “back” of their rhizomes is constantly illuminated.
Swamp irises traditionally grow near bodies of water, and therefore love high humidity.
Regardless of the species, irises have several basic “preferences” regarding the area for planting:
- the soil on the site must be drained - especially those summer residents who have groundwater flowing under the soil need to think about drainage;
- irises extract the greatest amount of nutritional resources from loamy soils;
- the site must have an outflow of melt water;
- It is desirable to have a neutral or slightly alkaline soil reaction.
Acidic soils require liming before planting irises.
Soil preparation
Before you start planting irises, you should prepare the soil in advance. Both the poorest and the most nutritious soil need preparation:
- When digging up poor soil, compost or garden soil is added to it to improve its nutritional qualities. It is also advisable to distribute mineral fertilizers of the phosphorus-potassium group (superphosphate or nitrophoska) over the soil;
- When working with soil with high acidity, it should be pre-limed using fluff, chalk or charcoal. Liming is carried out every few years to maintain consistently low acidity levels, which contribute to the proper development of plants;
- Loamy soils are treated with peat and river sand before planting;
- Clay soil is added to sandy soils.
Clay soil makes sandy soils more nutritious and suitable for planting
All fertilizers are applied to the soil a week before the selected day for planting irises.
Also, before planting, the soil must be treated with disinfectants:
- first, the soil is watered with fungicides, which prevent the proliferation of fungal infections in the soil, which can easily spread to the flowers growing from it;
- Afterwards, the soil is sprayed with herbicides, which prevent weeds from spreading throughout the area and starting to take away nutritional resources from the planted plants.
Processing of planting material
Before ending up in the soil, planting material must go through several integral stages:
wetting in a solution of growth stimulants. Ecogel or Zircon can be used as drugs that accelerate the development of irises;
inspection of rhizomes. If the rhizomes have acquired roots that are too long, you should get rid of them by carefully cutting them with a knife. If there are rotting areas, you need to carefully cut out the affected areas
It is important to carry out the removal so that only the healthy part of the rhizome remains - otherwise the iris will continue to rot in the soil; wetting in a disinfectant solution. In order to disinfect the root and increase its resistance to various pathogenic bacteria, you should immerse it for half an hour in a weak solution of potassium permanganate.
Planting rhizomatous irises
Planting material is a fan of leaves with a rhizome from which roots extend. Such material can be purchased ready-made in gardening stores or prepared independently by dividing the rhizomes of growing flowers into parts.

Before planting, it is recommended to soak the root in a solution of potassium permanganate for about half an hour. We make a shallow hole in the ground, then a small mound in the hole, on which we place the root and sprinkle it with earth along with the roots.

Leave the back of the rhizome open. American botanists advise planting with its back facing east so that it is illuminated by the first rays of the rising sun. After this, you need to water at the rate of one liter of water for each hole. It is advisable to leave an average of 30-50 centimeters between the holes.
If the irises were planted in the spring, then we leave it that way. If it is in the fall, it is better to make a shelter; you can sprinkle it with earth, sawdust or spruce (pine) needles and branches.
The soil for planting must be mixed with sand and ash. It is better to plant in a dry, sunny place. When using planting material with a fan of 7-8 leaves, irises can bloom in the very first spring after planting. In other cases, after 2-3 years.
Flower garden for irises
Irises love the sun - choose a place for the flower bed in a bright area protected from strong winds. Dig up and loosen the soil. If you want to create comfortable conditions for flowers, get rid of weed roots and pest larvae, sift the soil through a large sieve. Soil moisture depends on the type of plant: bearded irises need soil with good drainage, while swamp and Siberian varieties prefer to grow in damp areas. On good soil, these flowers can develop without additional fertilizing, but if you decide to add fertilizers or herbicides to the soil, the flowerbed will be ready for planting only in a month.
If the soil is not very suitable for growing irises, it can be improved.
- Add potassium and phosphorus fertilizers to oily soil.
- If the reaction is acidic, neutralize the soil with chalk or ash.
- Add sand and peat to the loams.
- A sandy flower bed can be improved with clay.
Dig holes 10 cm deep. The distance between plants depends on the height of the above-ground part:
- border varieties - 15 cm;
- irises of average height - 20 cm;
- tall bushes - 50 cm.
If you are going to make a multi-tiered flower garden, plant the lowest varieties on the south side, and the tallest on the north side. The distance between the rows should be at least 70 cm, then all the bushes will have enough sunlight.
Planting bulbous varieties
The planting material is bulbs, which are placed in holes with a depth equal to three planting bulbs. Then they are completely covered with earth. At the bottom of the hole you can make drainage from sand or ash. Watering is not necessary. The distance between the bulbs is on average equal to three diameters of the planting bulbs.
An interesting option for growing bulbous irises would be to plant them in a growing basket or in decorative garden pots. It looks very original and beautiful.
Planting bulbous varieties, just like rhizome varieties, is best done in a dry, sunny place. When using large bulbs as planting material, irises can bloom in the very first spring after planting. In other cases, after 2-3 years.
How to plant irises in the fall
When planting irises in the fall, be sure to take into account the climate in the region in order to have time to plant the irises in the ground in a timely manner.
Landing dates
These flowers are planted 5-6 weeks before the arrival of persistent cold weather. By region the dates are as follows:
In the south, in areas with a warm climate, until the last days of October, varieties are chosen: Good Omen, Queens Tiara, Kogesho and others.
Good Omen iris variety is suitable for southern regions
Central Russia - from early to mid-September, varieties - Arctic Age, Lilac Glory.
Iris Lilac glory is grown in central Russia
In areas with a cold climate (Siberia, the Urals) - until the end of August, varieties - Dunford's iris, Hubbard.
Dunford's iris is suitable for planting in northern regions
Plants will survive the winter successfully if they take root before frost.
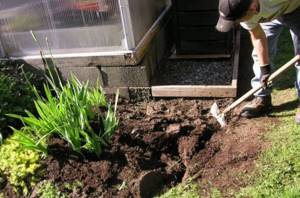
Site preparation, planting process
Irises need to be planted in an area protected from harsh winds and well lit by the sun. Since these flowers have a shallow root system, there should be no stagnation of water. Therefore, it is better to place the plants on a hill, for example, make a ridge about 20 cm high and with a slight slope to the south for uniform illumination and removal of excess moisture.
Irises prefer nutritious loamy neutral or slightly acidic soil. A week before planting, the soil under the flowers is dug up with the addition (if necessary) of the following components:
- to improve fertility - humus, compost in the amount of 2 buckets/m2;
- soil-deoxidizing wood ash (dolomite flour) - from 100 to 150 g/m2;
- potassium-phosphorus fertilizers: potassium salt - 15 g/m2 and superphosphate - 30 g/m2;
- sand in case of heavy clay soils;
- clay, if light sandy soil does not retain moisture sufficiently.
The site is prepared about a week before planting the seedlings. Water the soil several times so that it settles and compacts, then the seedlings will not sink into the ground.
Step-by-step instruction
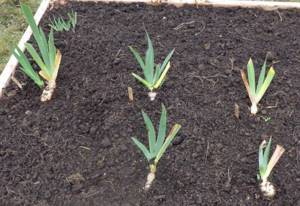
When the area for planting irises has been prepared and the right time has been chosen for this, the planting material is processed. Its roots are placed for half an hour in a weak solution of potassium permanganate. The foliage is cut off like a house, leaving a height of approximately 20 cm in the center. The roots are shortened to 19 cm long.
Iris foliage is trimmed into a house shape
Then they move directly to the procedure of planting flowers:
- Under each plant, dig a hole about 12 cm deep.
- In the middle of the hole, make a mound of earth up to 3 cm in height. The distance between adjacent holes is from 30 to 40 cm.
- Iris seedlings are placed at the top of the mounds, their roots are lowered down the slopes so that they do not bend.
- The roots cover the soil and compact it. In this case, the root collar should be above the soil surface, as well as the bending part of the rhizome, so that the sun's rays can contribute to the correct formation of shoots.
- The leaf fan is placed vertically.
- At the end of planting, the soil with the plant in it is moistened (0.5 liters of water for each bush). The next watering is carried out on the 3rd–5th day after planting.
If favorable conditions for the development of irises are created, they will bloom next year.
My irises grow next to the loggia; I live on the first floor. I planted them in September two years ago. Although at that time I did not know the intricacies of planting these plants in the autumn, I probably did everything right, since every spring I admire these beautiful yellow, blue and brown flowers.
Planting seeds
This method of cultivation is less popular among gardeners and is more used by breeders to create new varieties.

Planting seeds is possible in March and September. Before this, the seeds are prepared: wrapped in a damp cloth, they are stored for one month in the refrigerator or other cool place. Then the seeds are planted in a container with soil and after the sprouts appear, they are planted in open ground. Flowering with this method of planting can be expected no earlier than in 2-3 years.
Conclusion
Irises will take root well and bloom profusely if you take into account the characteristics of each species when planting. Some can grow in moist soil, while others need soil without stagnant water. There is a common requirement for all varieties of these plants: they all love the sun and bloom poorly in shaded areas.
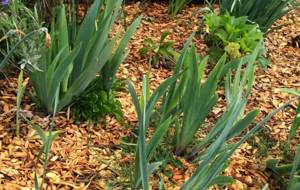
Weeding a flower bed is very difficult; with a hoe you will damage the roots of bearded irises, which are located on the surface. To make your task easier, sift the soil in the flower garden or spray it with herbicides. After adding chemical compounds, rhizomes can be planted only after a month. Many species do not tolerate waterlogged soil; it is advisable to arrange a flower garden on an embankment; you can also make good drainage or add hydrogel to the ground. Do not be afraid that caring for irises will take up a lot of your time; if you plant the rhizomes correctly, the flowers will not require much care from you.
Caring for irises in the open ground
Proper care includes:
- soil preparation before planting;
- necessary watering;
- loosening the soil;
- weeding;
- timely feeding;
- pest control;
- removal of flower stalks and dried leaves;
- trimming leaves before winter;
- digging or sheltering for the winter.
Before planting irises, the soil must be mixed with sand and ash. Watering should be done during the flowering period once a week and on particularly dry days. The first fertilizing is done after winter with ammonium sulfate (at the rate of 1 kg per 100 m3), the fertilizer can be poured directly onto the snow, it will be absorbed into the ground along with the snow.
The threat to this plant is the iris fly. Spraying with the following solution will help protect flowers from the pest: 10 grams of fresh or 5 grams of dry hot pepper plus 40 grams of grated laundry soap per liter of water. First we boil for about an hour, then leave for two days. Then we spray the plant with this solution at the moment when the arrow begins to emerge, that is, before the bud appears. We carry out the processing three to four times.
After flowering ends, the peduncle must be pulled out, and dried leaves must also be removed regularly.
If the weather continues to be humid, then to prevent the appearance of red spots, it is recommended to treat the leaves of irises with preparations containing copper. For better adhesion of the drugs, you can add a drop of shampoo.
As for shelter for the winter, the ideal option would be to simply cover it with earth. If very frosty and snowless weather is expected, you can cover it with sawdust or spruce branches. Experienced iris growers do not recommend covering with dry leaves, as rodents that eat the rhizomes of the flowers can live in them.
Proper care after planting
Caring for irises after rooting is simple and minimal for 3–5 years, when the time comes for the next rejuvenation of the plantings and division of rhizomes to ensure long-term flowering.
Fertilize in early spring with a low-nitrogen all-purpose flower fertilizer in the grooves around the plants or with compost. Avoid surface application of nitrogen fertilizers or mulching with organic matter, which can cause rhizome rot. Remontant irises give better results if they are fed again after the end of the first wave of flowering.
Irises are drought tolerant, but even such plants need moisture and periodic moderate watering, which is necessary to achieve a growing season and good flowering. Flowerbeds should not dry out, so during dry periods it is necessary to water the flowers at least once a week. During dry summers, without good watering, growth can stop and plants become dormant. Do not mulch the soil around the rhizomes (keep them exposed) as mulch retains moisture and too much water causes rot.
Taller irises need a garter to prevent the flower stalks from breaking. Flowering occurs sequentially on buds located along the stems. After flowering is finished, cut off the flower stalks at the base. Remove the seed pods that form after flowering. Seed formation takes energy away from the rhizomes, roots and leaves.

To protect against winter frosts, you need to take care of covering the flower garden. Sprinkle the rhizomes with 3–5 cm of sand and cover them with spruce branches, which are applied after the onset of cold weather and removed next spring. In early spring, remove winter mulch and any old foliage to promote fresh new growth and prevent iris weeds.
Proper care will ensure long and abundant flowering. But sometimes novice gardeners wonder why irises don’t bloom.
There could be several reasons:
- deep landing;
- crowded and densely overgrown lump;
- lack of sunlight;
- post-transplant stress;
- varietal characteristics;
- unsuccessful wintering and frost damage.
Planting and dividing irises
Irises can grow safely in one place for an average of four years. Then they should be divided and planted. This is how they reproduce. Without these procedures, irises will not bloom.
It is better to dig up the rhizome for division three to four weeks after the end of flowering. By this time, the roots will have gained nutrients and strength. The prepared “cuts” are planted according to general rules or sent for storage.
Secrets of experienced iris growers
In order for irises to always delight you with their flowering, planting and care in the open ground must comply with the following secret principles:
- choosing a dry, sunny place for planting;
- soil preparation, mixing it with sand and ash;
- be sure to leave the back of the rhizome open to sunlight;
- Spray against pests in a timely manner;
- treat the place where the peduncle was removed with ash (to dry it);
- Dry the rhizome or bulbs after digging in the sun for 2-3 days.
Charming and noble irises have always been revered by people, as evidenced by numerous images and photos of irises from ancient times to the present day.
These blooming droplets of the rainbow will be a magnificent decoration for any garden and plot; their aroma will bring joy and pleasure, and the juicy green leaves will prolong the feeling of summer.