Definition of a multi-tiered flower bed
Such a flower bed will consist of several tiers. When producing it, it is worth considering several features that will allow you to grow luxurious colors in it.
For example, such flower beds must be equipped with drainage. Without it, processes of root rot are possible, since watering begins from the top tier and gradually all the water flows down.
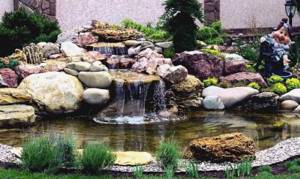
Therefore, it is worth planting those flowers on top that are more resistant to dry soil, and on the bottom those that thrive in excessive moisture.
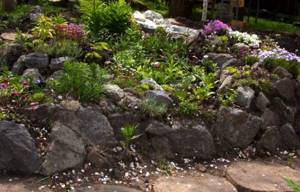
Brick
Interestingly, garden flower beds can be made from any available material. For example, after construction there may often be extra bricks left, which can create an unusual flower garden that will consist of several floors.
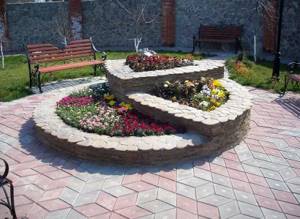
Moreover, any form can be created, it all depends on the place where it is supposed to be placed. Remains of crushed stone, sand and other construction waste can be used as drainage in such flowerbeds. This flowerbed is made for a very long time.
Tree
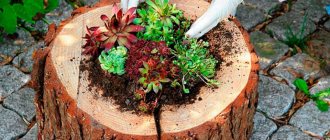
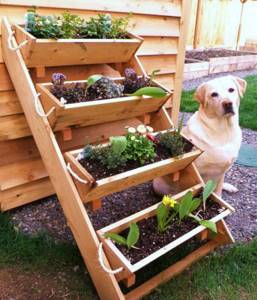
Here you can also use leftover boards, wooden boxes, and any old pallets. in order to create a flowerbed, you need to connect them one above the other and secure them with nails.
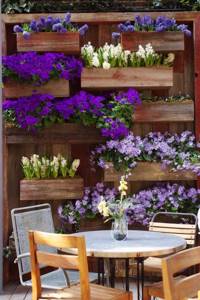
How the future flower garden will look depends solely on the imagination of the one who creates it. The main thing is not to forget about drainage; it will be an essential part for any type of structure.
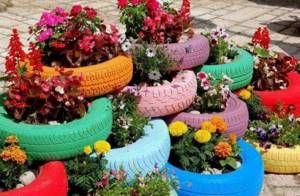
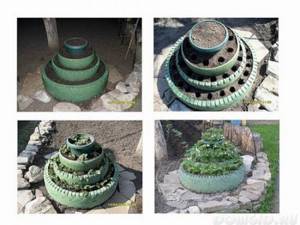
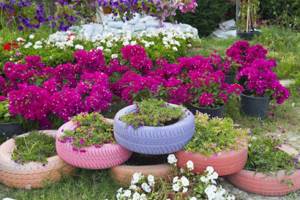
Multi-tiered flower bed made of tires
Everything is quite simple here, you can paint them in bright colors and place them on top of each other. Such flower beds look more interesting if they use tires of different sizes.
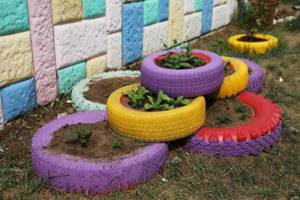
In this case, the largest one is placed down, and the smallest one will be the finishing touch. In such flower beds you don’t need to use drainage, but it is necessary to feed the flowers with fertilizer.
How to make a pyramid flowerbed from boards
To assemble a pyramidal flowerbed with your own hands, it is better to use step-by-step instructions:
- First you need to prepare all the boards. Stepping back 5 cm from the edge, you need to cut a groove, deepening it by a third of the width of the board. Do this on both sides.
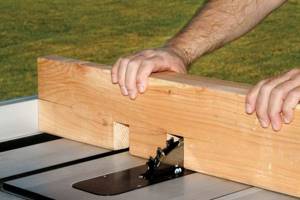
- Make another groove on the opposite side of the workpiece, departing 20 cm from the first. The board of the next tier will fit into it.
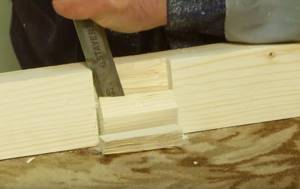
- Repeat the operation with all workpieces. Leave only the boards of the last floor.
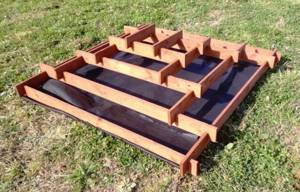
The multi-tiered pyramid flowerbed is ready, all that remains is to assemble it, fill it with soil and plant flowers. Such a flower bed is visible from all sides.
It is not necessary to make a pyramid flowerbed, installing tiers in the center. You can assemble the structure offset to the side or at an angle of 90°. The assembly of such and similar structures occurs differently. They do not move, but are stationary. They are collected according to plan:
- Dig a pit 15 cm deep in a suitable place. Cover it with sand, crushed stone or expanded clay. The thickness of the drainage layer is no more than 5 cm.
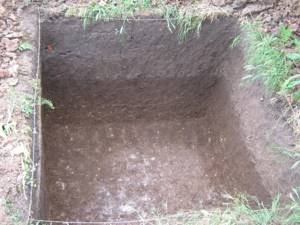
- Install the lower tier of the pyramid, and then fill it with fertile soil.
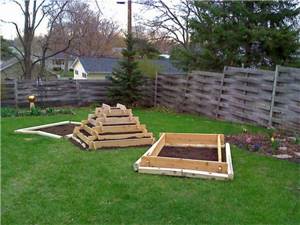
- The second box is installed offset or at an angle to the first. Then it is filled with soil.
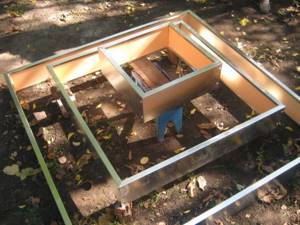
- The entire flowerbed-pyramid is assembled using this principle.
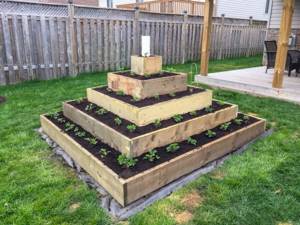
At the end, the flowerbed is watered, but excessive watering can wash away the soil. It is enough to moisten the soil from a watering can with a fine sieve.
You can make a flowerbed into a pyramid of boards that can be pushed up against the wall. With their own hands, they cut out the parts to size and assemble the boxes. They are installed on top of each other. The largest one will be at the bottom - this is the base of the pyramid; smaller boxes are placed on it. The boxes must have drainage holes so that excess liquid does not stagnate, but drains away.
Rules for choosing colors
Selecting flowers for a flowerbed that is considered multi-tiered is not so difficult; it is only important to rely on several basic criteria. The bottom row should be planted with flowers that like moist soil, as they will always receive the most water when watered. At the end of such a flower bed should be drought-resistant flowers that are less demanding.
It is recommended to plant flowers either in the same color scheme, or using contrast, but without interfering with many different shades. It is better to plant flowers with a maximum flowering period in flowerbeds at the dacha, so that they will delight everyone who happens to be on the site throughout the entire season.
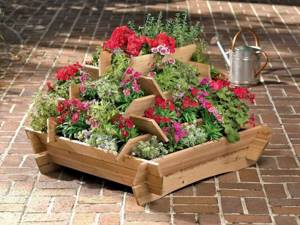
It is also worth planting flowers with more massive buds at the bottom, and as they rise, the plants themselves should also decrease in size, then the whole composition looks more organic.
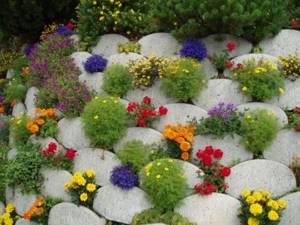
Types of multi-level flower beds
Let's look at the features of constructing four types of multi-level flower beds and flower beds.
raised flower bed
This is the common name for a small flower garden of regular geometric shape, rising above ground level. Its optimal height is 50–100 cm, diameter is no more than 150 cm. If you do more, it will be inconvenient to care for the flowers.
In a raised flower bed there are 1 to 3 tiers, but more is possible
Most often, raised flower beds are laid out in front of the central entrance or on the sides of it. Compositions look advantageous against the backdrop of a green lawn or a carpet of ground cover plants. If size allows, a multi-tiered flower garden can be arranged in the compositional center of the recreation area.
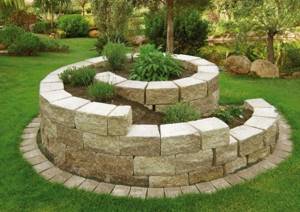
Original raised flower bed in the shape of a snail
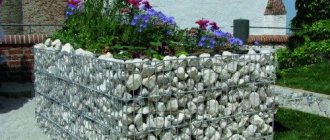
The walls of a raised flower bed are made of different materials: wood, brick, concrete blocks, natural stone. Gabions – wire structures filled with large pebbles – look interesting as fencing.
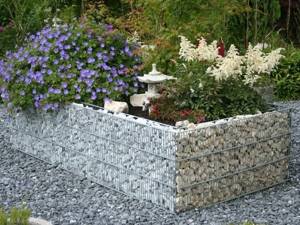
Fencing for flower beds made of gabions
To make this decorative element of the garden look harmonious and the plants to feel comfortable, it is recommended to follow three rules when decorating a flower bed:
- place flowers of the same size on the same level;
- plant moisture-loving plants and perennials with large inflorescences at the bottom, and drought-resistant plants with small flowers on the upper tiers;
- select plants with different flowering periods so that the flowerbed remains blooming all season.
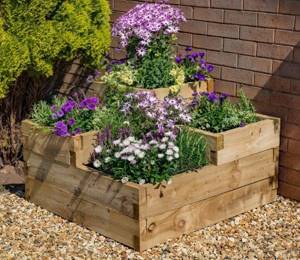
A three-tier flower bed, partially covering a brick wall, creates a beautiful vertical
If the flowerbed is single-tiered, tall plants are used as a compositional dominant in the center, and decorative perennials are planted between them. Creeping plants are allowed to grow along the edge, the hanging shoots of which will partially overlap the fence.
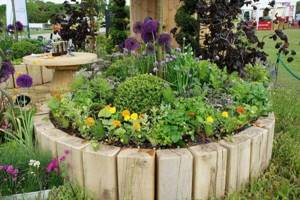
Single-tier raised flower bed, decorated in a natural style
Retaining wall
Initially, retaining walls were created solely for practical purposes - to prevent the soil from sliding on a slope and to create a terrace suitable for farming. But these days they are used as a decorative element and part of multi-level flower beds.
Retaining walls are built against a natural slope or artificial earthen mound to create a raised platform on which to plant plants.
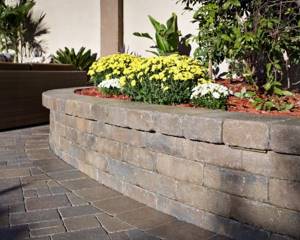
Flower garden with retaining wall
The wall can frame the raised composition on one or more sides. Be rectangular, semicircular, shaped, repeat the natural line of the relief. Unlike a raised bed, flower beds surrounded by retaining walls are not limited in size and can be located in any part of the garden.
The height of the retaining walls varies from 30 to 200 cm. The walls are built from rectangular stone, brick, concrete blocks, and garden posts. Use mortar or dry masonry.
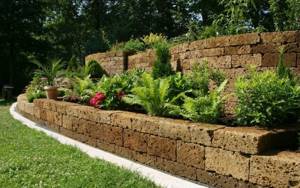
A retaining wall made of porous blocks encloses a two-tiered flower garden and separates one step from another
On retaining walls above 1 m, coniferous plants, ornamental shrubs, tall perennials look good, on lower structures - creeping conifers, dwarf trees with a weeping crown, evergreen shrubs, and ground cover plants.
The walls in the sunny corners of the garden will be decorated with phlox, alyssum, carnations, aubrieta, and in shady places - bells, arabis, ferns, hosts.
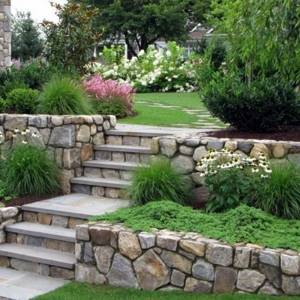
Design option for retaining walls
Terraced flower garden
In areas with difficult terrain, you can arrange a terraced flower garden. This is a complex multi-level composition with small narrow terraces located one above the other.
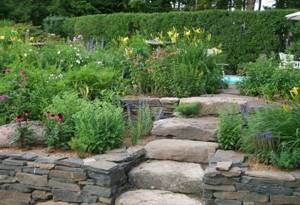
Slope designed as a terraced flower garden
All terraces can be planted with the same plants or a twist can be added to each, but stylistically the terraces must be combined. To make it convenient to care for the plants, a system of stairs and stone paths is organically integrated into the composition. The filling of decorative crushed stone simplifies maintenance.
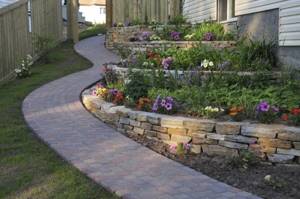
The terraced flower bed follows the line of the garden path, making both elements look like a single whole
Terraced flower beds look harmonious in large areas when they are correctly integrated into the natural landscape. If the size of the garden does not allow it, but you want to do something similar, you can arrange a small composition as in the photo below.
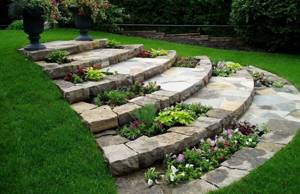
Small pockets in the steps of the stairs made it possible to create an original terraced flower garden
Landscaping project from Sad-dizain
More details
Architectural rock garden
Another type of multi-level landscape composition is an architectural rock garden. It is similar to a terraced flower garden, but has a more complex structure. Unites the garden and architectural elements into one whole: retaining walls, terraces, stairs, water features.
A mandatory element of a rock garden is earthen pockets filled with plants and natural stone to imitate mountainous terrain. In architectural rockeries, low ornamental shrubs, dwarf and creeping conifers, alpine-type perennials, cereals, and ground cover plants are planted.
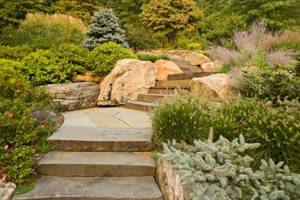
In an architectural rock garden, natural beauty is organically combined with man-made elements
We introduced you to the main types of multi-level flower beds and landscape compositions, but human imagination is limitless. Search, experiment, be inspired by new ideas. We will be glad if our advice will help you decorate your garden with original flower beds.
Flowers for a multi-tiered flower bed
Many experienced gardeners can attest that the ideal color combination for these beds is a mixture of perennials and annuals.
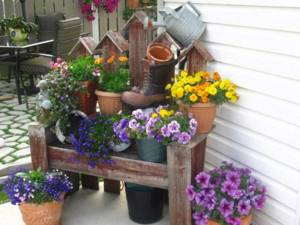
Every year, annuals will be able to add something new to the appearance of the flower bed, and perennials will maintain the continuous blooming appearance of the flower garden. The most common types of flowers are viola, heuchera, phlox, which is considered awl-shaped, petunia, carnations, and small asters.
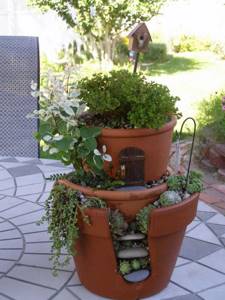
Before planting the selected plant varieties, it is important to carefully study how much they can grow and arrange the planting order accordingly. Then the site will feature beautiful designer flower beds.
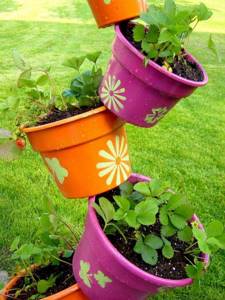
Flower beds and flower beds are undoubtedly an important part of every garden. They create the overall look and decorate your site. There are many types of flower beds: they differ in shape, design, location, methods of planting and care.
One of the most convenient, popular and beautiful types of flower beds is the pyramidal flower bed. It is a stand with a vertical rod, and several disk containers with soil are mounted on it. Such a flower bed is convenient because it takes up little space, while allowing you to grow more plants. It is suitable for both flowers and growing wild strawberries. Often, a pyramidal flower bed is also understood as a tiered planting. This is a type of planting where the tallest plant is grown in the center of the flower bed, and then smaller plants are grown in each circle. Thus, the general appearance of such a planting is a pyramid and it looks much more interesting and original than an even, monotonous arrangement of plants.
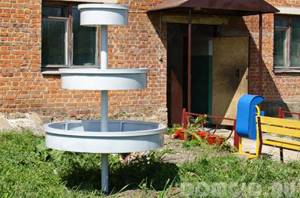
The frame of a pyramidal flower bed can be bought in a store or you can make such flower beds with your own hands.
Content
- How to make a flowerbed with your own hands video
- Planting plants in a pyramidal flower bed
- Design of pyramidal flower beds video
How to make a flowerbed with your own hands
Anyone can make a pyramidal flowerbed at the dacha with their own hands. First you need to decide on the location of your flower bed. A suitable location should be sunny and not exposed to too much wind. Plan in advance which plants will be planted in the pyramidal flower bed and their location. The size of the pyramid boxes will depend on the number of plants and the area of the chosen location. In our little lesson on creating a flower bed we will take average values.
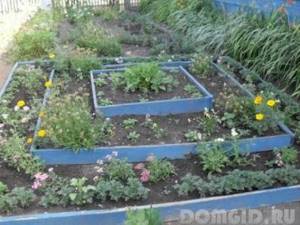
Step 1 The selected place for the pyramidal flower bed must be covered with a chain-link mesh (metal hexagonal mesh) measuring 240 cm by 240 cm. Step 2 We construct a square base box from wood or slate. If you don’t have suitable boxes, you can make them from boards with grooves cut into each. The finished box should be approximately 20 cm smaller than your grid (i.e. 220 cm by 220 cm), and 25 cm high. Step 3 We fill the box with a 15 cm layer of earth. Step 4 Install the pipe in the center of our box. The diameter of the pipe must be 10 cm or more. We close the bottom of the pipe in advance and drill holes for irrigation. Step 5 Place compost around the heating pipe for our pyramid. Step 6 We make another box - 170 cm by 170 cm. Now we install it in the base box in the center, and also fill it with earth. Step 7 We make, install and fill with earth three more boxes, each smaller than the previous one - 120 cm by 120 cm, 70 cm by 70 cm, 20 cm by 20 cm. The height of each box should be the same as the base - 25 cm.
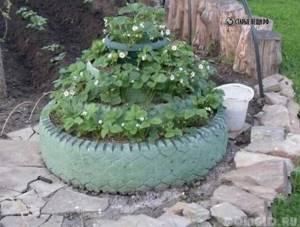
You can also create a pyramidal flowerbed yourself from the most ordinary tires. The biggest challenge is finding the right tires in different sizes. But the technology for creating the pyramid itself remains unchanged, only unnecessary tires are used instead of boxes. So, our pyramidal flower bed is ready. Now you can start planting the selected plants.
Planting plants in a pyramidal flower bed
Any flower bed plants need some care. You need to choose the plants for your new pyramid wisely. It is very practical to create a composition of plants that do not require special care and shelter for the winter. It is also necessary to take into account the flowering time and the “perenniality” of the planted plants, so that every season your flowerbed pleases you and does not look empty. Think about the adult sizes of the flowers you plant in advance so as not to plant them too close. And before planting, be sure to prepare the soil - dig it up and fertilize it. The good thing about a pyramidal flower bed is that it is suitable for growing flowers, berries and even vegetables. If you decide to create a flower bed, then the original solution would be to plant colorful plants on different tiers. Flowers such as nemophila, lavatera, azalea, morning glory, passionflower and many others look very beautiful in any flowerbed.
The pyramid flowerbed is ideal for growing wild strawberries and strawberries. It is better to plant their seedlings in August or September. Before planting, it is necessary to loosen the soil and add mineral and organic fertilizers. You also need to straighten the roots of the seedlings so that they do not bend upward, then cover them with earth and compact the earth well around them. On one pyramid flower bed it is possible to plant about 70 bushes of such seedlings, yielding up to 50 kg of berries.
Design of pyramidal flower beds

The design of flower beds depends only on your own tastes and scope of imagination. Such a flowerbed can be beautifully painted by painting each tier in its own color and adding pictures or patterns. It is important to remember that the design of the pyramid flower bed should be combined with the overall look of your garden and other flower beds. You can decorate all elements of the garden with the same color or the same pattern. Also, the sides of a pyramidal flower bed can be covered with small decorative stones or figures of different colors and different shapes. They can also be used to decorate areas of land in a flower bed that are free from planting. In addition, the sides of the flower bed can be decorated with lighting, so that your pyramid looks impressive even in the evening.
The decor of a pyramidal flower bed, like the entire garden, depends only on your imagination and creativity.
Author: Sergey and Svetlana Khudentsov
10
Ideas for unusual multi-tiered flower beds
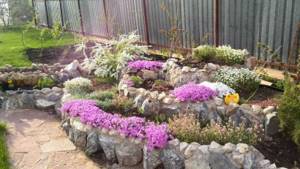
Old unnecessary chests of drawers, bicycles, as well as other interior items that no longer find their place in everyday life can be used as basic materials for this type of flower bed.
The main thing is to approach the selection of flowers correctly, the task of which is to further decorate such a flower garden. Therefore, before throwing something away at the dacha, you should think carefully about whether this thing will be useful, and maybe it will even make an excellent multi-tiered flower bed.
Dacha kingdomTips from a gardener, your recommendations
Tweet
In this case, by stepped flower bed I mean the arrangement of flowers in height from the foreground to the background. Therefore, we will not specially create terraces on the flowerbed. To better emphasize the steps, each of them is usually decorated with uniform colored stripes. Such compositions look great at the foot of walls, along fences, in front of thick, carefully trimmed hedges. The stepped flower bed described below consists of plants that prefer sunny places and fertile soil. In this case (photo No. 1) we will use annual flowers.
In a selected area measuring approximately 1.3 x 2.5 m, we fertilize the soil with compost in the spring. To make planting easier, mark out the flowerbed by stretching ropes along it so that you get five longitudinal stripes. Accordingly, there will be five steps consisting of different plants. Of course, it is better to plant flowers as seedlings, because thinning them out later will be problematic. In the background we plant Sander tobacco, an annual that blooms from June to October. We choose tall varieties about 80 cm with white flowers. The distance between plants is approximately 30 cm.
The next step is Houston's ageratum, an annual with blue-violet flowers collected in dense inflorescences. Blooms from June to October. We choose varieties with a height of 50 - 70 cm, for example, Schnittperle. Plant at intervals of about 25 cm.
A step below we plant two-colored ragwort. The decorative appearance of the ragwort is given by silvery leaves, and depending on the variety they can have different shapes: pinnately dissected, wavy, whole. We select varieties with a height of 30–40 cm.
Then there will be a step with Waller's balsam. This is an annual plant 15–30 cm high with dark green leaves and a fleshy stem, with simple or double flowers of various colors. Flowering from June to October.
We plant a multi-stemmed chrysanthemum along the front edge. It is an annual plant with creeping shoots and blue-green leaves. Peduncles up to 20 cm high with golden-yellow inflorescences about 2 cm in diameter. Flowering begins at the end of June and lasts until October. Common varieties are Kobold and Gold Plate.
We plant groundsel, balsam and chrysanthemum with an interval between plants of about 20 cm.
Here is such a simple stepped flower bed. Of course, you can use others instead of the listed plants. For example, groundcovers include petunia, sea lobularia, lobelia, and nolana. Low-growing varieties include marigolds, ever-flowering begonia, Chinese aster, and hard verbena. As medium-sized plants, you can plant gillyflower, snapdragon, crested sage, and cape anhusa. For the background we can recommend cleoma prickly, dahlias, and cosmos bipinnate.
Most of the listed plants can be found on the website by typing the name in the search bar (in the form of a tablet in the upper right corner).
Based on materials from the magazine “Garden of My Dreams”.
Flower garden on the window. Beauty in the countryside.
Do It!
Share this post for your friends:
Friend me:
Articles on the same topic:
- Flowerbed in the sun
- Flowerbed of annuals
- A flowerbed of annuals, another option
- Flowerbed until late autumn
- Flowerbed on a slope
Nuances of multi-tiered flower beds
Before you start assembling the structure, you should consider that it is not too bulky, otherwise the plants that you plan to plant in it will be difficult to see.
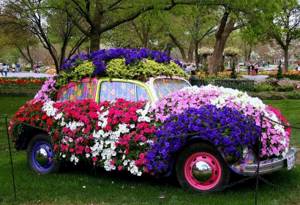
It is definitely worth considering the background; a more common approach for it is a variety of greenery. For small spaces, so-called stepped models are suitable.
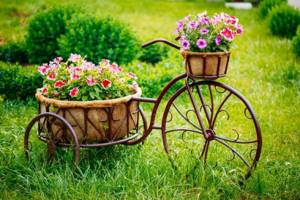
It is important not to forget about drainage. Also, do not forget about the characteristics of the material used for manufacturing. For example, stone and brick flower beds will last for decades, which cannot be said, for example, about wooden ones, which with constant watering will quickly fail.
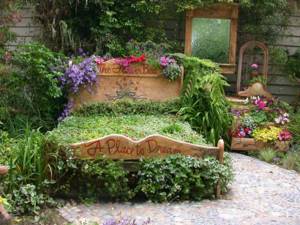
Plastic models are also practical, and they will also be a pleasant addition for many years that will decorate a place for a country holiday. But environmental friendliness speaks in favor of wooden models, so what to choose and how to approach the implementation of creative ideas should be determined by the summer resident himself.
The main thing is not to be afraid to experiment and try, as often unnecessary pallets can be transformed into a luxurious flower garden with unusual and very spectacular flowers.
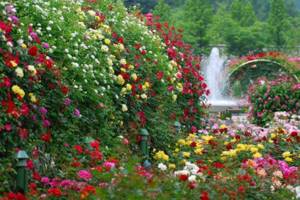
And instead of wasting time on removing construction waste, you can find a use for it. For greater convenience, it is worth placing the flower beds as close as possible to the water source, since, firstly, it will be more convenient to water them, and, secondly, this can be done a little more often. Organizing automatic watering is also a good solution.
STEP FLOWER FLOWER WITH YOUR OWN HANDS - OPERATION PROCEDURE
The length of the flower bed can be determined at your own discretion, but I recommend a width of no more than 1 -1.3 m.
We dug up the selected area, removed the weeds and added compost or old humus to the soil.
Three steps were formed from the earth, edging them with a special border tape (or other suitable material). This is important, since in the rain or when watering the shape of the flowerbed may be disrupted. And moisture in the frame lasts longer.
We planted tobacco in the background of the flower garden (varieties 30-80 cm high). The distance between seedlings and from the edge of the flower bed is 30 cm.
In the middle row, ragwort, balsam and chrysanthemums were planted with an interval of 20 cm between them. To keep the ragwort lush, the tops of the shoots were periodically pinched.
Ageratum was planted in front (height 25 cm).
The soil was mulched with grass clippings and the plants were watered regularly.
By autumn, when they had all bloomed, we removed them and mulched the flowerbed with straw, compost, and leaves in a layer of 2.5-3 cm.
The assortment of plants can be changed every year. For example, use ground cover: petunia, lobularia, lobelia. Or plant thin-leaved marigolds, evergreen begonia, aster, and verbena in the foreground. For the middle, leftover, snapdragon, sage and anhusa are suitable. At the end of the “ladders” are tall cleome, dahlia, cosmos, and verbena.
© Author: Vladimir GEORGENSON, Moscow
