Who has ever encountered construction starting from scratch, i.e. from the immediate laying of the foundation, he will understand what we are talking about. In this situation, it was purely personal need that forced me to take such an action. Having compared everything, I decided to make a concrete mixer with my own hands.
Before you start making a concrete mixer with your own hands, we suggest you look at the description, photos, instructions, and drawings for making another concrete mixer by our subscriber.
Having calculated that in the future house about 40 cubic meters of concrete would be needed to fill the basement, I quickly figured out that transporting it from a neighboring city, which is located 80 km from the future building, would be not only expensive, but too much! It is useless to invite guest workers Dzhamshuts and Ravshanovs - they only have their hands as tools.
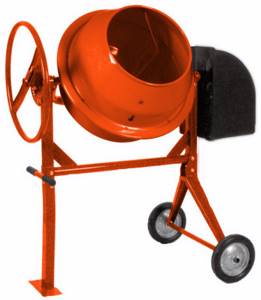
Ready-made units such as concrete mixers, presented in the retail chain, did not cause delight with their appearance and reliability.
We decided to do everything ourselves and started with calculations, measurements and searching for structural elements for the concrete mixer. The Internet can help us, namely the site Umeltsy.ru. Everything was found and we were on our way – through garbage dumps, car dismantling yards and metal collection points. I have never encountered anything similar before, since the “technical” knowledge in the field of engineering is mostly specialization in labor protection.
Calculation of a concrete mixer bulb for a volume of 0.25 cubic meters
Part one
A little math: (CA) 2 = (Ev) 2 + (Bv) 2 (CA) 2 = 402 + 152 =
182500
CA =
427.2 mm
OS = OX = d/2 xCA = 200 × 427.2 = 85440 =
569 .6 mm
D/2 – d/2 350-200 150 OA=OU=OS+SA =569.6 + 427.2 =
996.8mm
AU (circumference) = AB x 3.14 = 700x3.14 =
2198mm
Part two
the simplest: The dimensions of the rectangle are Ev per AU. That is, in this case 300mm by 2198mm
Part three
In order to get an uneven bottom of the concrete mixer bulb, you need to cut a circle with a diameter larger than the diameter of the concrete mixer bulb itself.
This is not an acquired taste: I took a diameter of 740mm
. It could have been more: then the bottom would have been steeper.
But we get it like this:
⌀740 x 3.14 =
2324 mm
The circumference we need is (700 x 3.14) =
2198 mm
We get the value X = 2324-2198 =
126 mm
We delete it as shown in the figure. The inner diameter of the circle depends on the diameter of the crown used + 70 - 100 mm.
For the pear, 2.5 mm steel sheets were taken, leveled with a sledgehammer and cut according to pre-prepared drawings.
The bottom of the concrete mixer bulb is made of 5 mm thick sheet steel.
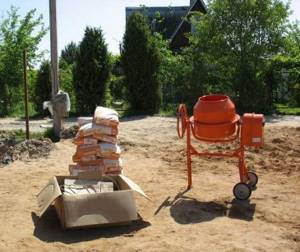
Now the weather is warming up and time is moving towards construction, for this, of course, you need a concrete mixer, after a two-week search in stores and on the Internet, I couldn’t find anything reasonable in price, everything costs more than 10,000 rubles, even used, I think it’s expensive in your store below 15,000 rubles and the volume I haven’t seen anything from 120L, but small ones of 60L for 7000 rubles are nothing at all.
I surfed the Internet looking for homemade concrete mixers and, after looking at several options, came up with a project.
Having purchased a profile 40*20*2 13 meters and a pipe 20*2.8 4 meters, I began to cook everything.
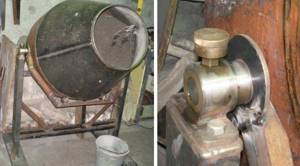
On the first day, I welded a frame for the barrel and a frame on which it would stand and rotate.
We will also need 4 bearings and a hub, I bought the inner bearings from them 25 outer 70, and I took the hub from an old Camry on which the barrel will sit.
I put bearings on the 20th pipe and had to make a cut in 6 places so that the 25th bearing could be put on the 20th pipe. since, taking into account the wall, the outer diameter of pipe 20 is 25.6 mm.
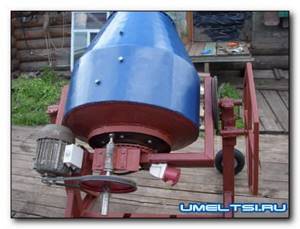
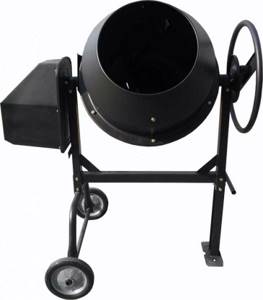
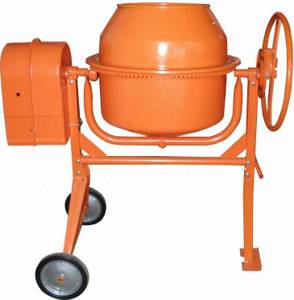
Electric concrete mixer
The essence of such a concrete mixer is a stationary tank and active mixing blades.
Such a unit has both pros and cons.
The advantage of an electric concrete mixer is that it does not require making a sealed hole, as in the manual version.
The downside is the need to install oil seals on the drive axis.
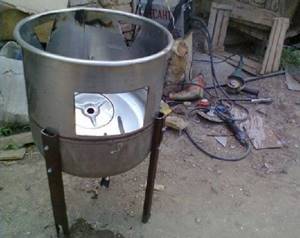
The tank is made of a 200 liter barrel, onto which the walls are welded. The upper part is covered with bars. A profiled pipe is used for the base. The tank is firmly attached. The initial components of the solution are loaded from above, the finished concrete is drained thanks to a shutter with a rubber gasket.
Note!

Lamp for disinfection of coronavirus (COVID-19) - an overview of the best options, as well as instructions for use
How to make a medical mask: instructions for making simple and complex masks to protect against coronavirus (COVID-19)

How to learn to knit and crochet: detailed instructions for beginners
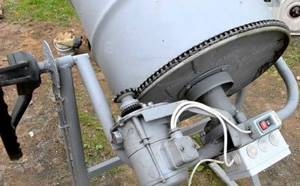
The mixing shaft is made from a car crank analogue, the blades are made from angles and steel sheets welded to them, 3 mm thick. At the point where the shaft exits the gearbox there is an oil seal.
The engine is used from a crane. Its power is 5.5 kW. The gearbox is from there. The motor has 3 phases and the ability to change the direction of rotation.

A tray is placed under the working concrete mixer to collect the water that initially flows out. It is poured back into the concrete mixer.
In conclusion, we note that the concrete mixer we created ourselves is better than its analogues from China. We hope that this article will help you do this necessary thing yourself.
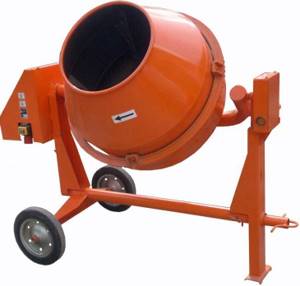
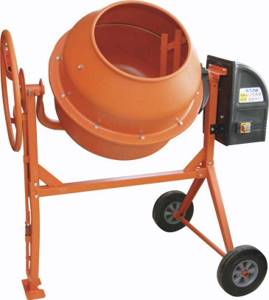
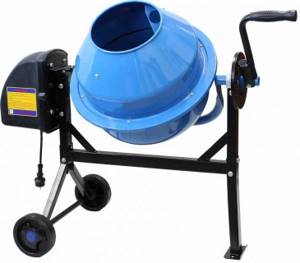
Manual concrete mixer
At a construction site there is not always electricity, and large volumes of mortar and concrete are not always required either. The solution is to make a small-volume concrete mixer that will rotate manually (with a manual drive). The designs of these models are simple and straightforward.
From a milk flask
The simplest manual concrete mixer can be made using an ordinary metal flask (milk used to be sold in these). You will also need pipe cuttings or other scrap metal. The design is simple, such a concrete mixer can be built with your own hands in a couple of hours. The main thing is to weld the frame. Assembling the concrete mixer itself will take a couple of tens of minutes.
Design of a manual concrete mixer made from a milk flask
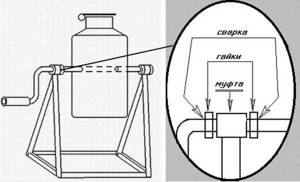
You make a frame and bend a handle from a round pipe. In the upper part of the frame, weld two water couplings (for example). Their internal diameter is slightly larger than the diameter of the pipe used for the handle. The pipe is passed through the flask and welded to the body.
How to find the center of gravity
In order for the barrel to spin easily, you need to find the center of gravity. To do this, you can put it on some thin object, and move it forward/backward to find this very center. This is where you will need to pass the handle. Having passed the handle, it is attached to the walls of the case. This is where complications can arise: flasks are usually made of aluminum alloy, and the handle may be made of steel. It will not be possible to connect them by welding. The only available solution is cold welding. He is quite real. The remaining modes - with bimetallic gaskets or argon-arc welding at home - are not implemented. Another way out is to weld plates onto the handle, which are riveted to the sides of the flask.
Types of concrete mixers and materials used
Any concrete mixers consist of the following main parts:
- working capacity;
- mixing blades;
- drive with transmission;
- body (frame);
- mechanism for unloading the solution.
According to the method of setting the torque, there are 2 types of installations - manual and mechanized .
In the first case, rotation is done manually, and the transmission increases the rotation speed of the working body. Mechanization is provided using an electric or gasoline engine.
According to the design of the working tank, the following main varieties are distinguished.
Milk can (flask)
It is quite easy to make a manual concrete mixer from such a container. A pipe is passed through the center of gravity of the can, going out on both sides. The pipe must be securely fixed in the walls of the flask, for which cold welding .
This design is installed on the bed posts . On one side, the pipe bends to form a handle, by which you can twist the container manually. The second pipe outlet is installed on the frame in a bearing. For such a simple installation, a standard 40 liter flask .
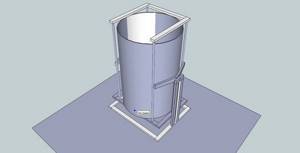
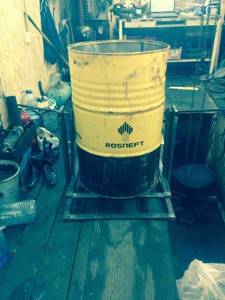
From a barrel
If you use a metal barrel up to 100 liters , then the manual installation is made similarly to the previous option. 200 liter drum , an electric drive .
We recommend: Wood sander - which one is better to choose? Rating of popular models and manufacturers
In this design, it is necessary to seal the container with a lid . A shaft is passed through the bottom and lid of the barrel. When assembled, the container is installed on the frame posts so that the axis of rotation is inclined.
A large gear for a chain drive or a belt drive pulley is attached to the shaft from the bottom of the barrel. Rotating torque is provided by an electric motor with a power of 1-1.2 kW . A window for ingredients is cut into the bottom closer to its edge. When loading, it is located at the top, and when unloading the solution, it is in the bottom position.

Washing machine option
This household appliance just begs to be used as the basis for a concrete mixer. The most suitable option is top loading machine . It is better to replace the activator reservoir with a metal barrel.
A shaft of the same diameter is installed in place of the gearbox. The machine threads are used to attach blades and brackets, which must be well balanced. The drain hole is plugged. This homemade concrete mixer is quite suitable for preparing a small amount of concrete .
See: Hand router for woodworking
DIY electric concrete mixer from a barrel and a washing machine engine
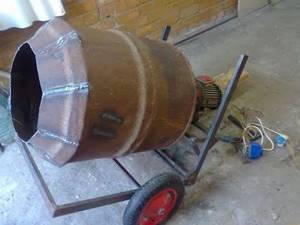
This concrete mixer is gear type. To make this model you needed:
- galvanized steel barrel 180 liters (diameter 560 mm, height 720 mm);
- washing machine motor - 180 W, 1450 rpm;
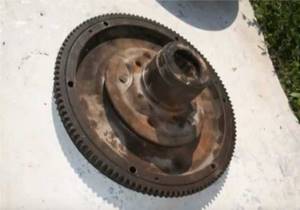
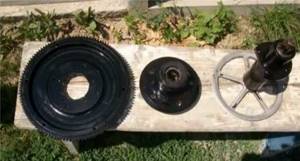
- flywheel and starter gear from Moskvich 412;
- two pulleys from a washing machine with a diameter of 300 mm and 60 mm;
- wheels from a garden cart;
- scrap metal for the frame.

Gears, wheels - everything is old, everything was in the garage
This is also not new
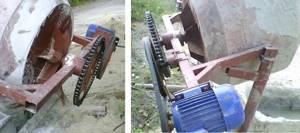
First of all, we clean everything from rust, treat it with a rust converter and cover it with primer.
We make a frame from pipes and channels. We strengthen the corners of the frame by welding metal plates. Everything must be tough and reliable. We are making a serious crossbar: a barrel of solution will “hang” on it, and everything will vibrate and spin.
Collapsible mixer from a barrel
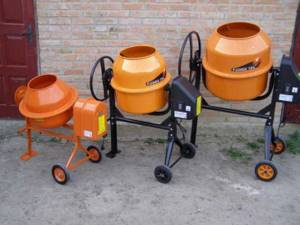
Photo of homemade concrete mixer units (may be useful)
Each or almost every self-made concrete mixer has some original solutions. Few people repeat the design completely without making any changes - you have to adapt to the parts and components that are available. There are some interesting solutions in the photo.

If you leave the bottom of an ordinary barrel without reinforcement, the thin metal (3-4 mm) may not withstand the load and will simply twist. Therefore, it is better to weld corners or U-shaped bars
Organization of transmission using a motorcycle chain and a second belt
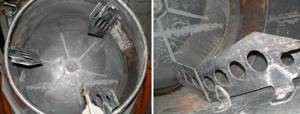
The shape of the blades is a complex thing. They need to improve mixing and not stop the concrete from falling down
How to make a container movable so you can turn it inside out
How to do it yourself?
When choosing the design of a homemade concrete mixer, you must proceed from the availability of a home workshop and the necessary equipment . You should take care of the following tools in advance: welding machine, grinder, electric drill, vice, hacksaw, chisel, set of files, pliers, screwdriver, hammer, sledgehammer, set of wrenches, adjustable wrench, metal scissors, calipers, metal ruler.
Working capacity
Its volume is selected based on need. For example, when building a basement, small structures, or arranging paths, it is enough to find a sealed tank with a capacity of 40-60 liters , but when building a house, you will need a container with a volume of at least 100-120 liters .
Large containers should be made of metal, but for miniature installations, durable plastic can be used.
For homemade devices, any cylindrical, sufficiently strong containers of the required volume are of interest - metal or plastic barrels, a large saucepan, a washing machine tank or heating units (for example, Ariston), a milk can, etc.
The manufacturing process can be considered using the example of a barrel. The role of mixing elements can be performed by a comb formed inside the container . The comb is made of a metal strip, to which nails 20 cm long are welded in a row with a pitch of 8-12 cm.
Two such parts are welded across the entire height of the barrel opposite each other. , flanges with a bearing are attached on both sides , after which a hole is drilled and the shaft is threaded through. To strengthen the shaft entry point, it is recommended to strengthen the bottom and cover by welding cross-shaped slats. The lid is hermetically welded to the barrel body. The loading hole can be located on the bottom or on the side .
Body and base
The concrete mixer body must withstand significant loads during operation caused by a rotating container with a full load of solution. The base of the housing must ensure its stability during operation, despite vibrations and torque.
To do this, the width of the support is selected to be approximately twice the diameter of the working container. The drum is installed on vertical racks, which are reinforced with oblique supports.
We recommend: Advantages of a split system for an apartment
For the base, it is recommended to use a corner measuring at least 10x10 cm . The tank is installed at a height of at least 110 cm. A lower location makes it difficult to unload the solution. It is better to make all connections by welding, but in the absence of a welding machine, a threaded connection using bolts with a diameter of at least 20 mm. For small concrete mixers, the body can be made of wood - timber and board.
Engine
In homemade devices, most often, rotation is provided by an electric motor with a power of 1-2 kW .
It attaches securely to the base of the frame and can be adjusted to ensure alignment.
Torque is transmitted to the shaft of the working container using a chain or belt drive .
To do this, a gear or pulley of the appropriate diameter is pressed onto the working shaft. It is recommended to ensure the drum rotation speed is within 20-30 rpm . To do this, use the desired gearbox on the engine and select the diameter of the drive and driven gears (pulley).
Final assembly
Direct assembly of the concrete mixer is carried out in the following order:
- Installation of the housing and strengthening of the base. If necessary, it is weighted.
- Installing and securing the working container on vertical posts. The best option is to position the shaft obliquely.
- Installation of the electric motor and its gearbox on the frame so that the output gear (pulley) coincides with the location of the gear (pulley) on the drum shaft.
- Installing and adjusting the transmission belt or chain .
- Installation of electrical network , starting and control devices.
Recommended reading: DIY knife sharpener