Advantages and disadvantages
A wooden fence for a private house has the following advantages:
- Availability of source material.
- Demonstrating personal skills and mastery.
- Practicality.
- Safety from an environmental point of view.
- Ease of construction and repair work.
- Economical.
- Variety of design solutions.
- Possibility to choose the desired shade yourself.
- Aesthetics.
In addition, wood has the ability to maintain a comfortable temperature. She is also friendly with materials such as brick, stone, metal, concrete. In addition, installing a wooden fence with your own hands allows you to use original geometry and shape.
The disadvantage of wooden fences is the need for constant maintenance.
Wood processing for fence
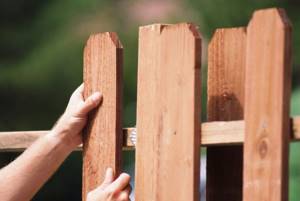
In order for a wooden fence to last longer, the wood must be treated. It doesn’t matter what type of fence you choose – coating against fungus, rot and mold is always necessary. The varnished layer protects against moisture and repels insects and rodents.
You can decorate the tree in any way you like, experimenting with colors, aging or geometry. It combines delightfully with stone, metal, brick and other materials. To strengthen corners and complex structures, use metal corners and rods.

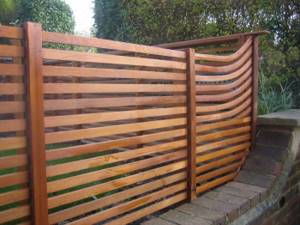
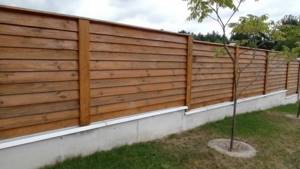
If you prefer natural shades and texture of wood, use stain or translucent varnish. This fence is very noble and attractive. To paint bright colors, use special wood paints with protective properties to prevent the coating from cracking.
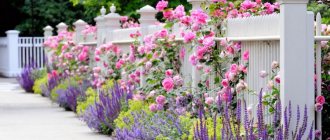
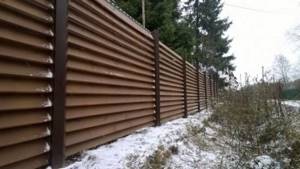
Snow-white fences look fresh, laconic and aesthetically pleasing, standing out as a bright spot against the background of greenery. If you want something discreet and inconspicuous, choose brown, gray and green shades. A black wooden fence is very stylish, and the bright colors immediately create a festive summer atmosphere.
Installation of wooden fence posts
Any construction of wooden fences begins with the installation of supporting elements. For fencing up to 2 meters high, square or round beams with a maximum transverse dimension of 90-100 mm are used. Higher fences of 2.5-3.0 m must be installed with concreting of the base; the cross-section of supporting elements for blind fences must be proportionally increased by 25-30%.
To fence a dacha or country house, the following pole installation schemes are most often used:
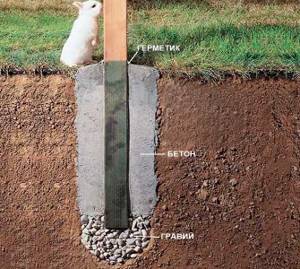
- Concreting in a well drilled with an auger drill to the installation depth;
- Fixing wooden poles by filling the well with crushed stone, rubble, broken bricks, and gravel screenings;
- By driving a wooden support into the ground. Such schemes are often used as temporary ones, with subsequent replacement with metal or concrete supports;
- By installing a wooden beam inside a steel glass or pipe section driven into the ground.
For your information! The small specific gravity of wood makes it relatively easy to install wooden poles even alone; it is much more difficult to solve the problem of how to align the supports in one plane without resorting to the help of neighbors.
We install wooden fence posts in concrete with our own hands
If you have to install wooden supports yourself, without helpers, then the easiest way would be concreting or filling with rubble stone. This method allows you to easily align the pillars using a marking cord and a couple of building levels.
Along the marked contour of the fence, you will need to drill the required number of holes, with a diameter of 10-15 cm larger than the maximum size in the cross section of the support. The easiest way is to use a garden auger with a diameter of 15-20 cm. Before drilling, stretch a steel or paper non-stretch rope or twine and hammer in pegs 20-25 cm high. After drilling, the bottom of the well is covered with fine gravel screenings, the layer thickness is 5-7 cm. The screenings must be well compacted and leveled to form a flat bottom. Next, install the corner or outer fence posts.
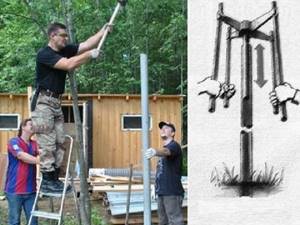
Before concreting the well, the outer supports must be leveled most carefully, since all the other pillars of the wooden fence will have to be placed on them. To align the position of the support, three main parameters are used:
- The distance from the marking cord to the head of the post, so that there are no errors in height, the stretched thread must be leveled horizontally using a building level;
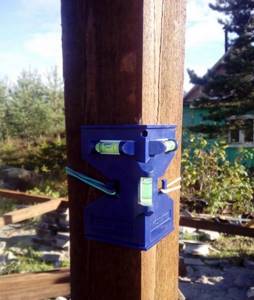
- Indications of two building levels in mutually perpendicular planes.
If possible, it is better to use the device shown in the photo. If this is not available, you can take two building levels and secure them to the planes of a square beam with an elastic band. After aligning the pillars, the position is fixed with wooden spacers or pieces of building material. Concrete is poured into the well in small portions so that the mass does not hit the wooden beam of the support.
Leveling is performed in the same way when using a layer of gravel or rubble material instead of concrete. The fastening mass is poured and compacted in small portions, 5-6 kg each.
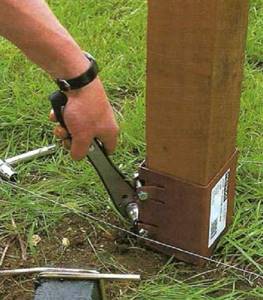
How to hammer and level a wooden post
For low wooden fences, it is easier to drive the supports into the ground than to fool around with drilling and concreting. When using oak beams, you only need to sharpen the lower end by symmetrically chipping, and you can hammer in. In order not to break or split the top of the support, it is necessary to attach a board made of soft wood, linden or poplar to the head.
As the timber is hammered and settled, the position of the support must be periodically monitored using a building level. Until the fence post is buried more than a third into the ground, the tilt can be corrected by simply knocking out the side surface; after this, the soil around the post is compacted with blows of a sledgehammer.
Wooden posts made of larch cannot be driven directly, like oak ones, due to the high tendency of the wood to split. In this case, a steel pipe or crowbar is first driven into the ground, and thus a thin guide hole is obtained, after which the larch fence post can be installed and driven in.
Classification of wooden fencing
Before you start building a fence, you need to decide on the answers to the following questions:
- purpose of the fence;
- its height and type;
- opening method;
- whether any other materials will be used;
- what fence posts are planned from;
- type of wood;
- price.
Wooden fences can be of the following types:
- Christmas tree. The design in this case is similar to solid siding. But, if you look closely, you can see gaps. This rather unusual design looks quite impressive.
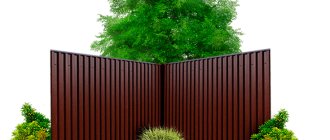
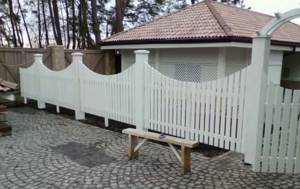
- Classic. It is a tightly fitted canvas consisting of vertically or horizontally arranged boards. The base is a foundation made of brick or stone. The pillars can be made of brick, wood, metal or stone.
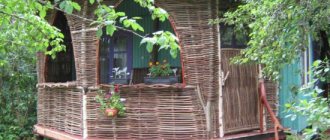
- Wattle fence. This type of fencing creates warm emotions like no other. The first mentions of it go back centuries. Pletni are distinguished by their unique decorative effect.
- Ranch. This type of fence originated in the USA. It originally served as a cattle fence. But today there are also beautiful variations that can be safely used to fence a site.
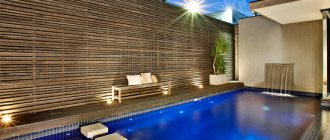
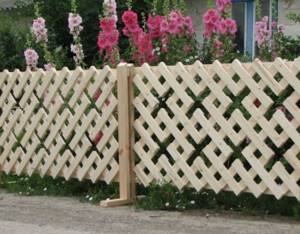
- Lattice. This is one of the most original fence options. Such structures look light and airy and can serve as a decoration for the area.
- Palisade Has a long history. Nowadays it is usually used exclusively for decorative purposes.
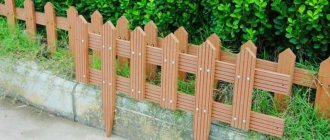
- Fence. Such fences are the most common. Their popularity is so great that in addition to wood, they also produce metal picket fences. A wooden picket fence is a structure made of picket fences, which can have different sizes.
- Chess. This is a combination of three types of fences: a regular picket fence, a classic fence and a picket fence. The essence is a picket fence nailed in 2 rows. The fence turns out to be blank.
Decorating a wooden fence with your own hands
From the very beginning, a wooden fence looks attractive, but arranging a wooden fence is far from such an easy task. But over time, its appearance may become familiar and boring. In order for it to continue to please you, you need to decorate it. There are many ways to change the appearance of your fence. It can be:
- paint;
- decorate with painting;
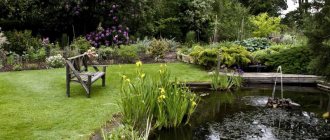
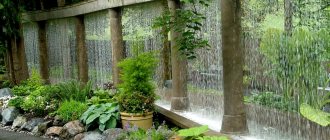
- decorate with flowers;
- carry out partial modernization;
- decorate with a photo grid;
- decorate with available materials.
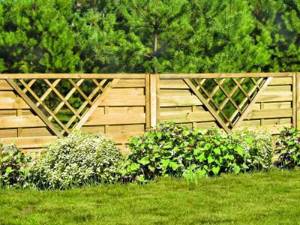
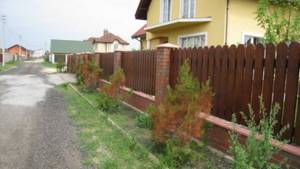
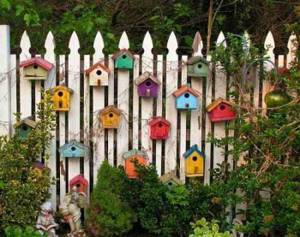
Small bushes along the fence

Decorating for the kids' joy
Along the fence and picket fence, for example, you can plant climbing roses, ivy or clematis, as well as flowering bindweed. Such fences will cease to be ordinary and will begin to delight the eye with their beauty and ease. Any fence can be painted; all you need to do is use your imagination. Each picket fence can become a nesting doll or any fairy-tale hero. Children will be delighted with this innovation.
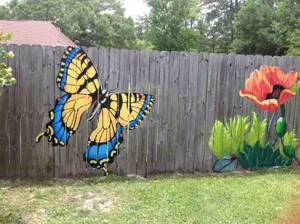
The drawing will create the mood
You can draw a rainbow, clouds, flowers and your favorite fruits. On the partitions you can depict snow-capped mountain peaks or an endless sea surface. It’s worth trying to draw a jungle with its inhabitants. If you know how to draw three-dimensional drawings, then this will come in handy.

Rubber boots can also be used
The subject matter can be very diverse. These can be landscapes and graffiti. Even plastic bottles can add beauty. They are used to make containers for flowers, which are then hung on the fence. Colored rubber boots can also be used to replace hanging pots, as in the previous photo.
Decorating from scrap items and materials
If your fence has become covered with cracks and holes over time, disguise these imperfections with colored glass and decorative stones.
The fence in the sun will shimmer like a fairy tale. You can even use bottle caps. It is worth remembering that decorating a fence is done mainly using scrap materials.
Color spectrum
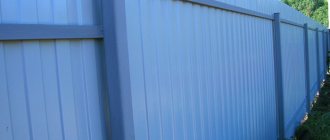
There were times when fences made of wood were not painted, preferring the natural color of the wood. But today many owners prefer to improve their fencing structures.
The fence color can be any. You can even use varnish rather than paint, thereby preserving the natural pattern of the boards. Using varnishes of different colors, you can give wood of one species a shade characteristic of another.
Some types of fences like to be painted in different colors. You can, for example, design the grid in the form of a set of colored pencils. This way it will look much more interesting.
A similar solution can be used to fence a playground. If the house has a painted facade, then it would be more appropriate to paint the fence in a corresponding shade.
In conclusion, we note that if you decide to make a wooden fence with your own hands, then think carefully about everything and study all the necessary information before doing so. Remember that the fence should perform not only a practical function, but also a decorative one. Good luck!