DIY planters made from towels and cement
Planters made from towels and cement look quite unusual and creative!
To make such a pot you will need a bucket of mixed cement. Dip the prepared towel into this bucket and soak well.
Then remove the soaked towel from the bucket. Turn the bucket upside down and place it on some hill.
Hang the towels on the bucket so that the edges hang freely.
Wait until the towel is completely dry.
The finished flowerpot can be coated with paint.
The same idea can be used to create a garden candlestick.
Peculiarities
Wooden flower pots, like any wooden products, evoke a feeling of unity with nature, increase the degree of warmth and comfort in the interior, creating a welcoming atmosphere.
We can talk about the benefits of wooden products for a long time.
- Environmentally friendly. They are made using 100% natural materials that are safe for human health.
- Durable and reliable. They do not break like ceramics, and do not crack under the influence of negative temperatures or mechanical loads, like plastic.
- Mobile. Due to their light weight, they are easy to move around the area, which is very convenient when changing compositional solutions in landscape design and floristic design of different segments in the garden.
- Hygienic. Many types of wood have antibacterial activity, so harmful organisms do not take root in such an environment.
- Breathable. Good air circulation inside the wooden flowerpot prevents overheating and drying out of the earthen clod.
- Reasonable price. Of course, we are not talking about exclusive products made from valuable mahogany or ebony wood, the purchase of which costs a tidy sum. There are a lot of original solutions from less expensive types of wood: linden, aspen, larch, ash, beech, birch, alder. The most affordable options are homemade flowerpots made from different parts of trees (stump, trunk, bark) or lumber (timbers, boards, logs).
The main disadvantage of wooden structures is hygroscopicity.
Contact with water causes deformation of their surface and provokes the development of rotting processes. Therefore, it is important that the outside of the product is treated with special moisture-proofing compounds, and that the inside has a waterproofing insert.

From knitted napkins
A similar idea for pots can be used for crocheted napkins.
To keep the delicate white napkins white, use PVA glue instead of cement.
Delicate candlestick made of knitted napkin
Required materials and tools
When making decorative containers, the tools used are scissors, nails, a hammer and a glue gun. Tabletop and hanging flower pots are made from plastic bottles, old boots, burlap, concrete, and clay. Among the abundance of ideas, they choose a concept that suits the style of the site, and calculate the financial possibilities.
- Plastic is cheap and comes in an abundance of colors. Do-it-yourself plastic flower pots have gained recognition due to their ease of operation and the ability to choose the desired color. They produce models for large floor, table and hanging flowers. There are flowerpots for miniature succulents, which are used to create compositions in the spirit of the Mexican desert. It is easy to make drainage holes in the plastic and treat it against putrefactive infections.
- Wooden containers serve as thermal insulation for plant roots. Ecological material is pre-treated against insect pests and moisture. Useful for creating a composition in a rustic or ethnic style. Cheap material is recommended to be painted, varnished or decorated with knitted parts.
- Glass pots. Glass containers allow you to monitor the amount of moisture in the root zone. Unusual material will complement the high-tech style.
- Metal flowerpots will easily change the interior. Stands made of metal pipes look interesting and fresh.
- Clay flowerpots are a popular option. Clay pots are offered in any size and decor. The disadvantages include the inability to arrange drainage for plants and some heaviness.
- Stone flowerpots are a long-lasting garden decoration. The containers will last for several decades without changing their original appearance. Pots with conifers should be placed in them, creating a monumental composition.
Decorative flowerpots do not have holes for drainage, which can lead to rotting of the plant root system. It is recommended to fill the space between the flowerpot and the pot with small stones or line it with pieces of moss to avoid problems.
From tree branches and bark
Video
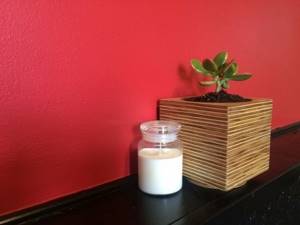
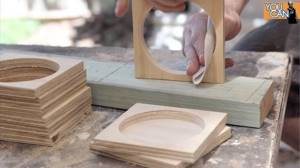
Detailed instructions for creating a simple flower pot made of plywood. For the lazy ones there will be a video at the end.
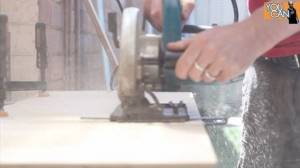
Step 1.
Cut the plywood into squares 140*140 mm (plywood thickness is 10 mm, but in principle you can use scraps from some leftovers)
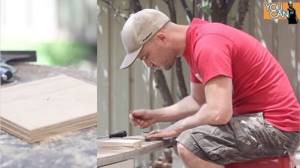
Step 2.
We measure the center of the square for drilling.
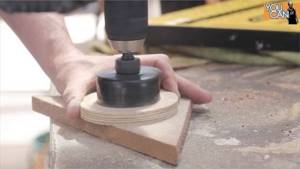
Step 3.
We make holes in all the squares except one - it will be the base. We make holes using a crown and choose a diameter that is suitable for your (or not your) flower pot.
In one of the cut out circles we make another hole, 20 mm smaller in diameter; further on we will describe why this is necessary.
Step 5.
We glue all the squares together, using the last one without a hole.
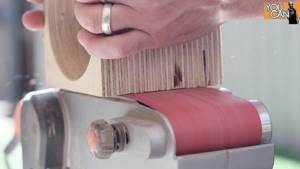
After everything has dried, we go through it with a sander.
We make drainage holes (10 mm) and glue the plywood circle to the base.

We seal the holes with electrical tape so that in the next step the epoxy does not leak out of the holes

Step 10
Coat the inner walls with epoxy resin and fill the base
Drill through the epoxy in the center with a drill of a smaller diameter (5 mm)

Step 12
We grind with a nozzle with a finer grain and blow through.

Step 13
Coat the outer surface with a 50:50 mixture of linseed oil and turpentine. We make at least 2 layers, but it would be nice to do all 4. This will protect our product from getting wet.
Flowerpots and candlesticks made from clothespins
You can use clothespins to make both flowerpots and original candlesticks.
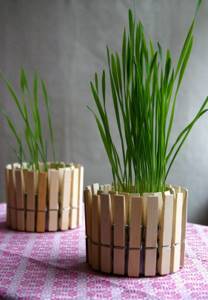
Take an empty tin can. Attach clothespins one by one to the edge until you have gone around the entire jar.
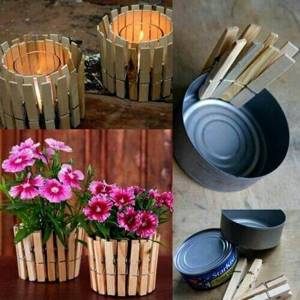
If desired, clothespins and a jar can be painted in any color and made into a decorative decoration.
Advantages of wooden flowerpots
Flowerpots made from wooden parts are slightly less common than plastic or ceramic ones.
At the same time, these designs have a number of obvious advantages:
- The material is very easy to process, so not only a professional carpenter, but any of us can make a flowerpot or flowerpot with a minimum set of tools and dexterity.
Note! The second aspect of this advantage is the wide range of design possibilities. Using a saw, jigsaw and hammer, you can make a flower pot of almost any shape and size.
This design will decorate any area
- The price of the products is quite low: the work does not require either expensive raw materials or complex devices. In principle, pots can be made literally from what is at hand, spending only on fastenings and finishing.
- If the wood protective treatment technology is followed, the flowerpot can last up to ten years. At the same time, worn parts are replaced quite quickly and easily, so repairs will not be difficult either.
As for the disadvantages, the main problem that we will have to face is the hygroscopicity of wood. When in contact with wet soil, the walls of the flowerpot can either begin to deform or rot, so we will definitely include moisture-proof and decorative treatments in the manufacturing algorithm.
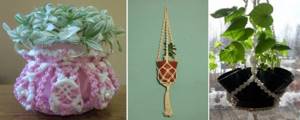
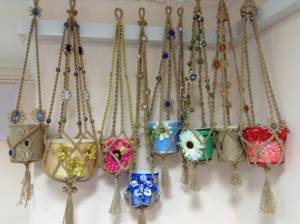
From the rope
Hanging flowerpots can be made from rope using a knotted weaving pattern (see picture below).
Scheme for weaving a flowerpot from a rope with knots
Instead of knots, you can use beads to connect.
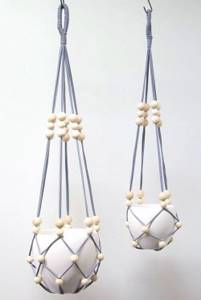
And of course, using the macrame weaving technique, you can make very beautiful flowerpots for your flowers.
Popular models
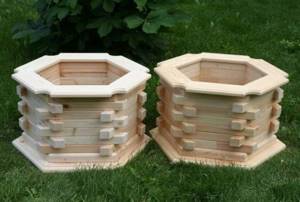
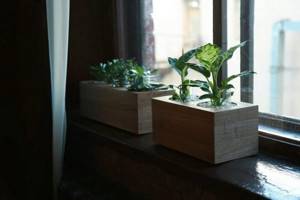
Cubo De Madera
Flower pots are a closed, seamless structure with a clear, laconic shape and a round hole for planting plants. They are easily integrated into any modern interiors of office spaces, apartments and houses, cafes and restaurants. But they look best in eco-design, minimalism, hi-tech, loft and urban style. Such pots increase the attractiveness of living plants, emphasizing the graphic nature of their silhouettes with their shape and repeating the foliage patterns with the linear structure of wood.
Compositions made from artificial flowers and decorative branches look no less expressive.
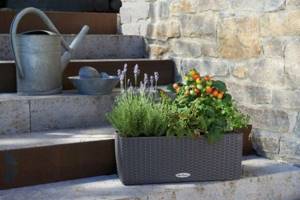
With built-in automatic watering system
The demand for flower pots with automatic bottom watering is driven by the quality and ease of caring for green pets. The container is equipped with an indicator of water level, substrate dryness and a drainage tube.

Advantages of models with auto-watering function:
- strict control of water supply to plants;
- retain water reserves, and there is enough of it even for moisture-loving plants;
- relieve the owner from the need for manual watering for 2–4 weeks;
- suitable for any flowering and decorative foliage plants;
- the substrate is rich in minerals that regulate the pH level of the soil and ensure normal root development.
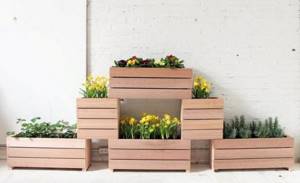
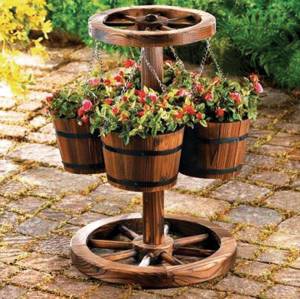
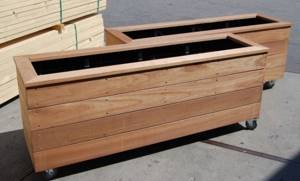
On rollerskates
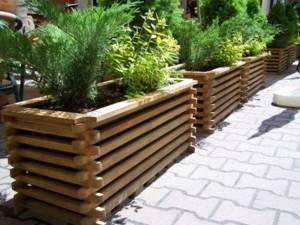
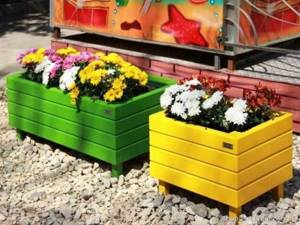
Floor planters for flowering annuals and perennial dwarf shrubs are indispensable for creating spectacular hedges by lining up a row of flowerpots. The use of flower beds of different heights allows you to create relief multi-tiered compositions. The design of such flower pots is extremely laconic: simple body shape, strict sides, natural texture of the boards. Equipping the drawers with small rollers ensures mobility of the structures.
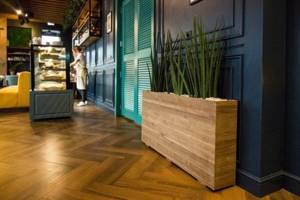
Under the window sills
Flower pots in the form of elongated boxes in a classic style are used for vertical gardening in kitchens, living rooms, loggias and are attached under windows or on walls. They are suitable for planting indoor herbs, ampels, and low indoor potted plants with erect stems. These products look great in Provence, eco, loft and scandi design styles.
Planters made of ropes and shells
Flower pots made of plaster
We will need:
- Siliconized form
- Brushes
- Gypsum – 400 g
- Plasticizer for gypsum – 8 g
- Acrylic paint
- 300 ml water
Stage 1
First, add a plasticizer to the water and mix the composition, then add about 400 g of gypsum. It is necessary to mix everything to a homogeneous consistency so that there are no lumps. Pour into the mold. Then tap the mold well so that all air bubbles come out. Take a tube and make a hole in the center of the mass.
We wait approximately 12 hours. The flowerpot is ready.
Stage 2
Level the bottom with sandpaper. We apply moisture impregnation to the pots, because... gypsum tends to absorb water.
Stage 3
You can decorate the finished pots as you please. Choose a suitable color and paint. Or choose a complex design.
Flowerpot made of stones
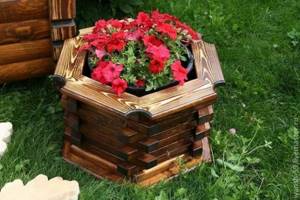
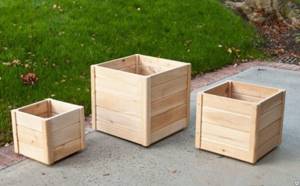
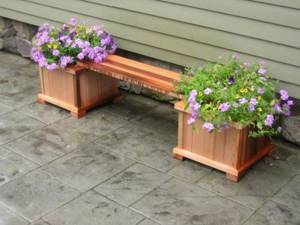
From wooden blocks and boards
We will need:
- Bars 20×20 mm and boards 10 mm thick
- Self-tapping screws. It's better to take extra. Nails will also work
- Drill
- Wood glue. Wood glue
- Composition for wood processing. This way we can protect our future product
Stage 1
It’s worth mentioning right away that the selected sizes of materials are suitable for a small plant.
First, we assemble a frame from cube-shaped bars. We cut out the bottom and walls from the boards. Remember that all parts must be thoroughly sanded. Next we drill several holes in the bottom.
Stage 2
We assemble the entire structure. We fasten all the elements using self-tapping screws and glue.
Stage 3
If desired, impregnate the finished flower pot with a moisture-proofing compound. You can also paint it or sand it.
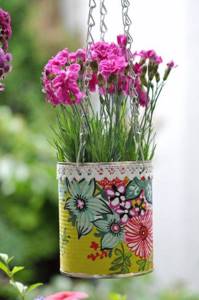
Pots made from tin cans
View entryAdd title
Today you can find a variety of beautiful flowerpots in stores. But you always want something interesting and creative. In this case, ideas for creating flowerpots with your own hands will come to your aid.
Therefore, we tried to collect the most interesting ideas for flowerpots and candlesticks.
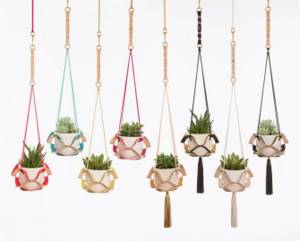
Is it difficult to weave a flowerpot?
Wicker flowerpots are equally appropriate in a room, on a veranda, on a balcony, or on the street. For those who still find it difficult to make flowerpots using the real macrame technique, tutorials are available on YouTube on how to easily and simply weave flowerpots without knowing how to read macrame patterns.
This flower pot is made from tape, cord or rope, the length of which is determined by the size of the flower pot. The ends of the rope are tied, forming a “figure eight”, in the middle of which a pot is placed, and then several loops of a closed rope are folded in such a way as to form a suspension. The whole process takes a few minutes.
But, of course, pots woven using the macrame technique are much more aesthetically pleasing.
For weaving, you can select cords of different colors and combine them in one product.
- Do-it-yourself dolls - the best ideas on how to make stylish, beautiful toys and step-by-step instructions on how to sew a doll (110 photos)

What can be crocheted, ideas for handicraft lovers
- Day-night curtains: features, advantages and disadvantages (design photo)
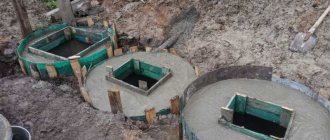
From cement
We will need:
- White cement
- Thick fabric
- Water
- Brushes
- Buckets
- Acrylic paint
The principle is not particularly different from the first option.
Stage 1
Take a couple of buckets and cover them with plastic wrap. Leave it like that and cut out a circle from the fabric. We wet the workpiece with water so that the fibers absorb the cement mortar well.
Stage 2
Let's move on to preparing the solution. Add cement to the water and stir until medium viscous. We completely immerse our fabric blank there. Leave for a couple of minutes.
Stage 3
We pull the rag over the top of the bucket, leaving edges on all sides and straightening them. The back part should be longer. We make a drainage hole in the center. We wait a few days until it dries completely.
Stage 4
Carefully remove the pot from the bucket. We moisten it with water and cover it with another layer of cement on all sides for strength.
Stage 5
After drying, sand the resulting surface. We decorate the pots with paint. Ready.