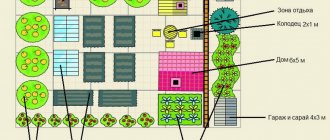
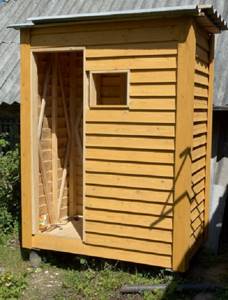
Plan
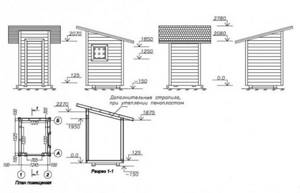
Detailed plan of the shower room from different angles
Before you go to a hardware store and purchase materials, you need to find out a number of questions for yourself:
- determine the features of the foundation
- select available materials for the manufacture of walls, doors and floors
- select a tank of sufficient volume
- think over a way to supply water and heat it if necessary
Before starting construction, large or small, it is necessary to draw up a detailed plan. It will help you visually see the object on a scale, draw up an estimate and calculate the full cost of construction.
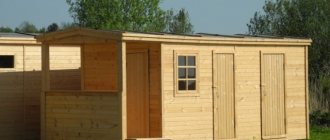
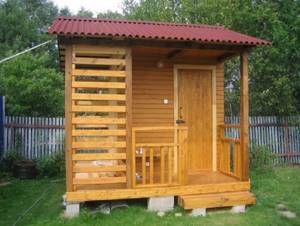
In small summer cottages, to save space, it is convenient to combine several buildings under one roof at the same time, placing them in sections. Such buildings take up little space and are easy to maintain.
Choosing a suitable place
The open area promotes uniform heating of water throughout the daylight hours
Before starting work, choose the location of the shower. It must be easy to maintain and comply with legal regulations. For this purpose, a secluded corner, located at a great distance from the wells and wells, is suitable.
An area open on all sides, not cluttered by trees and tall bushes, will provide access to the sun during the day.
Stages of construction of a summer shower
Have you made a plan, purchased all the necessary materials, and chosen the ideal location? You can begin a fun and exciting activity - building your own shower.
It is performed in the following sequence:
- install a drain
- welding a metal frame
- sheathing the walls
- install doors
- if necessary, arrange the interior space
Let's take a closer look at each stage.
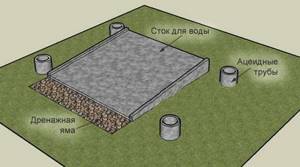
Shower drain
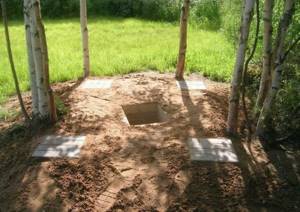
Construction of a drainage pit for draining used water
During active use of the shower, a reliable drain will be required. You need to think about its design at the planning stage.
To drain water, organize:
- drainage well
- cesspool
- septic tank
The ideal option for draining water in a dacha is a drainage pit. It can be dug right under the shower or not far from it.
The size of the drainage pit depends on personal preferences, the characteristics of the shower and the number of active users.
Its displacement should be twice the volume of the shower tank. This will allow you to avoid overfilling the drainage pit with used water during operation.
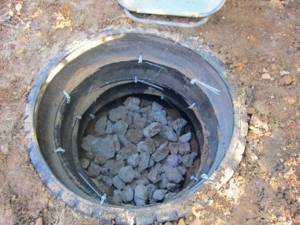
Old wheels will prevent premature collapse of the drainage pit
To avoid crumbling, the walls of the drainage pit are reinforced with sheet metal, bricks, boards or old wheels. The hole is filled with coarse gravel, a layer of sand is placed on top and lightly compacted.
Foundation
Installation of a cabin without a foundation
In summer cottages, it is quite common to install a shower without a permanent foundation. When installing temporary buildings, this option is quite acceptable. In this case, cinder blocks or bricks installed in the corners serve as the basis for the shower.
Strong winds may cause the shower stall to tip over. Digging the side posts into the ground will help prevent falls. If desired, the racks can be concreted.
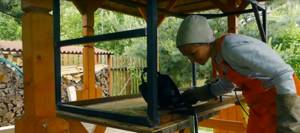
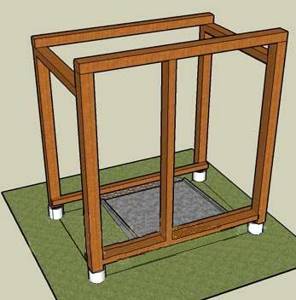
Metal carcass
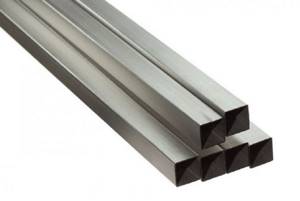
Profile pipe with a square cross-section is excellent for making a frame
The simplest option is to build a shower using frame technology. The work is carried out in the following sequence:
1 The racks are made of profile steel pipe with a square or rectangular cross-section with dimensions of at least 40x40 mm. To make the frame, you will need four main posts and one additional post for installing the door.
2 As a reliable connection between the racks, use horizontal jumpers made from the same profile pipe. Jumpers are installed at the bottom, top and middle of the structure.
When making the frame, it is necessary to take into account the dimensions of the tank and provide horizontal crossbars on the roof in accordance with its dimensions.

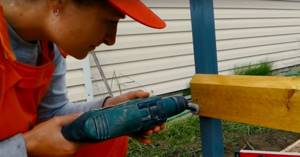
Pipe cutting
3 A small shower 2.2 x 1.2 m is usually quite enough for a summer house. Based on these dimensions, the profile pipe is marked and cut using a grinder. All frame elements are laid out on the ground or workbench. They are placed geometrically correctly and in the same plane. Check the correspondence of diagonals and angles.
4 The most reliable way to attach metal elements to each other is welding.
Pipe welding
5 However, if it is not possible to make a welded frame, metal corners and metal screws or screw connections are used as fasteners. The fastening is reinforced with steel gusset corners.
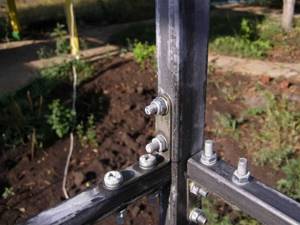
Fastening the corners
6 The contour and transverse elements of the frame are welded or bolted together, leaving openings for the door and holes for ventilation.
Strengthening fastenings
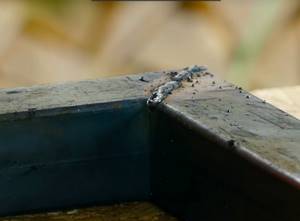
7 Welding seams are thoroughly cleaned with a grinder.

Sanding seams
8 All frame elements are cleaned of dirt. Then they are primed and treated with anti-corrosion agents. The top is painted with waterproof paint or varnish in several layers.

Painting
Tank installation

Container for water
To store water, large-volume tanks made of the following materials are most often used:
- plastic
- black steel
- of stainless steel
- galvanized metal
In a finished tank with holes for showering and water intake, you need:
- install a water supply hose
- install the crane
- install a spray nozzle
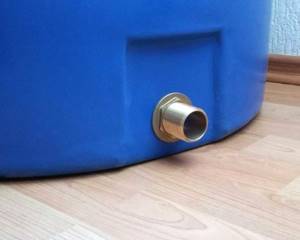
Water hole
If you use a regular container, you will have to drill the holes yourself. Such tanks require painting in dark colors and only after complete drying are they installed on the roof.
The size of the tank is chosen taking into account the number of residents. If necessary, install two interconnected containers.
The dark-colored tank heats up perfectly from the sun and provides warm water for the whole family
You can fill the tank with water manually. However, it is much more convenient to automate the process. A pumping station will help supply water in the absence of a centralized water supply.
On hot days, the roof tank heats up quickly and cools down slowly. It allows you to wash yourself with warm water without any problems. However, in cloudy weather and with the onset of cool autumn days, the water heats up slowly and often remains cold.
A heated tank will provide your family with warm water in cool weather
During this period, it can be difficult to wash comfortably. Installing a heated tank will help solve this problem.
You can equip a heated shower using one of the options:
- buy a metal tank with an installed heating element
- install the heating element into the system yourself
Also, ready-made water heaters are often used to heat water in summer cottages:
- flow-through
- cumulative

Heating water with a solar collector
Using a solar water heater installed on the roof will eliminate energy costs and provide hot water in sunny weather at any temperature.
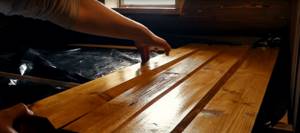
External and internal cladding
Boards are often used for exterior decoration
The frame is installed and dug into the ground. It's time to start finishing the walls.
The outside of the frame is sheathed:
- edged board
- siding
- plywood
- Chipboard
- OSB
If a dry edged board is chosen as the external cladding, the work is performed in the following sequence:
1 The boards are marked according to the required dimensions
Marking boards
2 Cut with a circular saw
3 The workpieces are treated with a primer, antiseptics and several layers of paint or varnish
4 Installation of boards begins from the bottom up. The bottom board is leveled and attached to the metal frame using self-tapping screws
Installation of boards
Many summer residents sheathe the inside of the room as well. Interior work is carried out using moisture-resistant materials:
- edged boards
- PVC panels
- linings
- OSB boards
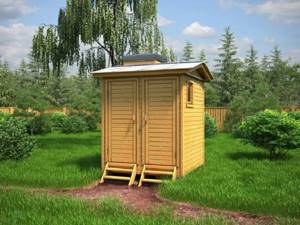
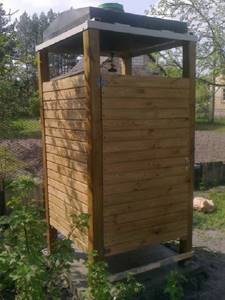
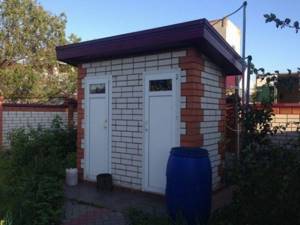
A shower with interior decoration looks beautiful and is very easy to use.
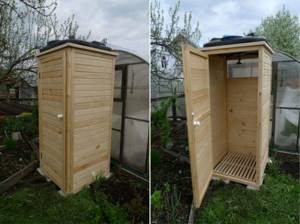
Externally and internally lined shower
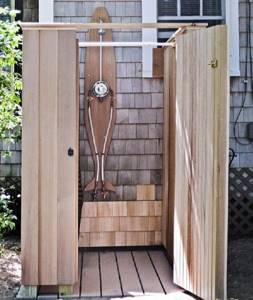
Doors
A wooden porch will make it easier to descend and prevent injury.
The frame for making the door is assembled from timber. The fastening is reinforced with jibs and jumpers. The frame is sheathed with the same material that was used to finish the external walls. The doors are hung on hinges, having previously installed handles and locks.
If desired, instead of a permanent door, you can hang any thick fabric, tarpaulin or oilcloth.
If the frame is installed at a sufficiently high height, you can create a porch for convenient exit from the shower.
Any available material is suitable for this:
- unnecessary brick
- logs sawn in half
- edged board
- gravel
- stones
An entrance canopy made of polycarbonate can be installed above the door to protect the porch from rain.
Insulation
A large room allows you to wash comfortably in any season
Some summer residents live outside the city all year round. However, with the onset of cold weather, taking a shower becomes problematic. There is a way out of this situation - you will have to take care of high-quality wall insulation in advance.
The following is used as insulation:
- Styrofoam
- stone wool
- expanded polystyrene
The insulation is placed tightly between the frames, trying to avoid large gaps. To protect the insulation from moisture and premature destruction, waterproofing materials are used.
High-quality wall insulation and installation of a heating system or installation of a temporary heater will allow you to shower comfortably even in late autumn.
Installing the roof and tank
The material for the roof will need to be hard. Slate or corrugated sheets work well. After securing the roofing material, drill a hole in the center of the roof. Place the tank on top so that the water supply tube goes into the hole. Screw the faucet and watering can onto the tube.
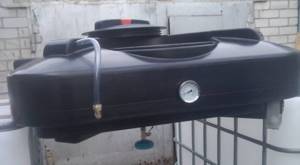
The optimal tank capacity for a country shower is 200 liters. You can buy a plastic or galvanized tank in the store or make it yourself by welding it from stainless steel. Any container with a neck for filling water will serve as a tank. To make a shower for a cottage with heated water, install a heating element with a power of 2 kW into a metal tank. Paint the top of the container with black paint. The dark color attracts the sun's rays and the water will heat up faster.
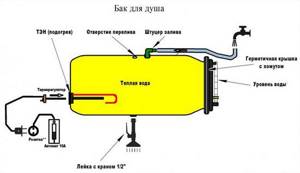
Diagram of a tank for a heated summer shower
If you install a wood-burning titanium in a cabin at the dacha, then in addition to hot water you will get a heated room. Then you will need to install a second tank with cold water nearby.
Interior arrangement
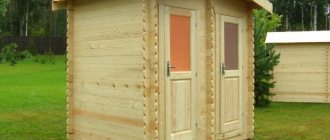
Wooden shower for a summer residence
To safely carry out hygiene procedures, you will need to organize the drainage of water. To do this, use ready-made shower trays or a homemade grid made of wooden slats.
Assembling a pallet from wooden slats
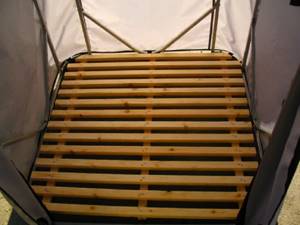
Wooden grate will prevent water accumulation
To make pallets, dry wooden slats with a width of at least 50 mm are used.
The pallet is assembled in the following sequence:
1Using a jigsaw or circular saw, cut the slats to the required length
2Carefully processed with a grinding machine
3Coat with several layers of any antiseptic to prevent the development of fungus and mold
4The slats are laid on the lower cross members of the metal frame. To drain the water, leave a small gap between them
5All elements are securely fastened to the frame with self-tapping screws
6The finished pallet is coated with several layers of varnish
7If the shower stall is large, the grille is installed on a pre-prepared frame of perpendicular crossbars.
A rubber mat placed on top of such a grill will ensure comfortable procedures.
Installing a ready-made pallet
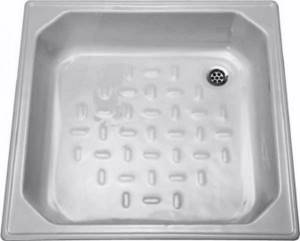
Installing a ready-made tray greatly facilitates the drainage of used water into the drainage hole
To arrange a shower in your country house, you can use a ready-made pallet. It is especially convenient when the drainage hole is installed next to the shower. In this case, installation of sewer pipes will be required to drain the water.
However, the installation of the finished pallet must be provided for at the stage of welding the metal frame. Installation of the finished tray will be facilitated by additional profile pipes welded to the base of the shower stall. A pallet is installed on them.
Building a summer shower in your dacha with your own hands is not at all difficult. With a little effort, you can comfortably take treatments even on cool and cloudy days.
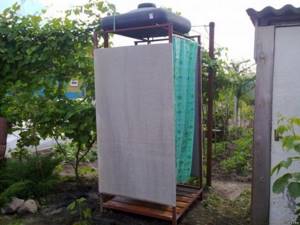
Do-it-yourself shower for a summer house
The first thing you need to do before starting construction is to decide on the location of the summer shower. A well-lit, calm, slightly elevated place is suitable for such a structure.
Advice: it is advisable that the shower is not located too close to buildings and is built in the same style as them.
Stages of building a shower in the country
Drafting a project . It is planned to build a shower consisting of two small rooms. The minimum size of the bathing compartment should be 100x100 cm, the changing room - 60x100 cm. In our case, the optimal shower size is 200x150 cm.
On the selected site we mark a rectangle measuring 140x190 cm. We drive pipes into the corners. The foundation for the shower will be piled from two-meter asbestos-cement pipes, the diameter of which is 90–100 mm. They must be buried in dug holes to a depth of about 1.5 m. There should be 20–30 cm above the ground surface. After this, a drainage and drainage system should be installed.
Summer shower project. Photo
To organize water flow, a waterproof layer . It can be made from polyvinyl chloride film or roofing felt, which must be laid on an inclined surface. As an option, you can make a reinforced concrete screed.
Next, they begin to manufacture a wooden frame from timber, the cross-section of which is 100x100 mm.
The upper and lower trim .
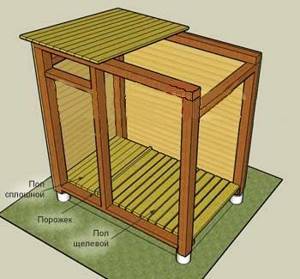
Installation of plank flooring.
Tip: To ensure water flows out of the shower stall, it is recommended to install floorboards with gaps of 10 mm wide.
The shower room should be separated from the changing room by a high threshold and a curtain .
Finishing work . The outside of the country shower is sheathed with clapboard or siding, moisture-resistant plywood, fiberboard, etc. For interior finishing, you should also use materials that are not afraid of moisture.
A water tank must be installed on the roof; the water heater is installed indoors.