The buildings
Publication date: 01/13/2020
0
3686
- Extension project
- Preparatory work
- Foundation for the veranda
- Building a wooden veranda frame with your own hands
- Roof arrangement
- Finishing work
- Glazing of the veranda
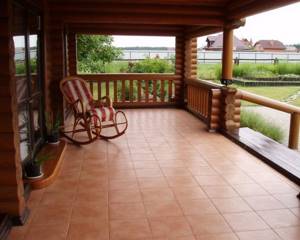
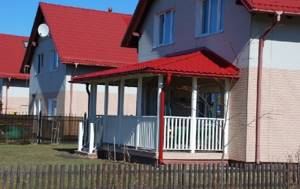
The veranda is a convenient and beautiful addition to a private home. Thanks to this extension, you can significantly expand the useful space around the house. In terms of area, the veranda can be made small for a few chairs and a table, or wide and roomy. Any veranda must have a roof, but you can also glaze the walls and use it as an additional room, for example, for a winter garden. Then this room can be used at any time of the year for a variety of purposes. You can correctly build a veranda for a country house with your own hands by following all stages of work and choosing the appropriate materials.
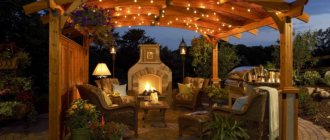
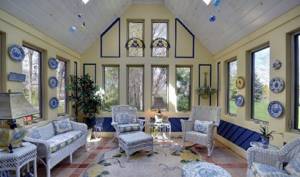
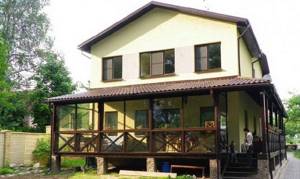
An example of a summer veranda
Practical and aesthetic purposes of building a veranda for a house
Meanwhile, an ordinary extension - a veranda to the house - can complement, and sometimes even shape, the façade design. This small part of the home is able to present the facade in a very favorable light to the eyes of incoming guests. With a professional approach to solving the problem, it harmoniously fits into the landscape design of the site adjacent to the house.
And finally, the veranda project also implies very specific practical goals:
- Maintaining stable microclimate parameters;
- Organization of additional space;
- Organization of a comfortable and rational entrance group;
- Providing additional heat capacity and sound insulation;
- Organization of a place of rest;
- Organization of additional utility space.
And the list of practical advantages doesn’t even stop there. It’s enough to think about what was already mentioned at the beginning - the veranda makes it possible during bad weather to at least have time to open an umbrella when leaving the house. And when entering the house from a rainy street, you can take off your wet clothes and change your shoes in the veranda.
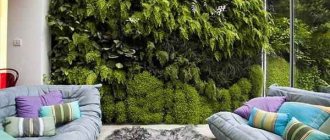
There is another very practical purpose for this structural part of a residential building. Rational and enthusiastic housewives often create a small oasis of exotic and indoor plants in the veranda. Some of them don’t even stop there, upgrading this part of the house to the status of a winter garden.
- More practical homeowners could consider using the veranda for commercial purposes, growing seedlings in it for sale.
- Thrifty residents of houses with this design find another use for it - a warm wooden veranda , for example, is used instead of a pantry. And it successfully stores winter preserves.
What is curious is that the veranda can combine some of the listed functional purposes with the house. For example, you can store jam in it for the winter, some unnecessary things, and at the same time use it in the spring for growing seedlings and early flowers. And if all this equipment is squeezed out a little, then even a couple of bicycles can easily fit in the veranda. The practical values of the veranda are complemented by very pleasant circumstances. It is on the veranda that the most frank conversations happen over a cup of tea, where friendly, intimate meetings take place. The veranda can also be used as a hallway, freeing up several square meters in the house itself for more practical purposes.
In short, there are plenty of functional purposes for the veranda. And in order for all of them to be fully or at least partially realized, the arrangement, layout and finishing of the veranda must be done at a professional level. However, residents of the capital and the Moscow region do not have to worry about this - with the assistance of qualified specialists from the InnovaStroy company, absolutely any goals will be achieved.
Arrangement of the terrace floor
The process of adding a veranda to the house continues with the construction of the floor. Here, special attention should be paid to the quality of materials.
It is better to avoid pine boards - on an open veranda they will quickly become unusable due to excess moisture . The optimal solution would be to use larch or wood-composite panels (decking).
Both options are resistant to high moisture and abrasion . However, natural wood will still have to be periodically treated with protective compounds, and decking does not require additional care.
Useful: Do-it-yourself metal frame for home (LSFK)
Floor laying rules:
- The boards are placed on the logs in one row.
- To obtain an unusual visual effect, the floor slats are laid not in a straight line, but diagonally. However, with this method, the consumption of materials increases .
- The upper step leading to the veranda is installed flush with the floor of the extension.
- The construction of the stairs begins after finishing work on the floor.
Features of the veranda to the house
Some developers tend to confuse two related concepts - veranda and terrace. They are actually somewhat identical. However, both buildings have fundamental differences in design, as well as in appearance and functionality.
Since the current review is focused on verandas, it is better to leave the features of the terraces out of attention, returning to them later. As for the veranda, this part of the house is characterized as its additional structure. The peculiarity of the veranda is that it:
- It is small in size;
- Acts as a secondary room;
- Has a common base with the foundation of the house;
- Located under one roof structure;
- At least one wall is adjacent to the wall of the house.
In addition, if this is included in the veranda design, then it also has common communications with the house. In general, this structural unit in the house design should look like a single whole, being the outer part of the building.
Projects of houses with a veranda, with a terrace
Number of projects 2939
- 5 rooms
- 2 bathrooms
House Project P-85
- To favorites
- 148² Total area
- 10 x 9m Construction area
from 2,097,000 rub.
Construction period 30 days
- 5 rooms
- 3 bathrooms
House Project Wroclaw
- To favorites
- 191² Total area
- 10 x 10m Construction area
from RUR 2,482,892
Construction time individually
- 3 rooms
House Project Compliment
- To favorites
- 72² Total area
- 6 x 8m Construction area
from 750,000 rub.
Construction time individually
- 7 rooms
- 2 bathrooms
Gallant House Project
- To favorites
- 187² Total area
- 10 x 10m Construction area
from 2,524,500 rub.
Construction period 94 days
- 3 rooms
- 2 bathrooms
Project AS-107
- To favorites
- 119.9² Total area
from RUR 1,618,650
Construction time individually
- 5 rooms
- 2 bathrooms
Project of the House "BK 05"
- To favorites
- 148.5² Total area
- 10 x 8m Construction area
from RUR 1,447,875
Construction period 50 days
- 4 rooms
- 2 bathrooms
House project "1216"
- To favorites
- 168.3² Total area
- 11 x 10m Construction area
from 2,131,000 rub.
Construction period 30 days
- 7 rooms
- 3 bathrooms
Project AS-1263
- To favorites
- 330.9² Total area
from 4,467,150 rub.
Construction time individually
- 6 rooms
- 5 bathrooms
House Project DOK-451 / Prestige
- To favorites
- 451.6² Total area
- 16 x 19m Construction area
from RUR 8,128,800
Construction time individually
- 4 rooms
- 2 bathrooms
House Project Br-205
- To favorites
- 205² Total area
- 19 x 11m Construction area
from 2,767,500 rub.
Construction time individually
- 5 rooms
- 2 bathrooms
House Project FD-44-1-200
- To favorites
- 200² Total area
- 12 x 9m Construction area
from 3,030,274 rub.
Construction time individually
- 4 rooms
- 3 bathrooms
Winter's Tale House Project
- To favorites
- 217² Total area
- 14 x 15m Construction area
from 2,929,500 rub.
Construction period 108 days
- 4 rooms
- 3 bathrooms
Project AS-1178F
- To favorites
- 125.4² Total area
from 1,692,900 rub.
Construction time individually
- 5 rooms
- 1 bathroom
Nostalgia House Project
- To favorites
- 216.5² Total area
- 13 x 14m Construction area
from 2,079,300 rub.
Construction time individually
- 7 rooms
- 2 bathrooms
Project AS-2190
- To favorites
- 153² Total area
from 2,065,500 rub.
Construction time individually
- 4 rooms
- 2 bathrooms
Project AS-197F
- To favorites
- 207.5² Total area
from RUR 2,801,250
Construction time individually
- 4 rooms
- 2 bathrooms
House Project DOK-165 / Lyon
- To favorites
- 165.6² Total area
- 11 x 9m Construction area
from RUR 2,980,800
Construction time individually
- 4 rooms
- 1 bathroom
Project AS-2237
- To favorites
- 119.95² Total area
from RUR 1,619,325
Construction time individually
- 6 rooms
- 2 bathrooms
Project AS-825F
- To favorites
- 151.9² Total area
from 2,050,650 rub.
Construction time individually
- 5 rooms
- 2 bathrooms
House project No. 44
- To favorites
- 243.3² Total area
- 9 x 14m Construction area
from 3,284,550 rub.
Construction time individually
View all projects
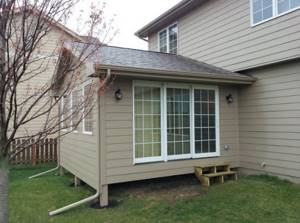
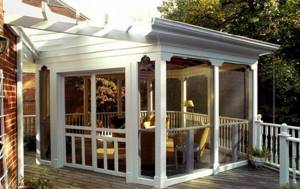
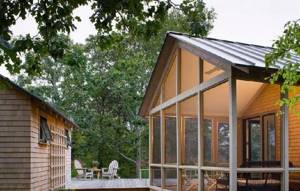
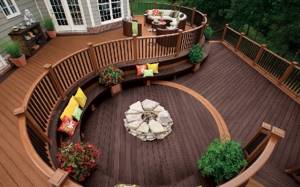
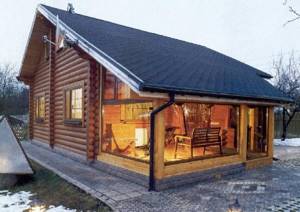
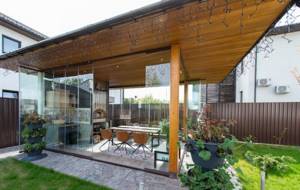
A covered terrace where you can spend time in any weather Source kayrosblog.ru
Drinking tea with your family on a beautiful summer morning or evening gatherings with friends in the fresh air without leaving home - what could be the best way to take a break from everyday worries? A veranda or terrace to the house built on the site will make your dream of a complete country holiday come true . In addition to functional properties, such buildings also carry a design idea, giving the appearance of a cottage or dacha a single, complete image of a truly comfortable home. Today, there are many designs, styles, and designs for both the exterior and interior design of a veranda or terrace. For those who are choosing which veranda to add to their house, projects, photos and layouts will be excellent inspiration.
What types of verandas are there?
In construction practice, there is no clear classification of veranda structures. However, experienced designers are able to include the most unexpected solutions for the veranda in an individual project.
Conditional classification may include differences in different options for constructing a veranda according to the following criteria:
- In terms of design style, this can only be limited by the imagination of the designer or planner;
- According to the materials used - brick, wood, concrete, glass, polycarbonate;
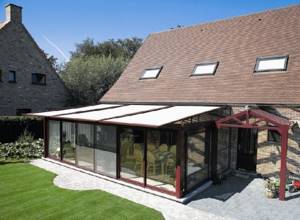
- According to the degree of glazing - with full or partial glazing, one or all sides;
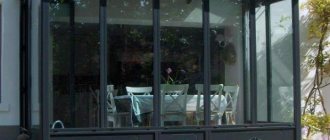
- According to the degree of openness - open (summer) structures and closed (winter) verandas;
- To provide communication systems - heated and unheated verandas, with or without sewerage and water supply systems;
- According to heat capacity - insulated (also related to the category of winter verandas) and non-insulated (related to summer structures).
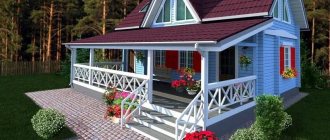
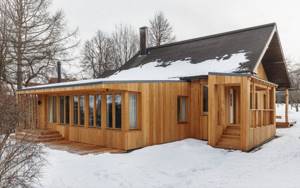
Moreover, several of these signs can be realized in the design of this element of the house. Example. The veranda can be wooden (a type of material) of the winter type (degree of openness), with partial glazing on the south side and with a heating system and water supply. By skillfully grouping the different features of this conditional classification, you can create truly unique designs for this structural element of the house! And some examples of what an original veranda are shown in the photos in all its glory:
As for aesthetic characteristics, no one and nothing limits the owner of the house. Buildings can be of the most unexpected configuration, of different heights and any area. They can cover part of the wall of the house or the entire facade. There is also an end summer veranda adjacent to the corner of the residential building. It offers the best view of different corners of the garden plot, yard and street. There are also designs of verandas adjacent to two or three walls of the house. They seem to be surrounded by the entire building, which helps maintain coziness and a comfortable environment in this part of the house.
Veranda project
We must not forget, when designing an extension to a house, that its purpose is to improve the performance of the main structure: make it spacious, add beauty, comfort. A closed terrace also has the function of improving the thermal performance of the house. For the correct construction of the summer extension structure, you must follow the rules that are indicated in the developed project.
What does the project consist of:
- We determine where in the main house we will add a veranda. The main aspect is maintaining the aesthetic perception of the entire architecture of your own home together with the veranda. Important! Experts recommend setting up a veranda in regions with high summer temperatures on the western or eastern side of the main house. It will be less exposed to direct sunlight.
- It is necessary to indicate the location of the entrance to the terrace (veranda). The entrance from the outside and the entrance from the house are indicated. You can make a through passage through the veranda when the door to the house is opposite the entrance to the veranda; this method is not recommended, as there is a risk of drafts.
- We select the type of doors and their installation location.
- We determine the total size of the summer room located along the house. The length is often taken equal to the length of the wall along which the veranda is built. The width is usually taken in the range from 3 meters to 7 meters, the main thing is to maintain the proportion. When choosing the dimensions of the veranda, we relate them to the overall dimensions of the house in order to maintain a single ensemble of the exterior of the building.
A good example of building a veranda with your own hands, when the design is done at the design stage of the entire house.
Advice! Experts do not recommend saving on the project ; this will reduce the cost of documents permitting the extension and guarantee its correct construction.
What type of veranda is most successful?
Each homeowner has the right to choose a suitable veranda design for himself, based on the following criteria:
- The value of the construction estimate;
- Functional purpose of the veranda;
- Type of materials used;
- Style concept;
- Operational properties of the veranda.
In addition, design characteristics and loads must be taken into account. Although with regard to this structural element of the house there are no clear and strict requirements either in SNiP or in state certification and standardization standards.
If the presence of a veranda is important from the point of view of summer recreation, or if it is being built on a summer cottage, then this structure can be of an open type. This design solution is dictated by the fact that it is more pleasant to relax in an open veranda; you can always breathe fresh air and admire the opening panorama of natural landscapes.
If the veranda room is planned to be used as a place to store winter supplies or for relaxation in the winter season, then it would not hurt to install heating and hot water supply in the veranda. For growing vegetation, a wooden veranda with a full type of glazing, insulated and equipped all necessary communications for heating, watering plants and draining used water.
Thermal insulation of floor and ceiling
In order to insulate the floor, you need to install logs made of wooden beams, the pitch between which depends on the width of the insulation. Similar to walls, it is enough to lay thermal insulation material between the joists, fill the gaps with polyurethane foam, and then cover it all with floor covering.
As for the ceiling on the veranda, the roof space excludes the presence of an attic, which is why it is necessary to install a sheathing on the ceiling with the required distance between the bars. Foam plastic can be used as insulation, however, when finishing the ceiling, the use of insulating film will be necessary. The finishing material for the veranda ceiling is plasterboard sheets.
Ultimately, after carrying out all the procedures for insulating the veranda, you can get a full-fledged room suitable for living. In winter, the veranda will retain heat, but in summer it will be able to keep cool, providing comfortable conditions.
How to build a veranda for a house
Competent specialists from the InnovaStroy company recommend not to rush to conclusions regarding the choice of the type of veranda. It is better to do this in the process of jointly discussing all the design details of the veranda with experienced designers. Such specialists from InnovaStroy can give recommendations not only based on their level of qualifications, but also from their own multifaceted practical experience.
So, the beginning of the construction of a veranda, like any other elements of the house, begins with the preparation of the project. This procedure usually takes quite a lot of time. At the same time, absolutely everything is taken into account during the design process, even the smallest details:
- Compliance with the style concept;
- Practicality of the veranda;
- Aesthetic appearance;
- Possibility of connecting communications;
- Decoration of the exterior and interior of the veranda.
Even furniture, plumbing and other elements can be provided by a professional project. In addition, during the design process it is necessary to take into account the requirements of the fire inspection, building codes and regulations (SNiP), state standardization parameters, as well as safety requirements put forward by the gas service, the district electrical network office and the architectural department.
Important! When designing a veranda, you need to pay special attention to its location relative to the front of the house and. which is especially important regarding sunlight. It is important to keep in mind that in order to reduce the cost of drawing up a veranda project, it would be more rational to include it immediately in the overall design of the house. This could help save the cost of two different projects by combining the budget into a smaller amount for one project.
In the case of preparing a project for an already built house, it is also necessary to consider the need for dismantling work - since the veranda must have a common roof and a common base with the house itself, then some structural elements of the house will have to be modernized or completely changed. The area for the veranda is prepared according to the same principles as The site for the entire house is also being prepared - construction waste is removed, the area is leveled, and a place is prepared for the foundation.
Further procedures for constructing a veranda can be described by the following steps:
- Preparing a trench or well for a veranda. True, unlike the entire structure of the house, the base for the veranda can be of a lightweight form - with less depth and smaller dimensions. With a light veranda, this condition can be positively used to increase the economic profitability of construction.
- Laying or pouring the foundation while simultaneously performing its hydro- and thermal insulation;
- Laying flooring material;
- Erection of a frame structure and its simultaneous connection with the frame of the house;
- Construction of the roof structure.
If there are glazed openings, window and door structures in the project, it is necessary to proceed to this part of the project.
Creating a foundation: pouring rules
Most often in Russia, a strip or column foundation is made for a veranda attached to a house, equal in depth to the foundation of the main building. At the same time, it is recommended not to tie them into one monolith, because the house and the veranda have different weights, and therefore different degrees of shrinkage. And to prevent a heavy building from dragging down a light building, place the veranda on a separate base. To do this, a gap of up to 4 cm is left between the foundation of the house and the veranda.
Attention! When creating a foundation, you should take into account the soil characteristics in your area and the total weight of the building. Lightweight foundations on heaving soils can “play”, and then the veranda will move away from the wall of the main building. In addition, they are not designed for heavy walls, for example, made of brick, and can shrink under their pressure.
Strip foundation
It is used for the construction of large verandas made of bricks or blocks, which are covered with a heavy roof (slate, metal tiles, etc.). The easiest way to build a strip foundation for a veranda to a house is from concrete.
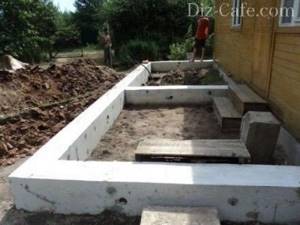
The heaviest veranda will stand on a strip foundation
For this:
- A trench is dug (calculate the dimensions according to the foundation of the house).
- The formwork is placed at a height equal to the height of the future foundation (or slightly higher). It is made from boards, knocked down into shields.
- Concrete is prepared in the following proportions: 1 part cement, 3 parts sand and 6 parts crushed stone.
- The first layer of concrete is poured onto the bottom and reinforced with stones to make it about 10 cm.
- Next, pour in the next portion, add stones again, etc.
- For the top layer of concrete, stones are not used, but the surface is leveled with a trowel and left until it hardens (3-4 days).
- If it’s hot, then water it a couple of times a day to avoid cracking of the foundation.
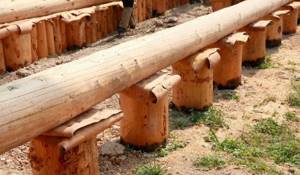
Columnar foundation
If the veranda is frame or wooden, then you can put it on a columnar foundation. To protect against soil heaving, dig holes to a depth below the freezing point of the soil in your area (more than a meter). For a small and light veranda, it is enough to place posts only in the corners. For a large one, it is worth making a series of intermediate columns with a step of 50-60 cm between them.
Recent Entries
5 working ways to use tar in the garden 7 indoor plants that help you get married even in adulthood Indoor plants that can bloom in trouble
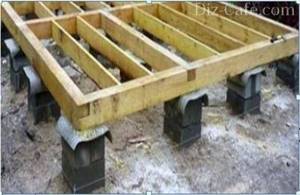
The columnar foundation can be made of concrete, blocks or red bricks
Work progress:
- Holes are dug.
- The bottom of each of them is covered with a 20-centimeter layer of sand.
- Pour concrete to the surface of the ground and wait for it to dry.
- Coat the finished post with bitumen and fill the gaps between it and the ground with sand.
- The above-ground part of the column is created from brick or block masonry, bringing it to the height of the main foundation or slightly lower. Make sure that there is about 30 cm left to the finished floor of the veranda.
Preparing the foundation for the veranda
There is no need to show professional skills in this process if the construction of the veranda is planned together with the construction of the entire house. As with the entire house, a strip, pile, pile-grillage, prefabricated or monolithic, screw or slab foundation is prepared for the veranda. But if it is laid under the veranda, it is permissible to use a structure with lighter design loads.
Depending on the project, the height of the basement level of the foundation can be further increased. Also, this decision is made when constructing a veranda on an area with a loose soil structure or a high groundwater horizon.
Construction of load-bearing structures of the veranda
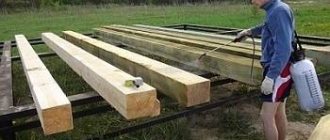
The veranda frame can be erected simultaneously with or after laying the floor. For this purpose, the provided materials are used, connected to each other at the joints and at the top by means of the roof. When simultaneously arranging the floor, reliable durable materials must be used for its manufacture, since most likely they will be used in outdoor conditions, as a result of which they will have to work to a greater extent exposed to a humid environment.
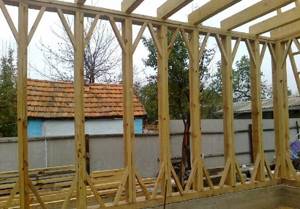
Making a veranda frame
For a wooden house, the frame of the veranda begins with laying the timber on supports in the lower frame. In the corners we use “dovetail” for cuts, so it is better to join the timber at the corners .
For reliability, nails are used; dowel fastening is possible. Recommendation! Often the bottom trim is made double, then logs and veranda posts are attached to it.
Timber for a wooden veranda is used with a cross-section: 100x100 or 180x80 millimeters. When logs are used in the harness, their cross-section should not be larger than 120 millimeters. The supports near the wall are made higher than the rest to form a pitched roof. When the frame is mounted, horizontally installed beams are the basis for the window sill , if glazing is provided. The top trim completes the installation of the veranda frame; it is the basis for the rafters and creates rigidity for the entire system.
Temporary spacers must be used to avoid distortion in the frame structure.
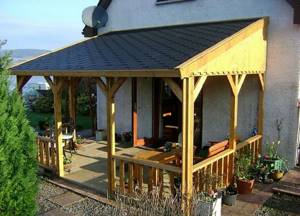
Veranda roof
Once they have decided on the material for covering the roof, they begin to install the sheathing on the rafters, which are attached to the top trim.
Structurally, the following types of roofing are offered for verandas :
- Single pitch roof. This is a simple design and easy to implement. Requires a slope from the main wall of the house towards the street.
- Gable roof. It is used if the veranda is attached to the end of the house with a narrow side.
- Polygonal roof. Its design is varied, the main thing is to maintain a slope for water drainage.
The rafter system is installed based on the selected material:
- Lathing for metal tiles, slate and ondulin
- Solid decking is made for flexible roofing materials.
Veranda floor
Making the floor with your own hands is simple:
- We install the logs on the lower frame of the veranda structure. The distance between the lags is no more than 100 centimeters. We install them perpendicular to the floorboard.
- We cover the logs, checked by level with a floorboard.
If you plan to build an open veranda , many agree on installing a floor with a slight slope to allow water to drain. The board is fastened with self-tapping screws, the length of which is twice the width of the board. It is necessary to impregnate the floorboards with a solution that resists the creation of fungal deposits.
Veranda design sequence
When the veranda structure itself is ready, it is time to bring it into proper shape. First of all, if this is a closed type of building and if this is assumed by the project, windows and doors are installed in the veranda. In some projects, the doorway may remain completely open. In other design solutions, instead of windows, continuous glazing can be used. Externally, facade work is being carried out related to the insulation of walls and floors, as well as decorative finishing of the external part of the veranda.
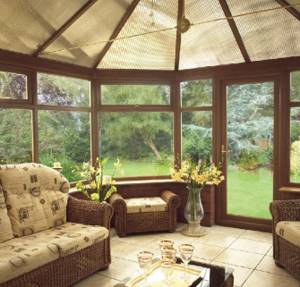
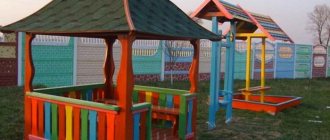
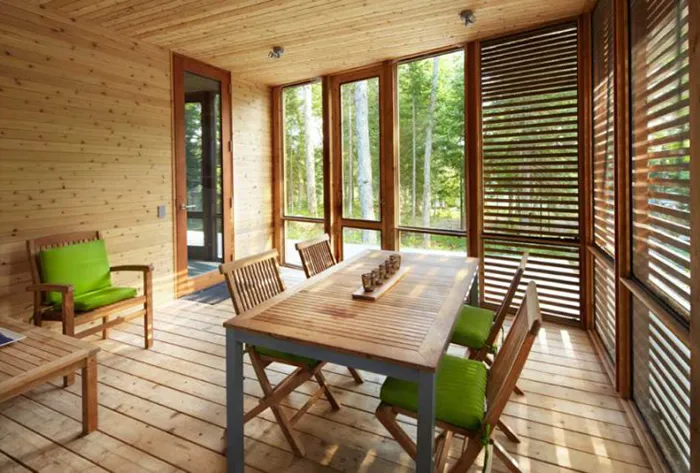
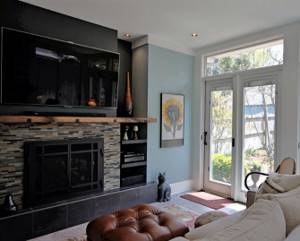
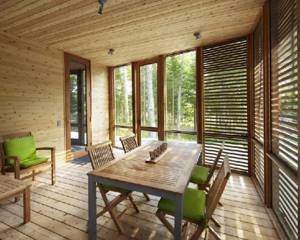
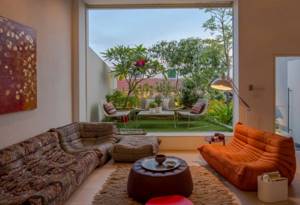
The most exciting stage is decorating the interior in the chosen style. At the same time, you can plan the veranda and zoning its space into a work area, a place to relax and practice your favorite hobby. Photos illustrate what a ready-to-use veranda might look like in different design compositions.
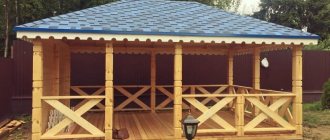
Practical and beautiful veranda designs
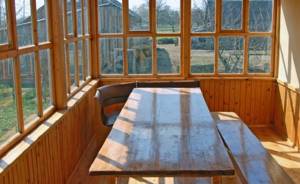
To make your veranda look just as aesthetically pleasing and stylish, don’t be afraid to go beyond the limits of your imagination! Any of them can be brought to life. Moreover, if experienced and qualified specialists from the InnovaStroy company assist in this. In the photographs below you can see the features of verandas made according to different projects and from different materials. In each such project, you can realize your own ambitions and practical goals, as a result of which the house will be transformed for the better, becoming more comfortable and practical.
And this will clearly show the professional work of the entire InnovaStroy team - designers, planners, builders, foremen, craftsmen, engineers. And the proposed video fragments will help you learn more about this structural element of a residential building, its purpose and principles of construction.
Methods for insulating veranda walls
Internal insulation of the extension
The first and most inexpensive method for insulating an extension is to independently finish the veranda from the inside. It is worth noting that this is the optimal solution, since interior work can be done in any weather and at any time of the year, in addition, such finishing is considered the most inexpensive.
First you need to prepare the surface of the walls by removing the finishing material and sealing all the cracks. After this, using a construction stapler, you need to secure a vapor barrier film, on top of which a wooden sheathing is nailed, the pitch of which depends on the width of the thermal insulation material. As insulation for the veranda, you can use mineral wool, which needs to be “covered” on both sides with an insulating film. The final stage is finishing the walls with plywood, finishing strips or plasterboard.
Important! There should be no gaps between the sheathing bars and the insulation.
External insulation of the veranda attached to the house
External insulation of the veranda is an alternative solution that has several nuances. First of all, you will have to face the problem when joining the insulation to the roof, since a gap will form, affecting the quality of the work done. As a result, the upper corner of the veranda will constantly freeze. The solution to the problem is to replace the roof or reconstruct the roof.
As an external finishing material, you can use plywood, plaster, facing lath or gypsum board. Thermal insulation material for external use is polystyrene foam, which does not require the use of insulating film. It is worth noting that the external facing material must be fireproof, so plaster is the optimal solution. If plasterboard sheets (GKL) are chosen, then you need to install lathing, and for plaster you need a reinforcing mesh.
For external insulation, it is enough to secure the foam sheets to the wall using self-tapping screws with a large head, sealing the cracks with polyurethane foam. After this, the structure must dry, the excess is cut off with a knife and proceed to the installation of the day or lathing for the subsequent finishing of the veranda.