Laying modular tiles on a solid base
The rigid base for rubber tiles can be either a cement screed or asphalt concrete coating, or wooden shock-absorbing floors made of plywood or chipboard (OSB), arranged on logs. It is also allowed to lay modular products on tiles and self-leveling polymer floors.
The technology for laying rubber tiles depends on the method of connecting the elements to each other. If the design includes locking connections or connector sleeves (on thick tiles), then it is allowed not to fix it to the base using adhesives. Otherwise, polyurethane-based glue or rubber-bitumen mastics (for asphalt concrete pavement) are used.
Pros and cons of rubber paving slabs
Rubber crumb tiles have the following advantages:
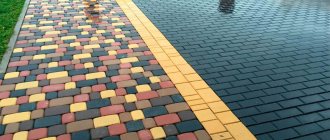
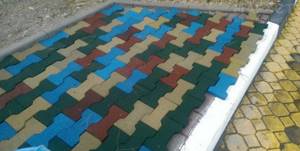
- The range is represented by products with smooth and corrugated surfaces.
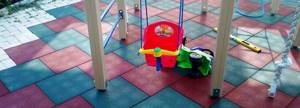
- Application options: outdoors with a highly waterproof coating, and indoors with a moisture-permeable coating.
- There is a large selection of design and color solutions, which allows you to create a wide variety of decorative coatings.
- Cushioning ability.
- Environmentally friendly composition, due to which the scope of application of rubber bases is not limited.
- The coating has an anti-slip effect, which ensures a high degree of safety in any weather - be it rain, snow or ice. Injury rates are reduced to a minimum.
- Easily and quickly create convenience and comfort indoors and outdoors.
- Simple installation and the ability to dismantle the rubber base and then install it in another place.
- High wear resistance of the coating and the ability to withstand heavy loads.
- Resistance to sudden temperature changes - the tiles do not break, deform or collapse under the influence of frost and heat.
- There are no special requirements for storage and transportation.
- The surface is not susceptible to the negative effects of ultraviolet rays.
- No special care is required - the surface can be easily washed with water or with the addition of cleaning agents.
- A reliable and durable base that does not lose quality, technical characteristics and properties throughout its entire service life. The original appearance is preserved due to the non-fading of the coating.
Preparing the base
In the event that the tiles are laid with an adhesive, certain requirements are imposed on the base.
It must be completely free of debris and dust and free from chemical and oil stains. Weak and flaking areas are removed and repaired using special putty compounds. It is recommended to sand the base, although high-quality leveling is not required for laying thicker tiles, since the elasticity of the lower surface allows you to level out small flaws.
The humidity of the cement screed should not exceed 3%; if the installation is carried out on freshly laid asphalt concrete, then a technological break of 15-20 days is required for the bitumen in its composition to completely harden. On wooden floors, the vertical displacement of the sheets relative to each other at the joints is checked when a load is applied, and if there is one, they are fixed.
All screw heads must be recessed.
Before laying modular tiles with glue, the base must be primed with special compounds. This will not only reduce its absorbency, which will reduce the consumption of the adhesive composition and increase adhesion, but will also bind small particles of dust that cannot be removed mechanically (with a broom or vacuum cleaner).

When laying rubber tiles in open areas without using glue, it is recommended to slope the base (2-3%) to drain atmospheric moisture draining through the seams.
Technical characteristics of pavilastic
Rubber tiles have many advantages over other finishing materials, allowing them to be widely used as a protective and decorative coating for facing horizontal surfaces exposed to aggressive use.

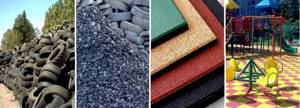
Rubber coatings can be produced in the form of tiles or rolls of various thicknesses
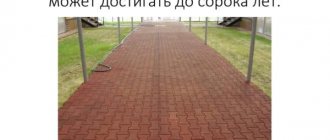
- The high durability of the coating (up to 15 years) is determined by:
- strength and wear resistance due to the high density of rubber;
- high resistance to mechanical damage associated with the high elasticity of the material;
- frost resistance;
- resistance to oils and most chemicals;
- possibility of making spot repairs with your own hands.
- The safety of pavilastics is ensured by:
- anti-slip effect of the front surface of the rubber tile;
- ease of everyday care, including cleaning from dirt and ice;
- low risk of injury from a fall;
- high noise-absorbing properties;
- environmental friendliness, resistance to the formation of mold, moss and fungi on the coating;
- The aesthetic appeal of pavilastic is justified:
- variety of colors, shapes and sizes of tiles;
- UV resistance (does not fade in the sun).
General performance characteristics of rubber tiles: · durability - more than 10 years of operation
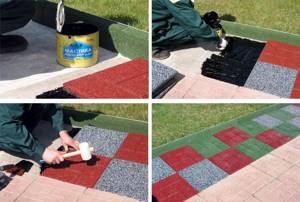
Adhesive compositions
The adhesive for rubber tiles is selected depending on the type of base. The most common are varieties based on epoxy polymer resins. Manufacturers produce both ready-made compositions and two-component ones made from resin and hardener, mixed in a certain proportion immediately before the process of application to the base.
To lay tiles in open areas, you should choose compounds that are specifically designed for outdoor use and have high frost resistance.
It should be borne in mind that the “survivability” of two-component compositions is 30-60 minutes (depending on temperature), so it is necessary to prepare the glue taking into account the volume of production during a given interval.
If the “lifetime” time is exceeded, polymerization will enter a phase in which laying tiles on the base is no longer possible.
When laying a modular coating on an asphalt concrete mixture, it is recommended to use rubber-bitumen mastics. When using glue in an open area, it is necessary to control the temperature of the base from exposure to sunlight.
The rate of polymerization of the composition directly depends on temperature, and at low values hardening will occur too slowly. If the base is very hot, the reaction speed will not make it possible to make adjustments to the tiles during the laying process.
Work can be carried out at a base temperature from +5 °C to +30 °C, while manufacturers of adhesive compositions recommend the optimal curing mode at +25 °C.
In addition, you should check the weather forecast for 2 days after the installation of the modular coating is completed. It is unacceptable for moisture to get into the seams of freshly laid tiles, as well as overheating of the coating until the glue has completely dried.
What is rubber coating made of?
Covering materials are obtained from recycled materials. The basis is the recycling of old car tires that need to be recycled. Some craftsmen can, at home, separate the tire rubber from the cord, grind it, mix it with glue and make a small rubber mat. But for a large coverage area this method, of course, will not work.
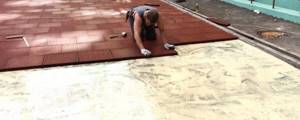
Laying tiles
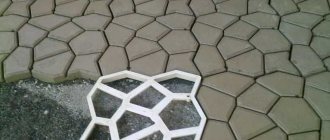
To avoid distortion when laying tiles due to the curvature of the enclosing structures, it is recommended to begin installation from the central axis of the room, first in one direction and then in the other. As an original design solution, you can use a diagonal arrangement of tiles on the floor surface.
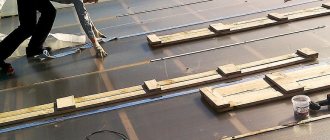
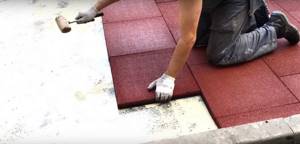
After marking the base, you should apply the adhesive composition to it with a notched trowel or roller (the choice of tool depends on the consistency of the mixture) before laying the first tile. For ease of work, manufacturers often add dyes to the compositions, allowing visual control of the place where the glue is applied.
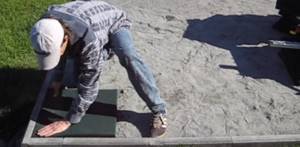
Having placed the product in place, you should seal the connection with the base using a rubber mallet, tapping the surface of the tile, this removes excess air from under the tile, making the connection much stronger.
Having laid out the central row, you can proceed to the next ones. Laying can be done either in parallel rows or offset by half the tiles. To install elements in the outer rows (along the walls), tiles are trimmed. It can be done either with a sharp knife (for thin products) or with a jigsaw.
Any adhesive that has come out through the seams during installation should be removed immediately using a rag soaked in solvent, otherwise removing it later will be problematic.
When laying rubber tiles with dovetail joints, the technology is almost the same. The locks are tapped with a mallet until the upper surfaces of the joined elements completely coincide.
When laying thin tiles, it is possible to additionally fix them with an adhesive mixture, which can be applied both over the entire surface of the base, and pointwise - only under the locking joints (along the perimeter of the tile).
The curing time of the adhesive composition ranges from 12 to 48 hours and depends on the temperature and humidity conditions.
Laying modular tiles on a ground base
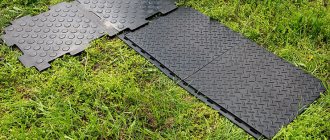
For open areas with a soil base, only thick (from 30 mm) tiles with connector bushings in the side faces are used. The exception is a type of modular coating - rubber paving stones.

To prevent the tile from moving during operation due to dynamic loads, manufacturers often make its lower surface embossed.
Preparing the base
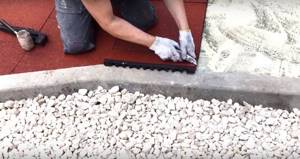
Laying rubber tiles on the ground base begins with removing the plant layer to the required depth, taking into account the sand-coal cushion and the thickness of the modular elements, but not less than 10-15 cm.
The site is leveled and leveled taking into account the design elevations, although a slope for surface water drainage is not required in this case, since the water will drain directly into the ground.
A crushed stone cushion of fractions of 5-10 or 20-30 mm is placed on the soil surface with mandatory compaction with a vibrating plate. Its thickness should be at least 70-100 mm. Sand, ASG or fine screenings are laid on top of it in a layer of 50-70 mm with compaction.
The thickness of the cushion is selected depending on the performance characteristics: if a minimum layer is sufficient for a garden path, then it should be increased for a car parking space.
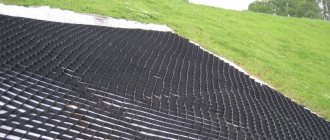
To increase the strength characteristics of the base, improve its drainage properties and prevent the germination of weeds, it is recommended to separate the layers of crushed stone and sand with a geotextile fabric. A modular covering can be laid on the prepared base.
It is not recommended to carry out work on laying rubber tiles at sub-zero temperatures. Although the temperature coefficient of expansion of rubber is minimal, there is a possibility of swelling of the coating laid in winter during the warm season
Laying tiles
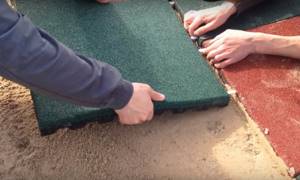
Before laying tiles in an open area, enclosing borders should be installed, which, in addition to decorative purposes, serve to prevent the coating mass from “creeping” under the influence of loads. For this purpose, you can use both a concrete curb and rubber products, which is more responsive to the injury safety factor.
Typically, tiles have holes for sleeves only on two opposite sides. The installation of the first row of elements should begin from the curb, installing them towards it with the edge on which there are holes. It is necessary to fit the modules tightly to each other, without leaving a gap between them. If necessary, tap them with a hammer to place them on the base.
Having laid out the first row, insert plastic connectors and, aligning them with the holes, lay the next row. Installation can be done either in pairs or offset by half of the tile (if the location of the holes allows).
The last row usually needs trimming, which can be done with a jigsaw or fine-toothed circular saw.
After laying the entire surface of the coating, sprinkle the seams with fine sand and remove the excess with a brush. Such a wedge will make the connection more durable and the tile will not “walk” during operation.
When laying rubber paving stones, the technology is similar to installing its analogues made of artificial stone. The coating is ready for use immediately after installation.