Plastic bottles - universal purpose
One thing that modern life definitely doesn’t need is plastic containers. Depending on its quantity, you can do a variety of experiments:
- Assembling bottles into one design to create a specific flower bed;
- Cutting PET into strips that narrow when heated, which is typical for heat shrinking;
- Making holes with a pin in the walls of transparent vessels for drip irrigation
- Cutting plastic bottles into fragments for further assembly of greenhouses.
This article is devoted to how to make a flowerbed from bottles with your own hands, so further we will talk about the most relevant techniques for decorating flower beds.
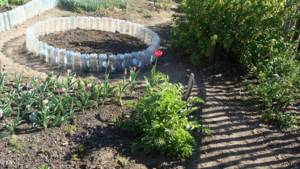
Flowerbed made of bottles: 130 photos of examples of site design using plastic and glass containers
Any flower bed can become a bright decoration of a country house or summer cottage. But only if it is beautifully designed. Almost all available means are suitable for decorating landscape design. You can make flower beds from plastic bottles. Moreover, the material will decorate the old wall and become an indispensable fencing for the flower bed.
Modern designers use bottles to make hanging flowerpots. The main thing is to decide in advance which version of the flower garden you like best and choose the manufacturing technology.
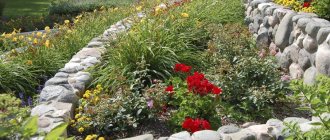
In landscape design, there are three directions for creating rockeries:
- In the Japanese style - the so-called rock garden, with a minimum number of plants or no plants at all. The stones are selected in contrast in size and even color.
- Rockery in the English style - is arranged with a predominance of green, non-flowering plants - low-growing conifers, dwarf shrubs, and numerous slow-growing cereals.
- The European style of creating rock gardens implies the predominance of decorative flowering perennial plants.
Plastic bottles - preparation
The larger the container, the more room for creativity. True, there is one “BUT” - the bottles for the flower bed must be the same in size and color, or at least they must make up a good percentage of the total amount of containers. So blue, green, white containers can be alternated with each other to get an original contrast.

But such a plot is relevant only for large flower beds. If the latter are separate open flower beds, then it is better to limit yourself to one color.
Some gardeners manage to decorate plastic and glass bottles to create exclusive vessels. For registration, use one of the following means:
- Acrylic paint;
- Shells;
- Pebbles;
- Colored foil, etc.

This technique is expensive in terms of money and time, but if the flowerbed is small and open, then why not use it?
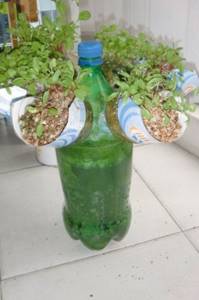
When painting, it is recommended to pour the paint inside and shake it so that the finished result pleases the eye despite the influences of the external environment.
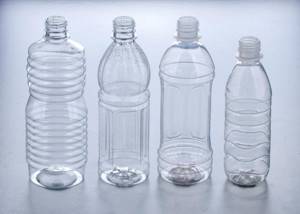
And don’t forget that colored PET bottles show a completely different color after dyeing. For example, when filling green containers with blue paint, the color turns out to be turquoise.
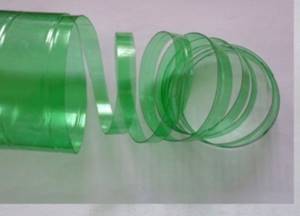
Another important point is that the brown containers of kvass and beer look gloomy and blend into the ground. Such bottles are unlikely to highlight the flower bed well.
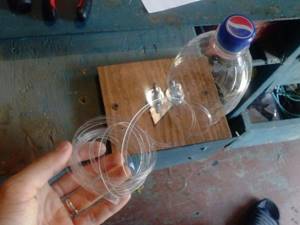
In addition, dark containers heat up well in the sun. This makes it suitable only for fencing narrow spring flower beds (although some people allow the use of brown PET all year round).
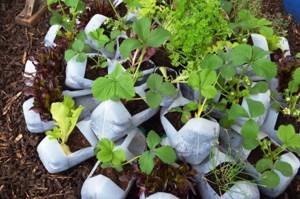
Flower bed of glass bottles laid on a base
The main difference between this flowerbed is that, due to its size, it will most likely be stationary. An old barrel or stacked tires will serve as a base. If there is a bottom at the base of the flowerbed, drainage holes must be made in it.
To build a flowerbed, you need:
- install the base for the flower bed;
- prepare cement mortar (1:2);
- starting from the bottom, apply the solution to the base of the flowerbed;
- lay out the first row of bottles, pressing them into the cement;
- Place the next layer of bottles on top of the first in a checkerboard pattern, and so on - until the desired height of the flowerbed.
When the solution hardens, pour crushed stone or pebbles inside the flowerbed (at the bottom) for drainage, and on top - nutritious soil for plants.
There are still many examples of decorating flower beds using bottles; the main thing is to show a little imagination, and elegant flower beds will delight you with their appearance all year round.
Plastic bottles for decorating flower beds
Thematic containers are easy to cut and bend, which only expands their use in garden art. Crazy hands have already learned to create from plastic bottles:
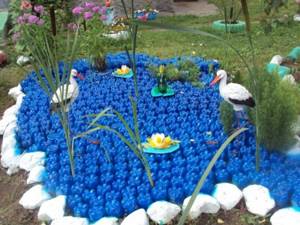
- Blue lakes with white swans;
- Multi-colored paths;
- Hedge fencing;
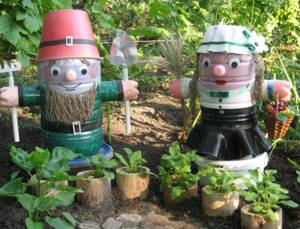
- Dwarven houses;
- Bird feeders;
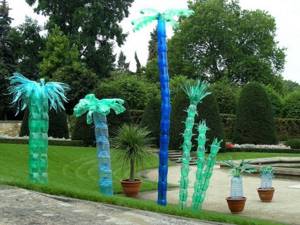
- Green palms on brown legs;
- Fun little trains;
- Pendant lamps.
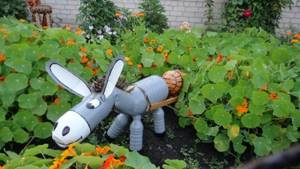
The latter prove that a festive mood is welcome even in summer, when daylight lasts longer than night.
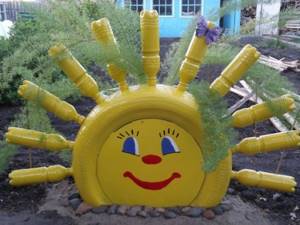
But here we must take into account the property of the material to melt, which is why plastic bottles are suitable for use as lampshades only for LED lamps.

But if the containers are glass, then you can already immerse candles in them. Here’s another secret on how to decorate a flowerbed, but under the dome of a starry sky.
By the way, pendant lamps can be hung individually or in the form of one continuous garland.
Principles of creating a flower bed from bottles
Glass containers, unlike plastic ones, are quite heavy; they are more resistant to mechanical damage and withstand wind loads much better. Accordingly, any type of fencing made from glass bottles is more durable and reliable than models made from lightweight materials.
Flower beds and flower beds made from glass bottles are made according to a variety of designs.
- The simplest option is a series of vessels dug into the ground filled with sand; most often the model is used to fence a small flower garden.
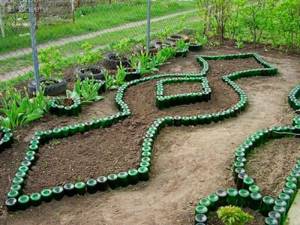
- A more complex solution is a screen. It is often made from plastic bottles, but a screen border made from glass containers looks more beautiful. Such a flower bed consists of bodies with the bottom and neck cut off, the top of the products is sanded. An even more effective option is when such a body is cut in half and the bottle halves are placed in a row. But in this case you will have to spend significantly more time, since cutting a glass product is much more difficult than a plastic one.
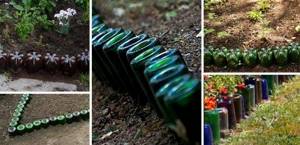
- Flowerbeds with wire fastening - in this case, whole glass bottles are used. A hole is drilled in the bottom and placed on a wire. Can be mounted both vertically and horizontally. This option is required when organizing a high fence.
- The border shelving is also suitable for fencing a tall flower bed. The basis of such a fence is a wooden frame with fairly wide transverse slats. The bottles are placed neck down on the rail, secured in pre-drilled holes. The height of the rack can reach more than 1 m.
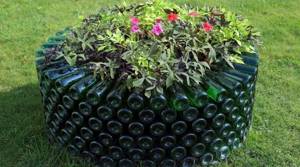
- The most reliable option is a concrete fencing made of glass bottles for a flower bed, which is made according to a slightly different principle. Whole glass vessels are placed with their necks inward and filled with cement mortar. The location may be different, but they are fastened in the same way.
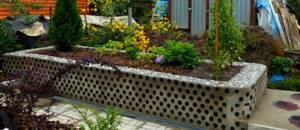
Important! Fixing glass bottles with concrete allows you to create both a continuous concrete fence and a border in which the cement is almost invisible to the eye. The last option is somewhat more complicated, but looks much more aesthetically pleasing.
Large Christmas tree made from plastic bottles
To buy a coniferous tree for the garden, you will have to fork out several thousand rubles. After this, you have to wait and care for the tree, which will take years.
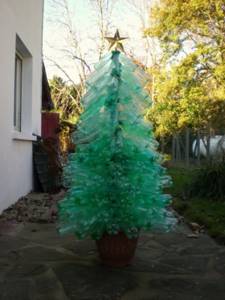
Some people can’t wait to see the desired result, so the designers came up with a simple solution for the target audience - a Christmas tree made from plastic bottles.

The manufacturing process is as follows:
- Finding a place to install a pole 2.0-3.5 m long and 10-20 cm in diameter;
- Deepening the pole 0.5-1.0 meters into the ground;
- Drilling holes to create different levels;
- Driving rods of different lengths into holes (the lower the level, the longer the rod should be);
- Putting green bottles on rods.
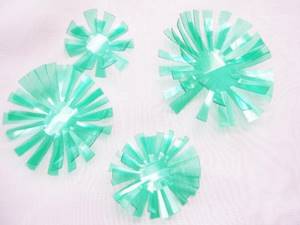
If the pole and rods are strong enough, then it is recommended to put glass bottles on them. Before the corresponding procedure, it is better to make plastic analogues heavier so that they do not play under the influence of the wind.
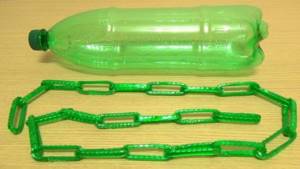
Green containers can be alternated with blue and white depending on the desire to create a certain contrast. In any case, the thematic design is a charming decoration of the garden and evidence of a brilliant idea.

Crafts from bottles for the garden
Bottles are not always unnecessary trash. After all, even with the help of them you can create very interesting and original things. For the dacha, not only small accessories and decorations are made from bottles, but also many large-scale things. So, you can even build a greenhouse or a children's playhouse from them. The structure is not only warm and bright, but also very practical, since its creation does not require a lot of money.
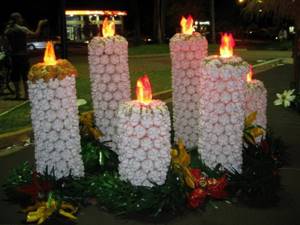
Glass bottles
Since these containers can be glass or plastic, it is better to consider them separately. For example, glass containers are less practical than the latter type of material, so with its help you can build only a small number of gizmos.
Lamps
It happens that the area of the dacha is poorly lit. In this case, people usually think about special lighting. If you also need this, then you can use small 0.25 liter bottles instead of regular sconces. It is best to first remove the labels and dry them.
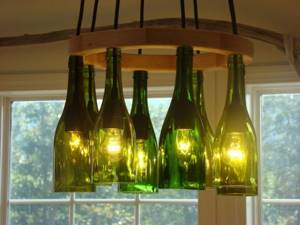
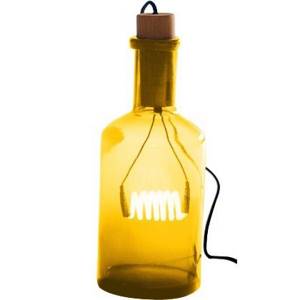
For lighting, a regular wire is used if it will be powered by electricity. You can also use LED or daylight lamps. A very nice composition can be obtained if you use containers of different colors to create it. By the way, you should attach them to the wire with regular electrical tape of the same color as the wire. But you can make them portable.
Fencing
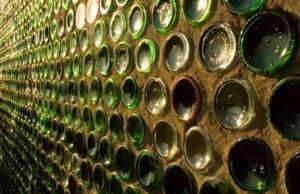
To build fences of different levels, it is better to choose containers not only of different colors, but also of different shapes. This will allow you to create not only interesting patterns on the wall, but also make various applications and mosaics, thus decorating the wall and making it unusual.
As a binder base, you should choose a regular concrete mixture. To give greater plasticity and durability, you can replace one part of the water with liquid glass and add it to the mixture. This will, in addition, give the wall such qualities as strength and water resistance. In this case, even under the influence of moisture and sun, concrete will last much longer, since it is known that it can quickly collapse.
All bottles can be sorted by color or mixed. Each container is covered with concrete mortar, after which the next rows are laid. It is better to make them uneven and lay them at different levels. At the end of the construction of the wall, it is necessary to wash off the remaining cement stains from the protruding glass before it has time to harden.
Such fences are very noticeable, memorable, and bright. In addition, in the sun they will shimmer and create beautiful reflections.
Flowerbeds
Glass containers can also be used for garden beds and flower beds. In the first case, they are fences. The work is done in stages:
- The marking is carried out using a small block with which you need to draw the desired pattern.
- On straight lines, it is best to drive pegs along the edges and thread the thread through them. This is important so as not to make the line uneven.
- Next, you should dig holes throughout the marked area. 10-15 cm is enough.
- Bottles should be washed. It is better to sort them at the very beginning by color, since containers of the same color look more attractive.
- They must then be installed in the recess, filling them with earth and compacting it. This is very important because it holds the entire structure in place.
Making fences for garden beds from this material is not difficult, and the work is done very quickly. Usually 4-5 hours are enough to make several of these patterns.
You can build a more convenient and attractive flower bed for flowers. First, it is best to take the rim of an unnecessary barrel to form a regular circle, and then stack bottles of the same color on top of each other, fastening them at the narrowest part with a cement solution. You should not take it too much, since it is necessary that only in the inner side of the circle they are fastened in this way. On the outer side, the circle thus retains its special decorativeness.
Plastic bottles
Plastic containers have a much wider range of applications than glass ones. For your dacha, you can use them to create simply incredible structures, or simply decorate the entire perimeter of your garden plot. You won’t have to invest extra money in this, since an ordinary sharp knife will be enough, as well as a lot of unnecessary “raw materials”.
We recommend: DIY twig weaving
Decorative flowers
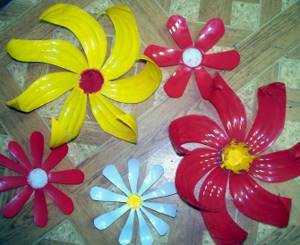
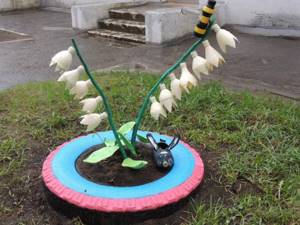
To create flowers, you can take regular 1.5-liter containers. If you want to add more liveliness to the entire composition, then you can take containers of larger or smaller volume, since with their help it will be possible to create flowers of different sizes. The forms can also be different. For example, you can take a small piece of reinforcement and attach several slightly bent wires to it. At the same time, it is necessary to paint the upper cut parts, form the petals and screw them with a green lid. You should first make holes in them so that the wire can fit into it. By stringing such buds, you can get a lily of the valley bush that will delight you at any time of the year.
If you make the petal curvier and take a bottle with a stronger bend, you can get more beautiful buds. By the way, they can be painted a rich red color and simply tied to the fittings with ropes. Still, such a flower will look very unusual. Or you can make a whole tree.
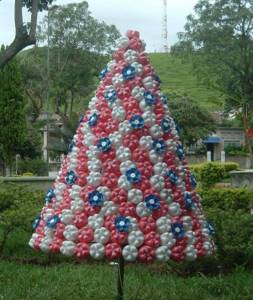
Decorations for the play area
If there is a special area for children's games on the site, then it is best to decorate it with various animals and characters, since this is where such figures will look best. Do you think bottles are not suitable for this purpose? In fact, it is one of the safest and best materials that can be invented for creating decorations!
For example, you can create a beautiful ladybug. Since it is created on the ground, you first need to dig a shallow hole under it to secure each particle. First you need to paint them in red, black and white (or green) shades. The first color will be needed to form the wings, the second - for the specks and head, and the third - for the eyes. The number of bottles will determine the size of the ladybug you want to decorate your lawn with. This is how beautiful it can turn out:
By the way, you can make a ladybug using glass containers, but this material is not suitable for a playground. After all, kids can fall on it or accidentally throw a ball on it. It will not be so difficult to break them, and it will be just as easy to get hurt, so it is better to choose plastic bottles for this purpose.
You can also make a snowman figurine. It is especially important to build it in the fall, so that by the first snow the children will have a real snowman. The work is carried out in stages:
- First you will need to make three or two circles of different sizes. This will be considered the frame for the future figure. It is best to use ordinary polystyrene foam for this purpose. The excess can be cut off and glued to further places where it is missing, recreating a round shape.
- Containers of the same size prepared in advance need to be washed and their lower parts cut off - these are the ones you will need to recreate the snowman.
- Next, each of the bottoms must be painted white. When the paint dries, you can get to work.
- Holding the foam ball, you need to carefully string the bottoms onto it. To make them stick better, you can use glue, putty and even concrete mortar.
- Once the largest ball is ready, it will need to be threaded onto a small metal pin to give the structure stability. You will need to insert another pin on top, but with a round head ball.
- After the snowman is ready, you can decorate it to your liking and glue on a few buttons, a plastic carrot and eyes. You can dress up the figurine in scarves, caps or even hats.

By the way, blanks for the ball can be not only foam plastic, but also made, for example, from mounting material. But in this case, it is better if there is a small frame inside the entire lump of foam, since otherwise the ball will harden for too long. There is a great risk that it may remain raw inside, which is why it will collapse at the slightest pressure.
Country house
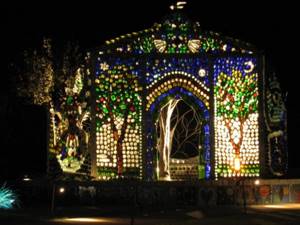
It is quite possible to build a children's country house, utility room or even a greenhouse from plastic bottles. The work is carried out in almost the same way as in the case of laying a wall from glass containers, only the plastic ones must always be screwed on with a lid and the masonry must be made even. You will also first need to fill them with cement mortar, since then they will retain heat longer. But it is best to pour sand inside.
We recommend: How to make molds for paving slabs with your own hands
When building, it is important to consider the following important points:
- It is imperative to make several holes along the entire length of the bottle. The plastic will not be able to come into contact with the cement on its own, which can make the wall of the house very unstable. But, penetrating through the holes inside, the concrete solution will tightly bind with the sand inside the container.
- It is important to ensure the evenness of the masonry. Since this is very difficult to do by eye, it is important to fix the containers with each new laying so that they do not spread until the moment when the solution finally sets.
- To increase strength, it is necessary to use a reinforcing mesh. It should be laid after each new row, as this will ensure the best traction.
Once the walls are erected, you can begin building the roof. If such a house will be used only in the summer, or is intended simply for children to play, then tiles or even slate made from plastic bottles will be a very economical solution. In addition, the material is quite light, which is why you can safely lay roofs on walls made with their help.
To create tiles you will need to compress each container. Each of them should be heated first, as this will help prevent the thin walls from breaking, because then it will become unusable. It is best to place the bottles in the sun and, when they warm up, press them. Installation of such tiles is carried out in several layers using a screwdriver on a pre-laid roof frame.
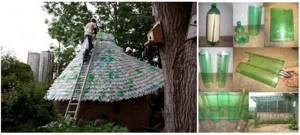
The raw material for slate is the cut-off middle of the bottle, which will be further cut lengthwise and then in half. All the resulting parts will need to be fastened either with glue or in another reliable way in order to obtain a wavy resemblance to slate. It must be fixed to the roof in the same way as tiles.
Using the same technology, you can build not only the structures listed above, but also construct unusual gazebos. The material is easy to construct and can be used to make summer verandas of absolutely any shape.
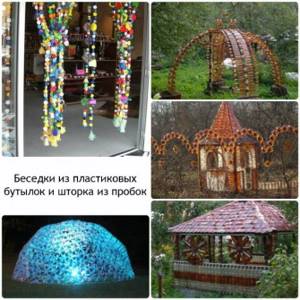
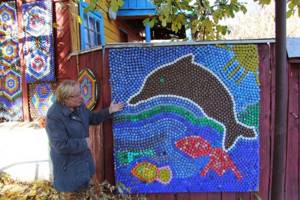
If such a house is made for children, then you can also build a fence from plastic caps around it. It is not necessary that it be too high, because for children a small fence in front of the house, or just an applique on it, will be enough.
Carport
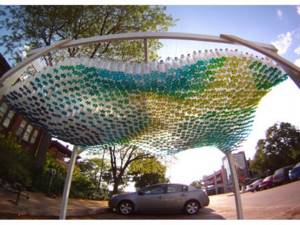
If most of the previous structures are intended primarily for decoration, then the next structure will be very useful in the country. A canopy made of plastic bottles is a godsend for a motorist! Especially if you have to visit your summer cottage infrequently and there is no garage for your car. Such a roof is very quick and easy to construct, and also does not allow moisture to pass through. The cost of creating it is very low, so you can safely get down to business.
Creating a canopy includes the following steps:
- Installation of a metal frame. It is important to install it according to the rules, digging it into the ground and filling it with additional concrete mixture. You may soon want to change the canopy roof to another one. That is why the frame must be stable.
- Next you will need an awl for work. They will need to make holes on the bottle. One through one will have to be located on the neck, two more similar ones - on the bottom. The easiest way to make them is to preheat the awl. This way, holes will be made easily, and the possibility of injury will also be reduced if its sharp end suddenly slips off a smooth surface.
- A fishing line is threaded through the holes. It will need to be secured, and then string other prepared containers.
- The roof can be made wavy. To do this, you just need to make holes slightly higher than the main ones.
The carport will look more elegant if you pour a small amount of water onto the bottom of each bottle. It should first be tinted with any food coloring. It looks very unusual and beautiful. In addition, this will help curb direct sunlight, which can heat up the car.
Furniture
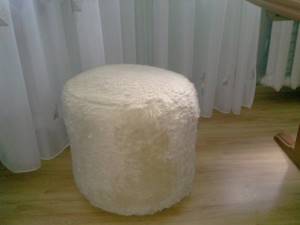
Country furniture can very quickly become unusable. If you don’t want to buy a new one and spend quite a lot of money on it, then you can create it from ordinary plastic containers. For example, you can make a soft pouf by tying water bottles together with fishing line. They will need to be covered with round cardboard on top and bottom and securely sealed with tape. Next, you need to cut the foam rubber or padding polyester according to the size and wrap it around the pouf. It should be attached carefully so as not to damage the frame, since it is filled with water. At the end of the work, you can cover the pouf with almost any fabric.
We recommend: Carport drawings
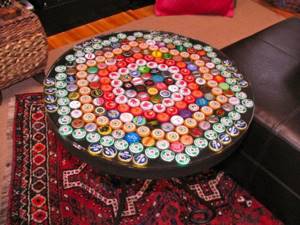
You can create very elegant and bright compositions from the caps. They can be used to decorate a country table or even chairs.
You can also create sofas and armchairs from plastic bottles. At the same time, it will be important to fasten them very tightly with fishing line so that the structure is not shaky, but stable.
Lamps
You can get original lamps if you simply paint the bottle with fluorescent paint. A composition of them can serve as a decoration for any gazebo, especially if you choose different colors. If lighting is not provided throughout the entire dacha area, then several such “flashlights” can serve as some kind of beacons. To do this, you just need to place them along the path.
Solar-powered garden lamps do not always look out of place in an elegant garden. They can also be decorated using a bottle. You can attach pre-cut petals to create a daisy or any other flower. This solution will look fresh and fit perfectly into any garden, adding color to it.
Garden paths
An ordinary path, sprinkled with fine gravel, sand, or simply paved with cobblestones, no longer looks as interesting as before. Of course, this is a classic, but those who set out to make their site elegant and unlike any others need to take into account the fact that the paths should be given no less attention than other details. So, the path with mosaic covers looks very beautiful. They can make any pattern.
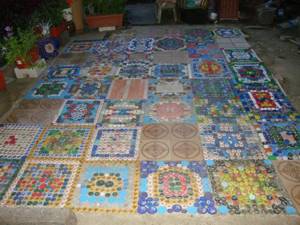
The advantages of the track will be several important factors:
- Durability;
- Cleanliness, since any dirt can be washed off from them without effort;
- Resists moisture and does not collapse;
- Practicality;
- Ease of dismantling.
It is best to secure the lids in concrete. It was already noted earlier that there is quite low adhesion between it and the plastic, however, thanks to the side corrugation, each cap will be very tightly connected to the cement.
Curtains
Making light curtains that will also serve as decorative elements is quite simple. To do this, you will need to cut off the bottoms of plastic containers and make one or two through holes in them. The fishing line will be threaded through them. Having strung them, you can fasten each such segment to the cornice and hang it above the door or window.
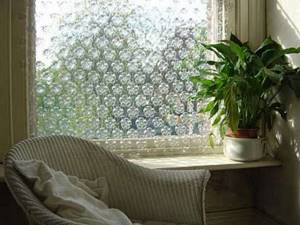
You can use beads or seed beads, which are best strung in the inner space of the bottoms. It is also permissible to lightly dip them in paint. Thanks to the unusual relief, you will get a very unusual and beautiful flower.
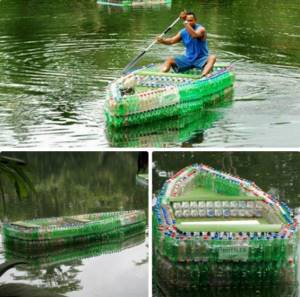
Boat or raft
Since we usually visit dachas during the hot season, when children love to splash around in open water. Together with them, you can create a very stable and reliable raft or boat from plastic containers. Using them you can even create the most unsinkable mattress. After all, an inflatable one will not be very reliable.
You can create a small boat-shaped craft as follows:
- The bottom of each container should be cut off and placed one inside the other, thus obtaining long tubes from them;
- Using furniture tape, you then need to secure each joint in several layers. It is reliable and will not come off when in contact with water;
- When making the same tubes, you should make several of them for the bottom. Additionally, you can also make sides if small children will swim in the pond at the dacha.
The dimensions of the craft will depend on the number of possible passengers and their total weight.
Conclusion
With the help of various bottles you can create unrealistically beautiful things. They will fit perfectly into any garden design, complementing and decorating it. There are countless uses for these containers, so you shouldn’t limit your imagination only to what is presented in the article. Create your own unique things, as many people do.
In addition to very common structures, other types of crafts made from glass and plastic containers are often found.
