Types of designs
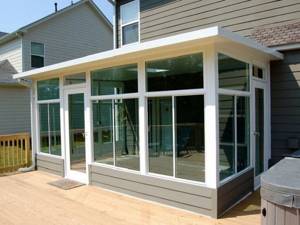
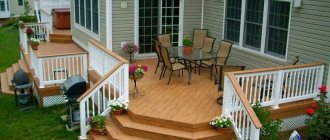
The terrace can be exclusively open. If the extension is closed, it is already a veranda, as follows from building regulations.
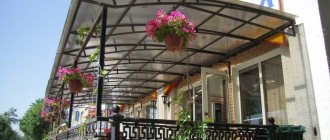
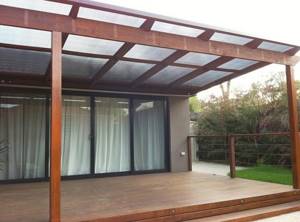
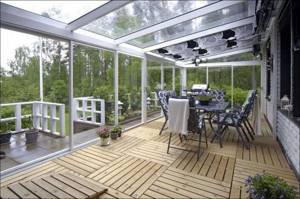
A good option is a semi-open terrace. It will be quite spacious, but at the same time provides protection from rain, snow and sun. However, furniture should be placed away from open areas.
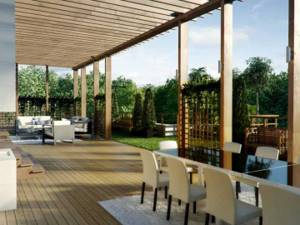
The original type of terrace is a pergola. A good choice for dry areas. It is not necessary to completely cover the structure with climbing vines. It is enough to place climbing plants along the edges and on top.

Most often, terraces are made of wood. However, they can also be classified into different types, depending on the number of levels, sizes, shapes, type of fencing, decor, etc.
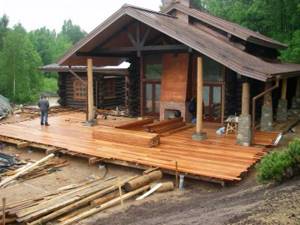
We build the frame
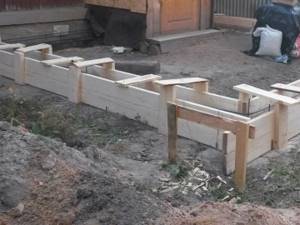
Wooden beams or logs are used as the basis for constructing the frame. They begin to build the foundation for the future veranda from the bottom. It is better to connect the beams with each other using a straight lock.
At the place where the connection
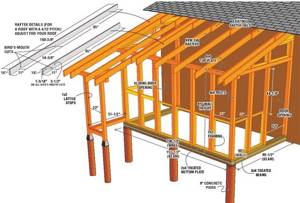
The next log and base are cut, boards and racks equipped with spikes are installed vertically. The entire structure is fastened with staples for strength and reliability. The base for the roof and the top trim is attached to wooden blocks.
Moreover, the frame for the rafters is attached to a beam located horizontally, which runs under the slope of the roof. All structural elements are fixed with anchor bolts. During the process of building it yourself, you need to ensure that the roof of the house and the terrace are well connected to each other.
Terrace project
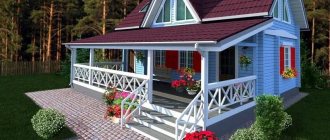
The design of a house with a terrace should be harmonious. The transition from the main house to the terrace should not stand out.
Therefore, you should first prepare a project. It needs to provide for all the parameters of the future building, such as dimensions, height, floor and roof features, number of levels, location of furniture, etc.
Decorative finishing also needs to be thought out in advance to ensure unity with the overall style of the house.
We recommend reading:
How to make a utility block for a dacha - a step-by-step description of how to build it yourself and instructions for arranging a utility block (115 photos)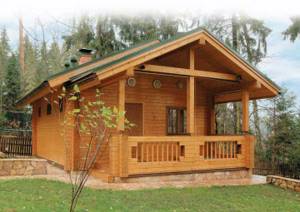
How to build a bathhouse from timber - 125 photos of the best projects and ideas on how to build a bathhouse correctly
Do-it-yourself canopy: step-by-step description of how to build a canopy correctly. The best ideas and beautiful design options (95 photos)
You can use ready-made projects, study photos of terraces from the Internet to get design ideas. You can make a terrace based on a finished project, simply adapting the dimensions to your needs.
Read here How to build a brick barbecue: projects, drawings, 125 photos of design and design ideas
If a foundation is required, this should also be provided. For example, you can’t do without it when creating a barbecue area with an oven or building a massive covered terrace.
What is the secret of the terrace
Despite a certain external similarity between the veranda and the terrace, the purpose of these buildings is different, as are the actual sizes and designs. A veranda is a part of a house with closed walls, windows and a full roof. The terrace is a landscaped outdoor area for relaxing on a sunny day with a canopy, canopy or awning. It’s easier to understand the difference if you look at photos or drawings of a classic terrace.
When choosing a place and method for building a terrace with your own hands, you can use classic techniques for arranging a recreation area:
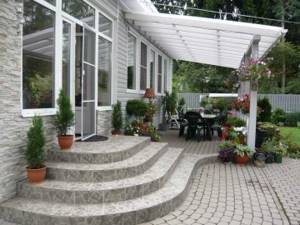
- In close proximity to the house, using the platform and steps as a porch and platform in front of the entrance to the house;
- Take it out as a separate area and place it in a cozy, sunny and less windy place in the summer cottage. In this case, a prerequisite is the arrangement of a path, stairs or steps, with the help of which you can quickly get inside the house;
- Build a special type of roof or ceiling for a country house with your own hands, on which the recreation area will be located.
Important!
It is clear that verandas and gazebos are not built this way, so any drawings and recommendations for the construction of terraces can be creatively processed, changing the dimensions to suit your wishes. The main thing is that the design is comfortable, durable and safe to use. The dimensions of terraced areas, as a rule, can be several times larger than the dimensions of gazebo buildings, and even more so, verandas. Almost always, the base of the deck is built from wood or composite, raising the structure above the ground so that moisture and dampness do not affect the condition of the boardwalk.
Materials
Beautiful terraces are usually made of wood - timber and boards. The advantage of the material is its attractive appearance. Terraces are built extremely rarely on the basis of a metal frame.
In addition to wood, you will need cement (for the foundation), antiseptic impregnation, metal structures (corners and other blanks) and paints and varnishes. Wooden terraces are installed quite quickly.
Sometimes terraces are made of brick or stone. This is a much more complex option, and there are fewer decorative methods in this case. You can use metal structures (forged elements, etc.) as decoration.
Which material to choose?
The most popular projects for extensions to a wooden house are, of course, structures made of wood, as well as foam blocks. These are simpler and more economical options. The price of an extension to a wooden house depends entirely on the functional value, weight of the structure, as well as the materials used.
So, for example, a veranda made of timber can cost two hundred to three hundred thousand rubles. An extension to a wooden house made of foam blocks is usually built in cases where the brick version is not financially feasible. This option for additional premises is a profitable solution from a financial point of view, and at the same time speed construction of an additional dwelling is quite high. When using foam blocks, such a reliable foundation is not required, which would be very necessary if an extension was being built from brick. Also, when using this material, there is no need to make a solution, since the blocks are easily placed on a special construction adhesive.
The disadvantage of a foam block structure is the need to correctly calculate the dew point and the need to protect the outer wall from freezing. Making an extension to a wooden house, although not an easy task, is quite doable. The structure is attached to a wooden house using reinforcement. For these purposes, in the corners, every 3 rows, a cut is made 3 by 3 centimeters, a groove 5 centimeters deep is knocked out, into which the reinforcement is then inserted, after which it is filled with adhesive. In the wall a hole is drilled into which the second end of the reinforcement is inserted and sealed with cement mortar.
Thus, the extension made of foam blocks is rigidly connected to the house itself, which reduces the depth of subsidence. A frame extension to the house will look the most aesthetically pleasing. Before direct work, it is necessary to take measurements and draw up a design for the additional room, as well as calculate the required amount of materials. After preparing the materials, you can start building the foundation. In this case, you can use piles, a shallow or columnar foundation. After the foundation is ready, begin assembling the frame, and you must first treat the frame with antiseptics. Screws, nails, and bolts can serve as fastening materials. At the end of the work, the roof is installed, windows are cut, the frame is sewn up, finishing work is carried out. It should be noted that the addition of a porch to a wooden house is always made from the same material as the house itself, in our case - from wooden beams.
Foundation
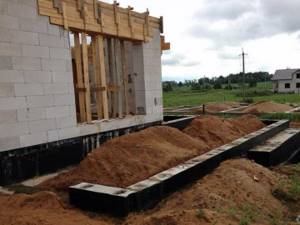
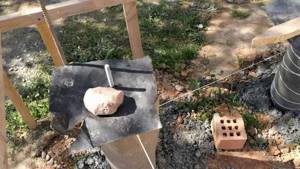
Before you build a terrace, you must build a foundation. It is usually made from 30x30 cm concrete blocks, dug halfway into the ground.
We recommend reading:

Beautiful canopy over the porch - installation options, design options and installation tips (95 photos)- Building a gazebo with your own hands - the best design ideas and main stages of construction (115 photos + video)
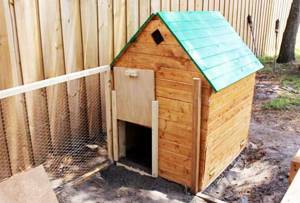
Construction of a chicken coop for a summer residence - how to make simple and high-quality chicken coops (105 photos + video)
The pillars must be mounted on a sand cushion. Waterproofing material is placed on the pillars to prevent wood rotting.
It is necessary to prepare racks through which the entire load generated by the structure will be evenly distributed over the foundation. Typically, 100x100 mm timber is used as racks.
In this case, the same beam can be used for the lower trim. If you are planning a large terrace, it is better to use timber of a thicker section.
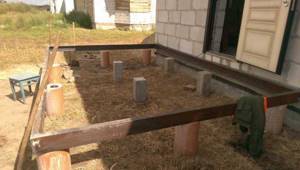
The racks are attached to the foundation using brackets. For further installation of the floor, you need to install logs. They are usually made from boards with a section of 50x150 mm.
Laying the foundation
If you plan to build a wooden or frame terrace, then a foundation with the installation of brick pillars is quite suitable, their number depends on the weight of the future structure. For an easy extension of modest size, a few columns installed in the corners are sufficient. If you plan to build a good-quality extension of impressive size, then the pillars for the base should often be located at intervals of 50 cm.
- The first step is to dig trenches, the depth of which is at least one meter. Each depression is filled with sand and gravel, to about a third of the depth. Next, a concrete cushion is formed, 20 cm thick. After the concrete has set, we lay out brick pillars. The part of the pillars that will be above the ground must be no lower in height than the level of the house’s foundation. After construction, each column is coated with heated bitumen. The cracks and holes in the pillars are filled with gravel or small stones. The holes between the soil and the columns are filled with sand. In the photo we see one of the foundation options.
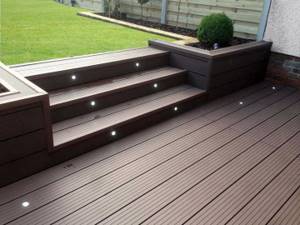
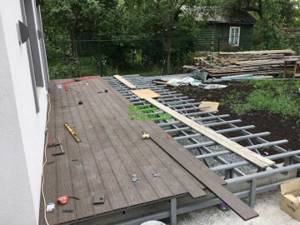
Flooring
Modern terraced houses are decked with quality flooring materials. They are usually laid on boards mounted on top of the joists.
The logs are attached with U-shaped metal hangers to the timber that forms the lower frame of the terrace.
We recommend reading:
- Construction of a barn for a summer residence: a step-by-step description of the construction of a barn. Modern and traditional materials for making a barn (100 photos and videos of construction)
DIY porch - 135 photos of the best projects and video description of the main stages of construction
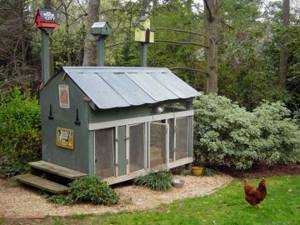
How to make a chicken coop with your own hands - step-by-step description, construction ideas and projects for the best chicken coops (120 photos)
The maximum width of the boards used to install the decking should not exceed 150 mm. Otherwise, the material may become deformed over time.
If the terrace is not covered, the flooring is not laid, and small gaps (about 3 mm) are made between the flooring boards to allow water to drain freely.
4. Installation of logs
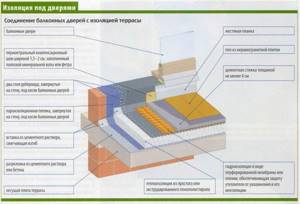
Installation begins from the point where the terrace adjoins the house. The first joist is attached to the house in increments of 600 mm. For a brick wall, a bolt 100 mm long is sufficient. For wood – at least 150 mm.
The junction is insulated to prevent water from flowing in. The logs can be mounted on base beams. Installation of logs on beams under the terrace
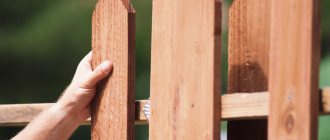
Fencing
The terrace fencing is installed after the decking is installed. It can be made in the form of a lattice or completely sheathed. Usually they make a decorative lattice fence.
First, a horizontal strapping is made that connects all the vertical posts. It is performed 5-10 cm from the flooring, and the height is limited at your discretion. Next, a lattice-shaped beam is mounted between the bars of the horizontal strapping.
You can make a metal fence. Usually it is built separately and then mounted on the terrace. The steel fence is attached to the support posts using metal corners.
Building an ideal outdoor terrace above the premises
The terrace is a vulnerable place for both heated and unheated rooms due to the fact that it is exposed to atmospheric phenomena: frost, heat, precipitation, temperature changes. Mistakes made during the process of insulating and finishing the terrace will come out within a year. At best, you will find cracked tiles and stains on the walls. The worst option involves deep cracks in the walls, peeling of the cladding and fungus. Repairing the premises under the terrace is fraught with large financial and labor costs. Therefore, in order not to pay twice, it is better not to save on materials and labor costs and do everything efficiently from the very beginning.
How to organize the work of teams
To build a terrace, you will need the services of not one construction team, but several:
- • Regular builders for preparing the concrete base, laying insulation and installing fencing. • A team of roofers with experience working on flat roofs to waterproof the surface. • Finishing specialists for laying stone or ceramic tiles. • If wood flooring is to be installed, the services of parquet floorers will be required.
There are certain disadvantages in involving several teams, namely: the complexity of organizing their work, difficulties in identifying the culprits of errors. Yes, and you can only determine how conscientiously the covering or fencing is made “by eye.” Therefore, it would be more expedient to monitor each stage with the assistance of a competent specialist.
Definitely a good solution would be to invite a specialized team capable of completing all the work and creating a complete waterproofing system. It is worth knowing that the price for the work of such a team and the system as a whole will be impressive.
Complete solutions
For a long time, the scheme for constructing terraces was the same: laying a vapor barrier material on the slab, then insulation, covered with a double layer of roofing material, pouring a cement screed and facing. This technology required builders to have experience and qualifications, which, however, did not guarantee the quality of the work. Today on the building materials market you can find a wide selection of insulation systems from leading manufacturers. Such systems based on profiled membranes, bitumen, roofing felt or “liquid film” will be the best option for covering insulation. As a rule, the system includes all the necessary elements and products for a comprehensive sealing of the terrace: tin aprons, drainage elements, edge profiles and profiles for expansion joints. Modern systems are much better than traditional ones in terms of overall efficiency. You cannot combine products from different systems or replace elements of the insulation system.
It’s great if the house design includes a plan indicating a specific waterproofing system for the terrace. But often architects do not pay due attention to the terrace.
Important! The thickness of the terrace flooring should not be greater than the thickness of the floor in the adjacent room. Take this into account when choosing an insulation system.
A well-made terrace does not require repairs for at least 10 years after completion of the work.
The most common mistakes when building a terrace
- 1. No expansion joints. This leads to deformation of the tiles, disruption of the integrity of the waterproofing layer, and increased humidity in the room under the terrace. 2. No slope. Leads to stagnation of water on the terrace. Frozen puddles can tear the ceramic finish. 3. There are no tin aprons or drainage elements. Result: water flows down the walls and leads to the formation of mold and mildew. 4. Fence posts violate the waterproofing of the terrace. As a result, the water partially penetrates deep into the layers of the terrace, forming mold on the ceiling and walls under the platform; frozen water destroys the terrace from the inside. 5. Glue and grout that cannot withstand temperature changes. Result: in the first year the tiles will crack and may separate from the screed.
Construction of the terrace in order
The basic steps of constructing a terrace are described below. It is important to monitor the work of contractors at each stage: • Laying insulation. At this stage, it is easy to identify the discrepancy between the terrace and the slope and, if necessary, correct the deviation by dismantling the insulation.
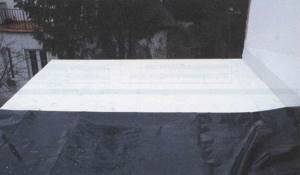
• Laying waterproofing material. Check the density of the waterproofing layer: when sloping towards the water intake, close the drain, fill the surface with water and see if the water is absorbed or remains. If the slope is towards the gutter, all that remains is to check the accuracy of laying the waterproofing.
• Installation of expansion joints around the perimeter and on the surface of the terrace. After laying the final coating, it will be difficult to control this moment, so focus on the seams before installing the screed.
• Fastening fence posts. Your presence is especially important if during their installation the layer of flooring and insulation will be broken through. Check whether the columns are sealed properly and whether the waterproofing is damaged.
• The final stage is laying the tiles.
Check the accuracy of the work, and also inspect the drainage system and balustrade.
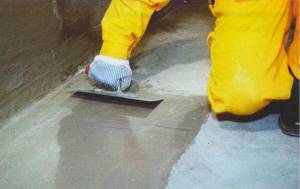
Slope is the key to a proper terrace
If you maintain a two percent slope of the terrace surface, then rain flows will flow in the direction of the drainage or drainage devices. It is good if the load-bearing slab itself, which is the base of the terrace, is already built on a slope. But often it is perfectly flat and the slope must be done manually from a cement or concrete solution, having previously treated the slab with a special preparation. Remind contractors that the ramp should be 3-4 cm thick at its lowest point.
Insulation is important
Regardless of whether the room under the future terrace will be heated or not, laying insulation is a mandatory procedure. Expanded polystyrene boards 10–15 cm thick will prevent heat loss and protect the base from temperature changes. Check with your contractors to see if they have covered the base slab or concrete ramp with a vapor barrier. If bitumen mass is used, it must be applied evenly over the entire area. When laying the film, it is important that the edges of the strips overlap by approximately 10–20 cm and are laid towards the slope of the terrace. If you still need to lay the film across the slope line, then start from the bottom edge, moving upward.
The thickness of the thermal insulation layer above the heated room is 15 cm, above the unheated room – 5–10 cm
No moisture
Waterproofing is the basis of the terrace, its most important component. It is laid on top of the insulation, acting as a terrace separator into upper and lower working areas, or on top of the screed. For waterproofing, a double layer of roofing material is often used. The first layer (with a density of at least 2000 g/m2) is laid loosely, connecting individual strips with glue or welding. The second layer (with a density of at least 2500 g/m2) is fused over the entire area. Make sure that the joints of the strips of both layers do not coincide. Roofing felt is laid in the same way as a vapor barrier film: along the direction of the slope of the terrace. If you want to give the waterproofing layer the opportunity to “breathe,” then you can lay a profiled film or membrane on top of the roofing material. As for waterproofing mastics, they need to be laid not on the insulation, but on top of the screed. Detailed recommendations for each type of mastic are indicated in the instructions for use. Contractors should review these documents carefully. Work with the waterproofing layer should be carried out in dry, not too sunny weather: in the range from +5 to + 25°C.
Waterproofing mastics are laid on the screed, and not on the insulation. All tips on application and number of layers are indicated by the manufacturer in the instructions
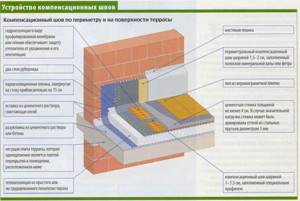
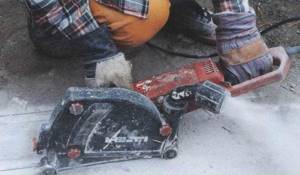
Working with expansion joints
Temperature changes cause the terrace to move, invisible to the naked eye. To prevent this movement from destroying the terrace, expansion joints filled with elastic material were invented. The rules for the construction of terraces imply the installation of a seam between the walls and the screed along the perimeter of the site, as well as between the walls and the covering. If the terrace is planned to be large, then it is better to divide the area into segments using expansion joints and fill them with any sealant that maintains elasticity. To do this, use a concrete saw or grinder to make a hole in the screed. Make sure that workers do not damage the waterproofing layer! It would be better to take care of the seams in advance: during the installation of the screed, place beacon strips in place of future seams and remove them after the mortar has set. It’s even easier to use ready-made compensation profiles after installing the waterproofing. They are installed in the designated locations, after which the screed is poured. Usually the seams should reach the covering, but if the area is very large, it is acceptable to have seams on the surface of the terrace. The length of the sides separated by seams should be at least 2 m, and if a dark terrace is planned, then the seams can be laid more often.
Space for expansion joints can be left both during pouring of the screed and after hardening. In the second case, you will need a saw for cutting concrete
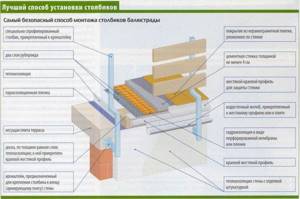
Particular attention to the columns
An integral part of any terrace is the balustrade. It’s good if the terrace design involves attaching columns to the wall of the house or the load-bearing slab - this will preserve the integrity of all its layers. If for some reason you are going to mount the posts deep into the terrace itself, make sure that the waterproofing layer is not damaged. Otherwise, water will get inside the terrace and cause irreparable damage. The junction of the column with the screed and the coating must be filled with waterproofing mass or sealant (MS polymer). As an additional protection for the junction of the column and the surface from moisture, builders must install so-called thrust bearings.
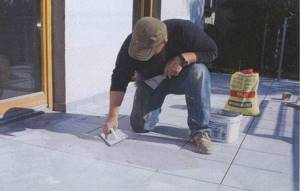
Don't neglect fugues
The top covering of the terrace must be reliable and durable, because it protects the underlying layers from rain, sun and damage. At the same time, it is also a floor that will be walked on in different weather conditions. Therefore, it must be resistant to temperature fluctuations and non-slip. The finishing of the terrace is often made from rough clinker or porcelain tiles, less often from stone (basalt, granite). Sometimes floorboards are laid on beams. To extend the life of terrace tiles and at the same time preserve their appearance, a highly elastic solution is needed for gluing. Grout for tile joints should have the same property. For joints between clinker and stone tiles (which are more than 5 mm), it is preferable to use silicone fillers rather than adhesive mortar.
Tip: choose a tile for the terrace so that its dimensions are 25–30 cm. Then the joint width will be 5 mm. A coating made of small tiles will be more resistant to changes in shape.
- 5
- 4
- 3
- 2
- 1
( 0
votes, average:
0 out of 5)
Read articles on similar topics
- Waterproofing system for terrace on the second floor
- 6 options for flooring your terrace
Stone terrace in the interior of a country plot- Metal fencing for terraces and balconies: beautiful, safe and…
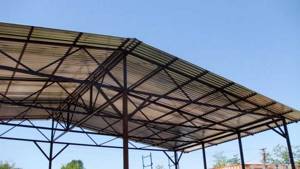
Roof
Usually the roof is made of the same material that was used for the main house.
In this case, the roof structure itself, as a rule, is made of a pitched roof. This is the simplest and most aesthetic option, since a gable roof will not blend harmoniously with the house.
The roof is mounted on a wooden rafter system, attached to the top trim by means of vertical supports.
You can also make a polycarbonate roof. You can use slate or metal tiles.
Sometimes an awning made of durable material is simply used as a roof. However, such a roof must be removed for the winter, as it will be damaged by snow.
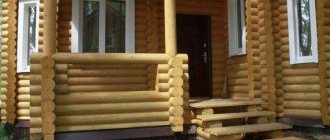
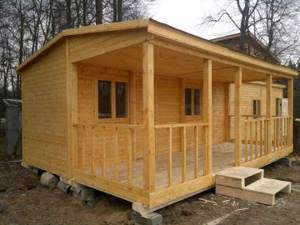
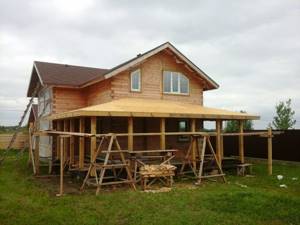
DIY extension to a wooden house
Why do you need an extension to a wooden house? Sometimes it happens that the house itself has been completed a long time ago, but there is a need to increase the living space, and the owners of private houses often face this situation. The construction of such a structure is no less troublesome than the construction of the whole building. In some cases, it can lead to changes in the layout and design of the entire house. The extension itself can be built as a veranda, terrace or other room.
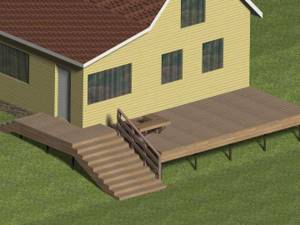
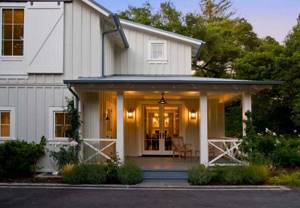
Photo tips on how to attach a terrace to your house
Did you like the article?
0
Extension roof
Of course, the roof of the terrace is an integral part and continuation of the roof of the house. Therefore, this structure can be constructed from the same material as the main roof.
Although, you can use another coating that is fixed to the sheathing. When constructing the veranda roof with your own hands, you need to pay attention to the careful adherence of the material to the base. When fixing the rolled covering on the roof, you should bury the nails as deeply as possible.
Along the edges of the roof, the covering is reinforced with slats. When using steel sheets, the joints are fixed using a “seam” seam. Asbestos-cement material is secured using screws or nails, which are inserted into specially prepared holes. Moreover, such material is laid with an overlap.
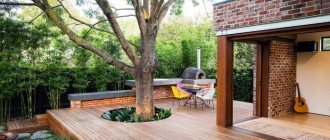
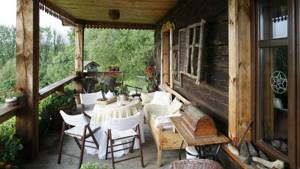
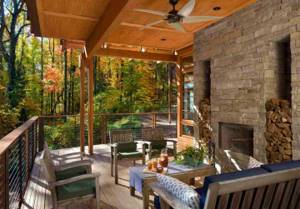
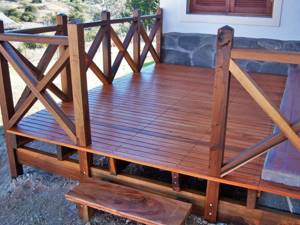
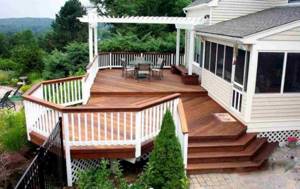
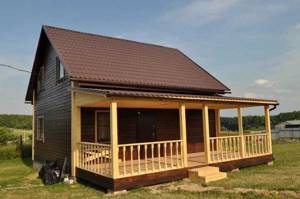
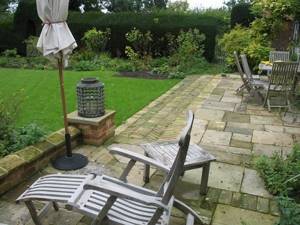
Wooden terraces - photo examples
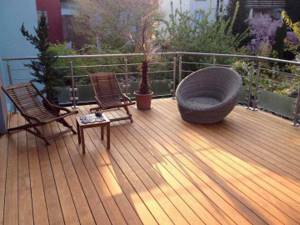
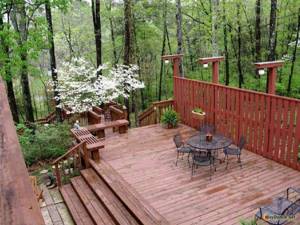
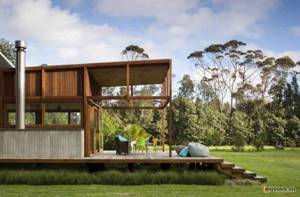
Outdoor wooden terrace
Open wooden terrace near the house
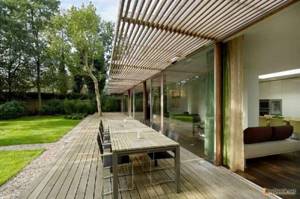
Wooden terrace for the house
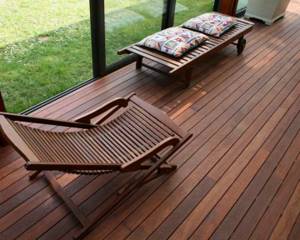
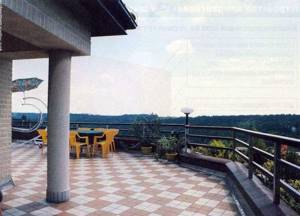
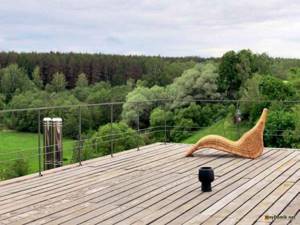
Original wooden terrace with furniture
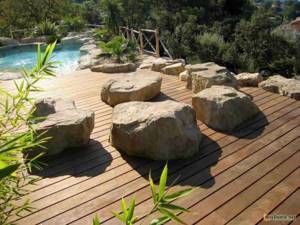
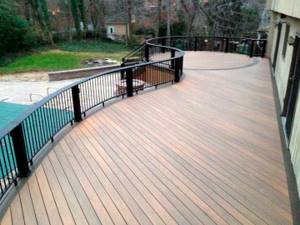
Wooden terrace with stones
Wooden terrace at the dacha
Wooden terrace with canopy
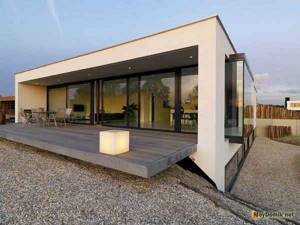
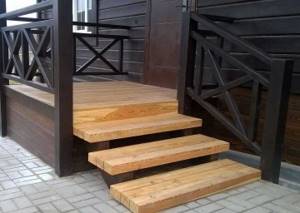
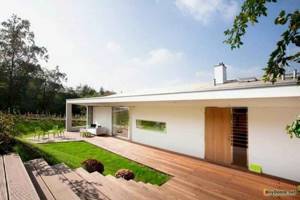
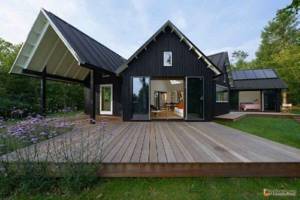
Wooden terrace in a modern style
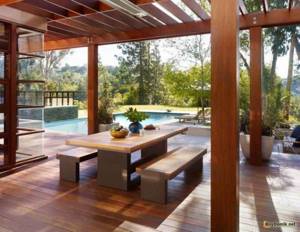
Wooden terrace near the pool
Varieties
A terrace is understood as a structure raised above the ground, covered with a light canopy, open on all sides or with a partial side fence. Of course, this design is not heated. Although there are terraces without a canopy, experts recommend not saving. Even the simplest roof will provide reliable protection from bright sun rays and short summer rainfall.
The ideal option for those who would like to sunbathe on the terrace would be a combination of both options:
- the visor will allow you to hide in the shade or wait out the rain;
- an open area makes it possible to enjoy unity with nature.
There are many types of terraces.
The terrace can be adjacent to the wall of the building or located separately. Each option has its advantages:
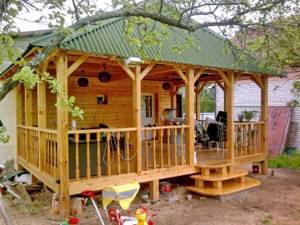
- A separate building can be located in a secluded place with a picturesque view. Such a building will be more expensive; you will have to prepare a strong foundation and dig in more support pillars around the entire perimeter.
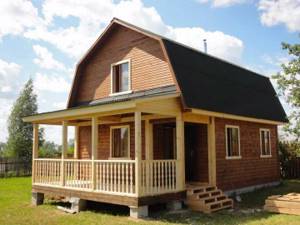
- The building attached to the house already has partial protection from the wind - an adjacent wall. Less building materials will be needed for construction; the porch and roof canopy can be shared.
The ideal is a collapsible design that can be easily assembled separately, placed anywhere, and with the onset of cold weather, disassembled and stored in the attic.
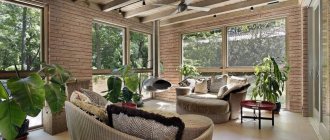
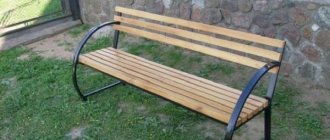
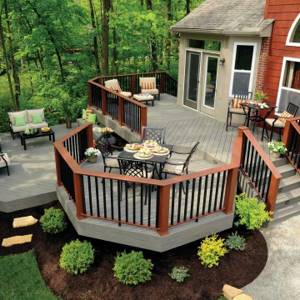
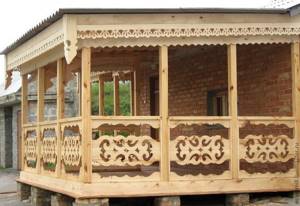
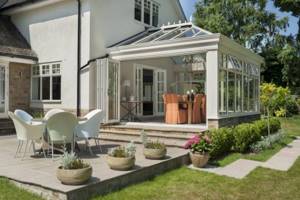
Decorating the terrace
Beautiful and useful design of the terrace space is an important part of the style of a modern home. The active decor of a recreation area can be forged or wooden fencing elements, stained glass partitions, and airy tulle curtains around the perimeter of the structure.
In the recreation area you can place wicker furniture, beach umbrellas, sun loungers, tables, and a barbecue. The unique style of a terrace depends on many details. This means that you should think not only about practical things, but also about things that are pleasing to the eye.
You can complement the interior with plants and flowers in pots, hedges, wind chimes, and paper Chinese lanterns.
If you don’t have any ideas for your own design, then photos with examples of terrace design can inspire and suggest in which direction you should move.
Making a veranda roof
When the rafters and mauerlat have been installed, you can proceed to the final stages of laying out the roof. There are three of them:
- Lathing – solid or sparse. The first type is suitable for rolled materials, and the second - for sheet roofing. Continuous sheathing is made with OSB boards. They are attached to the rafters, leaving a 1 centimeter gap. The sparse type is attached to the rafters using self-tapping screws or galvanized nails at the distance specified in the selected roofing material.
- Thermal insulation. If there are cells left in the sheathing, they are filled with thermal insulation, and then completely covered with film, securing it to the sheathing with a stapler. If it is solid, then the thermal insulation is carried out from the inside of the room, secured with transverse slats.
- Installation of roofing. It looks good when the roof of the veranda and the house are the same. But in each case, the owners decide this issue themselves, based on their capabilities and preferences.
Assembling the frame of a veranda attached to the house
Required materials and tools:
- Glasses, gloves and special clothing.
- Hammer.
- Profile pipes.
- Welding machine and iron scarves.
Stages of frame installation:
- Installing a frame of metal corners on top of the grillage.
- Weld profile pipes to the frames, making racks for the canopy (pipe cross-section - 80 mm).
- Connect the walls of the extension and the private house with metal gussets.
- Arrange a rafter system, the design of which depends on the type of roof specified in the project (pipe cross-section - 40 mm).