A well on a property is a fairly common way to have water available nowadays. Usually, the construction of a well necessarily includes the construction of a house for it.
What is a well house for, you ask? First of all, such a house serves as protection for water in the well. And, of course, not least important is the function of decorating the well.

Currently, there are a huge number of different shapes and designs for this type of building. The main qualities of the houses are absolutely the same for all models, the only difference is in appearance.
The required well house can now be easily found at various retail outlets. They are sold in various designs, but the cost is so high that many site owners decide to make them themselves. Moreover, it is not difficult enough to do.
Protection of the well is necessary from water contamination by insects, debris, as well as chemicals for treating the area. And also, clean well water is protected from precipitation with the help of a house.
Open and closed well houses
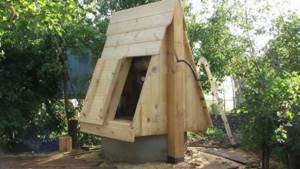
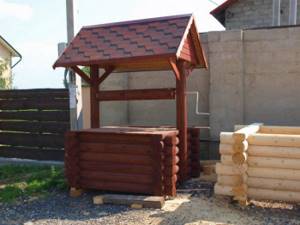
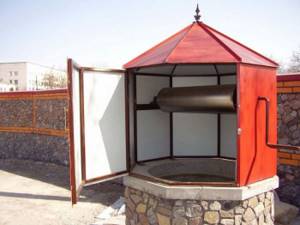
There are two options for designing a well: using an open house and a closed house. The first option is a small canopy in the form of a roof over the well, and a ring is made around it.
Such houses are good for those who do not want to spend money and time on complex buildings. However, if you want to use well water in winter, it is better to neglect this type of house, or insulate it additionally.
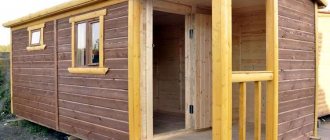
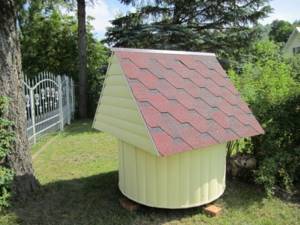
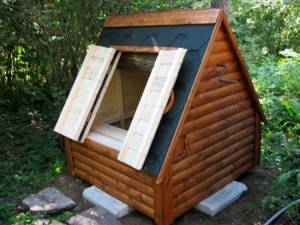
Closed structures are much better at preventing water from freezing in winter. Such houses represent a full-fledged frame in the form of a house. For better insulation during construction, you can use a layer of foam or insulation.
This type of house will not only save water in winter, but also provide better protection against debris in case of strong winds. But it will require time and more building materials.
When building a canopy, an additional cover is usually made, and you also need to know that the roof must be larger in size than the well itself.
Types of products and covers (superstructures) for them, photos
Before starting to consider the types of forged wells, it should be noted what components are included in the structure of the product:
- head (base, fence) - part of the well that ensures safe operation;
- The cover prevents dust, leaves, dirt and other debris from entering the water;
- gates, located between the posts that support the roof, serve to lift buckets of water;
- the visor (roof) is not always present.
Forged open-type well with a stone base. Photo Union of Blacksmiths and Metalworking Art
The entire complex of above-ground parts of a well is often called a superstructure or a house.
Any part of the well can be made of metal or all elements are often made of forging.
The implementation of such projects is an excellent opportunity for a master to show imagination , experiment, and apply a non-standard approach to solving assigned problems.
Open and closed
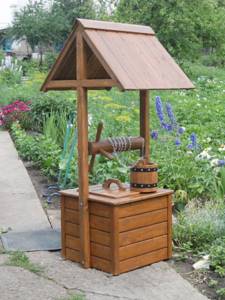
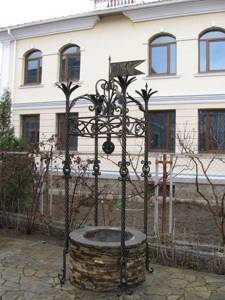
Forged wells (well houses) have a closed or open structure. Wells of the second type consist of a base, posts and a canopy , which has a different shape. Closed products resemble a real house : with walls and a roof of different configurations.
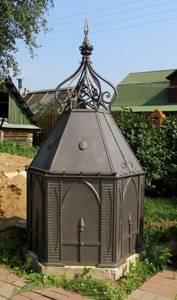
Closed forged well. Photo Kuznets Alexey Lebedev
They are much less common , since their production will cost many times more, and besides, installing an open well house is faster and easier. Also, open structures have great grace and provide easy access to the lifting mechanism. But a drawback - at subzero ambient temperatures, the water in the well freezes.
With and without visor
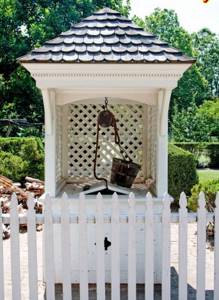
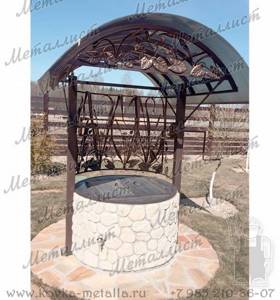
A forged canopy is not only a functional part of the well, but is an original element that attracts the attention of visitors to the house. The canopy roof is made of different materials: polycarbonate, sheet metal, tiles, wood . The material should be chosen based on financial capabilities and assigned tasks.
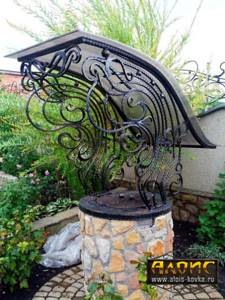
A well with a canopy made of forging and polycarbonate, having a non-standard shape. Photo Alois
The shape of the roof also varies; it should be chosen based on the configuration of the roof of the house and other buildings located on the site. There are models with arched, straight (slightly sloping), free-form and gable (house-shaped) roofs.
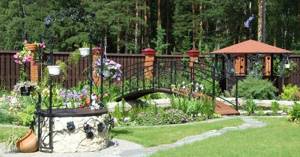
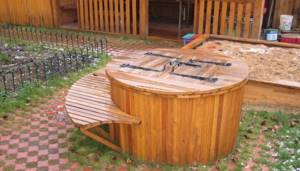
A forged well without a canopy with a stone base, complete with a bridge and a gazebo. Photo Creative group Taurus
Wells without a canopy have a non-standard design , i.e. the ground part of the structure includes the base, gates and posts, which are most often connected at the top, forming an arch.
In the form of a house
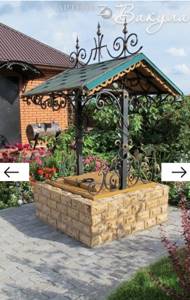
Forged visors with a gable shape are the most popular. Wells of this configuration resemble small houses that have an interesting design and attract attention.
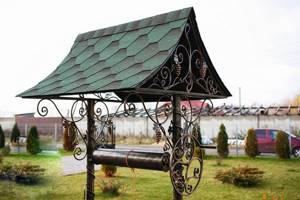
Forged well with a gable roof. Photo Golden Label
Forged heads
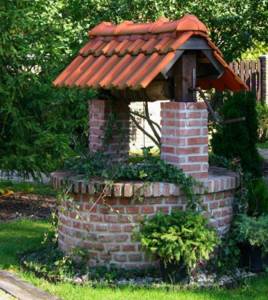
Forged well heads are not very common; in most cases, the base is made of other materials. But manufacturers offer interesting models of metal heads that provide reliability and safety, strength and durability. Decorating the base walls with elements gives the structure an individual design .
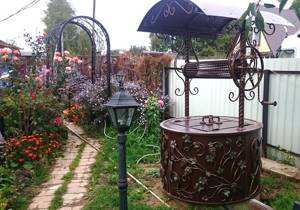
A well with a forged head, lid, posts and collar. Photo Golden Label
For this, plant-themed details , which allows you to create a harmonious composition with living plants. Openwork compositions made of curls are a universal solution, suitable also for the base of a well. There can be many options, it all depends on the preferences and wishes of the client.
Combinations of forged metal with other materials
The design of a well often includes elements not made of forged metal. The base is often made from artificial or natural stone, concrete, wood . In order for the head to harmoniously combine with the forged superstructure, it is complemented with decorative elements made of metal. For example, they place a branch with leaves that smoothly passes from the base, along the racks and to the roof.
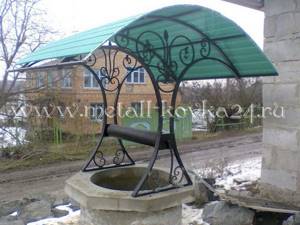
A well with a concrete base, forged posts and a collar, and a polycarbonate canopy. Photo Metal forging 24
Posts and gates made of wood with forged elements for decoration look great, so they are a popular option. The lid , if present, which is not always the case, is made of forged metal and wood. Moreover, the material of the cover does not always coincide with the material from which other elements of the above-ground part of the well are made.
There are a lot of combinations, which allows the client to choose the material for every detail of the structure.
Forged elements for design and decoration
Forged wells are decorated with almost any forged elements , with the help of which various compositions are created:
- designs with plant motifs are collected from leaves, grapes, flowers;
The well is decorated with forged plant-themed elements. Photo Metalist
- abstract compositions made from curls, volutes or geometric details that are made to order.
Forged racks are made from smooth and twisted round and square pipes with a large diameter.
Artistic and cold forging
Forged wells and individual elements for them are produced in two ways. Hot forging is a technology for manual processing of metal blanks. In this case, the master uses a limited set of tools: a hammer and anvil , pliers, forks, mandrels.
Giving the blanks the desired shape is carried out using artistic processing operations. As a result of the painstaking and lengthy work of a blacksmith, products are created with a unique design, but with a high cost .
The well with a gable roof is decorated with forged elements. Photos VAKULA
Cold forging is a more productive and less expensive method. The deformation of workpieces is carried out by bending and pressing ; equipment with varying degrees of automation is used for processing. The use of equipment allows us to quickly produce a large number of elements of the same shape and design.
The standard nature of the parts does not allow the creation of exclusive products, but ensures the assembly of interesting compositions. In addition, such wells have a much more affordable cost.
Video
Where to start construction
If you decide to build a house for a well, pay attention to the following organizational points:
- First, decide what your house will be like: open or closed;
- Secondly, you need to decide what shape and design your house will be;
- Thirdly, decide what materials it will be made from;
- And fourthly, draw up a construction plan and make a drawing of a house for the well.
When choosing a material, remember that it is better to make the house for the well in the same style as the house on the site. In this case, the buildings will be in harmony, from the outside it looks very presentable.
When choosing a design, you can look at photos of various well houses on the Internet. Here you will find a large number of the most interesting and unusual ideas for construction.
When drawing up a drawing, accurately indicate all the required dimensions of the well house. This will allow you to build the ideal model as accurately as possible. If you do not know how to draw up a drawing correctly, consult with professionals.
These tips will tell you how to build a good well house.
Construction of a well in a house
Types of arrangement of wells in the house
It should be said right away that there are two construction options:
- The source of water supply is carried out before the construction of the house.
- A well is being made in a house that has already been built.
In the first case, the construction of a well does not have any special features, the only thing is that you need to decide in advance on the location of the house on the site and its layout. To accurately determine the correct location of the source in the future building, markings should be applied.
In the second case, making a well is somewhat more difficult, since it is not possible to use technology, and it is not always possible to lower concrete rings into the basement. Therefore, they have to be made with their own hands on site. Next we will consider this option.
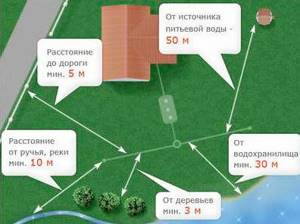
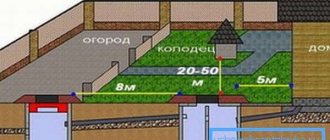
Layout of the well and pollutants
Preliminary work
Before you start building a well, you need to make sure that all the necessary conditions are in place for this.
First of all, this concerns sanitary standards, which are given below:
- The location of the future source must be at least 50 meters from the nearest pollutant. This applies to cesspools, sewer wells, cesspool toilets, etc. Often, land owners are interested in whether it is possible to dig two wells side by side if there is a dilapidated well on the site that is unprofitable to restore? In this case, the distance is also regulated by sanitary standards, since any well is a potential pollutant.
- The house should not be located closer than 30 meters to highways and highways.
- The depth of the sewer well in a private house should be higher than the level of the aquifer.
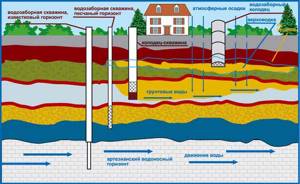
Layout of aquifers
In addition, it is necessary to ensure that the aquifer is located at an accessible depth. The easiest way is if there are wells in neighboring areas. In this case, you also need to ask your neighbors about the quality of the water, the debit of the source and other characteristics to make sure that the decision was made correctly.
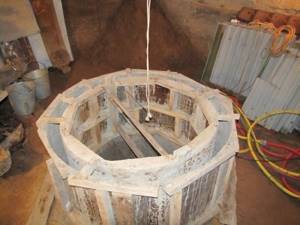
Formwork for concrete rings
Manufacturing of concrete rings
Work must begin with the manufacture of concrete rings, since this process takes quite a lot of time. Moreover, first you need to make the forms. To do this, you can use plastic barrels or pipes, however, it is not always possible to lower molds of the required diameter and height into the basement.
In this case, the formwork should also be made on site, for example from steel sheets. The manufacturing principle is quite simple - you need to make two well rings, the diameter of one of which is 20 cm smaller than the second. In this case, the thickness of the walls of the concrete ring will be 10 cm.
Advice! The inner ring should be slightly tapered to make the concrete products easier to remove from the formwork.
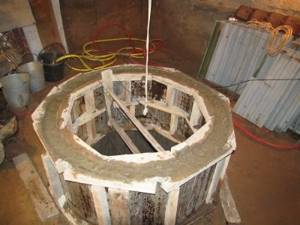
Formwork filled with concrete
The instructions for making reinforced concrete rings are as follows:
- The prepared rings are inserted one into the other.
- Then the formwork is centered and fixed so that during pouring there is no displacement of one ring relative to the other. To do this, you can use a spacer made of wooden wedges.
- Next, vertical metal rods are installed in the formwork.
- When the forms are ready, concrete should be made from cement, gravel, sand and water.
- The next step is pouring the formwork. It is performed in layers, with a thickness of each layer of about 20-25 cm. Moreover, after each stage of pouring, it is necessary to compact it with a metal rod.
- After a few days, the formwork needs to be dismantled and the concrete allowed to finally gain strength. This will take at least 15-20 days.
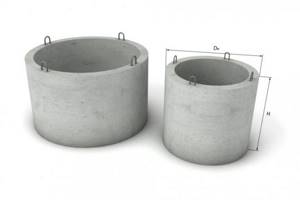
Reinforced concrete rings with loops for installation
Advice! If the rings are made without reinforcement, then the thickness of the walls must be increased to 15 centimeters.
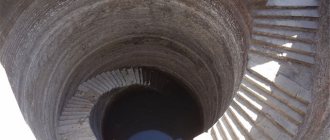
Well construction
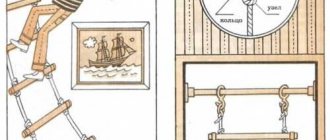
Once all the materials are ready, you can proceed directly to constructing the well. To simplify the work, it is advisable to make a tripod and hang a winch from it, which will simplify the transportation of soil and the installation of rings.
Well design diagram
The work is performed in the following order:
- The first step is to make a recess along the diameter of the concrete ring . Its depth can be one or one and a half times the height of the ring. In this case, the bottom of the resulting hole should be level.
- After this, a concrete ring is placed in the recess . It should be positioned as evenly as possible relative to the horizontal plane.
- Next, you need to go down inside the ring and deepen the shaft, evenly digging up the soil under the lower ring . The ring will gradually settle under its own weight. If there are large stones in the ground, they should be turned out using a short crowbar and removed to the surface in a bucket, or tied securely with a rope.
- As space becomes available on top, new rings should be installed . At the same time, tarred rope must be placed in their seams to ensure sealing.
- If you notice that the rings are stuck, i.e. stopped settling, they need to be weighted down by placing a shield and bags of stones on top . Under this weight, the structure will probably fall. To prevent such a situation from arising, you need to constantly monitor the horizontal position.
- At a certain depth, water will begin to flow into the mine, but it is too early to stop the deepening process . If necessary, water must be pumped out with a pump.
- When the water arrives too quickly and aquifer veins appear, dredging must be stopped.
- The next step is to make a filter at the bottom of the well . To do this, you need to wash large stones in advance and place them on the bottom, then cover them with a layer of washed gravel or crushed stone. Such a filter will significantly reduce sand impurities in the water.
- After this, the joints of the rings need to be covered with a solution of liquid glass and cement.
- To prevent surface water from entering the mine, a clay castle about two meters deep should be made around the column.
- This completes the main part of the work.
After the home well is completed, it is necessary to equip its upper part. Under no circumstances should the hatch be made flush with the floor. The well must have a head that will serve as a fence.
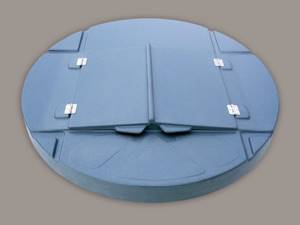
In the photo - a cover for a well
As a head, the easiest way is to install another concrete ring, which can later be finished with natural stone or wood, depending on the interior of the room. In addition, an important element is the well cover, which must close tightly. You can make it yourself from wood, or buy a ready-made one from PVC or other material.
- Well arrangement
Advice! It is advisable to provide for the possibility of manually collecting water using a metal bucket in case of a power outage, which often occurs in rural areas.
After the well is completely completed, water intake equipment should be connected to it. Considering that the source is located inside the house, it is best to use a submersible pump, since the noise of its operation will be inaudible, however, the price of the product is slightly higher than that of surface devices.
As for the power of the device, it is selected in accordance with the depth of the well and some other characteristics of the water supply system.
Top of the well
Note! Before starting to operate the source, water must be pumped out of it for 20 hours, which will allow the water-bearing veins to be flushed.
Stone lining of the well ring
Typically, natural stone is used for this finishing method. It is glued either to tile adhesive or laid on cement.
It is important to remember that when using any solution, the stones must be cleared of it before the solution dries. Cement or glue is applied to the well in a wide layer from top to bottom, and then stones are dipped into it.
To prevent the structure from collapsing, it is attached to a previously installed plastic or metal construction mesh. Before diluting the solution, be sure to read the instructions.
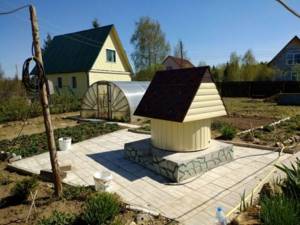
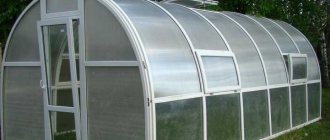
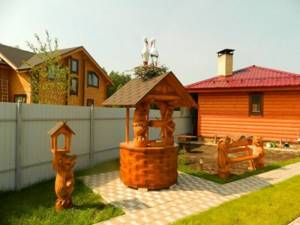
Ideas for building a house
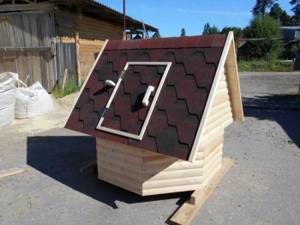
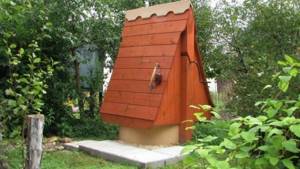
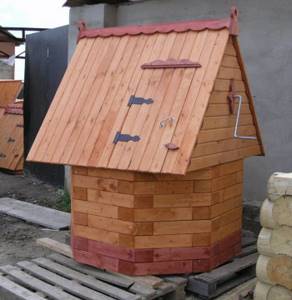
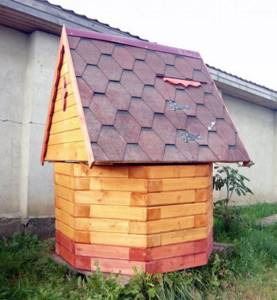
The base of the well can be finished with concrete, interspersed with broken glass, tiles and other materials. The well house itself can be made in the form of a hut on chicken legs, a beehive, or a mill. The number of slopes on the roof is unlimited. The main thing is that insects and debris do not get inside. The water source can be covered with a lid or film.
Many owners decorate it with various figures made from plastic bottles and other suitable materials. For those who don’t feel strong enough to build. We can advise you to buy a ready-made structure - they are sold unassembled. A diagram for assembling a house over a well is included in the kit of parts. The cost of such structures will be much higher, because the kit may include forged parts.