A type of recoil system
Depending on the purpose of the design, you need to make a choice towards one design or another.
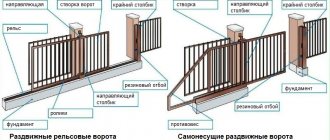
Making sliding gates with your own hands is not so difficult, but you need to know all the types of such a system. And there are not so many of them.
- Suspended sliding gates;
- Sliding on rails;
- Console.
Each of these types has its own strengths and weaknesses, which should be taken into account when constructing such a fence around the perimeter. Now let's look at them in more detail.
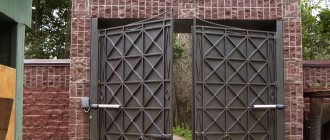
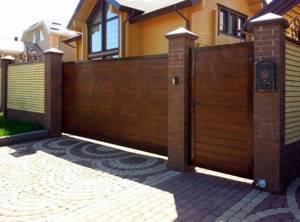
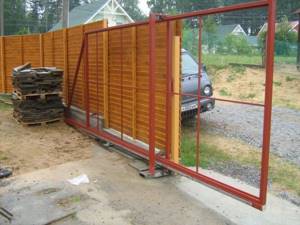
Sliding gate design with wicket
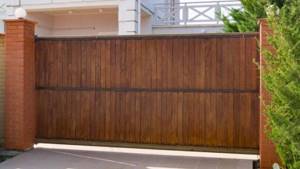
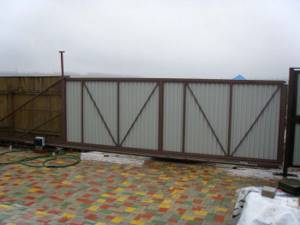
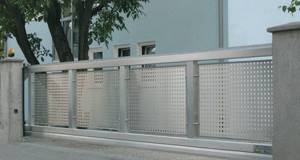
Sliding gates are a movable fence leaf that, using an automatic drive or manual mechanism, is moved to the side, forming an opening.
When open, the sash occupies a position parallel to the fence. Gates can be either single-leaf or double-leaf. Structural elements of sliding gates with a wicket:
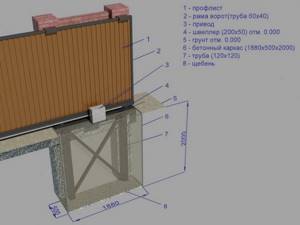
- rectangular frame;
- one-piece canvas with a hole for a gate;
- gate with a hinged bar;
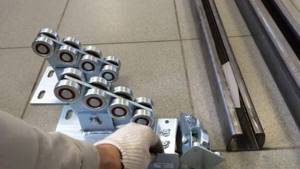
- guide skids;
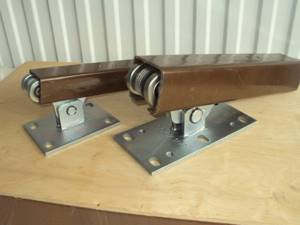
- a pair of roller bearings installed in the foundation;
- electric drive
For the movable leaf of sliding gates, steel or profiled sheets are most often used. It is fixed into a load-bearing frame, which is made from a profile pipe. The gate for the passage of people is designed during the drawing up of the drawing of the sliding system.
It is advisable to install a wicket gate in sliding gates in cases where it is not possible to equip it nearby. However, it should not be placed very close to the edge and should not be placed in the center of the structure. Its usual location is a meter from the edge of the gate.
Hanging sliding gates
The principle of operation is as simple as possible: roller trolleys are attached to a metal beam, from which the gate itself is very tightly suspended.
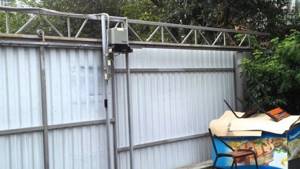
You can meet such a system at the entrance to enterprises and other protected facilities. There are controversial design disadvantages of sliding gates:
- The upper beam limits the opening, which can cause inconvenience when large vehicles enter;
- When constructing a gate, too much metal is consumed.
The cost of this kind of pleasure can cost a pretty penny, while visible shortcomings call into question the feasibility of such an event.
How to make sliding gates with your own hands: step-by-step instructions
To prevent the structure from turning out to be a propeller, welding of sliding gates must be done on a level area. Since you will have to do the work yourself step by step, you need to monitor the correct manufacturing and assembly of structural elements at every step.
Installing pillars
The supports are made of wood, channel, profile pipes, brick, stone. They are installed to a depth of at least a meter, but it is safer to equip a common foundation. Welding is used to install the catchers and support bracket, so sheet metal embeds are installed on stone and brick supports. Holes measuring at least 50x50 cm are dug under the pillars. After installation, verticality is checked and concrete is poured.
We install the foundation
A foundation pit 0.5 m wide and 30 cm longer than the counterweight is dug next to the fence. The bottom of the trench should be below the freezing point of the soil. Further:
- rods are cut from reinforcement with a length equal to the depth of the pit and 20 cm each;
- long rods are welded to the sides of the channel in increments of 50 cm;
- opposing rods are welded in pairs at a distance of 0.7 - 0.8 m from the channel;
- after installing the constructed structure in the pit, the channel is aligned horizontally so that its upper flange is flush with the driveway surface;
- formwork and additional reinforcement on the sides are installed;
- the trench is filled with concrete.
![]()
The bottom of the trench should be below the freezing point of the soil
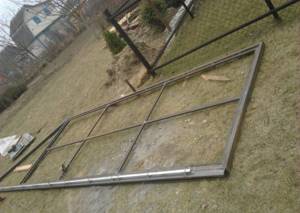
We weld the gate leaf
To weld gates from corrugated pipes, they are cut in accordance with the workpiece drawing. Then:
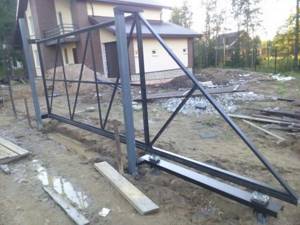
- A lower pipe 50x50 mm is welded to the guide beam, and vertical posts are welded to it. Next, the upper cross member and counterweight are mounted.
- The internal space of the frame is filled with frame elements from a 40×20 pipe for fastening the sheathing. To prevent overheating and deformation, they need to be welded in a checkerboard pattern.
- Welding seams are cleaned with a grinder, the structure is coated with a primer and painted.
To prevent the design from looking like a propeller, welding of sliding gates must be done on a level area
Installing gates
For ease of installation, a cord is stretched between the supports, at a distance from them equal to the thickness of the sash. The height above the passage is 15 - 20 cm. It will be used as a center line when installing support carts.
Assembly is carried out in the following order:
- Places for roller carts on the channel are marked. To prevent the end roller on the guide from protruding into the passage, the first trolley is placed 15 cm from the edge of the opening. The rear one is located at a distance equal to the length of the frame (including the counterweight) minus 10 cm, measured from the receiving support.
- After the platforms are tacked, roller carts are placed on them.
- The sash is installed and its position relative to the pillars is checked. If everything is fine, the canvas and trolleys are removed.
- The supporting platforms are scalded.
- The trolleys and gate are installed, the gate is closed.
- The level checks horizontalness. If necessary, the position is corrected with adjusting bolts on the platforms.
- The end roller is inserted into the end of the guide, secured with bolts, and tacked by welding.
- A support bracket is welded onto the support next to the trolleys so that the upper edge of the sash is inside it. Rollers set the vertical position of the sash.
- The lower catcher is put on the end roller, the gate is closed, and a place is marked on the receiving support. The fastening is done with bolts so that height adjustment is possible.
- The upper catcher is installed in the same order, but is secured by welding.
- The installation is completed with final adjustment of the rollers, catchers, and support bracket. The end of the guide is closed with a plug.
For ease of installation, a cord is stretched between the supports, at a distance from them equal to the thickness of the sash.
We trim and paint the gates
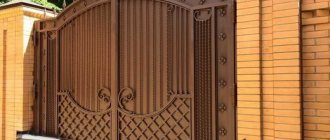
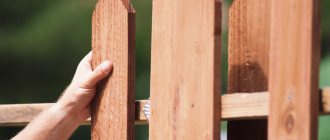
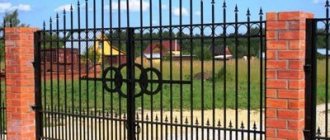
Sheathing made of sheet materials is secured with self-tapping screws or rivets. Holes are drilled under them, in the sliding gate frame elements. When covering with picket fences or clapboards, they must be treated with an antiseptic before painting. Forged elements are used alone or in combination with other materials.
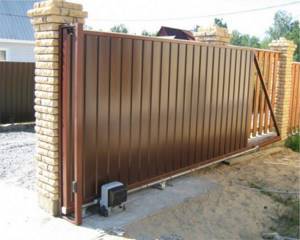
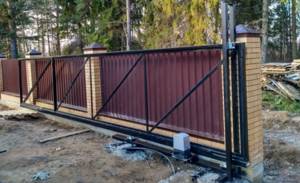
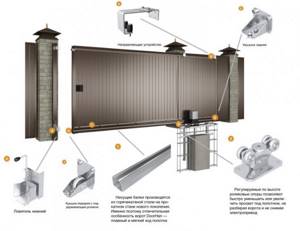
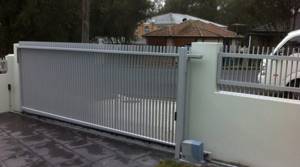
Cantilever gate system
This type of fencing is characterized by the absence of restrictions on dimensions at the top or contact with the ground part of the rails.
Of course, this is an extremely complex sliding gate mechanism, but it is completely justified in operation. The blade is fastened to cantilever rollers by means of a guide beam.
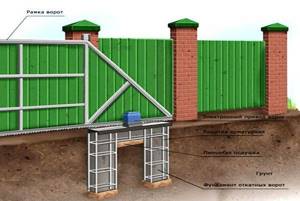
Features of the foundation for sliding gates
The foundation is installed along the fence, where the main mechanical part of the device will be located. For greater strength, you need to dig a rectangle a meter deep.
Afterwards, the carriages are installed on a metal crossbar, and a wire corset is attached to this crossbar. The tied wire is filled with cement mortar. After drying, you can begin installing the sliding gates.
Under what circumstances is it impossible to install sliding gates?
There are also cases when the construction of sliding gates is simply impossible for technical reasons. These include:
- The space allocated for the opening part of the gate should be one and a half times larger than the width of the opening itself;
- The area of free space must be perfectly level, since sliding gates move along an extremely flat strip;
- The terrain must be flat, otherwise moving the gate will be difficult;
- It may be necessary to increase the gate opening if the entry starts from a narrow space;
- Gate drawings should not assume a high threshold, which would be inappropriate in a house where children or elderly people live.
If there are no such problems on the site, then you can safely begin building a fence with a sliding mechanism. Having previously learned about all the intricacies of the installation process itself.
Why a corrugated fence with sliding gates?
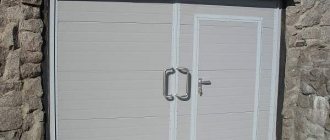
- PracticalityFences made of corrugated sheets with sliding gates are an extremely practical type of fencing. Corrugated sheets do not require expensive maintenance. It is enough to simply wash it with Karcher from time to time. And sliding gates practically open and close remotely using a remote control.
- DurabilityFences made of corrugated sheets with sliding gates are not afraid of sunlight and temperature changes. The corrugated sheet resists mechanical damage well and retains its original appearance for many years. Reliable and powerful DEIMOS automation ensures uninterrupted operation of sliding gates even in winter.
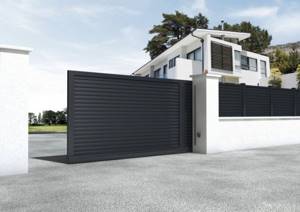
- AestheticsA fence made of corrugated sheets with sliding gates will harmoniously fit into the overall appearance of the site, and sliding gates open along the fence and do not require space to open the doors, without occupying the territory of your site.
- Isolation of the area Since corrugated sheet is an opaque material, a fence made of corrugated sheets with sliding gates will allow you to hide the territory from prying eyes and protect yourself from unnecessary penetrations.
Tips for laying concrete in a hole
Working with concrete requires compliance with certain rules and recommendations.
In order for everything to be done efficiently, it is worth considering the following nuances:
- The supply of concrete must be smooth so that the leveled structure remains motionless;
- To avoid the formation of air bubbles, after laying the concrete mixture, it must be pierced with reinforcement in several places;
- The channel must remain clean; for this, after each laying and leveling of a layer of cement, it must be wiped with a damp cloth.
Complete hardening of the concrete takes about two days, but for better installation of the gates, they should be installed only a week after the solution has set.
Those who are familiar with the installation of sliding gates should not have any problems. For beginners, such a large-scale undertaking may involve many pitfalls that can be easily resolved by a specialized specialist.
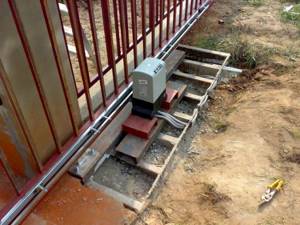
Gate installation
To begin with, when installing sliding gates, you need to mount special roller carriages, on which you can then install the gate itself. Next, using a level, you need to clearly align the structure.

Mortgages for other configurations are made from a square profile measuring 6x3 centimeters. Then roller catchers are attached to the rods removed from the posts.
At the end of the guide, a roller is mounted, which has special clamps and is closed on both sides with rubber plugs.
The roller carriages are mounted last, after which you can move on to the next stage.
Foundation arrangement
A properly equipped foundation will ensure the durability of sliding gates and their trouble-free operation.
If the dimensions of the foundation are chosen correctly, and the pouring technology is followed, the gate will not be afraid of soil movements and swelling, frosts and spring flooding. The foundation for sliding gates is poured from the side of the site, since its purpose is to hold the guides along which sliding gates with a wicket slide.

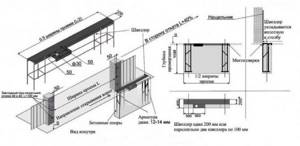
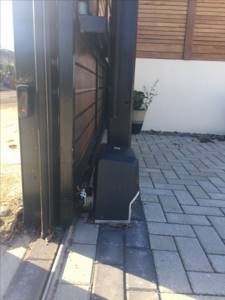
Typical diagram of automatic sliding gates
When building a foundation, the following recommendations must be taken into account:
- The length of the foundation is chosen equal to half the length of the opening. For example, if the opening is 4 m long, then it is necessary to pour a foundation 2 m long.
- The pouring depth should be selected taking into account the weight of the gate and the depth of soil freezing in the area. So, if the ground freezes at 120 cm, then the filling is performed at 150 cm. The same applies to the weight of the sash. The heavier the sash, the deeper the foundation should be located.
- The width must be at least 50 cm.
- A frame made of reinforcing rods is immersed in the prepared pit. After this, the pit is filled with concrete mortar.
Tip: it is recommended to pour the foundation for the gate at the same time as concreting the site. This will make it easier to bring the foundation to the required level.