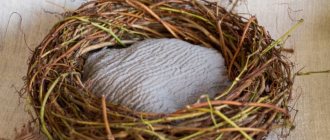
Nest materials
In order for the stork’s nest to be not only comfortable, but also safe, it is necessary to take care of building materials for it in advance.

It is best to choose natural elements. An excellent option would be to manually collect branches, brushwood and grass from the nearest area.
To build a nest you will need:
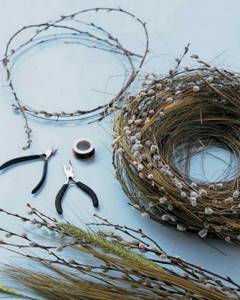
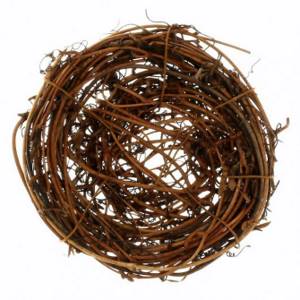
Brushwood. Several bundles of willow twigs. Reeds, grape vines and any other natural material that is flexible and elastic are also perfect. After all, the nest mostly needs to be weaved.
Twine. It is necessary to weave a nest from branches in a semicircle. This is quite difficult to do. Therefore, the twine will help securely fasten the elements together, making the nest strong and safe.

Manure. Manure is considered an essential element when building a nest. It is best to lay it between the branches while weaving the nest. You can take horse or cow.
Straw. Hay or straw are perfect for lining the bottom of the nest. The nest should be soft and comfortable;

Lime. Storks are not stupid birds. And the sight of a completely new, uninhabited and artificial nest can cause them fear.
To create the appearance of a nest where birds have already lived, it is necessary to coat the upper part of the dwelling with white lime, creating an imitation of bird droppings on the branches.
These are mandatory elements when building a nest for storks. But we should not forget about the importance of securely fastening this structure. It is best to prepare in advance a strong wooden pad on which the nest will be installed.

If the nest is installed on a pole, then it must be strengthened in advance.

It is important to understand that the nest can be inhabited for several decades, so the pole must stand securely all this time and withstand significant weights. The weight of the nest itself plus the weight of the birds themselves.
How to make a nest?
Before you start creating a stork’s nest, you should check whether it is possible to attract the bird to the dacha:
- The maximum distance from the garden to the stork hunting area (meadow, swamp, pasture) should be no more than one and a half to two kilometers. Otherwise, the bird will not have the opportunity to obtain food on its own;
- The distance to the natural habitat of storks must be at least 400 meters, otherwise the birds will conflict with each other;
- It is best to build a nest for storks in March or late autumn;
- The area where the stork approaches the finished nest should be free of old branches, electrical wires, wire and other elements;
- The diameter of the finished nest should be about one and a half meters, but it is allowed to make it a little smaller;
- Nests are allowed to be placed at a height of 5 to 10 meters. A lower height will frighten storks;
- It is not recommended to use wire to fasten parts, as the bird's legs may become entangled in it. Natural elements are safer and more beautiful in a finished nest for storks.
Storks are cautious birds and will not settle in a beautiful new nest, preferring old, lived-in houses. To attract birds and show that the new nest is safe and habitable, you can leave a few drops of lime on the branches, looking like bird droppings. The spots of “droppings” will show the storks that the finished nest made of branches is old, strong and suitable for life, and therefore the birds are more likely to settle in it.
Folk signs
Folk signs have been confirming for years that houses where storks live are places with bright energy.
Happy families with many children often live in such houses. There are fewer quarrels, and family life goes smoothly and without conflicts.
When attracting a stork to your site, you can follow a few more folk signs:
- If the stork made a nest on the roof of the house himself, you should expect bright joy in the form of the birth of a baby in the near future;
- If birds do not leave their nest for several years and have settled down in the yard, they have become defenders of the home from the evil eye and other troubles;
- But if the stork abruptly left its home for no apparent reason, trouble should be expected.

It is important that storks may not immediately take a liking to the housing built for them. This may even take several years.
Therefore, there is no need to rush to quickly disassemble the structure. Perhaps next spring a beautiful pair of storks will settle in your yard and bring good news for your home too!
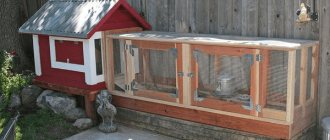
Installing a nest on the roof
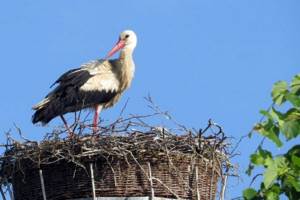
Most often, nests for storks are installed on the roofs of houses. This is the most convenient place, having the desired height. However, before installing the finished nest, you will need to prepare a place on the roof. For this purpose, a special platform is made in the form of a base for the nest.
No matter what type of roof your home has, the foundation will look the same. It is made from timber and a round platform on which the nest will be installed.
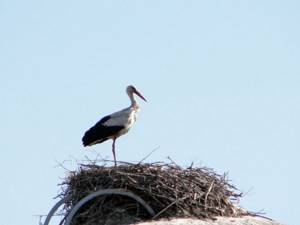
Next, the crosspieces are also connected to each other by boards. A round platform is added to the structure, similar to construction trestles. It can be made from a bicycle wheel or assembled from boards.
The finished structure is attached to the roof with goats. A ready-made nest is installed and secured on the upper platform. Remember that all this should look as if the stork himself had built a nest on the roof of your house.
How to weave a nest for a stork
The bird may have the right to choose - to settle in a new nest or choose an old and proven one. To get storks to fly to your nest, try to find an old bird’s nest in the forest or on the plain (storks prefer wetlands so they can hunt frogs and snakes). This will be the base on which you can then screw the brushwood.

To build a nest for storks you will need the following material:
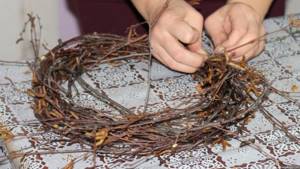
- fagots of brushwood – 3-4 pcs. To make a nest, willow twigs, straw, grapevine or reed stems are suitable. The material must be flexible. You can prepare the rods yourself or buy several bundles in the store;
- The branches need to be bent into a half ring and connected to each other to form a ring. The ends of the rods can be connected with twine. If the branches are damp, then it is very difficult to make a nest from such material. First you need to dry the rods; leave the knitting outside to dry. If it is raining or there is high humidity outside, it is better to keep the mating in a dry and warm room;
- In addition to the branches, prepare some straw. It needs to be placed in the middle of the nest, on top of a layer of branches;
- dry manure (you can take cow or horse manure) - lay in layers between thin branches;
- white lime to make an imitation of bird droppings - you need to coat the outside of the nest with a thick lime mortar. No chemicals should be used to build a nest box.