Canopy options
There are incredibly many design options for canopies. This is confirmed by photographs of these structures. All hanging structures are divided into two types depending on where they are located. Let's look at them:
- adjacent to the house;

- standing separately.
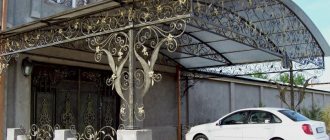
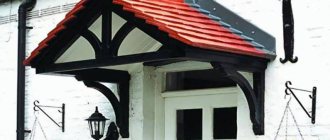
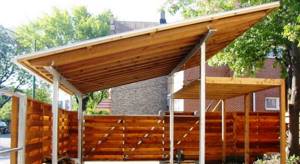
The canopies, which are built as an extension to the main building, are located close to it. Most often, such canopies are connected to the front wall of the house (facade). However, there are also structures located on the side or behind. Various materials are used to install awnings adjacent to the house. Most often, the canopy is built in combination. This means that different types of materials are used for its construction.
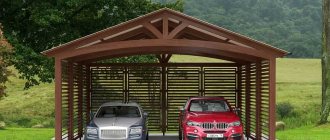
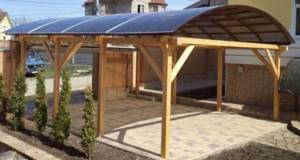
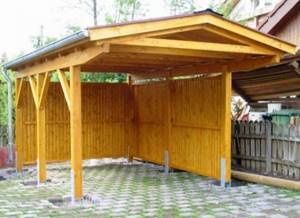
Independent structures located separately from the house have a different functional purpose. They serve as a gazebo for relaxation. It is also possible that a canopy is built to protect the car from precipitation.
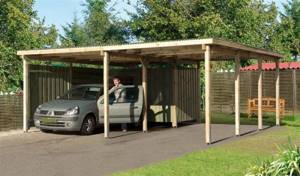
Car canopy
Separately, it is worth mentioning the roofing of the canopies. If everything is more or less clear with the frame, then there are a huge variety of roofing types. Moreover, this applies not only to the type of structure, but also to the material from which it is made. The canopy roof can be straight or at a certain angle. Also an important parameter is the number of stingrays. The roof can be made of metal, wood, polycarbonate, covered with fabric material, etc.
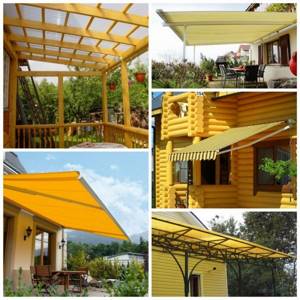
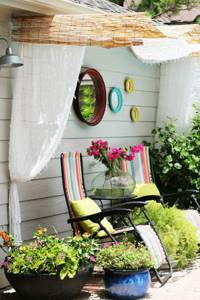
Creative canopies for sun protection
You may have everything you need to install an awning, just look around your home. What you really need is a fairly large piece of fabric, a couple of sticks or pillars, something for the base, a few tools, and extra supplies like cord or rope.
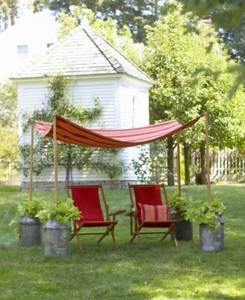
Stretch a suitable fabric or canvas for the awning and add plants for decoration
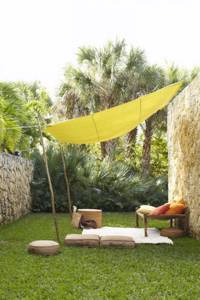
Here's another fun project that involves tubes to hang woven reeds or sheets from as a sunshade.
Use thatch for entertaining and lounging to add shade.
Using vintage milk cans to keep the canopy out of the sun
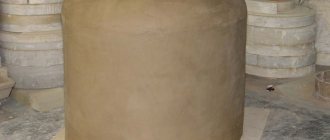
Do you have large plastic containers? Reuse them to create a cute little shaded area in your yard like the one you see.

Reusing old containers as the base of your dome
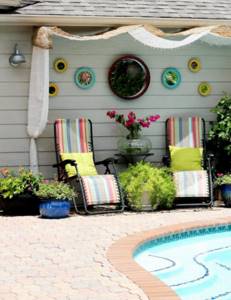
Some of the ideas above are great, but they don't include strong winds and rain. If you want, you can strengthen the canopy by driving sticks and posts into the ground and tying everything to the wall or structure with rope.
Attach the awning with rope to adjacent walls or buildings to resist wind
Preparation
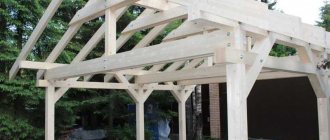
Before you start building a timber canopy, you need to decide where it will be located. Finding a place on the site for such a structure is not difficult if the area has a sufficient amount of free space. For small areas, experts advise choosing a drawing of a small-sized canopy. To build such a structure, wooden beams and boards are used.
Important! Support posts are the basis of the structure, so it is recommended to choose beams made from durable wood for them. The most affordable option is pine beams.
For roof construction, you can purchase metal tiles, which have an attractive price. The classic version of a wooden roof is also quite popular and takes into account the use of edged boards. It is also important to prepare in advance all the necessary lumber that will be required to build a traditional or unique wooden shed at the dacha. Let's look at what tools you will need to make a standard gazebo:

- yardstick;
- building level;
- shovel (bayonet);
- screwdriver;
- jigsaw;
- electric drill;
- axe;
- hammer;
- saw.
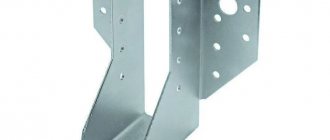
To fasten individual wooden elements, metal corners and screws (for wood) are used. To install the supports, you also need to prepare crushed stone and cement mortar in advance.
Making your own canopies
Polycarbonate construction
This material is considered one of the most modern and is perfect for constructing a protective canopy in the country.
The main advantages of polycarbonate:
- strength;
- durability;
- excellent resistance to cold, heat and precipitation;
- ability to take any geometric shape;
- ease of installation (to secure the sheets, ordinary self-tapping screws equipped with a rubber washer are required).
Using the described plastic sheets, you can protect any area of the site from precipitation. The main thing is to design and build a reliable frame, the material for which can be a wooden beam or a metal profile.
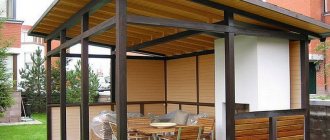
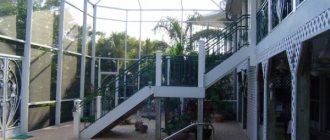
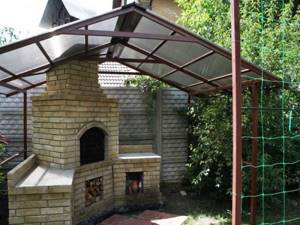
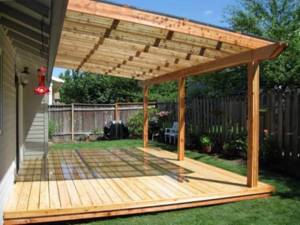
This design looks best right next to the house. Adjacent to the wall, the canopy creates a comfortable terrace for the dacha, and the sloping roof allows rainwater to flow down without leaving unpleasant and unsightly puddles on the polycarbonate surface.
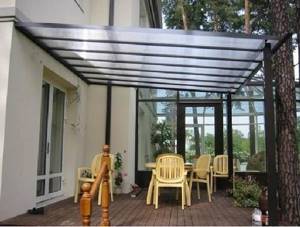
Polycarbonate canopy
The entire manufacturing process can be divided into several stages.
- For support pillars, take a wooden beam with a cross-section of 90x90 mm (the quantity is determined based on the size of the canopy). Remember that the front supports must be slightly shorter than the back ones to create a bevel.
Note! To prevent wood rotting, all parts of the canopy must be treated with antiseptic compounds before installation.
- To ensure that the supports are in the right place, you should make an initial marking of the area. Then, in designated places, it is necessary to dig holes about half a meter deep and 10 cm larger than the cross-section of the timber. Concrete pillars for the foundation are cast at this location. You can use special blanks sold in construction supermarkets. It is enough to dig them into the soil, which is then compacted well. The support beams will be fixed to the foundation using special brackets or metal corners.
- Considering that the structure is adjacent to the house, it is necessary to attach a horizontal cross member to the wall of the residential building, which will serve as a support for the rafters and sheathing. The latter are also attached to the crossbar using corners. If you limit yourself to self-tapping screws, the structure may collapse due to insufficient reliability of the connections.
- A beam of 70x70 mm is suitable for rafters, and no more than 50x50 mm for lathing. You should not use more massive lumber, as this will make the structure heavier.
Read also: Oriental hyacinth herbaceous plants for open ground
Wooden frame for polycarbonate canopy
- Polycarbonate is attached to the frame using self-tapping screws. It is also advisable to provide a device for water drainage. Very elegant gutters can be purchased at construction supermarkets.
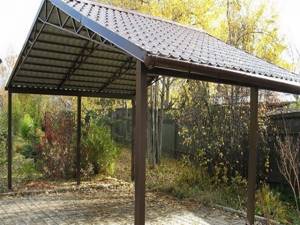
Using corrugated sheets
Galvanized sheets, distinguished by their excellent appearance and painted in various colors, are often used for the construction of canopies that protect personal vehicles from bad weather. Remember that, unlike polycarbonate, this material does not allow sunlight to pass through, so it creates a completely shaded area.
To make the structure more durable, it is better to make the frame from metal blanks. You can stop at four support posts, fastened along the upper edge with beams and sheathing.
The construction process is not much different from the construction of a polycarbonate canopy described above. The only point is that such a structure is rarely adjacent to the house, more often it stands at some distance from it.
Let's look at some small details:
- As in the previous case, you should mark places for attaching vertical metal posts, onto which a profiled pipe with a cross-section of 40x60 mm will go. The distance between the posts is about 1 meter, but depends on the thickness and weight of the profiled sheet used.
- In this case, a concrete foundation is required. Crushed stone is poured into a hole up to 60 cm deep, a support is installed and the pit is filled with concrete.
Advice! While the concrete is curing, do not forget to control the vertical position of the post. Otherwise, the canopy will come out crooked and may collapse during operation.
- After the concrete has completely hardened, which takes from 1 to 2 weeks, you can continue working on the construction of the canopy. For horizontal beams, a profile with a section of 50x30 mm is suitable. In this case, it is necessary to use welding, which sometimes becomes a problem for novice craftsmen.
- The last stage is the installation of the sheathing and installation of corrugated sheets. The best choice is ordinary self-tapping screws.
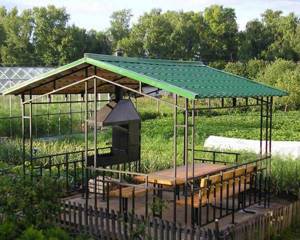
Canopy made of corrugated sheets with a metal frame
Fabric awnings
When you don’t want to waste precious time making complex and bulky structures, your choice is a lightweight fabric canopy.
The store sells ready-made frame structures, which include everything you need. You just need to mount it on the wall and enjoy your holiday.
The main advantage is the ability to quickly and without much effort fold the awning for a summer residence, using specially provided levers and mechanisms.
You can make a fabric canopy yourself, in which case its design will not differ much from the options discussed above. Unlike the polycarbonate model, it is possible to purchase brighter and more picturesque textiles that enliven and refresh the appearance of the site.
On a note! Remember that the fabric must be impregnated with a water-repellent composition, otherwise the first rain will force you to seek shelter in the house.

Fabric canopy at the dacha
Step-by-step instructions: assembling the frame
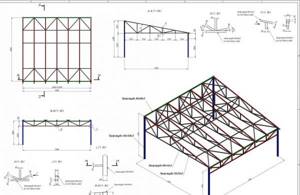
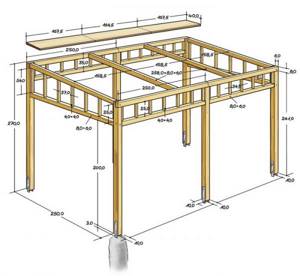
All work on the construction of a canopy on the site on which the dacha is located is carried out in stages in accordance with the project. The design drawing must indicate the dimensions of individual elements.
Let's take a step-by-step look at the process of building such a frame structure. The first stage of construction is marking the territory and marking the corners of the future canopy. Next, you need to clean the place chosen for the canopy. To do this, the top layer of soil is removed. The soil will need to be leveled.
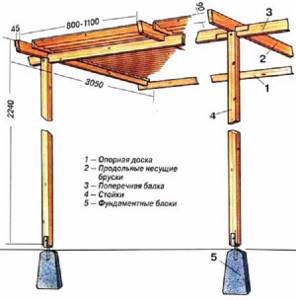
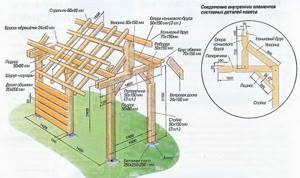
The next step is to organize holes for the support beams. The diameter of the holes should range from 35 to 60 cm. The depth of the holes is selected depending on the dimensions of the structure. The standard value is 55 cm.
Canopy diagram
You might be interested in: Wooden table for the garden: we make it ourselves
Next, you will need to install pine beams into the recesses and level them using a building level. Then the holes are filled with crushed stone and filled with cement. Before proceeding to the next step, you must wait until the solution has completely dried.
The next stage involves installation of the frame structure. The work begins with fixing the horizontal wooden crossbars connecting the support beams. The upper part of the gazebo frame is tied with transverse crossbars.
Roof construction
After installing the piping, you can begin building the roof. Let's take as an example the installation of a pitched roof, which is easiest to do with your own hands.
First, it is necessary to fix the beams to the upper parts of the support pillars. Next, the rafters are installed. These elements have a step. It is desirable that the distance between them be 1 m. For rafters, as a rule, wooden beams are used, the dimensions of which are 150 by 50 mm. Photos that demonstrate the work step by step can answer the question of how to build a canopy at the dacha.
The rafters are joined using metal corners and self-tapping screws. At the next stage, it is necessary to join the slats that are part of the sheathing with the rafters. The slats are fixed strictly perpendicularly. The distance between them can be different - from 0.5 to 1 m. The final stage involves the installation of roofing material.
Interesting: Garden plot design: options