Trimmer repairs should be carried out as soon as possible when the first signs of breakdown appear, so that minor faults do not lead to more serious problems. All models are characterized by the presence of the following main components and structural elements: drive system (motor), transmission devices, working part (knife or fishing line), belts and handles. Failure can occur in any part, but some components fail much more often than others.
Lawn mowers powered by gasoline or electricity (as well as different models from different manufacturers) differ in design and the nature of the problems. Some of them can be easily fixed with your own hands, while others will require more extensive repairs or contact a service center.
Basic malfunctions of gasoline trimmers
The most common breakdowns of brush cutters are associated with the following structural elements:
- engine (in particular with a piston system);
- carburetor;
- barbell;
- starter (rope break, spring breakage or disengagement);
- with an ignition or fuel supply system;
- transmission mechanism (gearbox);
- filters and muffler.
Symptoms of malfunctions are as follows:
- the appearance of uncharacteristic sounds when operating the lawn mower;
- the lawn mower does not turn on, does not reach the required speed, or stalls;
- when the engine is running, the working part does not rotate or skips;
- gasoline leak;
- excessive heating of individual components.
Smaller breakdowns can also occur, which are detected without any special diagnostics:
- start button sticking;
- limiter drop;
- line break or breakage (loss of sharpness) of the knife.
Minor problems are easy to fix. Repairing a gasoline trimmer in more complex cases will require preliminary diagnostics to determine the exact causes. If you have the appropriate knowledge and skills in plumbing, you can fix problems yourself by replacing failed parts.
Breakdown of the starter and gearbox
The gearbox transmits torque from the motor shaft to the cutting tool; during operation, its gears must be absolutely clean and always lubricated with a special lubricant.
Carrying out a technical inspection on your own once a season will eliminate the need to repair the gearbox or replace it, with the purchase of an expensive new unit.
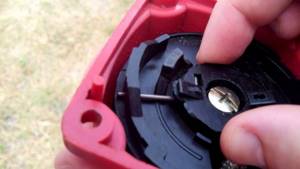
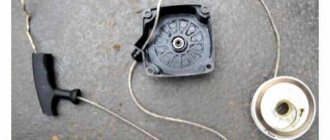
A starter is necessary to bring the trimmer into working condition; its diagnosis consists of checking the tension of the cord engaged with the teeth of the starter coil, which are often destroyed during a sudden start.
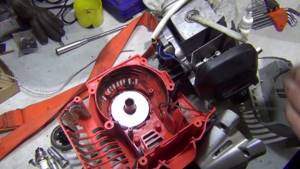
A non-working starter in a lawn mower cannot be repaired; it must be replaced with a working unit as part of a mandatory technical inspection or a set of repair measures.
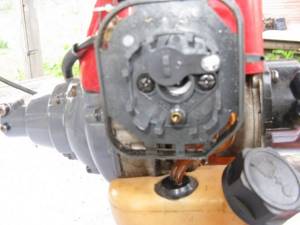
The cutting elements require special attention and care; they must always be cleaned of dirt and mown grass after use. Regular inspection and thorough preparation of the device for operation will help you avoid expensive and time-consuming repairs, and always be confident in the functionality of the lawn mower.

One of the main garden tools in the garden or country house is a lawn mower or trimmer. Gardeners use this tool for mowing grass, controlling weeds, and mowing the lawn. Like any other tool, a trimmer requires careful care and maintenance of the lawn mower yourself is mandatory.
Disassembling a gasoline scythe, lubricating its parts and replacing faulty elements
To disassemble a lawn mower for repair work, in general, you will need the following devices:
- a set of screwdrivers (with different tips) and wrenches;
- small puller for removing bearings;
- special spark plug wrench;
- hammer.
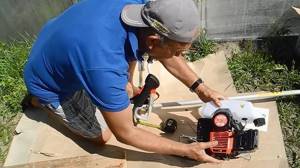
In each case, you will need to disassemble individual components.
It should be taken into account that the starter (starter) in a number of models is non-separable - in this case, if there are problems with it, only replacing the element is possible. If the knot is disassembled, it can be repaired by removing and replacing the rope and spring, or installing the latter in place (when it comes out of engagement).
Disassembly and replacement of the rod
Quite often it is necessary to repair the trimmer rod. It is a structure made up of the following parts:
- a steel drive shaft having polyhedral or square splines at the upper and lower ends;
- aluminum tubes;
- a plastic bushing designed to maintain the centralized position of the drive shaft in the tube (to prevent vibration);
- a rubber shock absorber needed to connect the rod to the motor;
- steering wheel with a handle used for steering, and a stand, a belt.
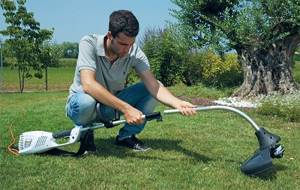
Some models have a shock absorber between the steering column and the bar. All control elements (lock lever, ignition switch, gas button) are located on the handle.
A bevel bevel gear is connected to the lower end of the rod, but some lightweight models are produced without it. This is due to the fact that their rod has a curved shape, and the shaft is a flexible cable.
How to disassemble the rod and then reassemble it to lubricate the shaft or replace it is shown in detail in the video below. In the same way, replace a broken rod with a new one.
It often happens that the multi-faceted or square splines of the drive shaft “lick”, while the working mechanism does not rotate or does so with over-slip. Then the shaft is changed.
When a knock appears in the tube, you should disassemble the rod and check the condition of the bushing, and if necessary, replace it. How to properly assemble the throttle handle on a trimmer is discussed in the video below.
If there is no intact rod suitable for installation, then you can tighten the fracture site with a clamp or apply something like a splint. This measure is temporary, so you should replace it as quickly as possible.
Clutch repair
When the knife or line spins almost constantly when the engine is idling, and uncharacteristic sounds come from the front of the engine, this indicates a breakdown of the clutch. The cause is a broken spring. At the same time, the equipment mows normally.
If slipping occurs, then in addition the pads are worn out.
The trimmer clutch is repaired as follows:
- remove the cover from the muffler;
- remove the metal stand;
- then remove the cylinder and starter caps to gain access to the clutch;
- unscrew the side screws to remove the shock absorber cover;
- remove the tube from it, having previously loosened the tightening bolts;
- unscrew the clutch (shown in the photo below);
- inspect the condition of the spring, pads and bearings;
- a new spring is hooked by threading the hooks into the corresponding holes;
- To replace the pads, you need to remove the spring, and then unscrew the bolts on them.
If necessary, stop the crankshaft using, for example, a rope.
Repair of gasoline engine, carburetor and gearbox
Engine problems can be caused by problems with the piston system, oil seals, and rings. To fix them, you need to remove the drive motor.
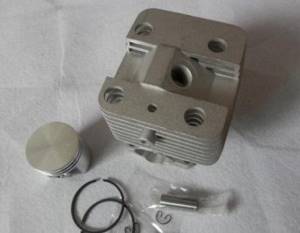
Determining what exactly caused the breakdown is not easy. If there is a warranty, you should take the mechanism to a service center for diagnosis and repair. If it is not possible to turn to specialists for help, then it should be borne in mind that most often the piston rings need to be replaced. To do this, you will need to disassemble the engine and remove the piston. They do this in the following sequence:
- remove the cover of the plastic case by unscrewing the screws or squeezing the clamps;
- disconnect the rod with the crankshaft;
- remove the cylinder head;
- take out the piston and rings;
- if necessary, replace them;
- Reassemble in reverse order.
The rings should be installed carefully because they are quite fragile.
How the piston is installed and the oil seals are replaced during engine repairs is clearly shown in the videos below:
If you use the lawn mower regularly, the gearbox may break. The gears and bearings wear out (they can also break). To prevent this from happening frequently, this unit should be lubricated regularly. The frequency is almost always indicated in the operating instructions for the model used (at least once a season). The video below can serve as repair instructions.
To lubricate the gearbox, unscrew the plug and simply squeeze out suitable lubricant inside the assembly while turning the shaft.
You can only remove and clean the carburetor yourself, and also replace the gasket between it and the engine. It is quite problematic to determine the tightness of a unit at home. The main thing is to correctly assemble the equipment after repair so that the trimmer works without problems.
Construction of a lawn mower
The trimmer consists of three parts: a gasoline engine, a rod with a shaft inside and a cutting element. Torque is transmitted through the shaft from the motor to the cutting head. In trimmers with a curved rod, the role of the shaft is performed by a cable. The rod itself is attached to the gearbox of a gasoline engine. The motor control is located on the rod; a belt can also be attached for convenient use of the trimmer. The cutting element in gas mowers uses a line wound around a trimmer head or a special blade used to trim large weeds.
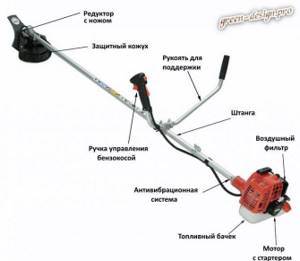
The main and most complex unit in a trimmer is the engine. In household and semi-professional brush cutters, two types of engines are used - 2-stroke or 4-stroke. Depending on the type of gas engine, its refueling and maintenance differ.
- 2-stroke engines do not have their own lubrication system, so they do not run on pure gasoline, but on a mixture of gasoline and oil. The latter, entering the combustion chamber, lubricates the moving components of the engine.
- 4-stroke engines are lubricated by oil in the crankcase. They run on pure gasoline without impurities.
Do-it-yourself trimmer repair and trimmer maintenance can be done without outside help. If you need to replace engine parts or tune it, then you need to contact a repair shop.
First launch at the beginning of the season
In late spring, when the active use of gas mowers begins, before starting work, you need to inspect and check the functionality of your tool. It is imperative to lubricate the rotating parts, inspect and, if necessary, replace the cutting elements (knife or fishing line). Check the presence of fuel mixture in the tank. If you drained the fuel at the end of the previous season, do not forget to pump fuel into the engine using a choke (if the engine has one).
Starting most two-stroke engines is quite simple. Use the procedure described in your trimmer's manual if it differs from the following:
- Move the choke lever to the "open" position. Place the trimmer on its side so that the air filter is on top.
- Hold or lock the throttle in the on position (the throttle should be held until the engine warms up).
- If the device has an on/off switch, move it to the on position (usually indicated by an "I" symbol rather than an "O").
- Make sharp, quick jerks with the starter handle until you hear the engine try to start. This should happen between 1-6 jerks, but no more.
- Close the throttle valve halfway and restart the starter. The engine should start after 2-6 additional pulls. If not, move the throttle lever to full position and pull the starter handle again. Return the lever to half throttle and pull 3 more times.
- After starting the engine, continue to hold the start button and allow the engine to warm up for 10 seconds, then disengage the starting system.
- When the trimmer warms up, it should restart with the throttle in the closed position.
You can also use another proven technique. If you remove the air filter before starting and pour a couple of drops of the mixture into the carburetor and reassemble it, the engine should start.
How to repair a lawn mower if the engine does not start.
Before repairing a lawn mower with your own hands, you first need to identify the problem. First you need to check the filters - both fuel and air. If necessary, the air filter can be washed in gasoline or using water and detergents.
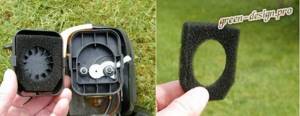
Air filter
Afterwards the filter is wrung out well and dried. Before installing it on the air filter, it is advisable to moisten it with a couple of drops of oil for 2-stroke engines. The fuel filter cannot be washed, only replaced.
Checking the glow plug.
On a cold engine, remove the high-voltage wire from the spark plug and unscrew it using a special wrench. This key is provided by the manufacturer so that you can easily repair the lawn mower yourself.
Common problems with electric trimmers
Electric trimmers differ from gasoline devices in a more simplified design. Conventionally, the electric scythe is divided into mechanical and electrical parts. Accordingly, the same groups of problems that occur with this equipment are identified.
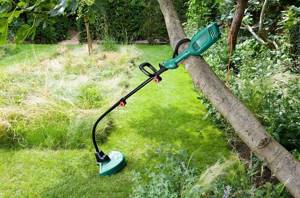
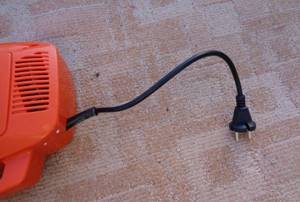
Most breakdowns cannot be visually detected. To do this you will need to use various devices. Visually you can determine the following:
- the integrity of the power cable is broken (the insulation is torn off it, or it is clearly broken);
- sticking or jamming of the start button;
- mechanical external damage to the brush cutter;
- problems with the cutting part;
- stopping the scythe when clogged with grass;
- plug damage.
To find out which part broke in other cases, you will need to disassemble the electric scythe and sequentially check the most likely options. At the same time, pay attention to external manifestations of deviations from the normal operation of the device. They help determine the cause.
Repairing an electric trimmer will require the following equipment and tools:
- indicator screwdriver;
- multimeter or tester;
- soldering iron;
- set of keys;
- screwdrivers with different bits.
Electric scythes often do not work due to reasons not directly related to them, but caused by a decrease in the supply voltage in the network or the inoperative state of the outlet used.
How to disassemble and repair an electric scythe yourself
Before disassembling and repairing an electric scythe, you should check the condition of the outlet and the voltage in the network. If its value deviates from the norms specified in the operating instructions, then you should not even try to operate the device without a stabilizer designed for the appropriate power. Otherwise, the electric motor may fail. Only after determining that the cause of the trimmer failure is directly related to it, can one begin to disassemble the mechanism for repair purposes.
Disassembly and repair of electrical parts
Disassembling the electric scythe in order to repair its electrical part is carried out in the following sequence.
- Place the trimmer on a flat surface (for example, a table) that does not contain unnecessary objects.
- Unscrew the cover screws located on one side.
- Remove the unscrewed half of the housing, gaining access to the start button, electric motor, brush assembly, bearings, electrical connections (these elements are shown in the photo below).
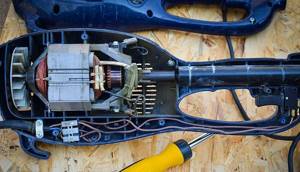
Disassembled electric trimmer
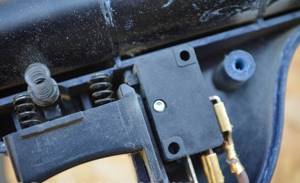
Start button
- Check for external signs of breakdowns: burning smell, broken (disconnected, fused) wiring, melted parts.
- When everything seems to be in order, they begin by checking the integrity of the power cord using a multimeter set to check the resistance.
- Then, if everything is in order with the wire, they check the button: if it does not close the circuit, then install a new (working) one by simply reconnecting the contacts and inserting the part into the appropriate slots.
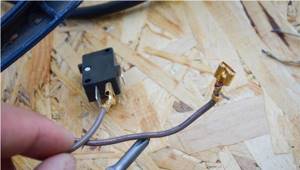
- Then check the brush assembly and commutator, cleaning them with sandpaper to remove carbon deposits.
- After unscrewing the mounting screws, remove the engine (also disconnect the power cables).
- The rotor and stator windings are checked with a multimeter: their resistance should be insignificant and correspond to the passport data.
- Along the way, inspect the bearing units (front and rear) on the motor shaft. If their mechanical damage is visible or there is strong play, then unscrew the bolts, remove the fan and part of the frame, carefully pull off the old bearings, and install new ones.
- If the engine is operational, then check the temperature control relay. To do this, they bypass it with a jumper or disconnect the incoming and outgoing wiring after connecting it to each other.
The brush and bearing units are shown in the photo below.
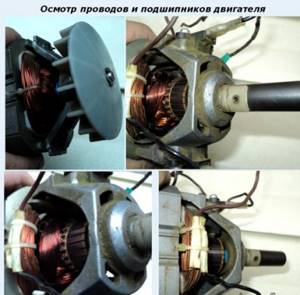
The scythe will work without a thermal relay, you just need to constantly check the temperature of the electric motor yourself, periodically letting it cool down. You can also install a new similar sensor.
The electric motor start button can be checked by closing its contacts with a jumper . If the trimmer works, then the problem is clear. But this option is unsafe. Everything should be done carefully so as not to receive an electric shock. To change the button, you should use a screwdriver to remove it from its seat and connect the wiring from the old to the new. After replacement, you need to assemble the electric scythe and then check its functionality.
Replacement of brushes is required if they are damaged. In this case, it is enough to pull out the old ones from the grooves and install new ones in their place.
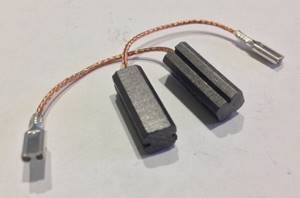
The connecting terminals on different models of trimmers are almost identical, so connecting and disconnecting wires is done in the same way.
Replacing a bearing is a rather difficult operation because it can become stuck and cannot be removed from the motor shaft. It should be pulled or knocked down carefully so as not to damage the rotor or seat.
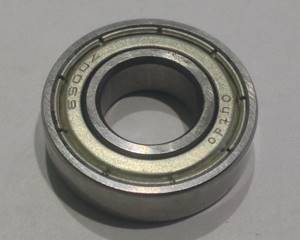
Bearing for trimmer ET1003A
When the trimmer motor fails and needs to be replaced with a new one, you should carefully remove the fan and bearings, and then install them in their original place. In terms of costs, replacement is almost comparable to purchasing a new mechanism. If you have no experience working with electric motors, it is better to entrust it to specialists.

