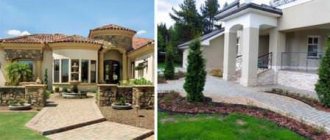
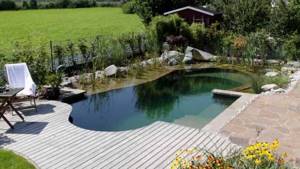
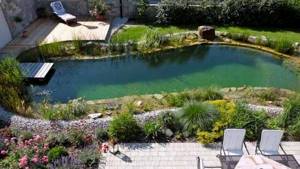
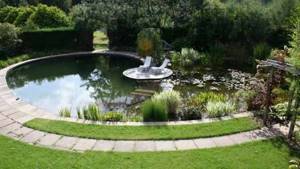
Whether you like to swim or just relax near the water, relaxing on the shore of a body of water is one of the wonderful pleasures of summer. But not every summer resident is lucky enough to build a summer house near water. Therefore, sooner or later, each of us thinks about how difficult it is to make a pond on the site with our own hands. Ideally, we see a pond in a dacha not only as a decorative element of landscape design, but also as a small body of water in which you can happily swim on a hot day.
However, faced with colorful descriptions of the technical difficulties, costs and nuances of regular care, many of us give up on this idea.
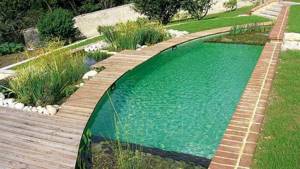
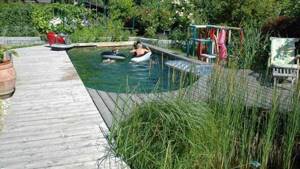
Let's start with the basics - what fundamentally distinguishes a pond from a swimming pool is the self-regulation system.

DIY swimming pond
We will tell you the process of creating a pond step by step, and you can make a garden pond with your own hands - by building a cool oasis in the middle of the heat right on your summer cottage, where with every light breath of a fresh breeze our everyday worries disappear.
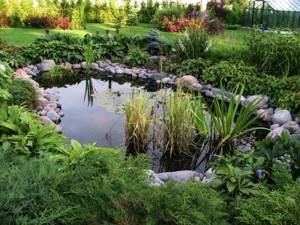
A garden pond is a living organism.
The pond at the dacha imitates the process that nature uses to keep lakes clean. Everything from the size and shape of the pond, plant species and water circulation are designed to maintain the pond in a stable natural state.
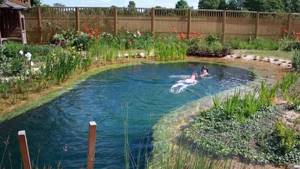
The problem that a pond owner faces is maintaining a balance between plants and water - the plants either die or cover the entire surface of the pond. Only a pond that represents a balanced ecosystem provides optimal water clarity and quality, and maximum enjoyment from swimming in the pond.
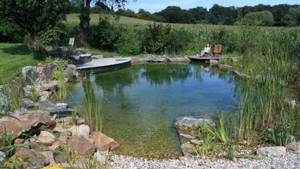
The water in the pond must circulate among the roots of the plants to cleanse itself. Plants enrich the water with oxygen, which supports the vital activity of beneficial bacteria that utilize pollutants and potentially harmful organisms, and also create a habitat for dragonflies, frogs and other aquatic inhabitants. The result is a stable, ecologically diverse system. Nature has revealed its technology to us and we need to use it carefully.
We create a pond at the dacha from scrap materials
Unfortunately, it is not always possible to find the right and high-quality building materials, but if the desire to create a pond with your own hands does not go away, do not despair. Simple materials at hand will also come to the rescue, of which any summer resident has enough.
A pond can be made from a variety of things:
- from an old car tire;
- from an old bathtub left after renovation;
- from a barrel, basin or bucket.
Bath pond...
...from old tires...

...and from an old barrel
If you truly want to create an unusual and original pond, then the lack of capacity will not stop you.
We use old containers
As we have already said, a pond can be made even from an old bathtub. After all, in essence, it is no worse than the finished form.
The process of creating such a pond will be similar to the previous ones:
- dig a pit for the form;
- fill it with sand and make a cement screed;
- insert bathtub;
- fill with water.
Due to its weight, the bathtub will sag greatly in the pit, which is why it is recommended to tighten its bottom with cement - to strengthen it. So that over time the pond does not go deeper.
Also, use sand and soil to stabilize the bathtub inside the pit. To ensure a tight fit of our improvised bowl to the banks, fill in all the voids.
And do not leave the side of the bathtub open, it will not look aesthetically pleasing and will spoil the appearance of the future artificial pond.
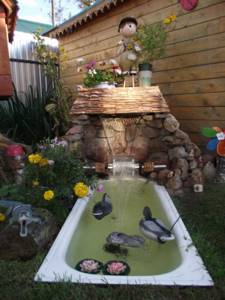
Next, all you have to do is line the bank with decorative stones, plant flowers and garden figurines in pots, and fill the pond with water.
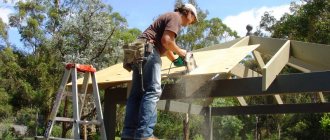
Vitaly KIY will clearly show and tell you how to dig a bathtub and shape it into a pond with your own hands in his video tutorial:
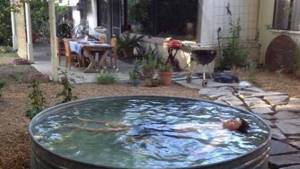
However, if your dacha plot is not large enough to have a full-fledged pond on it, do not be discouraged - you can make a pond with your own hands at the dacha from small containers, as in the photo.

Badeyka is no stranger to the bathhouse
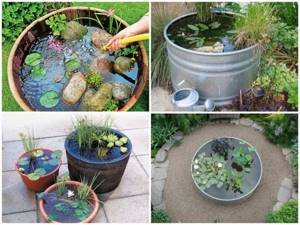
Ponds made from barrels and buckets
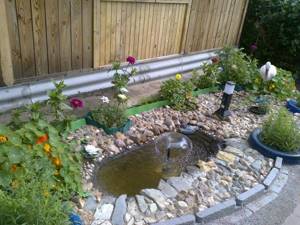
Take an old metal or wooden basin, a small barrel or tub. All of them can become an original decorative pond, which does not even have to be submerged below ground level.
A small pond from an old basin has many advantages , so do not deny yourself the joy of creating a modest artificial pond if the area of the site does not allow for more:
- does not require excessive costs - everything necessary for its installation is at hand;
- it will take a little time to arrange it - from a few minutes to a couple of hours, but not a day or more;
- it can be placed anywhere;
- if you installed the pond on the surface and did not dig it in, then you can always move it to another place by simply pouring out the water and filling it again after moving it;
- it does not require special attention to care - it is enough to change the water from time to time and wash it from the inside to keep the bottom clean.
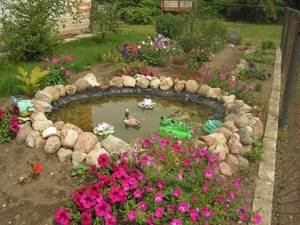
Ponds made from a basin or small barrel can be installed on a reinforced, flat surface, filled with water and decorated with decorative figures or flowers.
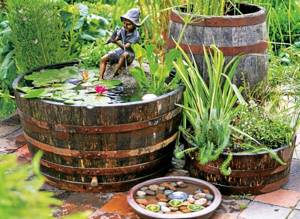
You can also decorate with a figurine
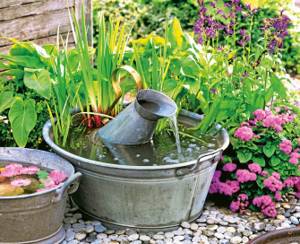
Or maybe with an old watering can
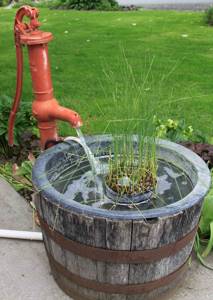
Or even a hydrant!
But if your basin has long lost its decent appearance and there is no way to return it to its former luster, then simply dig a small pit to suit its size, install it there like an old bathtub and cover it with pebbles along the shore.
As you can see, old containers allow us to fantasize and create incredible ponds with our own hands in a dacha of any size. And this helps us realize our creative potential.
How to make a pond yourself. Pond operating principles
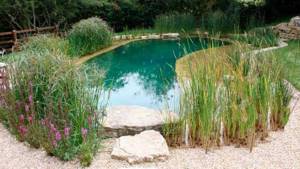
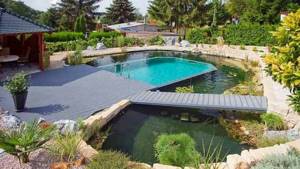
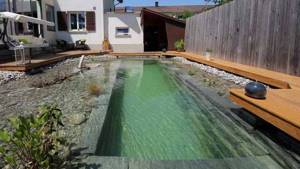
Water is a living biologically active component and all purification occurs due to the work of plants and beneficial microbes. For this purpose, the pond has a swimming area and a filtration area for plants. The filtration zone is actually the swamp part of our water zone, and just like in nature, it is this zone that guarantees the cleanliness of the entire reservoir. This zone must occupy at least 50 percent of the total surface area of the pond.
Natural stable biological balance can be achieved in ponds with an area of 100 sq.m. Smaller ponds require more of our attention, because... Their biological balance is precarious. Therefore, to maintain cleanliness, these ponds include a skimmer and UV sterilizer, but still offer a chemical-free swimming area and support the growth of aquatic plants.

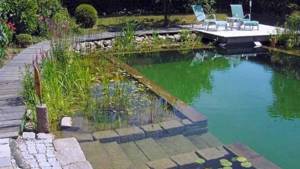
It is useful to regularly enrich the water with oxygen by adding a small waterfall, stream or fountain to the pond. Although, an aerator can be used for the same purposes.
How is water purified in a pond?

You can see that the process of filtering water in a pond is not complicated:
- Water from the swimming area flows into the regeneration zone.
- The water circulates back to the bathing area.
Through drainage pipes under the plant roots in the regeneration zone and/or after the skimmer, water is pumped through the UV sterilizer to a waterfall, stream or to the bottom of the swimming area. The pipe leading to the bottom of the swimming area is raised slightly above the bottom so that the flow of water prevents the formation of silt on the bottom.
What should the shape of the pond be?
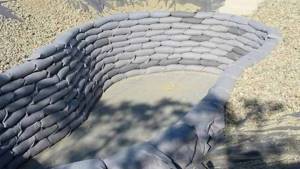
The pond bowl looks more like a soup bowl with large rims than a bathtub. The height difference should be about 30 cm for every meter of depth. It is this shape of the pond bowl that ensures the stability of the walls. The picture shows a cross section of a pond with a planting and swimming area:
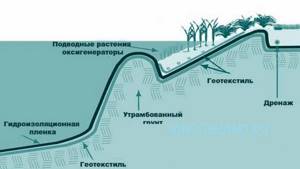
After compacting the surface layer of soil in the pit, geotextiles and a sealed liner are laid on the bottom of the pond. In the plant area there are drainage pipes and gravel. In order to separate the swimming zone from the plant zone, a small mound is formed - its top is 3 cm lower from the surface of the water. You can make it from bags of sand or gravel. The mound allows water from the swimming zone to pass into the plant zone, where the water is filtered by plant roots, and at the same time protects the plants from fluctuations in the water of the swimming zone.
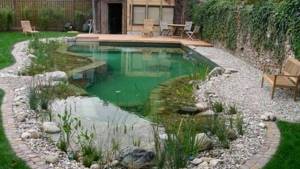
This pond design will allow you to conveniently clean the swimming area without affecting the plant area. In addition to cleaning the water, the shallow waters warm up quickly and provide habitat for frogs and other invertebrates, which you will appreciate when they begin to eat mosquito larvae.
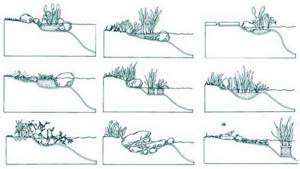
To imitate the natural contours of a pond, use a combination of different pond edge profiles. If you place plants on the terraces of the pond, it is better to do this in pots so that they can be easily removed when cleaning the pond.
What size pond is suitable for our site?
The optimal size of the pond is 1/10 of the area of your site.
What about mosquitoes?
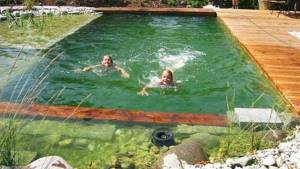
One of the first questions that arises when you hear the word “do-it-yourself pond” is what about mosquitoes? Mosquitoes breed only in stagnant water, but the water in a pond will never be static, so mosquitoes will find it unattractive for their habitat. Even if at some point they appear, the ecosystem of the pond in the form of frogs will reduce their population to a minimum.
Why make a pond at your dacha?
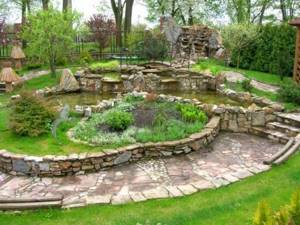
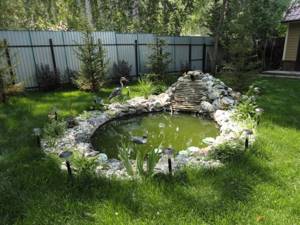
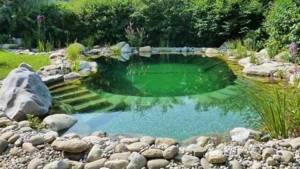
People who make a pond with their own hands make this decision because they want their pond to be a beautiful part of the landscape design and at the same time have a clean, attractive place for swimming on a hot day.
Is it possible to have fish in a swimming pond?
Unfortunately, fish, on the one hand, happily eat beneficial microflora, on the other hand, they are carriers of pathogenic bacteria, so there should be no fish in bathhouses.
Is it possible to make a sandy beach on a pond?
The best solution for entering the pond is a walkway or ladder. For a beach entrance to the water, you need enough area, because... The angle of entry into the water is small. In addition, the sand quickly silts up - those beaches that we see are often simply trampled down to sand, most of the shore of the pond is usually densely overgrown with plants.
Should I swim with frogs?
Yes, frogs are full-fledged and important inhabitants of the pond. Additionally, to purify the water in the pond, it is good to have bivalve shells or pearl barley, which filter water up to 40 liters per day. You can also get snails (coils, livebearers) - they eat dead plants and clean the pond well.
What's the best place for a pond?
It is better to place the pond away from trees, because... falling, the leaves will rot in the pond. Moreover, growing roots can damage the waterproofing film or tilt the finished container. The illumination of the area should be about 5 hours in the morning, and the rest of the time should be in partial shade. The pond does not need high illumination because... leads to increased formation of algae and overheating of water in the reservoir.
What to do with a pond in winter?
In winter, the pond, like natural bodies of water, freezes. There is no need to drain it. For the winter, all equipment (pumps, filters, skimmers) must be removed from the pond.
Does soil type affect the creation of a pond?
No, the composition of the soil does not affect it. There is a misconception that it is good when the groundwater level is high. In fact, groundwater at the freezing level is more of a problem. When ice freezes, it can bulge the bottom of the pond. This is especially problematic if the pond is made on the basis of a rigid finished mold.
The procedure for constructing a pond
If you have decided to arrange a landscape, have chosen a location and are thinking about the appearance of your future pond, then first decide the main question - what will it be like? Will you choose a ready-made bowl or cover the dug pit with film? It's up to you to decide. And we will help you create it according to all the rules.
Dig in the finished bowl
A ready-made mold cast at the factory is an excellent and simple solution for those who want to enjoy a charming and calm view of the pond after a busy day at the cottage.
Nowadays, specialized stores offer bowls of different sizes, types and contents. They may be:
- simple plastic baths;
- containers with several depth levels;
- bowls with complex contours of the shore.
Therefore, everyone will be able to choose the shape that best suits the territory and landscape without wasting extra time.
In addition, there are other advantages of ready-made bowls :
- the plastic form is durable and not susceptible to ultraviolet radiation;
- the bowl is non-toxic and easy to install;
- The average shelf life of this form is tens of years, which makes the pond durable and of high quality.
The main thing is not to damage the bowl when installing it in the future pond. The form cannot be repaired or restored. However, if you are building to last, you can choose a fiberglass bowl; it is famous for its strength and lasts 2-3 times longer.
So, you have chosen a bowl, found a suitable place, cleared it and are ready to create a pond with your own hands in the country. What's next?
First you need to transfer the contours of the bowl to the ground so that it fits exactly into the dug pit. For this you will need:
- bowl;
- pegs;
- shovel;
- rope.
To make the contour as similar as possible to the shape of the bowl, you need to place it on the ground and retreat 10-20 cm from its edge. Following the shape of the bowl, stick the pegs into the ground and stretch the rope along them.
This way you will get the outlines of your future pond, under which you need to dig a pit 20-30 cm more than the height of the bowl.
Don't forget to keep an eye on the top level. It is very important that the surface of your pit is level, otherwise the ground around the pond will always be wet and sticky, spoiling the appearance of the shore.
When you achieve the desired depth and shape, be sure to sprinkle everything with sand and compact it thoroughly. This sand bed will become the foundation for your pond. Afterwards, you can install the mold and fill the free space between the side of the bowl and the ground with sand.
When your future pond becomes stable, you can begin filling and decorating it.
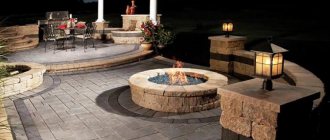
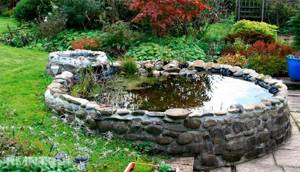
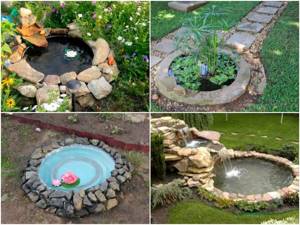
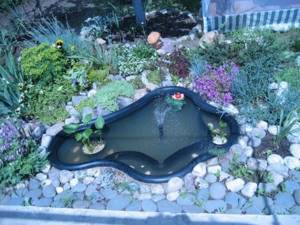
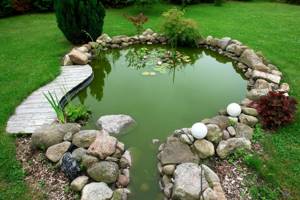
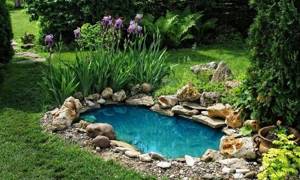
You can line the bank with decorative stones and plant water lilies or other water-loving plants along it. Install small figurines of swans or other DIY garden crafts.
Pond with water lilies
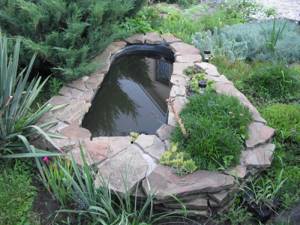
Beautiful stone sides
Small slide
Ornamental plants
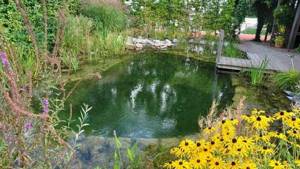
Natural design
Making a pond from film
If for some reason you do not want or cannot buy a ready-made bowl, then you can always make a pond with your own hands without it.
Enough to stock up:
- Shovel;
- a rope or hose to outline the contour of the future pond;
- thick film.
You will need the rest (water, decorative elements and figurines) later, when the main stage is completed - creating a pit for a pond.
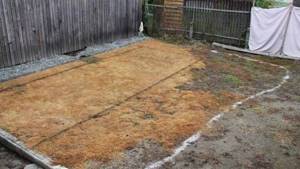
As when creating a pond with a finished bowl, first you need to decide on the size of the future reservoir and its contour. Afterwards, mark its borders on the ground using a rope or hose, which can simply be laid along the drawn border, or can be wrapped around driven pegs.
When you are sure that you like the shape and approximate appearance of the future pond, you can start digging. Here the process will always be the same, because we just need a foundation pit.
The pond level should be the same. Therefore, check the evenness of the banks using a building level or timber laid on both sides of the pit.
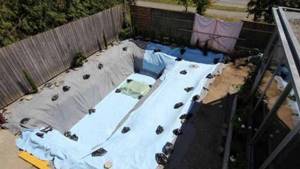
When you reach the desired depth, fill the bottom with sand, compact it well, and then lay it with geotextile so that the film does not tear over time. To do this, you can use special material sold in construction stores, or you can do it yourself. Take, for example, old carpets, rugs, roofing felt or linoleum that fit the area of the dug pit.
Now that the bottom is ready, measure your future pond and calculate the size of the film you need to create it. Usually for this it is enough to know the area of the pit and its depth. Then add an allowance of 50 cm on each side to strengthen the film along the shore. And you can already go shopping.
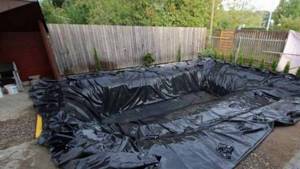
The film must be very strong and dense in order to withstand the weight of the water that we will eventually pour into the pond. Therefore, do not skimp on this primary material and choose it wisely - the film thickness should be at least 300 microns so as not to tear under constant pressure.
So, as soon as the film is laid out on the bottom:
- Flatten it so that there are no folds or bulges.
- Line the bank with stones so that when filling it does not accumulate at the bottom.
- Prepare plants if you want the pond to have water lilies or other living decorations.
Maxim Maximov will share with us the trick of how to arrange plants and flowers in a film pond in his master class:
The film pond is quite economical and allows us to create it of any shape and depth, which is impossible to do with a ready-made mold cast at the factory. That is why many choose this option to create their own pond in the country with their own hands.
But do not forget that the deeper you want to make the pond, the more likely it is that the shore may crumble. That is why we recommend that after the pit is dug, you strengthen its walls. Depending on their height, you can use tiles or slate. And how best to do this, Talla Khukhrianskaia in her master class:
When all technical issues have been resolved, the pit can be filled with water. To do this, just throw a hose connected to the water supply into it.
In addition to the stone, which has an important function and holds the film on the shore, you can place decorative figurines, flower pots and crafts that you made for your garden with your own hands. Design the pond so that it reflects your creative nature and pleases the eye.
Don’t get carried away with the decor, because the pond needs to be cleaned periodically so that the water in it does not die out and turn a beautiful country pond into a large puddle. And to do this, be sure to leave a place on the shore so that you can approach the pond. Better yet, provide a stream that will drain the water.
DIY pond made of film
The main question when creating a pond is how to make it waterproof. There are several types of pond waterproofing - film, clay castle, concrete and rigid form installation.
Installing a rigid mold is a simple and durable method, but they usually come in small sizes up to 3.5 square meters. meters. Their service life is 10-50 years.
Waterproofing with concrete is the most expensive; in addition, to protect it from frost, it requires additional treatment with a frost-resistant agent and liquid glass.
A clay castle is the cheapest in terms of materials, but the most labor-intensive. In order to waterproof a pit with clay, the compacted soil is covered with wood ash or soot. Then a 15 cm layer of clay dough is applied to the walls and compacted. When the layer dries, apply a second 30 cm. When the layer is almost dry, crushed stone is poured onto it, slightly pressing it into the layer.
The optimal solution for the construction of ponds with an area of more than 5-6 sq.m. - film waterproofing.
How much film is needed for a pond:
Film length = pond length + 2 ● pond depth + 50 cm reserve for fasteners.
Film width = pond width + 2 ● pond depth + 50 cm reserve for fasteners.
The film is available in widths from 2 to 10 m and lengths of 10-50 m. Knowing your needs, you can choose the optimal roll. Buy the film before digging a pit; this will allow you to cover it immediately when the pit is ready, preventing its edges from fraying.
Which film to choose for a pond
PVC film for a pond is cheaper, but over time it is destroyed by ultraviolet radiation, its service life is 8-10 years. Butyl rubber fabric is more expensive, but has protection from both ultraviolet and cold. The service life of such film is 50 years.
How to improve a pond at your dacha. Choosing the style and size of an artificial pond
Looking at landscape ideas for a pond at your dacha with your own hands, you will notice that there are several varieties of them. Small ponds and decorative ponds have a simple shape and shallow depth. Ponds with fish require a careful approach, selection of the optimal depth and location, as well as the installation of additional equipment. The functions of a country pond can be performed by a swimming pool.
Before building a pond at the dacha with your own hands, decide on the style of the future creation. There are the following types of landscape reservoirs:
- Regular. These are models with clear, regular outlines. Use square, round, oval or rectangular shapes. They harmonize well with a modern large house or cottage in a classic style.
- Landscape. They are characterized by irregular natural contours. The pond resembles a natural pond with plants growing along the banks. The shape can be any. This variety is chosen for areas on the terrain with small country houses.
The size depends on the dimensions of the territory. It is usually recommended to allocate no more than 10% of the local area, but in practice a lot depends on personal preferences. The depth depends on the purpose and size. If you decide to breed fish, then the depth must be sufficient. When choosing the size, take into account that the pond must maintain biological balance, which is necessary for self-purification. There must be a coastal, shallow and deep-water zone, and no more than half the area is allocated for plants.
On a note! Keep in mind that a large body of water is more difficult to maintain.
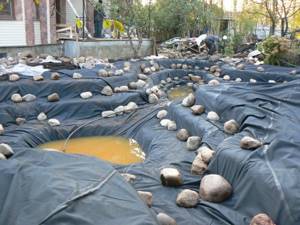
DIY pond construction photo.
A do-it-yourself pond begins with marking a pit. The curved shape can be marked with a hose. We remove the turf along the coastline and remove the soil with a bayonet - this will be the line of the swamp zone, then the next level of soil is removed inside the resulting border, and so on. As a result, our terraces will be 50 cm wide with slopes of 20 cm. When the pit for the pond is ready, all solid objects that can damage the film: stones, roots, etc. , we remove. We level and compact the walls and bottom of the pit.
Before work, the film is laid for several hours in a sunny place so that when it warms up, it becomes more elastic. Film installation is done in warm weather. Overlapping panels of geotextile or felt are laid on the compacted pit; they are needed to protect the waterproofing film from protruding roots and stones over time.
A waterproofing film is spread on top of the geotextile with a margin of 50 cm along the edges of the pit. The edges are temporarily fixed with stones. The film is allowed to sag a little, smoothing and leveling it to the shape of the pit.
The film inside the swimming area can be protected with dry stones stacked on top of each other.
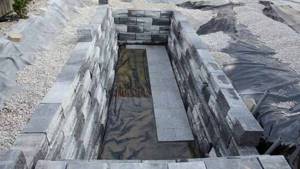
Instead of stones, you can use bags of gravel or sand. But keep in mind that it is more convenient to care for a pond with film walls. – it is easier to clean it from silt and mud.
Fill the pit with water in portions, removing air bubbles from under the film.
When the pond is completely filled with water, securely fix the ends of the film in a trench, which is made at a distance of 15 cm from the edge of the pit. In a trench 20 cm deep, the edges of the film are wrapped in a roll and covered with stones and pebbles.
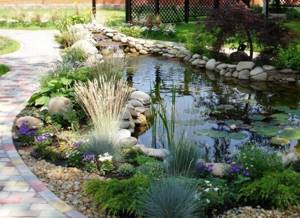
Decorating a pond at your dacha with your own hands in landscape style
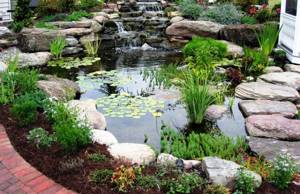
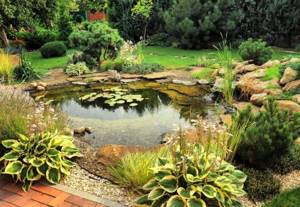
If the overall picture of the site allows you to create your own pond, close to natural, then in this case the shape of the reservoir can be any, usually it is a curved coastline, which is then formed with stones.
It will be better if the stones are either granite, or river pebbles, or decorative onyx.
Beige sand, patterned tiles and the like will look quite beautiful. The size of the stone should be determined depending on the size of the pond itself: if the pond is small, then the stones should be either small or medium in size; if the reservoir is large, use correspondingly large stones, but in harmony with the small ones. This way, the overall appearance of the design will be natural, as opposed to if the stones were the same.
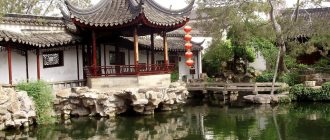
The decoration may be based on Japanese garden style. In the gardens of ancient Japan, the pond was built in a strict style, but with a carefully considered combination of stones. There shouldn't be any bright plants here. Due to the fact that Japan has a small territory, it has developed a culture of minimalism, as we see in the arrangement of reservoirs.
Tradition requires the presence of all the elements that include water. Usually this is a small vessel, near which a stream of bamboo tubes flows. On the sides of such a stream, trees of dwarf size are planted.
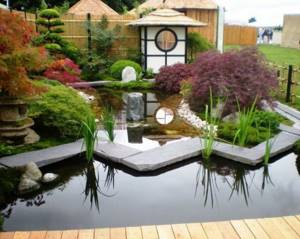
Often such a pond was built in the shape of a rectangle, which also emphasized the strict style of Japan.
You can get a special effect if, when arranging a reservoir, you put stones on its bottom. In this case, the depth of the artificial pond should be small so that the stones are visible through a small thickness of water.
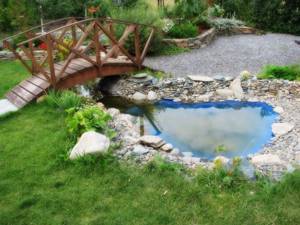
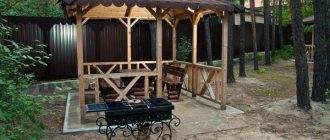
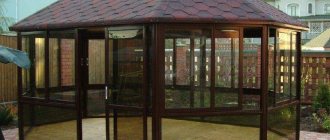
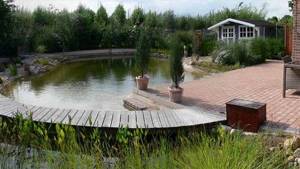
Graceful bridge over the pond
Also, instead of stone, the bottom of a pond can be laid out with beautiful patterned tiles. A beautifully designed monolithic bridge over the pond will also fit very well into the overall picture.
We make a pond with our own hands. Shore decoration
After you have made a pond with your own hands, before you start decorating the shore, you need to water it generously and wait 2-3 days, because... shrinkage is possible. In addition, during this time the water in the pond will settle.
We mask the film on the shore with crushed stones, stones, and snags. We plant plants in shallow water. A pond needs plants that saturate the water with oxygen. There are many suitable plants - reeds, crabgrass, iris, bathwort, marigold, arrowhead. Any plant that grows on the shore of a natural body of water will be suitable for your pond. Don't forget about algae, such as hornwort, which just floats in the water. Deciduous ornamental shrubs are best planted behind marsh grasses, which are planted directly on the shore.

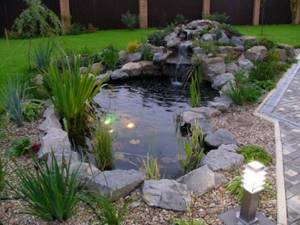
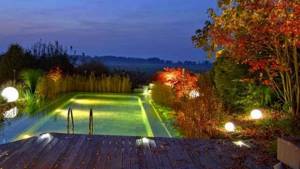
Illumination adds additional charm to the pond.
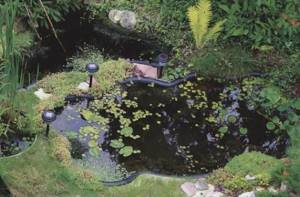
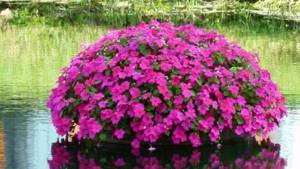
Floating flower beds look seductive on the surface of the pond.
Pond safety
If there are very young children in the family, then perhaps the construction of a pond should be postponed until they are older. It is necessary to consider visiting the pond by elderly people and school-age children. Make a convenient ladder to enter the pond, don't forget to clean it so it doesn't become slippery! It is better to cover all other sides of the pond, except the entrance, with plants.
Pond care.
The new pond will take on its natural appearance over the course of a year - while it forms its own ecosystem. The small world of your pond is very vulnerable. The pond may quickly heat up or freeze, water may evaporate, or the pond may overflow after rain. This puts stress on aquatic life that cannot immediately transition to a safer, more stable environment.
Therefore, your pond, like any living organism, requires care. On a hot day, you need to add water, use a net to collect debris that floats on the surface, check whether the plants have grown or perhaps something has not taken root and needs to be replanted. However, a surprising number of life forms will colonize your new pond; they will quickly explore new waters and will stay if conditions suit them.
The quiet splash of water is the most enchanting melody of a hot summer; water bewitches, attracts and seduces us with a playful play of light, transparent depth and invigorating coolness. A DIY pond will give your dacha a special charm.