How to make a barbecue shelter with your own hands?
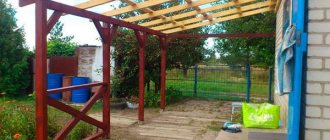
Making a simple roof is not difficult. The structure consists of 2-4 supporting posts and a canopy attached to them. The rafter system is most often made single-pitched, although you can also find examples with complex arched or double-pitched roofs.
The barbecue canopy is built with your own hands in several stages:
- installation of supports and construction of a foundation for them;
- production of strapping;
- assembly of the rafter system;
- fastening of roofing material;
- finishing.
You can make a barbecue with a canopy for your dacha yourself from different materials.
Materials for constructing the frame ↑
The frame is:
- wooden, mainly rounded milled logs or timber. Sometimes a tree trunk that has undergone minor processing is also used for the frame. Implementing such a barbecue canopy with your own hands is quite simple, especially since it does not require any special equipment. This design fits perfectly into almost any surrounding design.
The main disadvantage of a wooden barbecue canopy is its low fire safety. In addition, wood is often affected by fungus and is susceptible to rotting. The durability of the material can be increased if it is treated with various protective compounds: primer, antiseptics and fire retardants and finally painted.
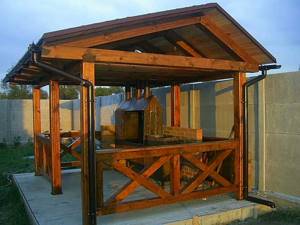
in the photo: barbecue under a canopy
- Metal with various design options, for example, forged barbecues with a canopy, as in the photo, with ordinary welded stands, or have a prefabricated structure. The metal frame does not have the main disadvantages of a wooden one, that is, it is fireproof and durable. Nevertheless, it also needs protection: anti-corrosion compounds must be applied to the metal. Otherwise, over time, the metal will become covered with an unpleasant yellow coating.
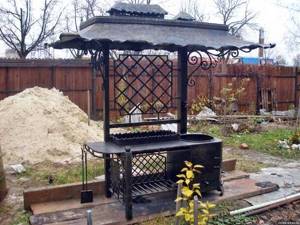
Making a similar canopy for a barbecue with your own hands (see photo) is more difficult. To do this, you must, firstly, have the skills to work with a welding machine, and, secondly, the machine itself.
- stone made of concrete, brick or natural stone. Such a structure can be considered capital. Its construction also requires certain construction skills, but this option is the safest and does not require further maintenance.
For barbecue ↑
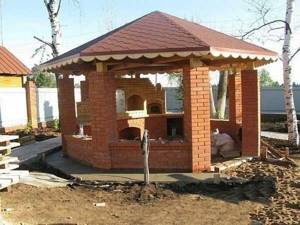
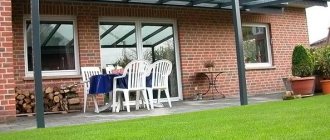
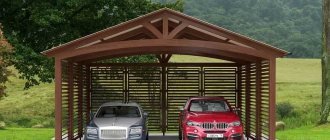
As you can see in the photo, a roof of this design can be:
- single or double slope;
- hip;
- tent;
- arched.
The roof slope cannot be less than 10° to prevent water from flowing in and prevent it from stagnating on the surface of the roofing.
A do-it-yourself metal barbecue canopy is most often covered with profiled sheets or metal tiles.
- Profiled sheets are an affordable material. They are durable, fire-resistant and come in a fairly diverse range of colors, which allows you to experiment. The ribs of the profiled sheets are placed in the direction from the top to the bottom point of the roof, but not in the transverse direction.
- Metal tiles are undoubtedly more expensive. However, if the roof of the main building of the summer cottage is covered with this particular material, then it is probably not worth saving on the roof. After all, there is always a possibility that a barbecue with a canopy (photo below) will stand out from the overall picture.
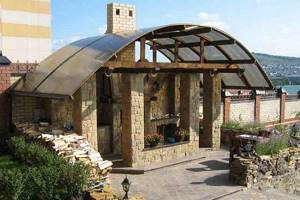
- For wooden as well as stone structures, you can arrange a canopy over the barbecue made of polycarbonate. It is better to choose profile-type cellular polycarbonate with a thickness of at least 6 mm. Due to the lightness of the material, the roof does not create additional load on the supporting frame system. Important
The distance from the roof to the barbecue in this case should exceed 250 cm to prevent the plastic from melting under the influence of high temperatures.Polycarbonate bends easily, so it allows you not only to create a separate roof for a barbecue with your own hands, as in the photo, but also to build a roof of complex configuration. For example, make a conspicuous arch or several bends at the same time.

Frame material
For a small house above the fireplace, it is better to choose non-combustible materials: metal, stone or brick. Even with a well-designed fryer, sparks and intense heat will always form, which can cause a fire.
If the building will cover part of the recreation area, the supporting elements can be made of wood impregnated with a fire retardant compound. The distance from the barbecue to the wooden parts should not be less than 1.5 m, so the minimum size of the wooden structure is approximately 3x4 m. Non-combustible parts can be located at any convenient distance from the brazier.
Wooden beam
An easy-to-process material that allows you to get by with a minimal set of simple tools. For support posts, take a block of at least 10 cm in cross section. You can replace the timber with a simple or rounded log.
The thickness of the rafters is calculated depending on the area and type of roof. For 2 small and steep slopes, thinner material is suitable, and for an almost flat 1-slope roof over the same area, you will need a thick beam or boards at least 3 cm thick, installed on the edge.
Metallic profile
The profile for the roof frame above the barbecue is selected depending on the expected load. Like the wooden beam, the steel parts that support the entire structure should be the thickest. Most often, for a large gazebo, a pipe with a cross-section of 10 cm and a wall thickness of at least 5 mm is used.
For rafters and trim parts, you can take a corrugated pipe or a smaller corner. Most often, in small structures, hardware with a cross section of 4-5 cm is used. For large gazebo sizes or increased snow load, it is advisable to use thicker material.
Working with metal requires skills in cutting and welding parts. If you have the skills to work with cold forging equipment, the canopy can be decorated with metal tracery.
Stone or brick
Most often, stone structures are erected using a metal frame inside. This way the posts will be more durable and will be able to bear the weight of the roof and the snow on it in winter. It is convenient to lay out protective walls from stone if the gazebo is located in an open place. Wooden buildings are sometimes combined with brick and stone masonry, laying out a wall near which a fireplace can be placed.
The rafter system on stone buildings is made of wood or metal.
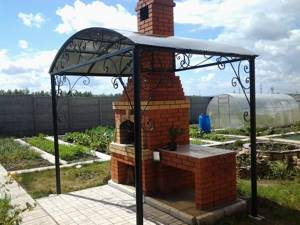
Variations of canopy coverings
Today on sale you can find material with various performance properties. To cover the canopy you can use:
- wood;
- metal;
- polycarbonate;
- profiled sheets.
Wood is a natural resource.
It is comfortable to stay under such a canopy in any weather. The design provides a stable shadow, unlike the same metal. Wood is available for sale at the best price, in different modifications. Its installation will also not cause any difficulties. The disadvantages of wood are poor resistance to environmental influences and fire. It is better to weld a metal roof to a compact canopy directly above the work area. Forged products are especially beautiful. The iron structure is heat-resistant, strong and durable. The disadvantages are heavy weight, noise during rain, strong heating.
Polycarbonate is a beautiful and comfortable polymer material. It is reliable, does not rot or rust. Survives in any climate. The material is simple, flexible and lightweight in installation. Polymers can be used to create structures of various shapes.
Corrugated sheeting is another current option. The strengths of the material are light weight, resistance to precipitation, long service life, easy installation, strength and fire resistance. The disadvantages include the high price and susceptibility to corrosion.
What is the roof made of?
Modern roofing materials make it easy to create a beautiful roof for a gazebo or canopy of any size. The standard size of metal or plastic sheets is 2x6 m, which makes it possible to lay a roof with only 1-2 sheets. When choosing a roofing material, sheets of the same color and texture as those on the house are often used.
Tree
Wooden parts are used as a frame for any type of roof. But the ceiling itself can be made from boards, placing them in 2 rows and covering the gaps in the bottom with the top layer. You can also install the boards horizontally, with an overlap on each underlying one. But due to its susceptibility to rotting, wood is rarely used on roofing.
Polycarbonate
Plastic material allows you to make an unusual roof. A homemade polycarbonate barbecue canopy will be transparent and create the impression of a light and airy structure. The material is plastic, it can be shaped into an arch or semi-arch. Over a large area with a high snow load, it can burst, so it requires installation of sheathing in increments of no more than 50 cm. Both cellular and monolithic polycarbonate can be used for the roof, but the latter is more durable.
Plastic sheets are available in a wide range of colors. You can choose either completely colorless sheets or painted, matte and transparent.
Profiled sheet
Metal roofing sheets are produced in different modifications:
- galvanized;
- coated with polymer dyes of different shades;
- wavy;
- smooth, etc.
Any variety is suitable for a roof over a barbecue. The sheets can be used to form arched roofs.
The material is quite durable and can withstand snow loads well. To prevent the roof from deforming, frequent sheathing is installed.
Other materials
The roof over the barbecue can be made from other modern materials:
- metal tiles;
- ondulin;
- soft roofing with different patterns;
- slate;
- plain tin or thin metal sheets.
The main requirement for roofing products is non-flammability.

Design features
Any barbecue shelter consists of supporting vertical posts and a roof. This can be a separate building, a structure on a separate site adjacent to a house, utility unit, bathhouse, garage, gazebo, or a single structure, usually mobile, where the roof and barbecue are connected by racks.
The size of the barbecue shelter is directly related to the size of the oven. This can be a small shelter just above the fireplace, or a full-fledged roof with a place to rest.
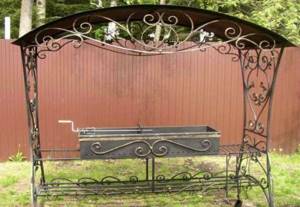
Barbecue canopies, photo of a mobile forged structure
Grill canopy frame - materials
The frame is the support of the barbecue canopy; it must be strong, fireproof, heat-resistant, easy to maintain, and not react to temperature deltas and humidity changes. But at the same time it is beautiful and fits harmoniously into the overall architectural ensemble of the site. Here we can distinguish 3 types of barbecue canopies:
- Wooden from timber, rounded logs, tree trunks. Such structures fit perfectly into any landscape design. Building a wooden barbecue canopy with your own hands is quite simple; no special skills or equipment are required, the material can be easily processed with household tools. Disadvantages include the fragility, fire hazard and rotting of wood, it is affected by fungi, and we especially emphasize vulnerability to rodents and insects. To extend its service life and maintain aesthetics, the wooden frame for a barbecue canopy must be carefully treated with fire-resistant and antiseptic agents, additionally primed and painted.
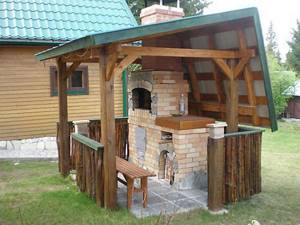
Grill canopy, photo of a wooden building in a rustic style
- Metal: forged, welded, prefabricated. This is the most popular type of canopy over the barbecue. The main advantage is the durability and fire safety of the material. If the farm has a welding machine, and you have the skills to work with it, in fact, a metal barbecue shed is an inexpensive, simple and very reliable structure that will last for decades. But a metal barbecue canopy is susceptible to corrosion and heats up from UV rays and fire. The frame must be treated with an anti-corrosion agent, coated with primer and paint; compounds with a hammer effect have proven themselves well here.
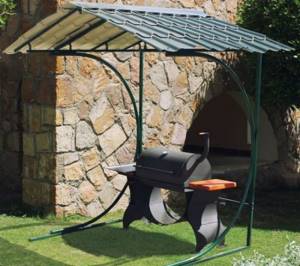
Canopy over the barbecue, photo of a portable welded structure made of round pipe and corrugated sheeting
- Stone, concrete, brick - these can conditionally be classified as permanent structures. To build a barbecue shed from brick or stone, you will need skills in laying vertical pillars, significant time and labor costs, as well as some inconvenience when working with mortar. But such a canopy over the barbecue is the most durable, it is not at all afraid of fire and does not heat up from the sun, does not require finishing, and does not require additional maintenance during operation.
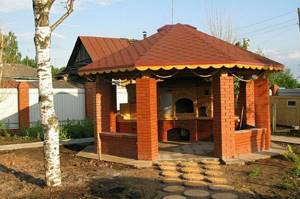
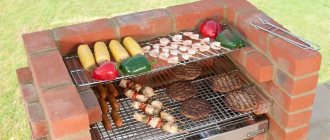
Photo of a brick barbecue under a canopy; a strip or slab foundation is recommended for such a structure
How and what is best to make a roof for a canopy over a barbecue
The roof of a barbecue canopy can be single or gable, arched, hipped, domed, conical and even curvilinear. The choice of shape depends on the roofing material and your capabilities. The easiest way is to make a lean-to and arched barbecue canopy with your own hands.
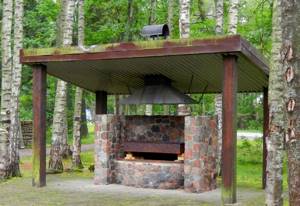
A pitched roof is the easiest way to protect a barbecue from precipitation
Corrugated sheeting and roofing felt are most often used as roofing materials for barbecue canopies; for arched structures, colored polycarbonate is the ideal solution. For complex, large extensions - metal tiles, soft roofing.
Corrugated sheets are corrugated metal sheets coated with a durable polymer that protects the material from rust, fading, and harmful chemical and biological influences of the environment. It is not afraid of fire, which is important for building around a barbecue. A huge color palette allows you to select sheets to match almost any style of architectural ensemble on the site.
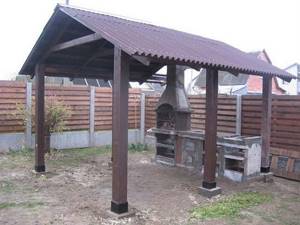
It is recommended to make the roof over the barbecue from corrugated sheeting 0.5 mm thick
Polycarbonate is more versatile compared to corrugated sheeting. For the roof above the barbecue, cellular polycarbonate, with stiffening ribs inside, 6-12 mm thick, is better suited. The material is slightly flammable, melts, but almost does not support combustion, and monolithic-cast sheets do not burn at all. The material is lightweight and creates virtually no load on the supports.
The material bends, so you can easily use it with your own hands to make a roof over the barbecue not only with a straight slope, but also an arched, curvilinear, complex shape, with several bends, which opens up wide horizons for the design of an extension to the barbecue.
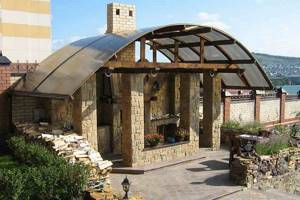
The polycarbonate barbecue canopy looks light and weightless due to the transparency of the material
Drawing of a canopy over the barbecue
Before you make a canopy over the barbecue with your own hands, you need to determine the dimensions of the building and draw a schematic plan. It should indicate all the parameters of the canopy, determine the angle of inclination of the slopes or the bending diameter of the arch. A detailed drawing helps to correctly calculate the amount of materials and calculate the dimensions of each part.
When drawing up a drawing, you need to take into account that the support pillars must be dug into the ground at least 50 cm. When choosing a pitched roof, 1 pair of supports must be higher than the other. The slope angle of the slope also depends on the difference in heights. When making a canopy attached to a house, the role of higher supports is played by a horizontal support beam mounted on the wall of the building.
How to build a canopy yourself: features of installation of the structure
Wood is the easiest material to process, so let’s look at how to make a canopy for a barbecue with your own hands using the example of a structure with wooden supports and ceilings. First of all, taking into account all the recommendations listed above, it is necessary to draw up a drawing indicating the dimensions of the future structure. This will help you more accurately determine the amount of materials needed.
Typically, for the construction of a wooden canopy, timber or logs (with a diameter of at least 10 cm) are used for pillars, a concrete mixture, crushed stone for a pillow under the foundation, boards of sufficient length and with a thickness of more than 5 cm for rafters, roofing material, fastening elements - screws, self-tapping screws. You will also need to prepare a set of tools and additional devices, namely:
- a shovel for digging holes for the foundation;

When installing supports, check the level - hammer;
- hacksaw;
- drill with an attachment for mixing concrete;
- axe;
- screwdriver;
- building level;
- measuring tape;
- long cord or rope;
- bucket for solution.
Although a wooden structure is light in weight, it still needs a foundation. To do this, dig 4 holes about 70 cm deep around the perimeter, pour a layer of crushed stone (5-10 cm) into them, install supports and fill them with a pre-prepared solution. During the installation of pillars, you should check their correct position with a building level to avoid distortions. It is also worth stretching the cord in advance, outlining the perimeter of the building; with its help, it will be easier to evenly position the supports. After the concrete has hardened, which usually lasts three days, you can proceed to the construction of the floors.
Grooves are cut out in the upper part of the supports, to which beams are bolted, serving as horizontal floors. They are placed around the perimeter of the canopy and used as a base for the rafters. Next, boards are mounted on the floors. It is better to secure them with strong long screws. When deciding on the number of rafters, one should proceed from the principle that the distance between them should not be more than 1 meter. If you neglect this rule, then in winter the canopy may not withstand the load from the snow cover.

Installation of rafters
Then the sheathing is placed on the rafters, and the material chosen for the roof is attached to it. He can be anything. Most often, corrugated sheeting, polycarbonate or metal tiles are used for such structures. If you want to provide wind protection to the structure, then it should be located close to a dense fence or wall of any building; you can also build a wall of boards or corrugated sheets on one or more sides.
Required Tools
Preparation for construction also includes the selection of tools needed during work. When installing a large stationary canopy for earth and concrete work, you need:
- roulette;
- cord and poles;
- shovel;
- container for mixing concrete mortar;
- building level.
After installing the supports and pouring the foundation under them, the construction of the above-ground part begins. For this purpose, different tools are used depending on the material used. When building a wooden structure you need:
- circular saw or hand saw;
- hammer and nails;
- measuring instruments.
To make a metal canopy you will need:
- Bulgarian;
- welding machine;
- tape measure, level, square.
When installing the roof, you may need a screwdriver or a hammer, depending on the type of fasteners used.
We build a barbecue shelter with our own hands
Below we will look at the installation of a wooden canopy for a barbecue or barbecue, on four or six supports, under a roof with a hole for a pipe. The longest part of construction is laying the foundation: it will take 3-4 days to harden. The shelter itself is installed in one working day.
Preparatory work
Creating a canopy over a barbecue is, although not too large-scale, still a construction project. Therefore, first you will have to make a sketch, and from it - a drawing with all the dimensions. Then, based on the drawing, we calculate and purchase/select the necessary materials. For example, let's take a wooden building on 6 pillars. Materials:
- 6 beams with a section of 10x10 cm - for supports.
- 4 bars with a section of 10x4.5 cm - for cross beams.
- Bars with a section of 10x4.5 cm - for longitudinal load-bearing. The quantity depends on the length of the building, provided that the load-bearing structures should be located 80-110 cm from each other.
- Narrow boards for creating sheathing - if required by the roofing material.
- Roofing material.
- Several strips of tin to create a pipe and a “skirt” for it.
- Embedded parts for fixing timber in concrete.
- Cement-sand mixture for pouring foundation pillars.
- Hardware for fastening elements together.
For convenience, the construction site should be marked using a system of pegs and cord.
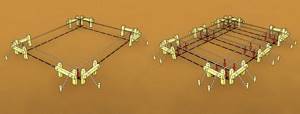
Marking the work site
Pouring the foundation, installing supports and creating a roof
We dig holes for the foundation - to a depth of 50 cm and a diameter of 30-35 cm, and fill the bottom with crushed stone (10 cm). We prepare a cement-sand mortar (3 to 1) and pour it inside. Cover the holes with cellophane and leave for 3-4 days until the concrete hardens completely. It is advisable to arrange small (about 10 cm) sides of boards around the edges and place cellophane on them - to avoid flooding of the holes in case of rain.
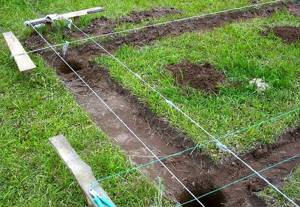
We are building a canopy over the barbecue: photo of a marked construction site with dug foundation holes
We screw the embedded parts into the hardened concrete, and to them we attach the pillars of the future canopy over the barbecue. We control this stage using a level. On the supports, along the short sides of the building, we mount transverse beams, and on them - longitudinal load-bearing beams. Next, you can begin attaching the sheathing and laying the roofing material. Be sure to leave an opening in the roof for the chimney.
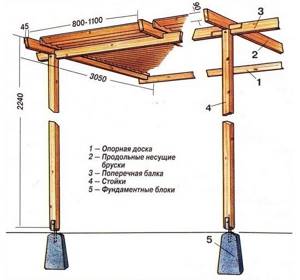
Installation of a canopy for barbecue
And now about the design of the smoke exhaust.
It is cut out of tin, on which a “pattern” is drawn in advance according to the drawings. The pipe should start 60 cm above the grill or barbecue and end 50 cm above the roof level. Above the pipe you need to make a rain protection - also from a piece of tin folded at a slight angle. In the diagram below you can see an example of such a design. Please note: around the chimney above the barbecue, unless the roof is covered with corrugated steel sheets, we must make a “skirt” of tin. It should encircle the pipe in a circle and be about 30 cm wide. We overlap the inner edge of the “skirt” (10 cm) onto the chimney. We seal all seams with a suitable sealant.
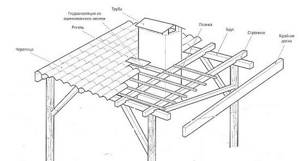
Installing a roof over a barbecue
Pouring the foundation for the supports
When constructing a stationary canopy to design a recreation area in a dacha, the first stage - installation of supports - is carried out according to general rules, regardless of the material used. Using a tape measure and a cord with pegs, the installation sites for supports are marked on the site according to the plan. Under each post you need to dig a hole with a diameter of 0.5 m and a depth of at least 0.5 m. In sandy or heavily frozen areas, the depth can reach 80-100 cm.
Sand is poured onto the bottom and compacted; the thickness of the cushion is 15-20 cm. A pole is installed on it and the vertical is leveled to the building level with a plumb line. The pillar must be strengthened with spacers made of stone, brick or pieces of timber.
Prepare a concrete solution from 1 part cement, 3 parts sand and 4 parts crushed stone. Fill the hole around the support with the prepared mass to the ground level. During the pouring process, it is recommended to tamp the solution to make it solid. Check the verticality of the post again and correct the distortion before the concrete hardens.
The prepared supports must stand for 7-10 days for the concrete monolith to gain strength. Only after this, work on the construction of the above-ground part continues.
DIY metal barbecue canopy. Materials for stationary canopies
This is where there is a huge variety of building materials used. But let's start with the fact that stationary installations are primarily a structure, not a structure. Therefore, it is built according to all the laws of construction technologies.
The classification of barbecue canopies and stationary grills is based on the materials used and architectural forms. Let's look at some interesting solutions.
Made of wood
The simplest option is a shed with a pitched roof, assembled on four pillars. The photo below shows one of the options.
A simple design, very stable, plus it fits perfectly into the landscape design of a country house.
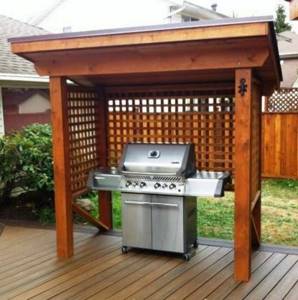
Wooden structure for barbecue and grill
On our website you can get acquainted with the most popular projects of small forms for a country house - from construction companies presented at the exhibition of houses “Low-Rise Country”.
This canopy is easy to decorate. For example, in the same photo you can see that the back wall and sides are formed by wooden gratings. They can be replaced with shelves, diagonal ties and other accessories.
The wooden structure is diluted with other building materials. By the way, wood is a universal material. It can be easily combined with stone, metal, and fabric. The bottom photo shows how wood, brick and stone can be combined. Not only the barbecue area is served in an original way. The dimensions of the canopy have been increased, and a recreation area has been placed under the roof. At the same time, the roof of the canopy is hip.
It should be noted that buildings of this size must fit into the design of the main house. That is, their roofs are covered with the same roofing material. A canopy should highlight the home's architecture, adding to it rather than being radically different.
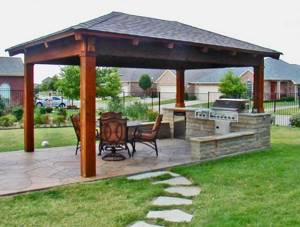
Wooden barbecue canopy with hip roof
And one more interesting photo with a canopy of an original shape. Here the barbecue space is divided into two zones. They are fenced with a functional structure in the form of a horizontal picket fence. One area for cooking meat, the second for relaxation, where upholstered furniture is installed. The solution is actually convenient if you correctly orient the building relative to the wind rose. That is, it is impossible for smoke from the barbecue to get into the recreation area.
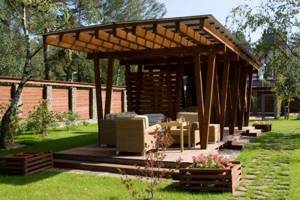
Wooden canopy consisting of two areas: barbecue and relaxation
Made of metal
Stationary metal barbecue canopies differ from wooden ones only in the use of metal profiles. In terms of shape, design features and dimensions, these are all the same structures. One of the simple options is in the picture below. Essentially, this is a gazebo with a barbecue installed inside. The main task is to remove smoke. And there are many options here. The photo shows that there is a canopy with a chimney installed above the barbecue. In addition, the grill itself is a separate structure from the canopy. The same goes for furniture. Therefore, they can be swapped inside the suspended structure or taken outside it.
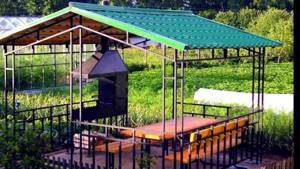
Gazebo with barbecue installed inside
This might be interesting! In the article at the following link, read about a review of gazebos with a stove and barbecue.
Made of brick or stone
Solid canopies erected from piece wall materials must first of all be designed. This is the only way to guarantee the strength and reliability of the building. Moreover, such canopies can be open or semi-closed. The last option is pictured below.
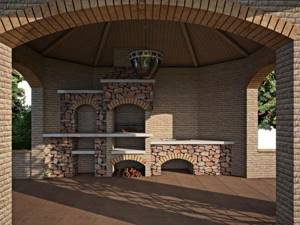
Brick canopy
The roof over the barbecue can be built from other building materials, for example, wood. But its solidity should be exactly the same as that of the walls.
If an open option was chosen, then even in it they try to build one wall as protection from the wind. It is this solution that makes it possible to overcome not only this problem. Thus, you can isolate yourself from the neighboring area. The bottom photo shows this option. Notice how the roof is made. It is pitched, but with enough protrusion to confidently speak about protecting the barbecue area.
Brick shed with pitched roof
Brick can be replaced with stone, giving the building a natural look. That is, the two materials are interchangeable. This means that there are also a lot of architectural solutions here. But there are other options, simpler ones. They can be called combined. That is, a metal or wooden structure is being built, but some of its elements are faced with stone or brick. This is usually how canopy support posts are finished.
This makes it possible to approach construction from the position of assembling the frame and installing it. And after installation, the racks of the structure are faced with stone or brick.
How to make brick and stone pillars?
For masonry, you need to prepare a solution of 1 part cement and 3 parts fine sifted sand. The simplest brickwork - 1.5 bricks:
- place 1 block next to the installed steel support pipe;
- lay out a second one perpendicular to it, aligning the edge of the end with the long outer side of the previous one;
- put elements 3 and 4 in the same way, closing a square around the pipe;
- the next row is placed with the seams bandaged: where adjacent stones are connected, the body of the next one should be located, and the connection will shift by 12.5 cm (by half a brick);
- continuing, again closing the square around the stand;
- perform the next rows according to the same principle, alternating the location of the joints of adjacent masonry parts.
Natural stone is more difficult to lay out, because it does not have clear geometric shapes. For ease of work, the pieces can be chipped, making them approximately equal in length and width, or additional pieces can be used if the layer is not long enough. When making treasure from pieces of natural stone, you should try to follow the principle of bandaging the seams, placing a solid piece above the junction of the pieces.
While the cement composition has not hardened, the protruding mortar is formed into a neat roller with a special jointing tool or pressed between the masonry elements with a stick. To obtain seamless (Chechen) masonry, a thin rod is placed between the bricks of adjacent tiers at a distance of 1.5 cm from the edge. The solution will not be squeezed out onto the outside, and the seam will remain clean. The rods are removed immediately after laying the next row.

Types of canopies
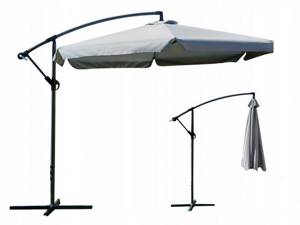
Sheds for barbecue can be open, semi-closed and fully covered in the form of gazebos. The first type protects from rain and snow. If a parapet of 90–120 cm is provided below, the side wind will not interfere with the operation of the barbecue or grill. Gazebos for barbecues are rarely made; you can consider the option of placing tables there, and the canopy itself over the barbecue should not be made completely closed.
There are simple projects, small and detached buildings. Simple awnings include four posts on which a strapping beam rests. The structure is often folding, and non-combustible soft materials are used for the roof.
Minimalistic canopy designs are presented in the form of portable umbrellas that can stand on their own supports or be attached to a barbecue. They use corrugated pipe, angles No. 45, 50. Free-standing structures are made stationary, their dimensions are 2 x 2, 2 x 4 m, the supports for them are made of brick and metal.
Roof structures
The roofs are made high with a large slope and made flat.
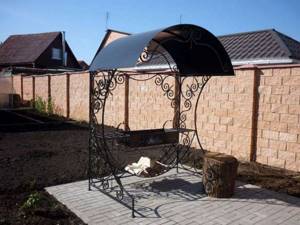
Canopy with semicircular polycarbonate roof
The execution technology depends on the type:
- Single- and double-slope structures require trusses. The elements are welded from metal and made from wood. For gable trusses, triangular trusses with sharp corners at the base are chosen, and single-pitch trusses are made using rectangular products. The trusses are installed side by side, with wooden or steel sheathing attached to the upper elements.
- Arched can be made of metal, brick. Wooden ones are rarely made, since ready-made expensive parts from solid wood are required. The metal profile is formed in the form of an arch on a bending machine, and brick arches are laid using a special template. Cross beams serve to secure the roofing.
- An angular roof is built at the junction of two walls at an angle. They can be with flat, triangular or arched slopes. Due to the large number of joints, there is a special requirement for sealing joints. Roofs of this structure are made of metal and wood, covered with polycarbonate, slate, and corrugated sheeting.
There is a separate category of canopies for barbecues or grills, which are made in the form of a canopy. The structure is attached on one side to the wall of the house. Such a design cannot have a large depth (extension). The width of the canopy is mounted on the wall, so this size is not limited. Wooden blocks and metal profiles are used.
Instructions for making a wooden frame
The support columns need to be connected with timber or logs, nailing them along the upper ends. Most often, first, those sides are connected on which the rafters will not rest, and then they are placed transverse to them. With this arrangement, the roof rests evenly on all installed posts. To connect in the corners, you can use the half-tree method, removing part of the wood at the very end or making a decorative extension of the beams beyond the roof. Sometimes, when using a beam, the method is not used, installing 2 load-bearing beams opposite each other on top of 2 others.
For strapping, you can also use strong boards (at least 3 cm thick). They are nailed on the outside of the support posts around the perimeter. If the load on the roof is large (large area, 1 slope), then the load-bearing pair of sides of the frame is made double, strengthening the same boards on the inside of the posts.
Installation features
Concreting
Holes are dug under metal and wooden poles with a garden drill, a backfill of crushed stone and sand is made below, then the surrounding area is concreted. The lower part of the support is wrapped with roofing material or lubricated three times with molten bitumen. When pouring concrete, pour it with a shovel, a piece of reinforcement, or use a vibrator to force out air.
Under the brick pillars, they dig a hole 5 cm larger than the cross-section on all sides. 5-10 cm of sand and crushed stone are poured at the bottom, compacted, and spilled with water. Lay a layer of waterproofing so that it completely covers the walls. A reinforcement frame is made, the rods are tied with wire or welded. They concrete the pit, then wait 12–15 days to start laying.
Laying brick and stone pillars
Prepare a cement-sand mortar in a concentration of 1:3 (cement, sand, respectively). When making masonry, vertical and horizontal seams are tied. After 2–3 rows, a stamped metal mesh is installed or reinforcement with a diameter of 4–6 mm is placed so as not to increase the thickness of the seam.
Natural stone is more difficult to lay because it does not have a clear shape. The edges of the pieces are slightly chipped to make them approximately equal in edges. The seams are also bandaged; the solution is removed immediately, since after hardening it is difficult to remove from the irregularities on the surface of the stone.
Assembling a wooden frame
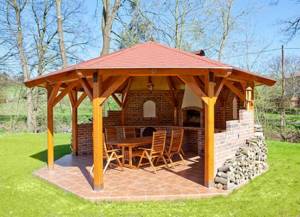
After concreting the racks, a transverse frame is made of timber. It is nailed to the end of the pillars. To connect corners, use the half-tree method. Sometimes the ends of two other purlins are placed on the beams on opposite sides, without choosing wood for joining in the beams. The rafters are fixed with brackets and bolts.
Before installation, the parts are impregnated with hot drying oil (+60°C) or store-bought antiseptics. After making the frame, it is painted with oil or acrylic paint.
Manufacturing of metal frame
Steel elements are assembled using bolts or welding. The bolted connection is regularly checked and the nuts are tightened.
Manufacturing stages:
- the crossbars are fixed to the racks at the selected height;
- cut out the corner braces and fix them in the right places;
- small trusses are welded on the ground, then raised, and large trusses are made at the top of the frame.
After installation, the metal is degreased, coated with rust preventative, and painted with pentaphthalic or latex compounds.
Canopy option with hood

hole is made in the canopy for the passage of a supercharged pipe. Forced ventilation is provided by installing a hood. The exhaust pipe structure should not touch wooden roof elements or combustible roofing. The chimney is insulated with mineral wool, polystyrene foam, polystyrene foam from the elements of the rafters and sheathing.
Covering installation
They use types of corrugated sheeting that are intended for roofing work; such material has a standard wave height so that it does not sag from snow or wind. Metal tiles require a continuous base, not separate slats.
The pitch between the sheathing elements is chosen depending on the angle of inclination, taking into account the strength of the material. Increasing the slope of the slope leads to a decrease in the load from snow, but increases the effect of wind.
Step-by-step instructions for making a metal frame
The general principles for assembling a metal frame for a stationary gazebo and a small canopy over the brazier itself are approximately the same. In the second case, the support columns are not dug in anywhere, but are welded to the legs or body of the barbecue. Next steps are as follows:
- Cut a corrugated pipe or a corner for making a trim to the size of the area that it is desirable to cover (most often, the ends are made at 50-60 cm along the perimeter around the fryer).
- First weld the sides that do not support the rafters. Across them, at the ends of the made outlets, lay load-bearing beams and weld them to the bottom ones.
How to make an arched roof?
If you need to make an arched or semi-arched roof, before making the frame, 2 parts of the lower trim are installed at ground level (10-15 cm above the soil). Their length is equal to the diameter of the arc of the arch or the radius of the semi-arched part of the arc. When making a small canopy, the center of the arc should be shifted to the front legs of the roaster. This way it will be shifted from the highest part, where it is more convenient for a person to stand.
The side parts of the roof frame are bent to the required diameter and welded to the ends of the lower trim and to each vertical support. Transverse load-bearing beams are installed above the verticals in increments of 0.5 m along the entire semicircle for an arched roof. If a semi-arch is being made, 1 load-bearing beam is placed on the upper edge, 1-2 above the vertical supports and 0.5 m to the bottom trim.
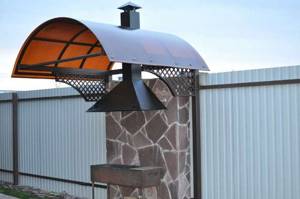
Covering installation
The complexity of making a roof depends on what kind of roof the canopy over the barbecue will have:
- For a single-pitch roof, rafters made of timber, logs, thick boards (3-5 cm) or metal parts (pipe 5-10 cm) are laid along the slope. The distance between them is 1 m. A sheathing of 2-2.5 cm boards is placed across it under the metal profile and other opaque roofing. For polycarbonate, make a neat sheathing from a bar or corrugated pipe, placing the parts at a distance of 0.5 m.
- They begin to install a gable roof by making trusses from 2 rafters connected at the top point. For rigidity in the upper third they are connected by a cross member. The rafter systems are lifted and secured to the top frame with nails or a weld, depending on the material. The distance between the trusses is no more than 1 m. Connect the upper corners with a ridge element running along the entire length of the structure. Make a plank sheathing between the rafters in increments of 30-50 cm.
The ends of the rafters and sheathing should extend beyond the perimeter of the trim by 20-30 cm, forming roof overhangs.
Sheets of roofing material are laid so that the wave on the profiled material is located along the slope. Installation begins from the bottom edge of the slope. Each next tier of short sheets should overlap the edge of the bottom by 7-10 cm. The fasteners are driven or screwed into the top of the wave after 20 cm. Adjacent sheets must be laid with an overlap of 1.5 waves or 10 cm. Polycarbonate is laid without overlap.
Self-construction from wood
Before starting construction, you need to take measurements and prepare tools. A wooden canopy goes well with a roof made of polymer material. We will consider this option in more detail.
The first step is to draw up a project, showing the main components and dimensions of the structure.
Choosing a location for the barbecue. It is better to stop at a place away from the living space, at least 5–6 m. We mark with pegs and pull the rope. There will be holes for the foundation in the corners. Their approximate depth is 60–70 cm. The distance between the pillars is up to 2 m. Make sure that the canopy is located away from neighboring houses.
Construction of the foundation:
- We fill the bottom of the dug holes with sandstone and crushed stone and tamp it down.
- We form a reinforcing frame from corrugated rods.
- We pour 10 cm of concrete and fasten the frame. We provide it with waterproofing.
- Fill everything with the solution.
It is advisable to wait a couple of weeks until the concrete hardens completely.
We install timber poles on the metal corners. We measure the height of the supports and adjust them to the required size. In order for the roof to have an optimal slope, the front pillars will be approximately 25–30 cm higher than the rear ones. We tighten the structure above the barbecue with timber along the perimeter of the upper heads of the pillars. We will make the rafters from edged boards. We install the mount. The optimal distance between the rafters is 50–60 cm. To prevent water from entering the frying zone, the edges of the rafter leg should extend 30 cm beyond the top trim. Wooden components must be treated with an antiseptic. Once the impregnation has dried, you can coat the material with paint, varnish, etc. All that remains is to install the polycarbonate roof.
Tools you will need:
- shovel;
- fastening components: screws, bolts, self-tapping screws;
- building level;
- hammer;
- hacksaw;
- roulette;
- rope, etc.
The construction process should not cause difficulties.
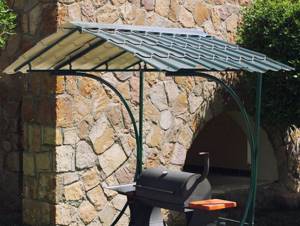
Don't forget about the tool for creating a canopy
Frame and roof
Typically, a wooden canopy is equipped with a pitched roof. If the grill is portable, then it is advisable to build a symmetrical gable structure. The rafters are assembled on the ground, then raised and secured. For such work you will need at least one assistant. If you perform the assembly on the roof, your own strength will suffice.
The frame and roof are the main components of a canopy. Their combination is possible using different resources. A good combination is wood for the frame, corrugated sheeting or polycarbonate for the roof. There are plenty of pictures of such construction solutions on the Internet.
To make the frame reliable, a foundation is made for it. It is better to assemble the roof on the ground and then lift it up. Before installing the roof, take care of its waterproofing. Before finalizing, make sure that everything is in order according to the geometric canons.
Painting the structure
Coating with paints and varnishes not only decorates the building, but also serves to protect it from adverse environmental conditions. Compositions for painting wooden and steel parts are selected with the marking “for external use”. Before painting, you can additionally treat the structure with anti-corrosion or antiseptic compounds.
Painting is done manually, using a brush to cover all the details of the structure in 2 layers. After applying the first one, allow the composition to dry according to the instructions for it. It is advisable to renew the layer of varnish or paint annually to cover damaged areas. You can completely repaint the canopy once every 3-5 years.
