Category: Accessories
Published 04/16/2020 · Comments: · Reading time: 8 min · Views: Post Views: 1,143
A protective canopy over the porch will allow you to hide from hot or rainy weather. It can increase the service life of entrance doors. And if you install a longer model, it will additionally protect the steps and path.
Purpose and functionality of canopies
A stylish canopy over the front door in a private house is part of the design; it also provides convenient entry. For example, if you are caught by surprise by rain or hail, then under the visor you can easily get your keys or an umbrella. And choosing the right material and style will make it one with the decoration of the house.
Each front door canopy meets the requirements listed in the table below.
| 1 | The material must be strong to withstand its own weight and weather conditions (rain, snow, hail). And also be resistant to fire. |
| 2 | The structure must have a drain into a specific container or sewer. Lack of drainage will cause sagging. If the water does not flow into a container or sewer, the streams will gradually destroy the porch. |
| 3 | To better protect surfaces, it is recommended to install a canopy not only over the front door, but over the entire porch. |
| 4 | The color, material and texture should match the exterior decoration of the house. |
Experts advise installing a canopy not only over the entrance door to the house, but also at the emergency exit, bathhouse and other buildings.
Interesting! Jets of water descending from a drain that is not equipped with a reservoir destroy the foundation.
Therefore, if you do not have a porch installed, you will still need a water collection tank to protect the foundation of the building.
Installation Tips

When constructing a roof over the front door, it is necessary to properly prepare a platform that will serve as a support for the entire structure. It is important to analyze whether the area near the entrance will withstand the weight of additional brick racks. If not, then they can be built around the edges. At the same time, a small foundation is laid under them. Two holes measuring 1x1 meter are dug. The depth should be at least 50 cm, and preferably below ground freezing. This will eliminate the unpleasant consequences of the movement of layers during solidification. A bedding of medium-fraction crushed stone is placed at the bottom. The thickness of the layer should be at least 10 cm. Medium-grained sand is poured in the same layer and compacted well.
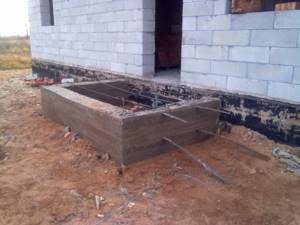
The walls of the dug hole are covered with waterproofing in the form of roofing felt. A lattice is made from metal reinforcement, which is laid on small stands with a height of 5 cm. Formwork is set up if it is necessary to fill a column that will be higher in height than the ground level. Usually this is not required, so the solution simply fills the voids. Using a deep vibrator or a piece of reinforcement, tamping is performed to remove air bubbles and fill voids. To add strength to future columns under the roof above the porch, you can immediately wall up pipes of the required length, which will subsequently be lined with brick to form columns under the roof above the porch. Examples of completed roofing projects can be seen in the video below.
Advice! If the frame for the roof over the porch is wooden, then it will be necessary to treat the timber with an antiseptic and fire retardants, which reduce the likelihood of fire.
Structural forms of canopies and types of canopies - classification
The canopy over the entrance to the house is divided into shape, type of fastening and material.
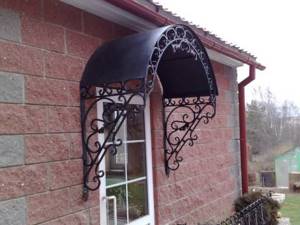
According to the type of fastening, awnings over the front door are:
- suspended - supports attached to the building;
- suspended - secured with upper fasteners and allow you to hold lightweight materials (corrugated sheets, polycarbonate, fabric);
- supporting - the material is held by supporting pillars installed in the ground or porch;
- capital - carried out during the construction of a building, for example, a balcony above the entrance.
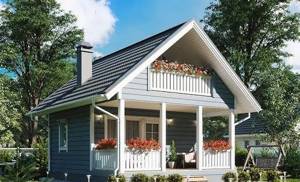
The mount can be monolithic, built into the wall. This design is very durable, but it cannot be moved to another location and is difficult to install. And the modular design is easy to install, repair and move. But it fails more often than a monolithic one.
Don't miss: How to remove and disassemble a round door handle: procedure
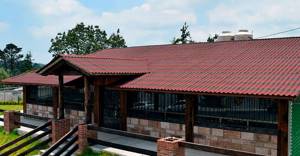
Single-pitch flat canopy
The lean-to type is the most popular due to its low cost and ease of installation. Mount it at an angle of at least 15 ℃ to protect the space from precipitation.
Interesting! A single-pitch canopy does not have protection on the sides, so it cannot always completely protect against rainfall.
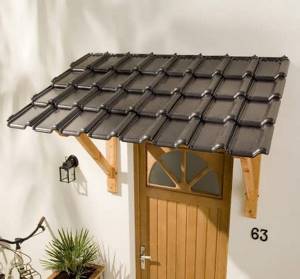
Gable visor
Two triangle-shaped slopes provide greater protection from precipitation. In addition, strong winds will not damage the structure due to better stability.
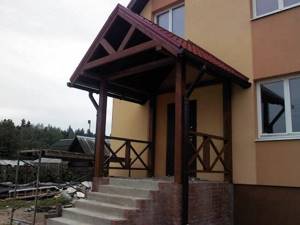
Three-slope visor
The stylish gable canopy complements multi-pitch roofs well, is durable and strong.
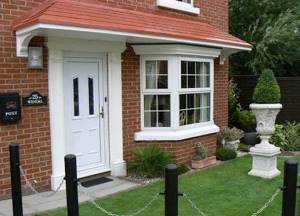
Arched structure
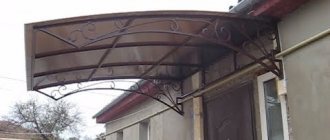
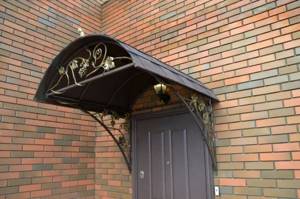
The arched variety is becoming popular. It has the appearance of a semicircular frame resembling an arch. It is easy to manufacture and install. It has high reliability and lateral protection.
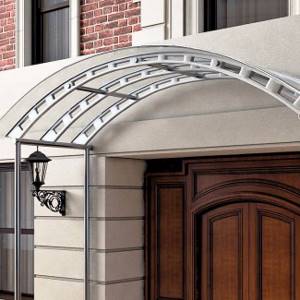
Concave visor
A concave canopy over the entrance will allow you to create a unique design. And due to the concave appearance, the snow will be easy to clean, and water droplets will quickly roll off.
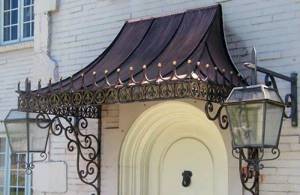
Dome forms
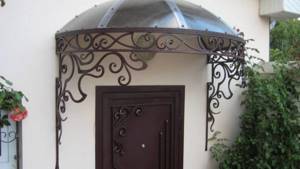
The dome shape of the canopy over the front door is the most beautiful and reliable. It is difficult to make due to the curved elements, but it provides good protection from bad weather (rain and snowstorms).
Marquise-shaped
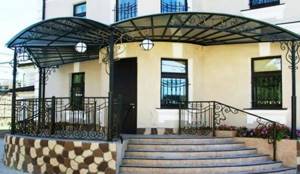
Awning-shaped canopies over the porch are similar in price to lean-to canopies, but are more in demand. This is due to the slightly concave shape on the outside. However, they also do not cover the surface from the sides well.
Instructions for installing a canopy over a porch
Let's look at the installation of a wooden extension with a pitched roof point by point.
- The first step is to transfer the exact dimensions from the terrain to the drawing (to scale). Next, we drive pegs around the perimeter and remove the top layer of soil. If the parameters of the extension with a canopy are 2.0 x 1.0 meters, its height is 2.20 meters, then you will need four wooden support beams: two 2.50 meters long, two 2.70 meters long. The beams (logs) are pre-treated with a special protective agent against ignition, rotting, and fungus formation. We smoke the parts of the wooden supports that will be buried in the ground and treat them with mastic.
- The second step is to dig holes for the support beams (logs) 0.70 meters deep. First we fill them with sand to a depth of 0.20 meters, then lay out a layer of crushed stone and tamp it down. Next, prepare the concrete solution for pouring.
- The third step is to install roof supports. Pour a small amount of concrete mixture into the previously prepared holes, insert support logs, and level them vertically using a building level or plumb line. Next, we completely fill the holes with solution and check again that the supports are installed vertically. We do not touch the porch for about seven days, until the concrete dries and gains sufficient strength. After this procedure, we cut the support pillars to the calculated height.
- The fourth step is to strap the structure using wooden blocks, while constantly monitoring the geometry of the logs. We use anchors as fastening elements, which will ensure reliable connection of the building façade and supporting pillars.
- Fifth step - we make support logs for the rafter system, which we place in increments of 0.20-0.30 meters. As a building material, we take a beam with a cross section of 0.50 x 0.50 cm.
- The sixth step is to form a drainage system for the pitched roof canopy. We install the gutter parallel to the facade of the house with a slight downward slope of the canopy. At the corner of the drain we fix a chain along which the water will flow onto the ground.
The final stage of construction is the finishing coating of the porch canopy and finishing it with additional decorative elements. It all depends on the desires and imagination of the home owners themselves.
Applicable facing materials
You can protect the porch with metal, corrugated sheets, metal tiles, polycarbonate, ondulin, wood, and glass.
Corrugated sheet
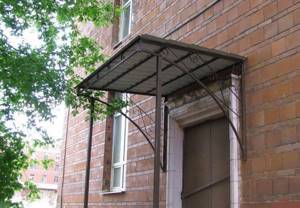
It is not uncommon for entrance canopies to be trimmed with corrugated sheeting. Low cost, easy maintenance, and ease of self-assembly allow the material to be practical. However, its strength is not great, so sheets with a large thickness are selected and treated with a special coating for protection.
Metal
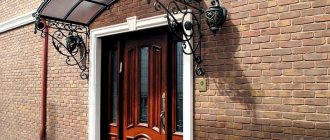
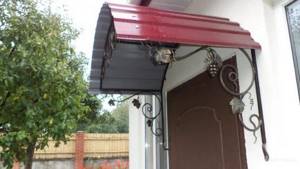
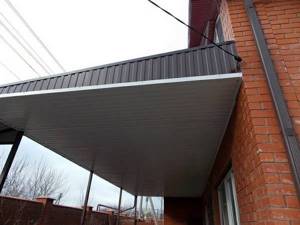
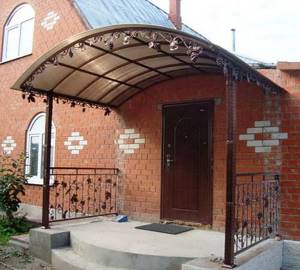
The metal canopy over the entrance area porch using forged elements is impressive. It is used in classic styles, but if you choose a non-pretentious pattern, it will suit modern styles.
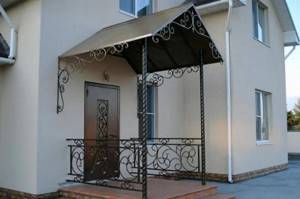
To save money, instead of a completely forged structure, order front or side doors. It will not be possible to install it yourself; only a specialist can do external fixation.
Metal tiles
Strong canopies over the porch are made from metal tiles. They are matched to the color of the roof covering for a spectacular look. The material lasts a long time due to its durability and easy maintenance. Low weight, good resistance to temperature changes and mechanical stress have made metal tiles popular.
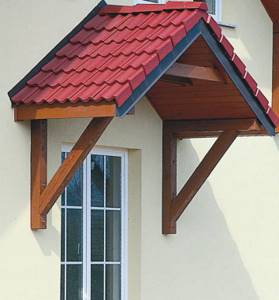
Interesting! The canopy can be made from leftover sheets from roof installation. This will save money and install the material exactly matching the shade and texture of the roof.
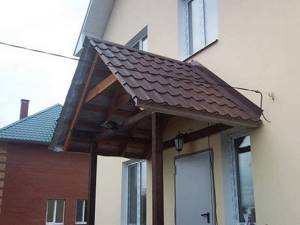
The disadvantages of metal tile construction are great noise and strong heating from the sun's rays. Sometimes not suitable for building design due to its heavy appearance.
Polycarbonate
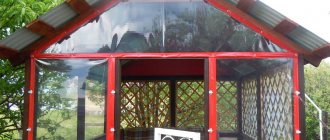
Reliable polycarbonate canopies are obtained over the porch of a private house and other buildings on the site. It has a large color palette and varied sheet thicknesses. It bends well, allowing you to build non-standard shapes.
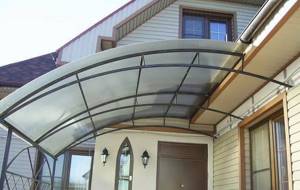
Positive properties are non-flammability, long service life and durable composition. Mold, mildew, rotting and corrosion do not appear on polycarbonate. And the changeable force of the wind will not damage the material.
Don't miss: Cat door in the door - how to make it yourself
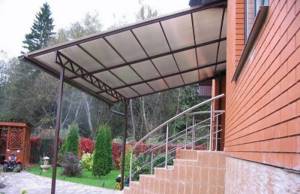
However, polycarbonate is not resistant to UV rays, which reduces its strength over time and causes color dulling. The surface can be protected by applying a special protective agent.
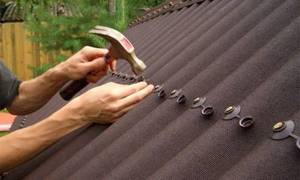
Ondulin
The modern material used for canopies above the entrance is ondulin. It is easy to install and is of good quality and value. Therefore, it is in demand in construction.
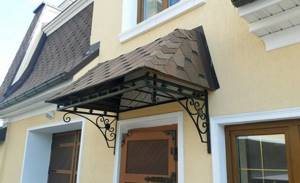
Interesting! Fungus does not appear on the surface of ondulin.
It resembles slate, but weighs less and does not contain asbestos. Good flexibility allows for complex shapes. Ondulin does not deteriorate due to temperature changes and changeable precipitation.
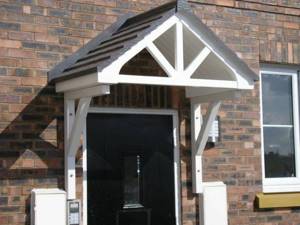
Tree
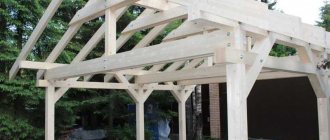
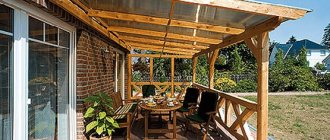
For a wooden porch it is not necessary to construct the structure entirely from wood. The frame can be made of wood, and the cladding can be made of other materials. But it is possible to make a complete wooden structure, for example, for rustic styles.
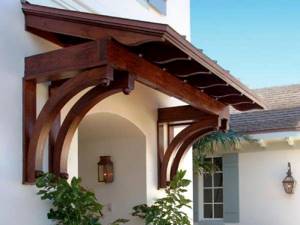
Before installation, it is important to treat the wood with special agents against mold, rot and insects. You can get an unusual design from wood: carve it, tint it, paint it, or leave it with a natural structure.
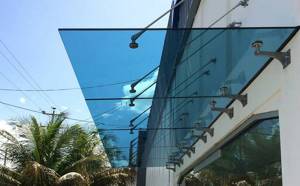
Glass
Tempered glass structures allow you to create a modern design for your private home. Glass weighs little and can be fixed in any way. Plain glass is not used for visors due to its low strength, but tempered glass is used very often. Not susceptible to rotting and fungus. However, it will require special care to maintain its new look. And after the rains there will be streaks of water.
Construction technology
How to build a canopy over a porch? First you need to decide on the materials. It will be easiest for a novice builder to work with polycarbonate, so let’s consider its installation. It is better for novice builders to start with a simple structure without bends, with a slope for water drainage.
Design
Before making a canopy over the porch, you should calculate its dimensions and make a design drawing. This will give a visual idea of what the porch of a private house with a canopy will look like after construction, and will help calculate the amount of necessary materials and decorative elements.
The canopy over the porch should not be too narrow, as it will not protect from wind and rain. The optimal length of the overhang is 80 cm, and its width should exceed the doorway by 40-50 cm. To ensure that precipitation does not linger on the roof of the canopy, it should be slightly sloping.
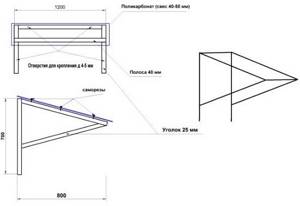
Drawing of a canopy over the porch, photo
Preparatory stage
Immediately before installing a canopy over a polycarbonate porch, you should clear the construction site and prepare all the necessary materials:
- sheets of cellular polycarbonate with a thickness of at least 10 mm so that the canopy roof is stable;
- metal profile pipes;
- welding machine;
- screwdriver and drill;
- self-tapping screws;
- tape measure, level, pencil.
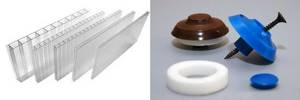
Cellular polycarbonate and special self-tapping screws with a thermal washer for its fastening
Installation procedure for a polycarbonate porch canopy
First, using a tape measure, a building level and a pencil, markings are made on the wall of the house. On it, according to the drawing, the main details of fastening the canopy frame are noted.
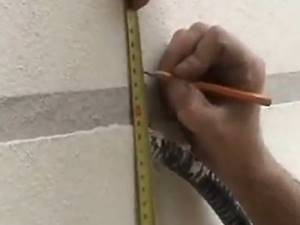
Marking for installation of the visor base
Next, the structure frame is made from profile pipes. It has a triangular shape. The pipes are connected using a welding machine. The base is assembled on the ground in whole or in part (this depends on its size and weight).
The frame of the visor can have several jumpers; the longer it is, the more there should be. They significantly increase the rigidity and stability of the canopy structure.
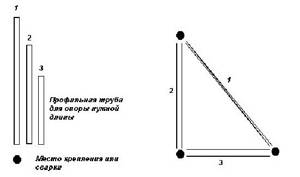
Scheme for manufacturing a metal frame for a porch canopy
Then holes are made in the pipes for bolts, and the structure is attached to the wall of the building. This is done using self-tapping screws or anchor bolts. In order not to burden the structure, polycarbonate sheets are attached after installing the base. The base of the visor should be secured in four places: at the top and bottom of each edge of the product.
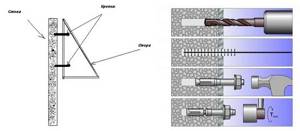
Attaching the hanging frame to the wall
After installation, the canopy frame is primed and painted. After this, the installation of polycarbonate sheets begins. A special sealing tape is installed at the ends of the product, which is inserted into a profile installed at the end of the frame.
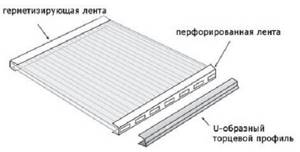
Installation of polycarbonate sheets
To properly secure polycarbonate sheets, use this diagram:
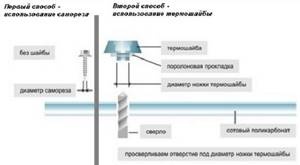
Options for how the polycarbonate canopy roof is fixed
After installing the canopy, you should seal the seams where the canopy meets the wall. This will protect the front door from moisture. For these purposes, you can use a metal strip.
Sealing joints
After removing the protective film from the product, the canopy is ready for use. If you have experience, you can even build a round structure.
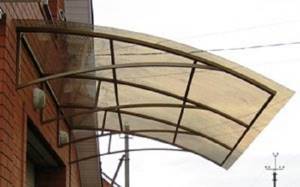
Polycarbonate canopy for porch, semicircular
DIY creation and installation
We will tell you the simplest ways to make canopies: with one and two slopes, support and arched.
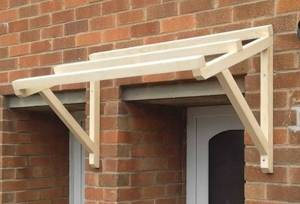
With one ramp
To obtain a single-pitched look, you will need to make a triangle with one side at 90 ℃. The right angle will be fixed on the wall. Depending on the level of slope, the lengths of the sides change.
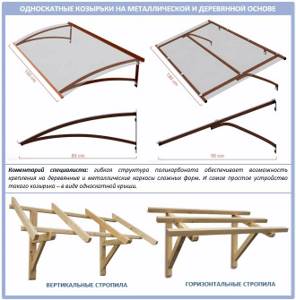
You can weld a triangular frame from pipes. Typically 3 triangles are required, but the number may increase depending on the size of the visor required. The elements are connected by lathing. If you are making a blank for sheathing with plastic or polycarbonate, you will need to weld strips, cross members, and corners.
Some make a single-slope type with an adjustable slope. To obtain it, you need to make struts on hinges (wooden, metal), cut holes in the frame and cover everything with lightweight facing material. The direction of inclination can be changed by inserting the strut into the holes.
With two slopes
For a do-it-yourself canopy with two slopes, you need supports for support, a frame for the rafters, a frame, a base and a facing covering. First, a vertical beam is fixed - it will serve as the basis for the racks. Afterwards, horizontal beams and struts are mounted using self-tapping screws.
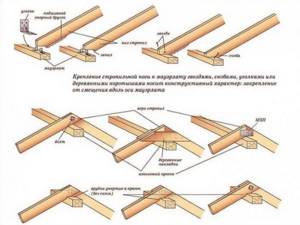
If the dimensions of the canopy are wide, then 3 pairs of rafters will be enough. But if the material is too heavy, then there should be more of them. To avoid gaps, cut triangular bars for all corners. They are secured with construction glue or self-tapping screws.
Don't miss: How to properly embed a lock into an interior door: instructions for installing a lock, do-it-yourself latches
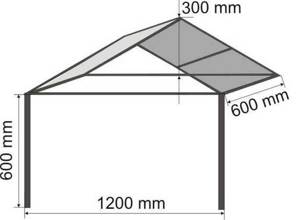
The manufactured slopes are sheathed with light tongue-and-groove boards or lightweight clapboard. Then the slab or waterproofing is laid, and the surface is covered with roofing material.
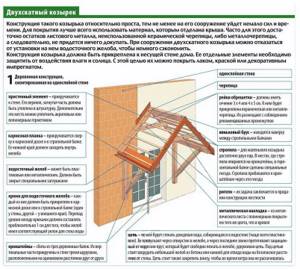
Support
The canopy on the supports is installed in the same way as other types. But before installing the frame, you will need to install racks. Wooden posts are treated with protective agents and painted for long service life, while metal posts are welded to the frame and given a beautiful appearance by priming and painting.
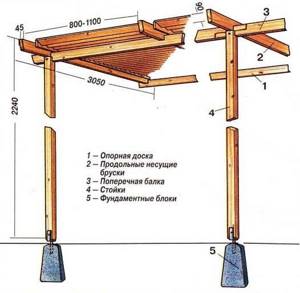
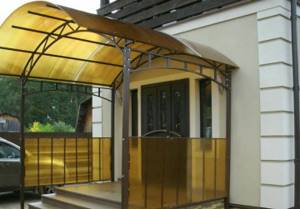
Arched
The easiest way is to make an arched canopy from cellular polycarbonate. The thickness of the sheets should be 8mm-10mm. The sheets must be positioned in such a way that water simply flows out along the internal ribs.
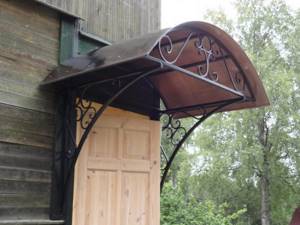
When laying sheets, the protective film should face up to increase resistance to ultraviolet rays. For fastening, the holes are drilled with a large diameter to accommodate the gasket and rubber washer. This system will prevent dirt from accumulating in the joints.
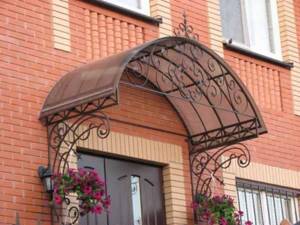
Expansion joints are covered with connecting strips. And the ends are covered with linings that remove condensate and are glued. The material is bent into an arch already on the frame within a radius of 80 cm. repeating the arrangement of internal channels.
Choosing which porch roof to make
If your house does not look like one of the mansions shown in the photo, most likely you will prefer to make a roof over the porch with your own hands. Otherwise, you will probably leave all the questions about what to do and what to refuse to the professionals.

Therefore, the first criterion in choosing a design should be a simple rule - the production of the selected project or structure should be realistically commensurate with your capabilities, no matter whether you try to do it yourself or with assistants.
Major roof option
The most expensive and complex roof project is expected for permanent cottages or houses. Its dimensions and capabilities correspond to the main building. The staircase and entrance area in front of the entrance to the house are most often at least ten square meters, so the dimensions of the protective canopy are also rather large. Most often this is a gable or tri-slope structure with two or four supports, as in the photo.
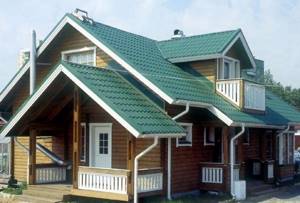
Almost all permanent roof structures above the porch have similar features:
- They are built on the basis of a developed load-bearing frame, and therefore require the use of supporting columns or racks to support the considerable weight of the structure;
- Due to the large area of such a roof, the structure experiences enormous torsional and overturning loads, which have to be compensated for by an additional number of power elements;
- The angle of the slopes and the design style of the roof are almost always tied to the technique of constructing the main roof on the house. Therefore, in houses with high sloping roof structures, it is often necessary to make a similar three-slope version for the porch “to match” the style, strictly observing the angles of inclination of the slopes. Even if the porch roof is slightly larger than the required dimensions, as in the photo.
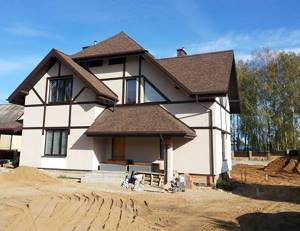
The easiest way is to build a roof according to the usual gable scheme from wooden beams and lining. To do this, the required dimensions of the canopy are determined and a horizontal frame is assembled, on which the load-bearing rafters are installed. The outer surface is covered with polycarbonate, the inner volume is covered with pine or spruce lining, as in the photo. It makes a nice roof for the porch.
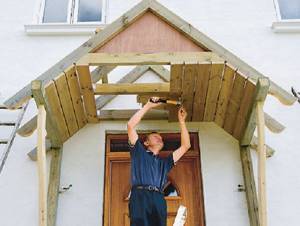
In large-sized structures, the mauerlat and roof rafters must be reinforced with horizontal beams, and the outer part of the frame must be lowered onto vertical cast or brick supports embedded in the foundation slab of the porch staircase. If there are more than two supports, they can be made from two-inch steel pipe. The best option is to use four steel supports with additional reinforcement with diagonal elements. Brick or concrete racks are much stiffer than steel ones, so to ensure the rigidity and stability of the structure under wind loads, two vertical elements are sufficient.

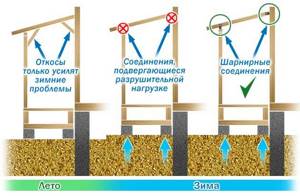
Important! All connections of the porch frame with the supports must be flexible and movable, providing compensation for temperature expansion of the load-bearing elements.
In addition to the loads from the wind and adhered snow and ice, the roof of the porch is subject to loads from the rising soil under the porch, the danger of which is clearly understood from the photo. If all connections have a certain level of flexibility, and the roof frame itself is not rigidly clamped to the supporting beam of the house, such loads are not harmful to the porch frame and support posts.
Lightweight and practical designs made of steel and plastic
A very interesting and common solution is to use part of the main roof overhangs to protect the porch, as in the photo. This is possible if the height of the walls and the amount of overhang of the rafters allows you to create a full-fledged porch without creating an additional break in the roof.
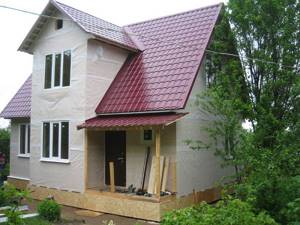
For your information! The traditional wooden roof material - pine or oak beams - is almost universally replaced by metal profiles and steel reinforcement in porch structures.
Often, metal and polycarbonate make it possible not only to close the porch, but also to fully protect most of the yard, while the illumination and ease of use are not affected at all.

For a small porch, a simple frame roof structure made from a pipe or metal profile is ideal, which is quite easy to weld and install with your own hands. A gable roof made of polycarbonate will perfectly withstand both snow and scorching sun.
Polycarbonate roofing is ideal for any porch roof option. It can be as large or even gigantic as you like, but this has virtually no effect on the overall appearance of the house if the colors of the walls, the main roof and the porch itself are chosen correctly. The low weight of polycarbonate slabs makes it possible to construct an almost openwork structure on a light aluminum frame. In this case, the roof may even consist of several elements.
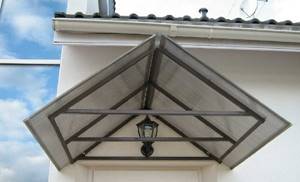
Polycarbonate has high transparency and often allows you to maintain good illumination of the porch, ensure dry steps and the absence of ice on the stairs and entrance area.
The high flexibility and strength of polycarbonate allows, if desired, to bend the canopy into the most unusual rounded shapes, which is almost impossible to achieve using other roofing materials. In addition, polycarbonate flooring is easily heated even by diffuse sunlight, making rain, snow or ice easily disappear from its surface.
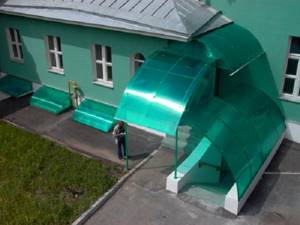
Important! With all its positive properties, polycarbonate has a high coefficient of thermal expansion, so to attach the sheets to the frame, you will need to use special compensation washers and make gaps.
Features of attaching a canopy to a multi-layer wall
If the canopy over the entrance to the house needs to be attached to a multi-layer wall, then the fastening is made into a load-bearing base. It is not recommended to attach the canopy to brick cladding. Strong winds will loosen the holes and the structure may partially explode.
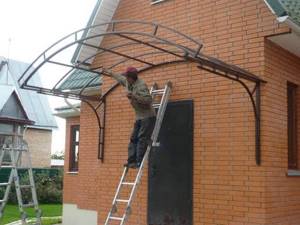
There are several options for fastening:
- For the rafter system, nests are cut into which a platform made of ceramic bricks or a reinforced reinforced concrete base with a thickness of 70mm-80mm is installed. To prevent rotting, all ends are wrapped with roofing felt. Also, a horizontal tie is secured to the wall using a metal mortgage or chemical anchor.
- To install the canopy to the brick cladding, install an aerated concrete platform in the ventilation gap.
- An insert is made from reinforced concrete inside the wall: a block is installed at the bottom and the mesh is stuffed onto the gas block. The cavity is closed with a mixture of cement and sand. The support board is anchored through the brick lining and reinforces the concrete lining.
Installation in this way allows you to redistribute the load. Instead of cladding, the wall will support the weight.
Did you find our advice useful?
Not really
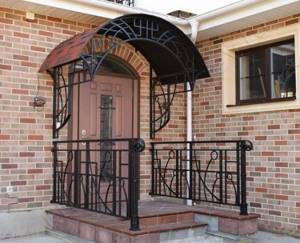
Photo gallery
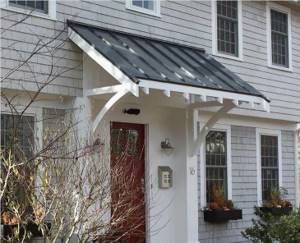
Look at the photo ideas for decorating the entrance with different types of visors in the selection below.
