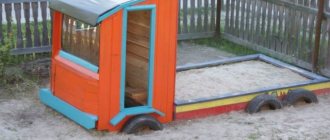
When it comes to home, organizing things often becomes a real headache. You can solve this problem by making a box with your own hands, which can then have almost any purpose.

Today we will talk about how to make a box yourself, where it can be used and much more. So, let's begin.
What is the box for?
The easiest way to answer this question is for people who live in a private house or spend a lot of time in the country.
Well, even in an apartment, you often need a container to store different things, even the same products, situations are different.
You can buy a box, or you can make it yourself - everything depends more on your desire, reluctance and financial capabilities.
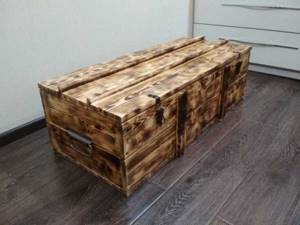
If buying is not your option, look at the photo of the box you made yourself. First of all, this is necessary in order to get rid of fears and prejudices regarding the fact that this is a very complex process.
Don’t forget that the box can be small, but it can be extremely simple. During labor lessons at school, all the boys did more complex things, and therefore there is no need to be afraid.
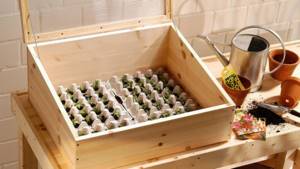
Requirements for seedling boxes
When making boxes for seedlings, you need to pay attention to the following requirements:
- The presence of several small holes for constant moisture removal.
- Tray for collecting liquid.
- The material for production should not be transparent, since sunlight has a bad effect on both the soil and the roots.
- The walls should be wide enough, as they protect the seedlings from temperature changes.
- There is no need to skimp on the material - it should not only be durable, but also completely safe for both people and plants. For example, cheap types of plastic should not be used because they release toxic substances into the soil.
Most often, seedling boxes are made of wood.
Dimensions of seedling boxes
Dimensions depend on the characteristics of the plants. There are general rules:
- length – 40 cm;
- width – 25 cm;
- depth (height) – 8–10 cm.
If you skimp on material and make a box for seedlings that is too small, the seedlings will be cramped and will not be able to grow normally. In such cases, the seedlings will stretch. Large containers are convenient for plants, but make them difficult to transport. Therefore, you need to choose a compromise height value - from 8 to 10 cm.
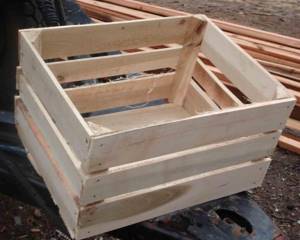
Product box
The simplest way to use a box is to store food in it - potatoes, carrots, onions, beets, and so on.
This can best be understood by farmers with small farms and simple gardening enthusiasts, who often think about how to make a box with their own hands.
In this case, the size of the box, its strength, and the product that will be stored in it will play an important role.
A simple example is that potatoes are much smaller than beets, and therefore there should be a small enough space between the slats of the box so that the same potatoes do not fall out.

The second point concerns the design itself. There must be free space on the walls and bottom between the slats so that the same potatoes can “breathe,” otherwise they may deteriorate and begin to rot.
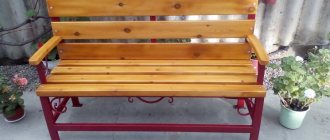
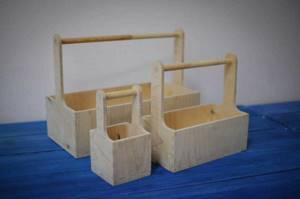
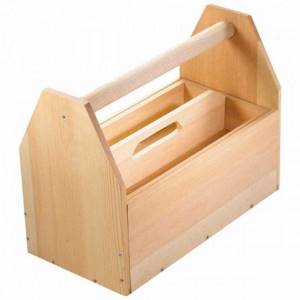
If we make a wooden box for food with our own hands, we must consider whether we will carry it when it is full. If yes, then the box should be small, maybe with small handles, but this is a matter of taste.
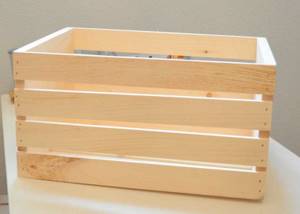
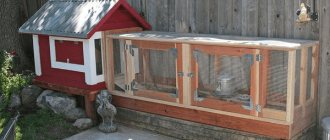
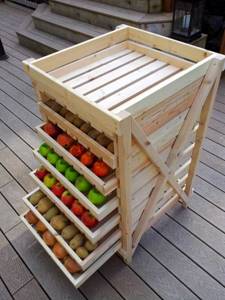
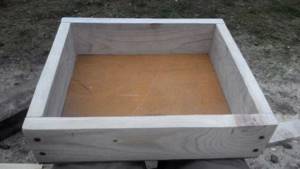
Simple wooden box for storing harvest
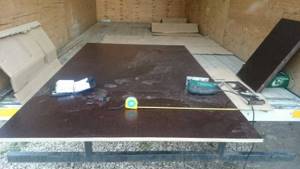
You can optimize the space in your cellar with the help of shelving and convenient small drawers. This will allow you to avoid cluttering the floor space, and
Place the maximum amount of vegetables and pickles in the smallest underground space. It is important to choose the right wood for making utility furniture and drawers.
First, put together a rack, purchase dried boards for it, it is best if they are pre-processed with a plane. The ideal width of the rack is 50-60 cm. This will allow you to install the maximum number of drawers on it. First, assemble the shelving box, to do this, assemble a rectangle from the boards, nail the burs in the corners, and also mark the location of the shelves with several horizontal bars. Keep in mind that the bars on both sides of the vertical walls must be at the same height.
Mailbox
Another area of life in which you may need a box is receiving mail. This problem again concerns owners of private plots, because in apartment buildings a set of mailboxes or cells are usually installed at once, which will be the same for all residents.

If you live in a private house, you can make a mailbox with your own hands, or go and buy a ready-made solution. There will be nothing complicated in the design, but there is a high probability that you will make the mailbox out of wood, because metal requires special skills.
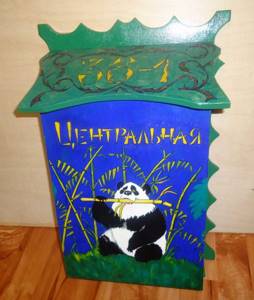
The disadvantage of such a box will come down to the characteristics of the wood, which is why it will need to be covered with a layer of water-repellent substance, and all joints will need to be sealed so that your mail does not get wet in the rain.
To do this, you will need several boards, a hacksaw, a pencil, a tape measure, a couple of hinges for attaching the door and a latch.

How to make antiseptic with your own hands: the best instructions for making antiseptic at home + photo reviews
DIY medical mask - TOP 100 photos and step-by-step instructions with diagrams of the best ways to create
- How to embroider icons with beads - a review of the best ideas with photos and examples from masters

How to make a wooden box for seedlings with your own hands
Experts recommend using wood to make boxes. It is an affordable, strong, durable material that is very easy to work with. For production you will need:
- wooden blocks (parameters are indicated in the instructions);
- boards;
- hacksaw;
- furniture stapler;
- Phillips screwdriver or screwdriver;
- screws, nails;
- metal corners and hinges;
- saw with longitudinal blade;
- window latches;
- film;
- roulette;
- pencil.
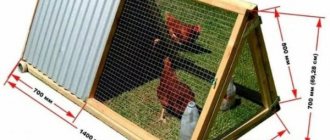
You can make a box for seedlings from wood with your own hands according to the following instructions:
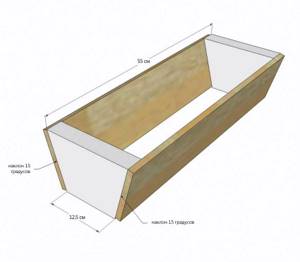
- Take a wooden beam and cut four fragments - two 36 cm each and two 30 cm each. Then you need to prepare 12 boards - six pieces of 2 m each and six more of 1 m each.
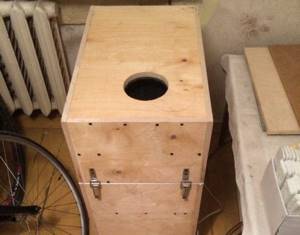
- Take two boards and make a shield for the seedling box. Step back 20 cm from the edge and draw a parallel line (widthwise) on one side and the other. A transverse block 36 cm long is laid along this mark.
- Fix the beams to the boards with self-tapping screws - you get a long box wall. Do the second one in the same way. At the top part, a hacksaw is used to make a cut of 5-6 cm - the result is an inclined lid.
- Take short boards and screw them to the bars fixed on the panels. You will get a rectangular box for seedlings.
- Cut the top boards at an angle to connect the high wall to the low wall in a straight line.
- Make a frame from the slats according to the size of the box - it is on them that the lid will rest.
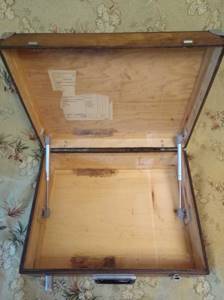
- Connect the elements for the frame with metal corners. At this stage you need to use loops. With their help, the frame is attached to the base of the box.
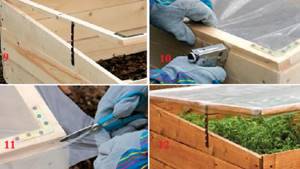
- Make and install two cross ties. They are used to strengthen the frame of the seedling box. This must be done before the frame is secured with hinges.

- Screw the window clips to the lid (widthwise). With their help, the height of the lid can be easily adjusted.
- Secure the plastic film around the perimeter of the frame using a furniture stapler.
- Remove excess film with a knife.
- Lay the soil and plant the seedlings in a box.
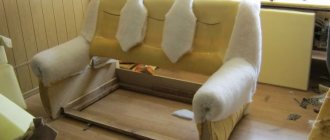
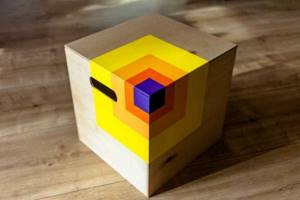
Organizer
Even when we make special efforts to keep our garage tidy, we often end up with some kind of disorder. Partly because there is simply no suitable storage space for many small items.
That is why next we make a box out of plywood with our own hands - an organizer. Why plywood? It is very easy to work with, and you can fasten the parts with nails or screws, or with simple furniture glue.

Next, from the same plywood we add a system of partitions inside and at the end we get a small but very practical organizer that will help solve the problem of small but constant clutter.
DIY photo of boxes
Read here - DIY burner - simple ways to make a mini burner with your own hands. 120 photos of the best ideas
Did you like the article?
0