The issue of the safety of loved ones and the protection of property cannot but concern us. That is why the construction of a reliable fence is the most pressing task facing the owner of a country house or summer cottage. In recent years, one of the most popular materials used in the construction of fences has become corrugated sheeting (corrugated sheet, profiled metal sheet). This was facilitated by its strength, functionality, and attractive appearance. It is worth noting separately that the reason for its popularity is the simplicity of the design. If desired, you can build a turnkey fence from corrugated sheets with your own hands. How to do it? We invite you to familiarize yourself with the step-by-step guide for installing a fence made of profiled metal sheets.
Which fence do you prefer: on a foundation, with brick pillars or on screw piles?
Before you begin actual construction, you should decide on the design of the fence. It is important to understand that each of the listed options has its own pros and cons. In order not to make a mistake when choosing, it is necessary to take into account the characteristics of the site, the type and bearing capacity of the soil, and the climatic characteristics of the area.
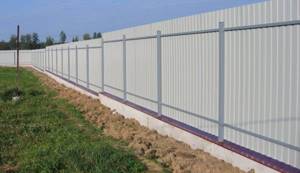
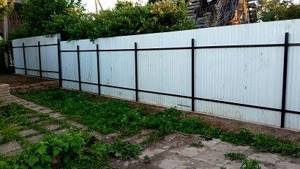
- Fences made of corrugated sheets on a strip foundation. Profiled metal sheet has many advantages, but it also has disadvantages. In particular, it should be noted the high windage. If your site is located in an area where strong winds regularly blow, you should take care of a reliable foundation. It is optimal to use a strip foundation, which perfectly holds the support pillars and increases the resistance of the fence to wind loads. But do not forget that if the depth is insufficient on moving soils prone to frost heaving, it can “lead”.
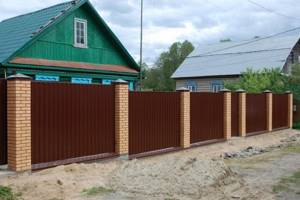
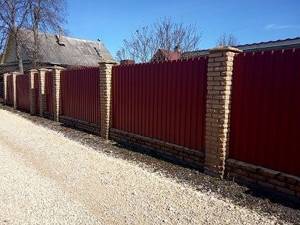
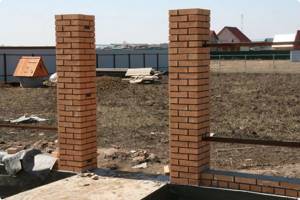
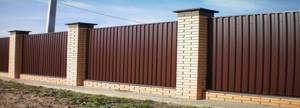
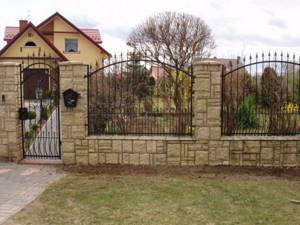
- Corrugated fences with brick pillars. This is the most presentable type of fencing made of profiled sheets. As a rule, these are chosen for full-fledged country houses, and at dachas they prefer to install a simpler option. At the same time, you should know that due to the rather large weight, the installation of a fence made of bricks and corrugated sheets is carried out only on a strip foundation. If the soil on the site is heaving, you should choose another option for designing the supports. An alternative solution to the problem is to deepen the foundation below the soil freezing level. But in this case, the cost of concrete will increase several times.
- Fences made of corrugated sheets on screw piles. A pile-screw foundation is an almost universal foundation. It can be used on any soil with the exception of rocks. And for swampy, loamy and sandy areas, where a strip foundation cannot be used, screw piles are the only fairly reliable type of support. If your site is located on such soils, we strongly recommend making a fence on a pile-screw foundation.
Important! For any foundation, as well as for the fence in general, it is necessary to choose high-quality materials and components. Insufficient wall thickness of the metal pillar, low-grade concrete, poorly welded blades of the screw pile - these and other shortcomings will inevitably affect the reliability and durability of the barrier. If you don’t want a self-built fence made from corrugated sheets to “float” in a couple of years, don’t try to save on materials. Experience shows that such savings turn into even greater costs in the future.
How to make a fence from corrugated sheets on a slope
We should also tell you how to make a beautiful fence from corrugated sheets with your own hands if the site is located on a slope. It happens that part of the site has a ground surface level lower than the rest of the territory. If this difference is insignificant, then there should be no problems - you can just add some soil here and there so that the fence does not rise too much above the lower part.
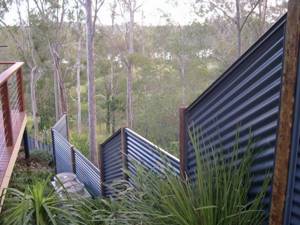
If the slope is steep, you should think about how to make a fence from corrugated sheets on a slope without compromising the overall design of the site. At first glance, you can simply install the fence along an inclined straight line, repeating the slope of the ground surface. However, such a fenced area with a fence made of corrugated sheets will look completely ridiculous. Especially if the remaining buildings and structures are level and plumb, regardless of the presence of a slope.
The solution is to make the fence stepped and attach the corrugated sheet vertically. At the same time, you should not make changes too often - after one or two sheets. Such a fence will look like a staircase. Even if the slope is quite steep, you need to “pull” the section further before making the next step.
Difficulty may arise when it is necessary to close the space under the sheets, which are much higher than the ground level. To do this, you can cut out individual parts by extending the corrugated sheet from below. Or you can simply fill the sinuses with soil, strengthening it by planting lawn plants or arranging a small retaining wall of stones. If a foundation is laid for the fence, then the tape will act as a retaining wall for the soil.
What tools do you need to prepare to build a fence?
To prevent the manufacture and installation of a fence from turning into a puzzle, you need to take care of purchasing equipment in advance. A complete set of tools, as well as average prices for household and professional models, are presented in the table below.
| Tool type | Household tools: brand and price | Professional tool: brand and price |
| Set of hand tools (wrenches, screwdrivers, etc.) | Set Sturm 1310-01-TS1 — 850 rub. | HAUPA Trend Bag plus 220556 — 37284 rub. |
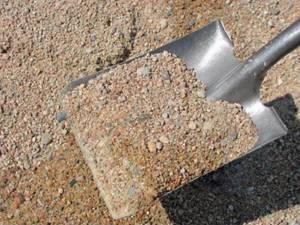
| Bayonet shovel | Gigant — 228 rub. | “Zubr Expert” - 2225 rubles. |
| Roulette | “Whirlwind”, 5 m - 121 rub. | Irwin, 5 m — 998 rub. |
| Laser level | Kapro 987XL-41-40 — 1142 rub. | Kapro 905-40-150 — 4323 rub. |
| Screwdriver | “Whirlwind” DA-12-1 72/14/11 — 1620 rub. | Hilti SD5000 - RUB 12,299. |
| Electric drill | Elitech YES 10.8SLK2 1.5Ah — 3239 rub. | Hilti SF BT 22A — RUB 18,982. |
| Drilling equipment | MaxCut motor drill — RUB 7,039. | Motor drill ESNO EA-410 — 49,990 rub. |
| Leg-split | Jute twine, 200 m - 170 rub. | Jute twine, 200 m - 170 rub. |
| Welding machine | FoxWeld VARTEG 250 — 4800 rub. | Fubag IN 316 T 68449 — 46530 rub. |
| Circular Saw | PARMA 200D — 4724 rub. | Circular saw Mafell K 65 cc — RUB 50,506. |
| Total cost: | 23933 rub. | RUR 223,307 |
When planning to purchase equipment for installing a fence from corrugated sheets with your own hands, owners of summer cottages often make the mistake of choosing an inexpensive tool. Unfortunately, its only advantage is its low price. But there are many more shortcomings. Most often, cheap tools are made from low-quality raw materials and components. As a result, there is an increased likelihood of failure during use, which not only results in additional costs, but can also cause injury. Moreover, this applies not only to technically complex devices, but also to hand tools.
Another disadvantage is inconvenience. While professional equipment is designed with ergonomics in mind, when producing cheap models, the last thing manufacturers think about is user convenience. For example, consider a bayonet shovel. The professional tool has a curved handle with a handle at the end, and the blade is made of titanium. This shovel has an ergonomic shape and is lightweight; it does not put unnecessary strain on your arms and back, so it is suitable for long-term work. On the contrary, household tools, as a rule, are equipped with a straight handle and the blade is made of steel. As a result, the shovel is heavy and inconvenient to use.
And finally, another disadvantage of household tools is that their use negatively affects the quality of construction work. For example, household welding inverters do not always allow you to fully weld a seam, and cheap circular saws are characterized by low power and require additional effort when performing work.
Important! If you decide to install a corrugated sheet fence with your own hands, consider the cost of purchasing equipment as a contribution to the operational life of the fence. By using professional tools, you can achieve better quality work and thereby extend the life of the fence.

Fencing a site with a fence made of corrugated sheets - advantages and disadvantages
Profiled sheet is a very convenient material. It is easy to cut and easy to transport. Therefore, fences made of this material have a number of advantages:
- fencing a site with a fence made of corrugated sheets with your own hands in the simplest version can be done in literally two to three days;
- erecting a fence from corrugated sheets with your own hands will not cause difficulties for someone who is used to doing everything on their own;
- the price of a fence made from corrugated sheets, made by yourself, will be low, and it will perform the functions of a fence “excellently”;
- the color range of products made from corrugated sheets is varied - from ordinary standard colors to imitation stone, brick or other fencing;
- the height of a fence made of corrugated sheets can reach 6 meters;
- the service life of the material is very long;
- ease of installation and repair - it is possible to replace individual sheets;
- fencing made of corrugated sheets has high fire resistance;
- a solid fence will protect the area from the wind and debris carried by it, as well as from the entry of strangers and neighboring animals.
However, some properties of a fence made of corrugated sheets may also be disadvantages:
- the continuous fencing of the site has a high windage - a solid base for the fence will be required;
- the area of land near the fence will be in the shade for some part of the day, so sun-loving plants will not survive here;
- Due to the low ventilation of the fence, moss may form in shaded areas.
But, since there are many more advantages than disadvantages, corrugated sheets are most often used for fencing an area. Disadvantages in landscape design can be taken into account so that their impact is minimal. If you follow the step-by-step instructions, fencing the area with a fence made of corrugated sheets is not difficult to do.
Selection of materials
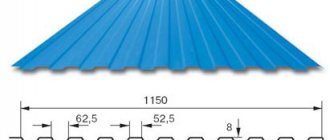
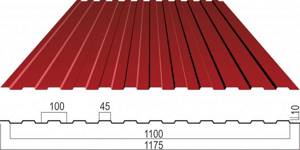
Profiled metal sheet is a wide group of materials used both for constructing fences and for roofing. To avoid making mistakes when purchasing, pay attention to the labeling. Corrugated sheeting is suitable for barriers, the alphanumeric code of which contains the letter C (wall). As for the numbers, they indicate the height of the corrugation (varies from 8 to 35 mm). The higher the “wave”, the more resistant the material is to wind and mechanical loads. At the same time, we must not forget that all corrugated sheets are made from sheets 1.25 meters wide. This means that as the height of the corrugation increases, the useful area of the material decreases. As a reasonable compromise between strength and economy, you can consider profiled sheets of grade C10 or C15. And finally, another parameter is thickness. Manufacturers produce sheets with a thickness of 0.3 to 0.8 mm. A material with a thickness of 0.4-0.5 mm is optimal for the fence. Thinner corrugated sheeting will tear under the influence of wind, while thicker sheeting will increase the load on the foundation and support pillars.
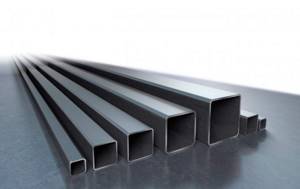
The next step is to select a metal pipe for the vertical supports and horizontal joists. As a rule, a profile rather than a round pipe is chosen for fences. This is explained by two factors. Firstly, due to the stiffening ribs, a square or rectangular pipe is more resistant to loads. Secondly, working with flat surfaces is much easier. Especially if you plan to do without welding. It should also be remembered that the main load falls on the pillars, which are located in the corners of the site and near the gate. Based on this, it is recommended to use:
- for corner and gate supports, a square pipe with a thickness of at least 2 mm and a cross-section of 80x80 mm;
- for the remaining (intermediate) pillars, a square pipe 60x60 mm with a wall thickness of 1.5 or 2 mm;
- for horizontal piping and gate frame, rectangular profile pipe 40x20 mm, 1.5 mm thick.
In addition to corrugated sheets and pipes, to build a fence you need to purchase a sand-gravel mixture, cement and self-tapping screws. PGS can be natural and enriched. The second option is preferable, since during its production an optimal balance is maintained between the amount of gravel and sand. As for cement, it is allowed to use grade M100 for the construction of a fence. But for a solid foundation it is better to choose concrete M150 or M200. And finally, the fasteners. To fasten the profiled sheet, use self-tapping screws with a 5.5x25 mm rubber washer. Note! If you want the fence to be not only functional, but also beautiful, choose fasteners with a polymer coating that matches the color of the corrugated board.
Stages of fence construction
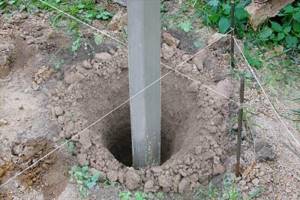
- Digging holes for supports is done with a garden drill. The depth of the pits is 1-1.5 m.
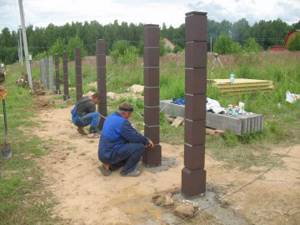
Installation of fence supports
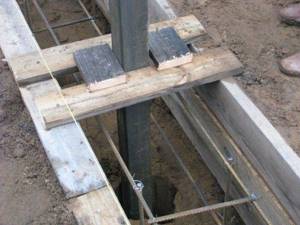
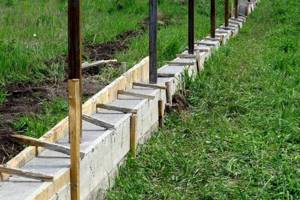
- Installation and cementing of vertical posts (supports). The reliability and service life of the future fence depends on the quality of this stage. The supports are installed strictly vertically, which is checked by the building level. Next, the vertically installed supports are filled with concrete mortar, which should be pinned after pouring. The air remaining in the solution must come out. The foundation is left alone for three days.
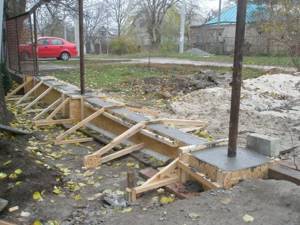
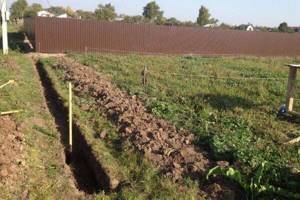
Pouring the foundation for a corrugated fence
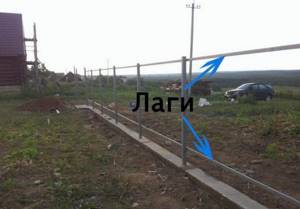
- Installation of transverse joists. These elements are installed parallel to each other, the outermost logs should be 20 cm away from the ground and the upper edge of the support. Using a welding machine, the logs are securely attached to the support pillars. If this is not possible, the logs are secured with bolts and nuts.
Installation of horizontal logs for corrugated sheets
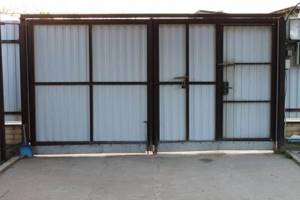
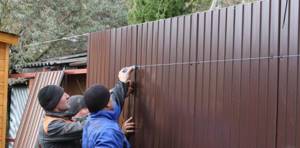
- Fastening profiled sheets to a reliable frame. This stage starts from the gate. The verticality of each sheet is checked with a building level. One sheet is superimposed on another in just one wave. The sheets are attached to the joists only with self-tapping screws.
Fastening profiled sheets to a reliable frame
Calculation of the required amount of materials
The first thing you need to do when calculating is to prepare a drawing. Not necessarily professional and to scale. A schematic sketch with basic dimensions is sufficient. This will help avoid mistakes.
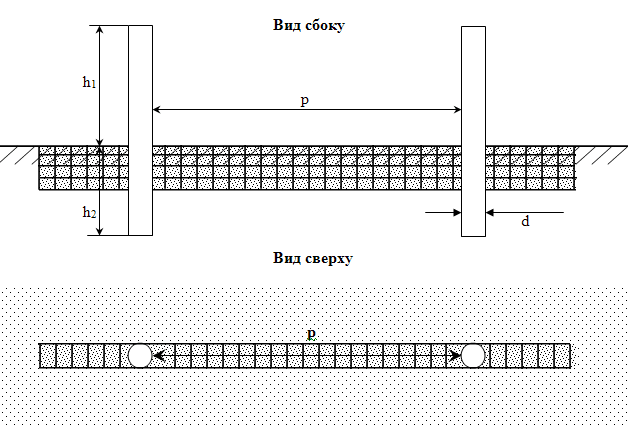
To make it clearer, we propose to consider step by step the procedure for calculating materials for installing a fence made of corrugated sheets on a strip foundation. For example, let’s take a standard dacha plot of 6 acres. Its length is 30 meters, width 20 meters, and the total length of the perimeter is 100 meters.
- Calculation of corrugated sheets. The fence is sheathed with profiled metal sheets in an overlapping manner, capturing one corrugation. That is why, when performing calculations, you should take into account not the total, but the useful width of the sheet. Depending on the height of the corrugation, it varies from 1000 to 1150 mm. For our hypothetical fence, we will choose C10 corrugated board, the useful width of which is 1100 mm. To calculate the required amount, divide the total length of the perimeter by the width of the sheet. Don't forget to convert millimeters to meters. So: 100/1.1 = 90.9 pcs. Round up to 91 pieces and add 3-4 spare sheets. Thus, we will need 95 sheets. With an average price per sheet of 300 rubles, the cost of material will be 28,500 rubles.
- Calculation of support pillars. The standard fence height for a summer cottage is 2 meters. To this figure it is necessary to add the length of the underground part of the support. Its value depends on the type of soil on the site, but in any case should not be less than the depth of soil freezing. In the Moscow region, loams freeze to 1.35 meters, small sandstones to 1.64 meters and large sandstones to 1.76 meters. Let's assume that our site is located on loamy soils. In this case, the length of one support will be 2 + 1.35 = 3.35 meters. Now you need to count the number of pillars. With a pitch of 2.5 meters, there will be 12 posts on the long side of the fence, and 8 posts on the short side (36 pieces in total). Of these, four will be corner kicks, two will be goal kicks, and the rest will be intermediate kicks. Based on this, we will need 6 * 3.35 = 20.1 meters of 80x80 mm pipe and 30 * 3.35 = 100.5 meters of 60x60 mm pipe. On average, the cost of supports will be 30,000 rubles.
- Calculation of trim and gates. The harness plays a dual role. On the one hand, it increases the rigidity of the structure. On the other hand, it is used for fastening profiled sheets. With a fence height of two meters, it is done in two places - at a distance of 30-40 cm and 150-160 cm from the ground. With a total perimeter of 100 meters of pipe, twice as much pipe will be required. But from this amount you need to subtract the width of the entrance, and then add the material necessary to assemble the swing gate frame. The latter is calculated separately. The standard entry width is 4 meters. At the top, the gate is level with the fence, and at the bottom, the distance between the ground and the gates should be at least 20 cm. This is necessary in order to ensure the free opening of the gate in the cold season, when drifts and ice are common. Thus, the width of one leaf will be 2 meters and the height 1.8 meters. In addition, to provide rigidity for each sash, it is necessary to make an internal frame from two cross-shaped sections of pipe. That is, one leaf will require three sections 2 meters long and the same number of pipe sections 1.8 meters long, that is, 11.4 meters. The total number of rectangular profile pipes 40x20 mm is calculated using the following formula: 200 meters (double piping around the perimeter of the site) – 8 meters (double width of the gate) + 22.8 meters (frame of two doors) = 214.8 meters. On average, the cost of material for strapping will be 16,000 rubles.
- Calculation of ASG and cement. To calculate the required amount of materials, you should calculate the volume of the future foundation. In the calculation we will use average values. As a rule, the depth of laying a strip foundation for a fence made of corrugated board is 50 cm, and the width is 40 cm. With a total perimeter length of 100 meters, we will need: 0.5 * 0.4 * 100 = 20 cubic meters of solution. When preparing concrete, you must adhere to the following proportions: 1 part cement + 8 parts ASG + 1 part water. Thus, to fill the foundation we will need 2 cubic meters of cement and 16 cubic meters of ASG. Based on the average density of cement grade M150 1300 kg/m. cubic, we get 2600 kg or 52 bags weighing 50 kg. The average price of one bag is 300 rubles. Thus, the cost of cement will be 15,600 rubles. The weight of 1 cubic meter of ASG is 1600 kg. This means that we will need 25.6 tons of sand and gravel mixture. With an average price per ton of 500 rubles, the cost of its acquisition will be 12,800 rubles. Total, the total cost of materials for the foundation is 28,400 rubles.
- Calculation of fasteners. To ensure sufficient strength of the fence, the corrugated sheeting is fastened through one wave. On our hypothetical fence, we use a C10 profiled sheet with a wave width of 10 cm. With a useful material width of 1100 cm, there are 6 upper and 6 lower fastening points per 1 sheet. Thus, to fasten one sheet you will need 12 self-tapping screws, and to completely cover the fence - 1140 pieces. To this quantity it is necessary to add a reserve of 5% for unexpected losses. Rounding up, we get 1200 screws. With an average price of one hardware of 1.5 rubles, the total cost of fastening will be 1800 rubles.
Let's summarize: when building a fence from corrugated sheets with your own hands, you will need 104,700 rubles to purchase materials.
Important! In 2021, amendments to SP 53.13330.2011 came into force. According to the updated document, opaque fences between neighboring areas cannot be installed everywhere. It all depends on the category of land and the legal status of the partnership (TSN, ONT, SNT, etc.). To avoid unnecessary costs for altering the fence, read the charter of the gardening partnership in advance. If the new rules apply to your TSN, you can sheathe the front side with corrugated sheeting, and for the sides adjacent to your neighbors, purchase a sectional mesh fence.
Profiled sheeting. Production method. Kinds
Profiled sheets are made of galvanized steel. On special roll forming machines, the sheets are given a corrugated shape using cold stamping. Thanks to this method, the corrugated sheeting acquires transverse rigidity, which increases its load-bearing capacity.
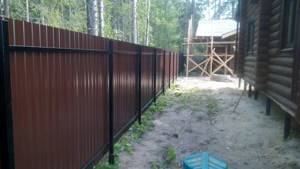
A fence made of corrugated board is a strong fence that can withstand even strong gusts of wind.
The undoubted advantages of a fence made from corrugated sheets are the durability of both the structure and the corrugated sheet.
After rolling through the machine, an anti-corrosion polymer coating is applied to the profiled steel sheets on both sides. Sheets of corrugated sheets for fences and roofing must be subjected to the polymer coating procedure. In this way, the material is protected from corrosion and exposure to ultraviolet rays.
The dimensions of corrugated sheeting for fences and other structures (here we mean length) are dictated by the customer. The use of rolled steel for the manufacture of profiled sheets allows this task to be accomplished. But the width of the material is set by the manufacturer. It varies from 980 to 1850 mm.
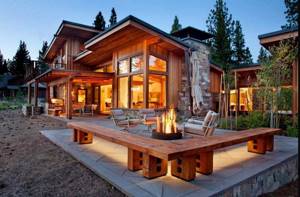
Using profiled sheets for installing fences allows you to make the facade of your house more attractive and varied.
Since corrugated sheet is initially a material for outdoor use, it does not change its properties under the influence of ultraviolet radiation, precipitation and temperature changes
Types of profiled sheets:
- roofing or load-bearing;
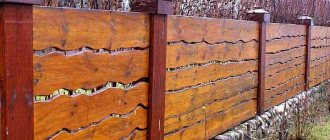
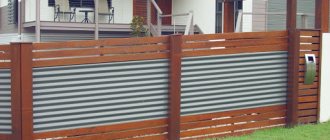
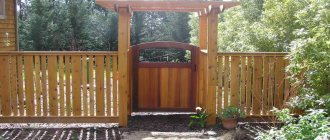
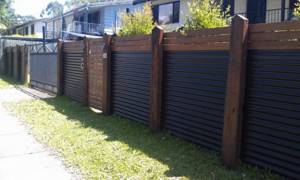
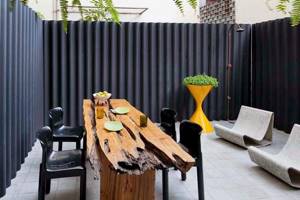
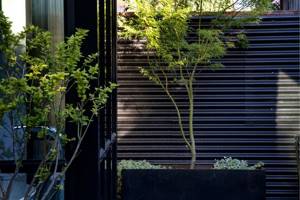
Beautiful fence with a horizontal profiled sheet
- wall;
- universal.
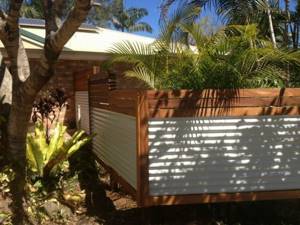
Corrugated wall sheeting is used for the fence

To answer the question of how to make a fence from corrugated sheets, you first need to select the material.
For the construction of fences, only profiled wall sheets are used. These structures will not have to withstand the heavy weight of fallen snow, so strict rules do not apply to them. Material with low corrugation (up to 21 mm) and a thickness of 0.5-0.7 mm will be the best option for constructing a fence and gate from corrugated board.
A fence made of corrugated sheets will muffle sounds coming from outside, as well as create a kind of sound-reflecting screen for sounds produced on the site
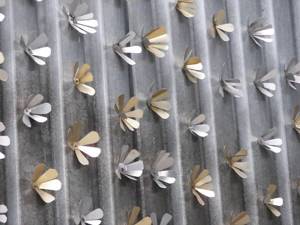
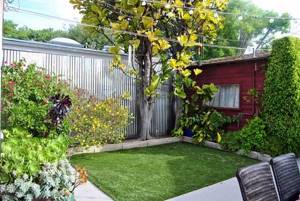
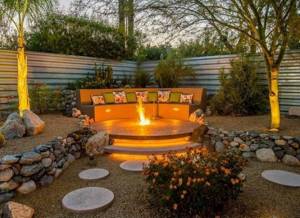
Beautiful decor for a fence made of corrugated sheets
Regarding color solutions, manufacturers offer a huge selection of shades. Modern technologies even make it possible to apply various images to the surface of a profiled sheet. It can be imitation brick , natural wood or stone .
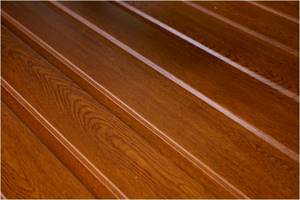
Wood-look corrugated sheeting

As a decoration, a corrugated fence can be painted with oil paints
Some types of corrugated sheeting, which have a pointed edge on one side, are produced especially for the construction of fences. This is an ideal option for a fence.
Some tips for choosing corrugated sheets
- Strictly check the thickness of the profiled sheet and its quality.
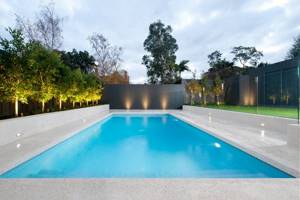
Stylish fence made of profiled metal
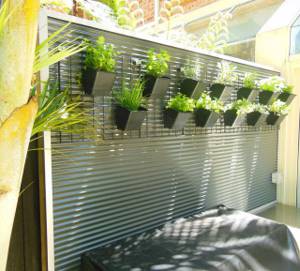
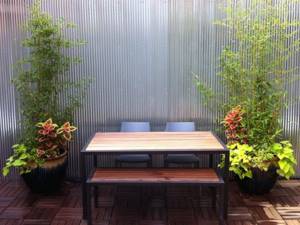
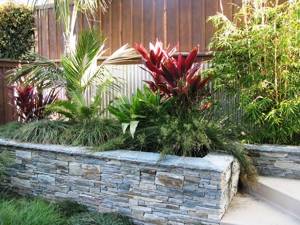
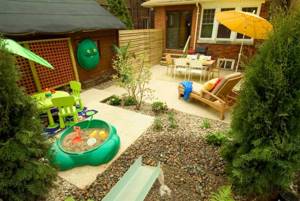
Decorating the fence with flowerpots with live plants
- Review the manufacturer's certifications to ensure that the material is manufactured in accordance with all standards and specifications.
- Remember that the cheap option always loses in quality. Find the middle ground between the durability of the material and your material costs.
The material for the corrugated fence must be manufactured in accordance with all standards and specifications
How to build? Stages of installing a fence with a gate
Before installing a barrier, you should collect available information on this issue. For example, you can watch a video about construction on YouTube, read forums, study photos, etc. This approach will help you avoid common mistakes.
So, the theory has been studied, and tools and materials have been purchased. Let's move on to the actual installation of a fence made of corrugated sheets:
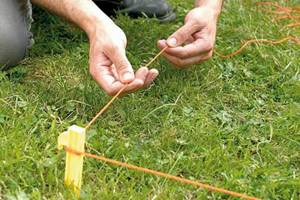
- Marking. First of all, it is necessary to determine the corner points of the site. The reference points can be holes from old supports, neighbor's posts, or information contained in the boundary plan. First, the pegs are driven into the corner points, and then into those places where the gate supports will be located in the future. The twine is pulled between the pegs and the remaining markings are made along the line formed by it. The distance between the posts is chosen in such a way as to ensure convenient cutting of materials with a minimum amount of waste. However, it should not exceed three meters.
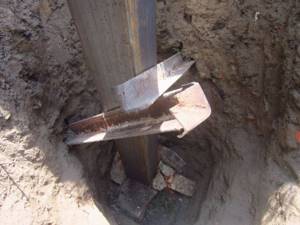
- Excavation. According to the previously completed markings, it is necessary to dig a trench 40 cm wide and 50 cm deep. At the installation points of the pillars, the trench is further deepened to 135 cm. Please note that we indicated the freezing depth of loamy soils in the Moscow region. If your site is located on a different type of soil or in a different region, read the SNiP 2.02.01-83 standards, which can be easily found on forums dedicated to construction. The recesses at the installation points of the pillars can be dug with a shovel, but it is more convenient to do this with a motor drill.
- Installation of pillars. If you bought a pipe that was cut into pieces of the required length, you can immediately proceed to installation. Otherwise, you should cut it with a grinder. Do not forget that for corner and gate supports it is necessary to use a pipe of at least 80x80x2 mm. We place the piece in a hole and back it up 40-50 cm with broken bricks or other construction waste. At the same time, using a level, we control the verticality of the installation. The maximum permissible deviation from the vertical does not exceed 2-3°. Otherwise, the fence will be on a slope.
- Preparing to pour the foundation. In order to prevent water from escaping from the solution and, as a result, reducing its strength, it is necessary to exclude direct contact with the ground. This can be done either using classic wooden formwork or using modern waterproofing materials. Also at this stage, a reinforcing frame should be made. Reinforcement with a diameter of 8-10 mm is suitable for this. It is better to assemble the frame without welding, using wire twisting. Note! After pouring the foundation, all reinforcing elements must be inside. For this reason, the frame is not installed on the bottom of the trench, but on some supports, for example, on bricks.
- Concreting the foundation. We prepare a concrete solution from cement, ASG and water. We perform the filling in several stages. First, the holes with the pillars installed in them are filled with the solution. Using a metal rod (you can use a piece of reinforcement), we compact the concrete and once again check the verticality of the supports. Is everything normal and the deviation is within normal limits? Then we move on to the next pillar and repeat the operation. When all the supports are concreted, we begin pouring the foundation. First we fill it to the middle of the formwork, and then we go through the entire perimeter again. After this, the foundation must be left for 1-2 days for the solution to set.
- Making a gate frame. Let's not waste time and while the concrete hardens, we'll weld the gate frame. To do this, use a grinder to cut a 40x20x1.5 profile pipe into pieces of the required length. On the end part we make a cut at an angle of 45°. This is necessary for convenient joining of segments. We assemble the gate frame on a horizontal surface and use a welding inverter to tack it at four corner points. We check the accuracy of the angles (90°) and finally weld the frame. After this, we weld two pieces of pipe crosswise inside (see picture below). We repeat all the operations and make a frame for the second swing gate leaf.
- Installation of crossbars. If you have skills in working with a welding machine, it is optimal to perform installation using welding. Otherwise, you can use X-brackets, which are bolted to the support. If you prefer the second option, when purchasing materials, do not forget to add brackets and bolts to the estimated number of fasteners. Note! When installing the crossbars, you must double check their horizontalness. First, when marking, and then after screwing in the bolts (until final fixation).
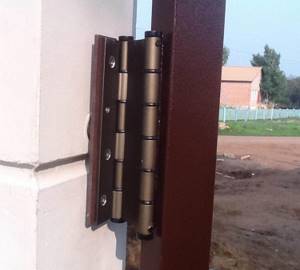
- Installation of the gate frame. We weld hinges to the pillars and the outside of the gate frame. The “glass” of the hinge is mounted on the support, and the counter part is on the sash. After this, the gate frame is hung on the posts. Depending on the weight of the structure, the sash can be held in place by two or three hinges. It should also be said that swing models are not the only option for organizing entry. Very often, owners of suburban areas install sliding gates. They are a little more difficult to manufacture, but with some skills in working with welding equipment and plumbing tools, you can cope with this task yourself. Another option is automatic gates. Moreover, it should be noted that the electric drive can be installed on both sliding and swing models.
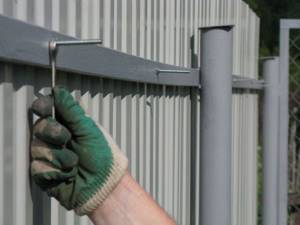
- Covering the fence with corrugated board. Sheets of profiled metal are attached to the crossbars with self-tapping screws and a rubber washer. When performing work, it is necessary to monitor the tightening force. The force should be such that the edges of the washer protrude beyond the screw head by approximately 1 mm. We start fastening the corrugated board from the gate post. The sheets are attached with an overlap, capturing one corrugation. Self-tapping screws are screwed through one wave. To cover the corner of the fence, the corrugated sheet must first be bent. This can be done either using a sheet bender or manually. In the second case, bending is carried out through the board, and double-sided tape is glued to the outside of the sheet, which will protect the polymer coating from damage. The gate leaves are sheathed last, when the entire fence is almost ready. The principle of doing the work is the same. The sheets are attached with an overlap, the screws are screwed through one wave.
- Final works. At this stage, a lock and handle are mounted on the gate, the attachment points of the corrugated sheet are treated with an anti-corrosion primer, and plugs are installed on the posts. At first glance, these works may not seem very important, but they should not be neglected, since the reliability and operational life of the barrier directly depend on this stage.
Now you know how to install a corrugated fence with your own hands. By following these instructions exactly, you can independently build a fence for any suburban area.
Preparing tools and building materials
Profiled sheets, the number of which has already been calculated.
Currently, many developers have begun to use corrugated sheets for the construction of fences with great pleasure
Corrugated fence: durability and reliability
Supports. You can use profile pipes, as well as round pipes with a diameter of 60x60. The distance between two adjacent supports is no more than 2.5 m. After measuring the perimeter of the site, it is easy to calculate the required number of pillars. The height of the supports should not exceed the height of the future fence plus 1-1.5 m, which are buried in the ground.
- To fasten profiled sheets, you need transverse logs - a metal profile.
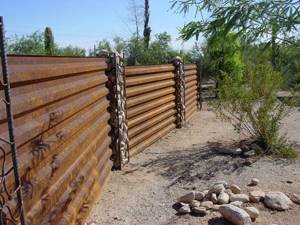
Corrugated sheet fence in rustic style
- Self-tapping screws for metal.
- Level.
- Welding machine.
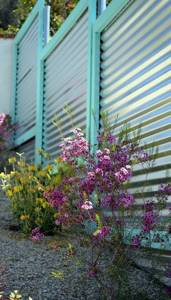
Magnificent fence made of profiled metal with turquoise edging
- Cement, sand, crushed stone.
- Container for preparing the solution.
Possible installation errors and their consequences
Experience shows that a lack of professional knowledge and skills in working with tools causes various errors, which subsequently negatively affect the quality, reliability and durability of the fence. Let's look at the most common mistakes and their consequences.
- Error: Wrong choice of season. The desire to complete construction work by the beginning of the summer season is quite understandable. However, you should begin installing a fence made of corrugated sheets no earlier than positive temperatures have established and the soil has completely thawed. This is due to the fact that due to temperature changes the soil becomes mobile. Consequences: skew of one or more pillars, “collapse” of the fence, partial destruction of the strip foundation.
- Error: incorrect choice of materials. Above we have given recommendations for choosing corrugated sheets, profile pipes and consumables. If you are planning to install a corrugated sheet fence yourself, follow these tips. Remember that trying to save money when purchasing materials in the vast majority of cases results in additional costs. Consequences: rupture of corrugated sheeting due to high wind load, damage to the sheet at the point of attachment to the crossbar, bending of support posts, rusting of screws.
- Error: Incorrect installation of pillars. Any violation of the support installation technology, be it deviation from the vertical, insufficient penetration into the ground or the use of low-quality cement, leads to a decrease in performance characteristics and deterioration in the appearance of the fence. Consequences: tilting of the posts, rupture of the fence due to changes in the geometry of the supports, skew of the gate, inability to fully open the doors.
- Error: incorrect perimeter marking. The installation technology involves the following sequence of actions: first, pegs are installed at the corners of the future fence, then at the installation points of the gate posts, and only after that the intermediate supports are marked. Moreover, the distance between the latter should not exceed 2.5-3 meters. Any violation of the described procedure is unacceptable. Consequences: difficulties in building the fence, twisting of supports due to excessive load, tilting or falling of the fence.
- Error: Incorrect installation of crossbars. Non-horizontal installation of logs has the least consequences. It is much worse when mistakes are made when performing welding work or when using X-brackets. Consequences: difficulties when covering the fence with corrugated sheets, damage to the anti-corrosion coating of the support or joist, rusting of profile pipes, separation of the cross member from the post.
- Error: incorrect installation of corrugated sheeting. This may include insufficient or excessive tightening of screws, installation of sheets end-to-end, saving or excess of fasteners, fastening at the top point of the wave. Consequences: reduction in the strength characteristics of the material and the fence as a whole, rupture of the barrier fabric.
We bring to your attention a selection of photos in which you can see the consequences of unprofessional installation of fences made of corrugated sheets.
Despite the fact that a fence made of corrugated sheets looks like an extremely simple design, its installation requires professional knowledge, as well as skills in handling tools. As a rule, the first experience is not very successful and after a year or two of operation the barrier will require repairs. And these are additional costs. In addition, when doing the work yourself, the installation period can last for several weeks or even months. That is why, without practical experience, it is better to entrust the installation to professionals.
Are you planning to build a fence on a site in Moscow or the Moscow region? offers to use the services of qualified installers. Our company has been working in the market of manufacturing and installation of fences from corrugated sheets for more than ten years. Over the past years, we have formed teams of experienced specialists, purchased professional equipment and tools, and established direct purchases of materials from manufacturers. This allows us to guarantee not only high quality and speed of construction work, but also optimal prices.
Do you need an inexpensive, reliable and durable fence? We are ready to help!
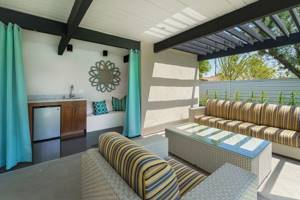
Decorating fences made of corrugated sheets
Currently, structures made from corrugated sheets are diverse. In addition to various combinations with various materials, very often different decorative elements are used to decorate the structure:
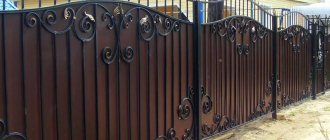
- Use of forged elements of different shapes and sizes.
- The use of a variety of parts cut from metal.
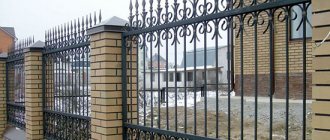
- Using original, stylish pillars made of natural stone and brick for the manufacture of structures.
In addition, you can plant beautiful plants along the fence. This will allow you to decorate the area in an original and stylish way.
In what cases is permission required?
The construction of fences, including temporary fences, is regulated by SNiP 30-02-97.
In particular:
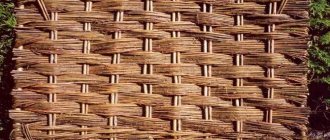
- the fence separating two neighboring areas must be transparent - it can be a mesh or lattice;
- the height of the fence should not exceed 2.2 m;
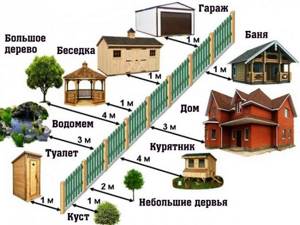
- the distance between the fence and any building on the site must be at least 1 meter.
If the project of the fence being erected violates the requirements of the specified SNiP, then written approval of this project will be required from the relevant committee of the current administration.
General technology for arranging a high-quality fence
You can install a fence yourself to enclose a certain area using a certain technology.

Depending on the materials used, there are mandatory stages of fence installation, these include the following procedures performed by beginners and experienced builders:
- preparation for the arrangement consists of carrying out the necessary calculations and measurements and purchasing the required materials, fasteners and functional structures;
- the main work on installing a fence includes mandatory marking of the site and excavation work for the installation of support pillars or arrangement of the foundation;
- the final stages allow you to install fence posts and attach purchased materials to them, mount a wicket or gate for ease of use of the fencing structure;
- After completing the main work, it is recommended to carry out landscaping of the driveway and entrance to the site, which will help delimit its territory before its practical arrangement.
The final activities include procedures for decorating the structure, for which you can use available tools and materials.
To increase the aesthetics and attractiveness of the structure, it can be painted and varnished, or compositions can be made from other materials and decorative elements.
We recommend reading:
- Do-it-yourself garden gate: modern models and unusual options for using gates (110 photos)
Options for arranging the yard of a private house - the best design ideas, preparation options and tips for creating a beautiful backyard area (90 photos)
Plot of 6 acres - examples of design, effective development and examples of landscape design (135 photos)
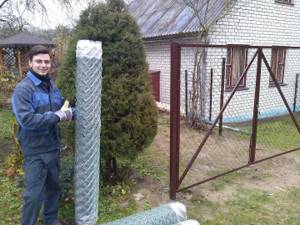
How to install temporary fencing with your own hands
You should always start by choosing the format of the temporary fence and marking the location for its installation.
Unless we are talking about concrete temporary fences, it is always recommended to install dug-in or driven-in supports (to a depth exceeding the freezing depth of the soil.
The posts should be installed strictly vertically - use a plumb line for this.
Fences made of mesh or polycarbonate do not need horizontal joists, but wooden or corrugated fences must have at least 2 rows of horizontal joists for attaching boards or sheet materials to them so that they can withstand wind loads.
Rules and regulations:
- What is the distance from the fence to the trees
- Fence height between areas