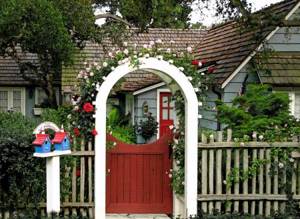
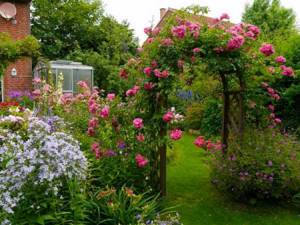
Benefits of a garden arch
The vertical design does not take up any space at all, so it can be used in very tiny areas.
With the right choice of materials, it does not require special care.
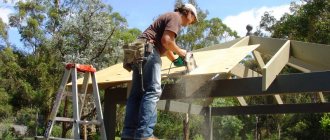
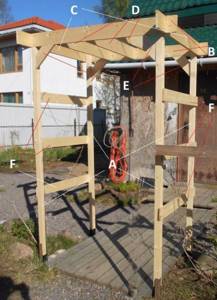
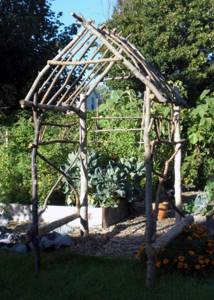
Some arches can be assembled yourself, using scrap materials that have been lying around in sheds and garages for a long time.

In just a couple of months, lovely plants will entwine the new structure, giving the site the beauty and mystery of an ancient castle, overgrown with bougainvillea and wild grapes. At the same time, caring for them will become much easier than caring for the flowers of a regular flower bed.
An arch with green plants helps create a special climate nearby, so it is often used to protect particularly capricious individuals of the plant world.
And finally, it's just beautiful and unusual.
Manufacturing
Depending on what type of arch you want to make with your own hands, you need to do some work. Let's look at the most typical options:
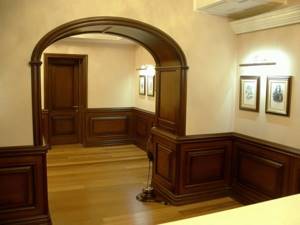
- Interior wooden arches of oval, round or rounded shape are made by connecting small parts. You need to prepare a slightly rounded beam, which you will then connect into a whole product. You can glue them together, or you can connect them with metal staples. The wooden look of the arches will then have to be thoroughly cleaned and sanded so that there are no burrs or irregularities left.
- Making a wooden arch of a square shape or with sharp corners does not require much explanation, since its manufacture does not require much knowledge. You can connect straight parts, as in the previous version, with special glue or staples; wood lends itself quite well to any type of connection.
- Wooden arches can be of a shape that combines both the first and second types. In this case, it is worth combining both methods: prepare small timber about 10-20 centimeters long for ovals and large, flat ones for other parts.
Related article: Water wall in the interior - 60 photos of unique design ideas
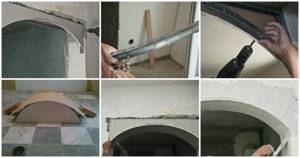
Preparing the opening
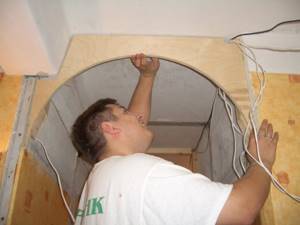
In order for the arch to fit into the opening without unnecessary problems, especially when wood is chosen for its manufacture, and you decide to do all the work yourself, you will have to carefully prepare the wall and the installation site.
It is worth removing everything unnecessary from the walls where the arch is attached - wallpaper, panels, paint. Clean the wall and level it. If the wooden interior arches have an oval format, and the old opening is square, then it needs to be converted into an oval. To do this, you can use additional brick, stone (do masonry), add a plasterboard frame, etc. It all depends on desire. The main thing is that the size of the resulting opening coincides with the parameters by which the arch was made.
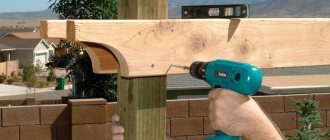
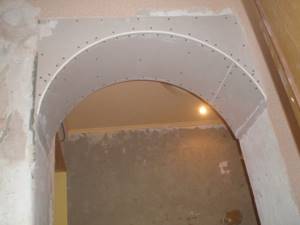
Installation
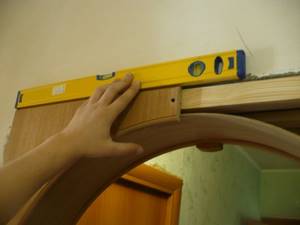
In order for the arch to install well, it is worth preparing wood screws, special glue, a screwdriver, and possibly dowels. When you insert the wooden arch into the door, check if everything is correct:
- the arch should not look beyond the edges of the walls;
- she should not hide behind the edge of the wall, everything becomes level.
Wooden arches between rooms should be installed so as not to damage their structure. It is necessary to screw the arch elements with self-tapping screws to the wall to strengthen the structure. If empty spaces form, they can be puttied or foamed. But this will be a minus of the design.
Finishing
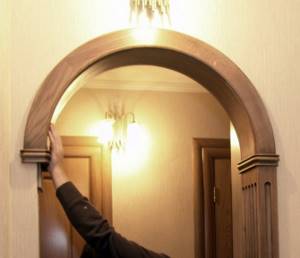
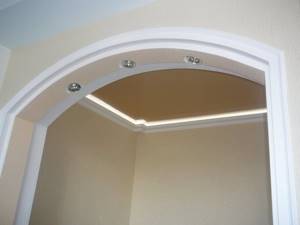
Once the arch is installed, it's time to finish it properly. If you made the opening itself using drywall, then before installing the structure, it was worth covering it with wallpaper or performing other cladding. The wooden type of arches must be varnished or painted. This way, you can protect the structure from aging and fading, and it will serve for many years.

At the end of the work, you need to check whether there are any disadvantages on the arch itself - dents, irregularities, chips. If they are found, they must be eliminated as much as possible using the finish that is selected. When you make an arch in a house or apartment, remember that the wooden type of openings will always be the best option, since it is environmentally friendly. The wear resistance and durability of wood makes it a very good option for indoor work.
Related article: How to hang a picture without drilling into the wall
Be careful at every moment when you make and install an arch with your own hands, and you will succeed. Good luck!
Arch selection
Photos of a garden arch will help you choose the most interesting garden design option. But before you take up the tools to create an unusual flower garden, you should consider a few points.
The smooth lines of the arch will look great in small areas; they look very natural and harmonize perfectly with the surrounding space. Rectangular arches are more suitable for modern minimalist gardens, as well as for large areas.
In addition to flowers, vintage items, garden figurines or crafts can decorate a vertical structure.
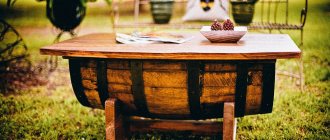
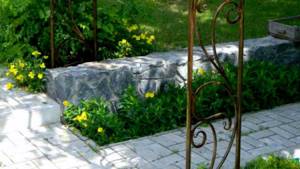
Several materials can be combined in one building, for example, wood and stone, stone and iron.
Types of arches
Such designs are divided into types according to their shape and style.
- Classic. A classic arch is usually called a semicircle or arc. This look fits perfectly into any environment, be it a residential building or an office building.
- Arches in the Art Nouveau style are considered modern. The look is a little similar to the classic one, the only difference is its shape, since its upper part has the shape of a circle. If you add a little imagination, you can add a little romance (make it in the form of a rectangle and round its corners). This option is ideal for wide doorways.
- For rooms with spacious rooms there is a type of arches, which has the shape of a semi-ellipse.
- The most common types of Art Nouveau arches are trapezoids. They look special when installed when moving from one room to another.
- Exclusive options require a wild imagination, as they can have non-standard forms. If a person wants to create a unique design in his home, then exclusive views are for him. Here you can make broken lines and various kinds of abstractions.
Related article: Skirting boards for countertops: how to fix them yourself
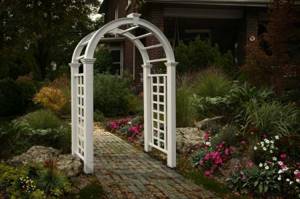
Materials for creating arches
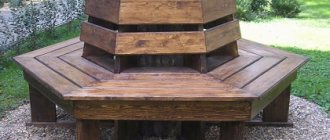
Garden arches can be made of wood, metal, brick, stone, plastic, wire and many other items that would be a shame to throw away. And small defects in the erected arch will quickly be hidden by fluffy plants.
Note!
- How to make a hot smoked smokehouse - 75 photos of the best ideas and step-by-step instructions
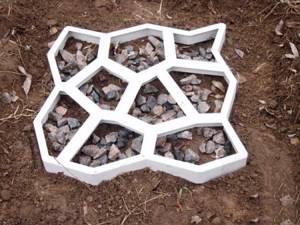
Molds for paving slabs - easy instructions on how to make them yourself (80 photo ideas)
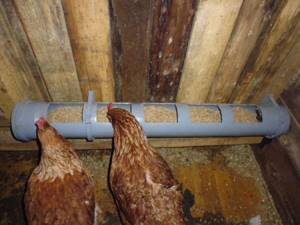
Feeder for chickens - ideas, description of construction and features of creating feeders from scrap materials
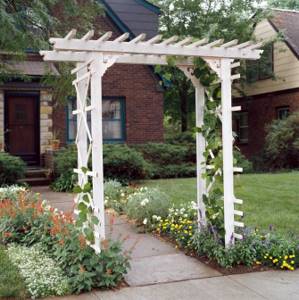
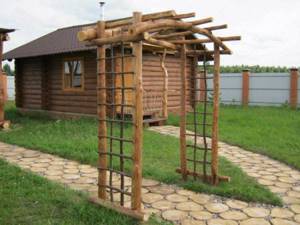
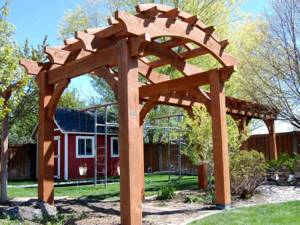
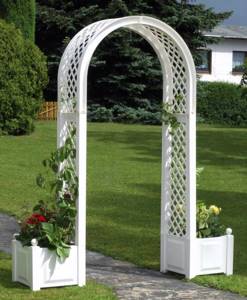
Wooden arches
Wood is still the most affordable material. It can last for years and does not require special skills to create an attractive design.
The only downside will be the need for annual maintenance of wooden supports. They will have to be treated with products against rot, mold and insects.
They try to cover the lower part of the supports with bitumen, and make additional drainage under the base.
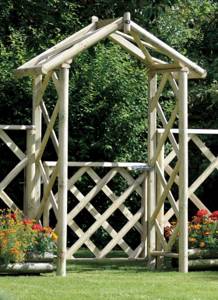
It will be quite difficult to make a rounded shape, so most often such structures are rectangular vaults.
The arch will be decorated with thin trellises for plants.
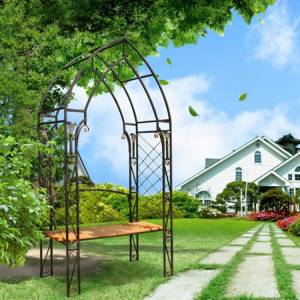
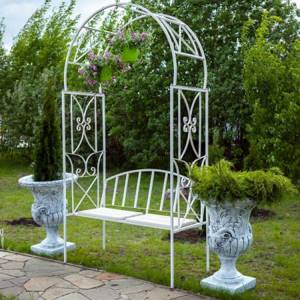
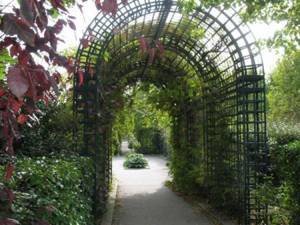
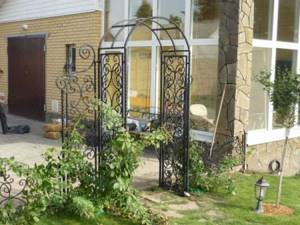
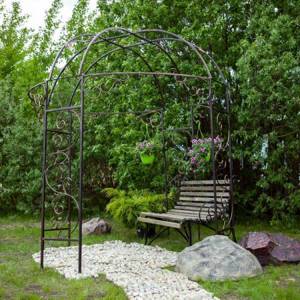
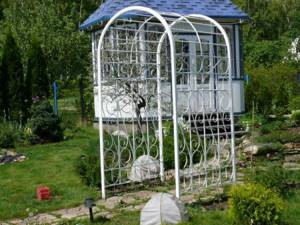
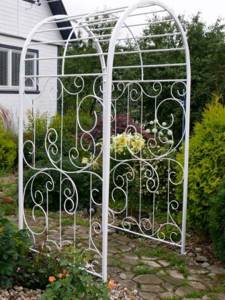
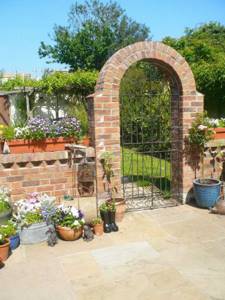
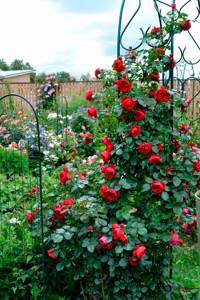
Metal arches
Garden arches made of metal are characterized by much greater durability and elegance. However, making them yourself will be somewhat more difficult. To create a durable structure from thick rods you will need welding and experience working with it. So in most cases it will be easier to purchase such an arch in a store.
If you use thin rods tied with wire, they may not withstand strong winds or bend under the weight of the plants.
On a hot sunny day, the metal will quickly heat up, causing burns to its inhabitants, and on cold days it can freeze plants left to overwinter.
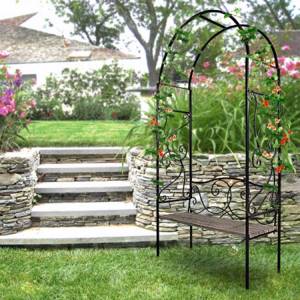
To create the simplest and most reliable structure, a metal mesh is used, tying it to stone or wooden supports.
The Corten steel arch is especially popular. In appearance, it resembles a rusty piece of iron, but it perfectly decorates any space, emphasizing the naturalness and natural beauty of the area.
The ends of the steel sheet can simply be dug into the ground or fixed with cement, and the sheet will create a gentle arch of any height.
Video “Making a wooden arch with your own hands”
The video shows a master class on making a wooden arch.
The best posts
- How to make a manifold for a heated floor with your own hands?
- How to make a garden table with your own hands?
- DIY sofa on the balcony (photo)
- DIY mosaic panel for the kitchen and bathroom with photo
- Knitting patterns for women: examples of fashionable knitted items with patterns and descriptions
- Weaving a paracord bracelet for a watch: instructions with photos and videos
- DIY polymer clay necklace: creating poppy flowers with video
- How to correctly say putty or putty? Does it make any difference
Brick arches
Massive structures look rather heavy, so it is recommended to use them only in large areas or decorate them exclusively with the entrance area.
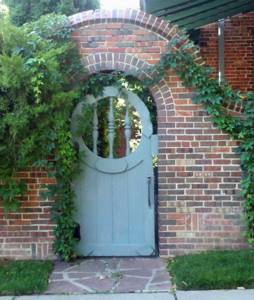
Red brick and gray stone will look lovely if you decorate them with delicate roses or clematis. Wild grapes in combination with such a base will transport the inhabitants of the site to the sea coast of Spain or Brazil.
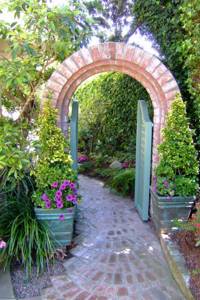
Such an arch will serve for a very long time, but to create this miracle you will have to hire specialists or master the science of a mason. And this will require quite a lot of money. And the material in the required quantities is unlikely to be found in the barn.
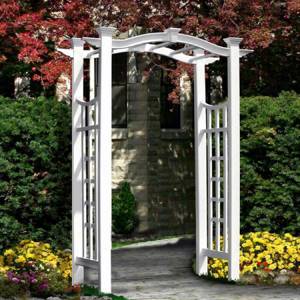
Arches made of plastic
A lightweight arch made of plastic pipes is very easy to assemble; its components are not very expensive and weigh little. This design is easy to install or move.
But it is precisely the light weight that is the main reason for the dissatisfaction of owners. The arch can be knocked over by a strong wind or overgrown plants can tilt.
Preparation for production
Tree selection
The following types of wood are used to make an interior arch: oak, ash, pine, larch, mahogany and others. Let's look at the most popular of them.
- Pine. It is most often chosen because of its color - the pinkish color changes to dark red. Among the advantages of pine are high strength and elasticity. In addition, it is resistant to rot and is inexpensive.
- Oak and beech. Usually they are chosen in cases where the room has something similar in style and texture. These types of wood are very reliable and durable.
- Red tree. The material is used very rarely for residential premises, the reason being its high cost. This material looks very elegant and expensive.
- Other. Usually these are cheap materials (for example chipboard), which will help you make an arch with your own hands at a very low price.
Dimensions and shape
When you have chosen the type of wood required for manufacturing, decide what shape and color the arch will be. Most often it depends on the furniture and design of the room. Today the most popular forms of arches are the following:
- Classic. A classic interior arch is called a semicircle or arc; it fits into any room.
- "Modern". This option is perfect for wide doorways; the difference from the classic arch lies in the shape (the top of the arch looks more flattened).
- Ellipse. Perfect for small openings.
- "Trapezoid". The design with sewn corners is used in rooms with different parameters. It’s easy to do it yourself, because to make such an arch you only need straight boards, no complicated processing is needed.
- Other. This includes “portals”, “transoms” and other exclusive solutions for people with wild imagination. Such arches may have a non-standard appearance.
Popular forms of arches
Wooden arches can be supplemented with side elements - shelves, decorative elements.
Plants for arches
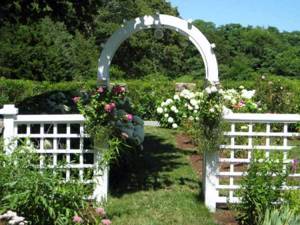
After installing the structure in the chosen place, it is decorated with flowers. By the way, this is a great way to hide some of the shortcomings of independent work.

Climbing plants are considered the best addition. They grow quickly, delight with an abundance of greenery and flowers, and in some cases (grapes or beans) they also bring practical benefits, delighting the owners with the harvest.
To achieve the best results, plants are additionally guided, tied or pruned.
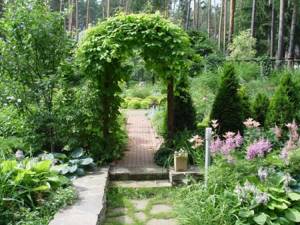
Photos of arches in the garden will show the variety of these lovely garden design options.
Types of arches
There are different types of plasterboard arches. They usually differ in the configuration of the top, and in some cases, in the method of connection to the vertical segments.
The photo of plasterboard arches shows that they are usually divided into six types:
- Classic.
- Modern.
- Romance.
- Ellipse.
- Trapezoid.
- Portal.
The semi-arch is also distinguished separately.
Making and installing an arched structure yourself is not that difficult. You just need to study the technology and choose the appropriate design for a plasterboard arch. We wish you success.