A modern dacha is not only a source of organic fruits and vegetables, it is also a place where a person can hide from problems and escape from the bustle of the city. This is relaxation, nature, a great mood.
The happy owners of suburban acres try to create maximum comfort on the site, bring something of their own, something original to its design, surprise the neighbors, and please the children.
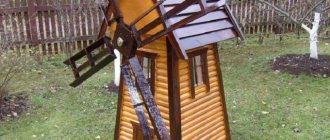
A wooden mill on a dacha or personal plot is the highlight that will decorate the area and help create a unique village landscape.
Windmill decorative or functional
A windmill (wind turbine) will be an excellent decoration for a summer cottage of any size and shape, you just need to choose its size and design wisely. The dimensions of the structure vary widely; it can be a toy house a few centimeters high, decorating a flowerbed or well, or it can be a full-fledged permanent structure that performs very specific household functions.
Before designing and creating such an original decoration of the site, it is worth answering the question why a mill is needed:
- A windmill is an excellent decoration for a yard or garden. It will emphasize a special rustic style and set the vacationer in a lyrical mood;
- a medium-sized mill will help hide unsightly places in a summer cottage (sewer hatch, ventilation hood, etc.);
- You can make a doghouse in the form of a mill. Surely your pet will like such original apartments;
- a reliable “capital” building will become a favorite place for children. In such a house you can play with friends, hide from your parents, hide from the rain;
- A large and spacious windmill will be an excellent place to store garden tools. On the one hand, it will decorate the territory, on the other hand, it will save the owner from the need to build bulky sheds that spoil the appearance of the site;
- If a wooden garden mill has rotating blades, then it can protect the area from mole invasion. To do this, the mill must be placed on legs and dug 10–25 cm into the ground. As the blades rotate, vibration will be transmitted to the legs, which will drive pests far beyond the site.

Among other things, it is worth mentioning the possibility of using a homemade windmill to generate electrical energy. Of course, this is much more difficult than making a simple decorative element; it requires knowledge, calculations, and expensive equipment.
Construction of a mill on a summer cottage with your own hands
We would like to divide the entire construction process into several stages. This will help our readers maintain the correct construction sequence, as well as distribute work and time evenly.
Tools and materials
Depending on the choice of the summer resident, the structure can be built from wood, plywood, plastic and metal, and other combinations of materials. But we decided to build on the classics, which means that for the construction we will need wooden beams, wooden boards, plywood, polyethylene, roofing felt.
Do not forget about the materials for the foundation, if one is implied, as well as fasteners and consumables for decoration.
We chose the simplest tools so that we didn’t have to buy anything extra - a hacksaw, a hammer, a drill, a plane, a grinder, brushes, buckets and some other little things for a comfortable construction process.
Installation location
If we are building a decorative version of a mill, this does not mean that its blades should remain motionless. Therefore, we choose a place not only convenient for construction and landscaping of the dacha, but also to ensure the functionality of the structure. In addition, it should be built on a flat area, perhaps on a small hill, away from tall trees and main country buildings.
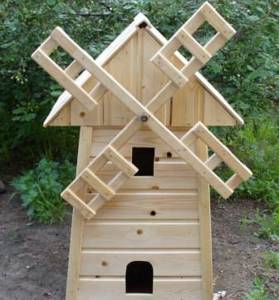
Preparing the site for construction
Having determined the site, it should be cleaned, freed from debris and growth, small bushes and weeds. By and large, we should get several square meters of flat and clean territory. On such a site it will be possible to begin construction at any time.
Base structure
We start construction from the foundation. We decided not to dig holes or pour a foundation, but to install the foundation on several logs or pieces of durable timber.
Having chosen the dimensions of the sides and laid the timber or logs, we install a rectangular frame made of wooden beams. We repeat the frame, only with smaller sides. It will be used to create the base of the roof. That is, we completely repeat the shape, but reduce the dimensions by about 1.5 times, so that upon completion of installation we obtain a trapezoidal structure.
We connect the two frames with vertical posts, which will be at a certain angle, directly dependent on the height of the posts.
The posts are installed on the lower frame, secured and connected to the upper roof frame. Thus, we get a ready-made skeleton for the mill.
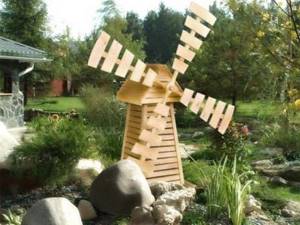
Sheathing of the structure
The cladding of the frame of a windmill at the dacha takes into account the openings for windows and doors, the installation locations of the roof and the mill blades. It is definitely worthwhile to provide reinforcement in the places where the openings are installed, as well as install reinforced beams or wooden beams for installing the blades.
The sheathing itself is done with a wooden board, and then with thick plywood, which will make the inside of the structure more airtight and give the appearance a natural and colorful charm.
We cover the board with nails, installing the materials on the skeleton of the frame. Closer to the top, you can switch to plywood sheathing, but not on the side of the building where the blades will be.
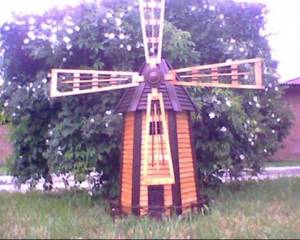
Roof installation
The roof can be flat, at a minimum angle for water to drain, or gable, classic. We prefer to pay more attention to appearance, and therefore we suggest spending a few more hours, but getting a good result.
The simplest frame for the roof, sheathing and logs made of timber and slats, stretching roofing material and laying plywood or a special roof on top.
Upon completion of the roof installation, you will receive a finished box that will require only minor modifications.
Creating the blades
The blades are the most important point, because they are the main part of any mill. But don’t be too clever, because our option is just a decorative craft for the exterior design of a summer cottage. But this does not mean that it will be enough to knock down the boards and attach them to the facade. It is worth considering the size, width of the blades, their weight and the angle of inclination from the axis, due to which they will take on the wind flow and be given rotational movements.
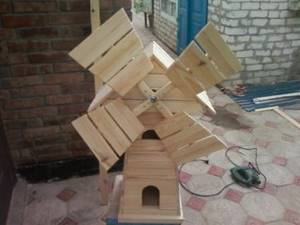
We recommend that you consider options for creating blades from the following materials:
- Made from wooden slats and plywood - light and practical blades:
- Made of wooden beams and thick polyethylene oilcloth;
- Standard wooden ones made of thin slats, which are secured and fixed to the axis of rotation of the blades.
Be sure to consider the size of the blades and their weight, since the blades should not rest on the ground, nor should they overweigh the overall structure, put pressure on the axis and thereby take away the strength of the mill. Ideally, the total weight of the blades should not exceed several kilograms, and more accurately, it should not exceed 10% of the weight of the entire structure.
Now install the axle into the reinforced beams inside the mill, which we talked about earlier, and put on the blades, carefully securing them.
Decorative finishing
All our finishing is to ensure the protection of wood from atmospheric agents, for which drying oil and varnish are most often used. Also, it will be necessary to equip the windows and doors of the mill, make a table for children and small chairs inside. You can also install wooden flooring to provide maximum protection from the cold.
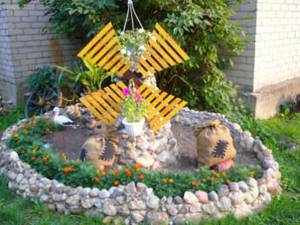
Dimensions of the structure
We leave the right to determine the dimensions of the sides, height and other parameters of the windmill at the dacha to you, since only the summer resident himself has the right to determine what decorative structure will be installed in the garden or on the lawn. Today, there are known cases of mills being built as tall as a man and with several floors, which makes it possible to equip internal premises. But you can always minimize costs and build a compact structure, say, half human height. Of course, then there will be no room inside for children to play and have fun, but the design will be very neat and harmonious.

We gave an example of a medium mill, the approximate parameters of which are as follows:
- The width of the sides of the building (the length of each part of the lower frame) is about 1.5 m;
- The height of the frame racks (the distance between the ground and the roof joists) is no more than 2 m;
- The dimensions of the upper frame (length of the sides) are no more than 1-1.2 m.
The size and type of roof is selected according to the finished building and your own requirements. In addition, during the preparation of a work plan, many parameters can change - dimensions, materials, types of fastening of parts, material for creating blades and roofing, etc.
Choosing a location for installation
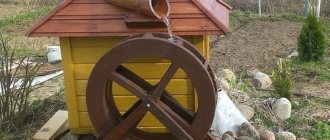
Where to install the mill is up to the owners to decide. This is a matter of taste and personal preference. In addition, much depends on the size of the structure. A small decorative windmill with rotating wings will decorate an alpine hill and will look good surrounded by flowers in an ordinary flower bed. It will also be an excellent addition to a wooden well, and when installed on a rotating base it will replace a weather vane on the roof.
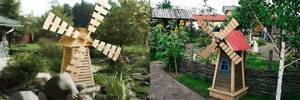
Larger buildings are installed in free areas of the site, on the lawn or in the recreation area. It is important to maintain the distance from the mill to the nearest buildings and trees; we must not forget that its dimensions are determined not by the area of the base, but by the span of the blades.
Let's start making the upper part of the frame
How to make a mill? To make it easier to navigate, we will divide the manufacture of a wooden mill into 4 parts - upper, middle, base, millstones and blades. Difficulties may arise when making a wooden wheel with your own hands so that it is proportional. The simplest part of the craft is the top part, so let's start with that. It should be mentioned that this mill is not the simplest, but not the most complex either.
To make the upper part of the windmill, we need 6 wide boards of the same thickness (we choose the length depending on the height of our windmill). Then we give them a trapezoid shape, cutting off the upper corners. Important: the side edges of the boards must also be leveled, processed and made at an angle of about 40 degrees. It is necessary so that, when placing the boards together in a circle, there are no cracks or gaps between them. The procedure can be carried out at the dacha with your own hands using a hacksaw, pencil and ruler.

Next, we fasten the boards with tape from the front side, turn them over to the back side and fill the seams with glue (the most convenient way is with construction “liquid nails” using a special gun). We let the workpiece dry for a day, then we make an upper hexagonal plug from this material - we outline it with a pencil and cut it to size and glue it to the upper (narrower) end.
Preparing for work. Tools and materials
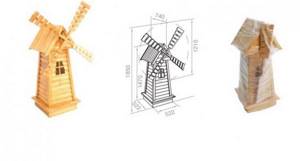
As a rule, a do-it-yourself mill made of wood is not particularly complex, however, before starting work, it would be useful to make a drawing, a sketch of the future product indicating the main dimensions. This will allow you to evaluate the design of the future structure in advance and help avoid gross mistakes during assembly.
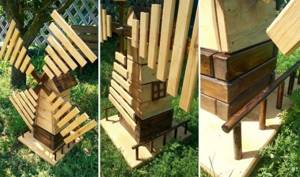
To work you will need a tool. It's worth worrying about in advance. A complete list of everything needed depends on the specific design, but the minimum set will look something like this:
- electric saw or hand saw;
- plane (preferably electric);
- screwdriver;
- Sander;
- sandpaper;
- hammer and nails;
- several brushes of different widths;
- tape measure and pencil.
To assemble the product, you will need wood screws of different sizes. An antiseptic will help protect the wood; in addition, you cannot do without varnish or paint for final finishing.
A lath is suitable as a material for the frame of a future building; for the walls you need thick plywood or wood-based sheet material. A “premium class” designer mill can be created from scraps of clapboard left over from home renovations.
The initial stages of creating a windmill
It is advisable to install the mill on a hill where its blades will spin due to the wind pressure. Otherwise, the decorative element into which effort has been invested will not fully correspond to the original idea. It is also advisable to create a level pedestal on which the structure will be located. You can simply compact the top of the embankment, making special grooves for water drainage, or even better, install a small pedestal made of wood, a box, or any available materials. At the end of the installation, when the product is ready, the unsightly parts of the platform are masked with flowers, decorative stones, and grass.
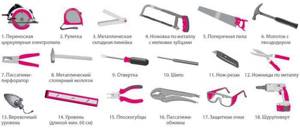
Tools for creating a windmill.
To get started, you need to stock up on the following materials:
- boards or wooden beams;
- carpentry tools;
- screws, nails.
The work begins not even with wood, but with the creation of at least an approximate drawing. The drawing will help you determine the size, shape of the mill, and its external design.
When the drawing is ready, you can start tinkering, starting from the bottom of the product - the base. It should be the most stable support for the decorative element, with its weight and stability ensuring that even in inclement windy weather the mill will not tip over from the pressure. To begin with, a square is created, the approximate dimensions of which are 60x60 cm. The thickness of the board used should be about 2 cm with a width of 20 cm. Something like a small log house is built, the upper part of which gradually converges towards the middle. Using a level and tape measure will help to avoid distortions and achieve the same dimensions at the correct angle.
If the structure will be located on compacted soil or grass, you need to think about ventilation of the lower part. If the mill is in contact with the ground with its bottom along the entire plane, the wood will inevitably begin to rot, due to which the mill will very soon collapse. The evaporation of moisture and access to air is helped by the installation of legs made from small identical pieces of wood. Another option is circles 2-5 cm high, cut from unusable PVC pipe. Two narrow wooden slats fixed in parallel with self-tapping screws are also a good opportunity to create ventilation.
Making a mill
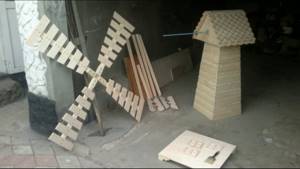
There is no single instruction on how to properly assemble a mill made of wood; it all depends on the size of the product, its purpose and the chosen project. In any case, it’s worth starting with preparatory work. The surface of the beams and boards must be carefully processed with a plane, leveled, and burrs removed. Lumber, especially that which will be used to create a children's house, is additionally sanded using a grinding machine, and, if necessary, the surface is finished with sandpaper.
Foundation: necessary or not
The support of a stationary structure is the foundation. It provides stability and distributes the mass of the building over a large area. It is easy to guess that for a simple decorative mill it is not needed. Moreover, it is better to make a small wooden mill portable. If you need to fix it in place, it is enough to provide four pointed legs and press them into the ground.
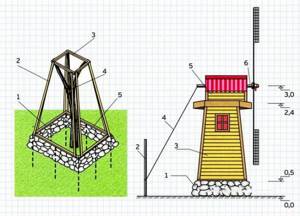
Advice! To ensure greater durability of the portable structure, it is better to make the legs from metal or plastic.
In the case of creating a capital structure that will be used as a change house, a room for tools, especially as a children's playhouse, you cannot do without a foundation.
There is no need to dig a deep pit; it is enough to make a shallow strip foundation around the perimeter of the walls. The same foundation is needed when constructing a mill, the walls of which will be completely or partially made of stone.
Support platform
The manufacture of the mill itself begins with a support platform, this is the lower part, it ensures the stability of the entire structure. There are several options for the design of the support platform; it all depends on the dimensions of the future structure.

The support of a small wooden mill, which serves a purely decorative function, is a square or hexagon made of multi-layer plywood. If the plans include a children's playhouse or utility room, then plywood or other sheet material is not enough. You need a timber frame that will rest on piles or a foundation.
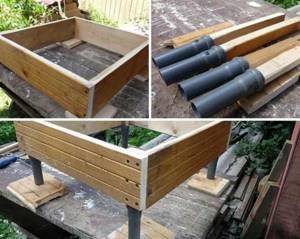
Case manufacturing
In most cases, the body will consist of a frame assembled from slats covered with sheet material.
The body shape is arbitrary. It can be a square or a polygon in cross section, it can be a cylindrical tower, it all depends on the owner’s idea.
When planning to create a unique polygonal design, you should be aware that the more corner joints, the more difficult it will be to achieve assembly accuracy.

The first step is to assemble the frame. The slats are cut into pieces of the required length and twisted together using self-tapping screws. When assembling a large structure, it is worth using tenon joints at the joints to add strength to them; steel angles will come in handy.
Roof
As a rule, the roof of the mill is made of a gable roof. If desired, there can be four or more slopes; a conical roof also looks good. The material for it can be the remainder of the roofing iron. If there is none, a sheet of plastic or plywood impregnated with drying oil will do.
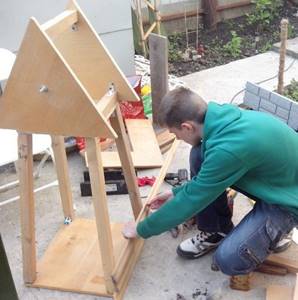
Blades
The last thing that needs to be done is to manufacture and install something without which a windmill cannot exist - the blades. Their configuration can vary; the easiest way is to make an impeller with four blades intersecting at right angles. Its main, supporting part is the slats; a wing is created at their edges. In the simplest version, these are several thin planks of different sizes.
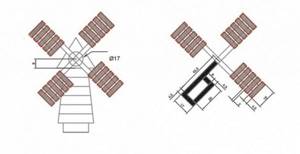
The configuration of the blades is selected in such a way that the impeller rotates under the influence of wind. This is not difficult, you just need to fasten each board at a slight angle.
Advice! When choosing an angle, you should not be too zealous - the closer it is to 45 degrees, the faster the rotation will be.
The blades are attached to a shaft - a metal rod (for a small decorative mill) or to a pipe (for massive structures). A hole of the required diameter is made in the housing, the shaft is inserted inside. For a large mill, it would be useful to strengthen the shaft entry point, or even install it on bearings.
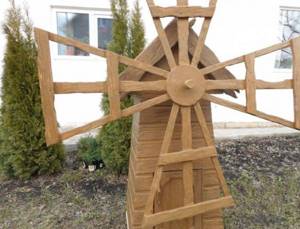
Building a windmill
Windmills have always been used to grind flour and other grains. Even animal feed was ground using windmills. Oddly enough, windmills served as a good aid in wood processing.

But in our technological age, when most processes are automated, windmills have become unnecessary. But, nevertheless, on any site, a windmill will look quite picturesque, attracting with its simplicity of design and primitive flavor. After all, a windmill may not be so large in size - you can always build a smaller decorative copy on the site.
Why build a windmill?
Do not assume that a windmill can only be built as a landscape decoration. It is quite possible to build a small replica to decorate the playground. Undoubtedly, a windmill can also be used as a wind generator, although its effectiveness is highly questionable. In any case, the presence of a windmill should not be considered as a reduction in any costs - for electricity, for processing materials, etc. This can take many times more time, which does not make the mill a cost-effective construction. Such a structure is just an element of the decor of your site and the landscape as a whole. You can get the maximum benefit only by using the building as a house for children.
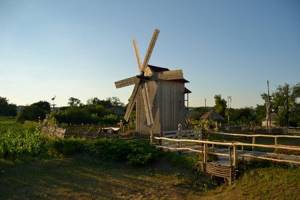
We build the mill ourselves
In principle, the construction of a windmill, like any other building, can be divided into several stages. This makes it possible to consistently and without errors not only build the building correctly, but also make it truly multifunctional.
Necessary materials and tools.
A windmill can be built not only from wood, but also from plastic, plywood and metal - from any material, even a combination of several. But for a classic building, it is best to take timber, roofing felt, wooden board, polyethylene and plywood.
No matter how decorative our structure may be, the foundation for it will still have to be laid, at least insignificantly. And as tools, those that are at hand are quite suitable - a drill, a hammer, a plane, buckets, brushes, a grinder, a hacksaw.
Choosing a location for a mill.
Even a decorative mill's blades can rotate, which means that the landscape on which the mill will be built must be cleared of various additional structures and obstacles to ensure normal operation of the blades. In addition, the surface must be flat so that the structure does not warp during the construction stage.
After you decide on the construction site, you need to remove all debris from the area, as well as free it from weeds and other vegetation. If you have a free space of about twenty square meters, you can start construction at any time convenient for you.
Mill base.
The base is the foundation, which can be a timber or several logs folded in the required order - it is not at all necessary to dig a hole and fill in the solution. After determining the dimensions of the base, the frame for the mill is installed, then duplicated in a smaller size from the inside of the building. Thus, by reducing the initial structure by one and a half times, you get a trapezoidal shape of the structure.
The internal and external frames are connected by vertical posts running at a certain angle. Installation of racks begins with the lower outer frame. As a result, you will get the “skeleton” of the mill.
We cover the mill.
The windmill should be sheathed taking into account the door and window openings, as well as the location of the blades. Do not forget that additional fastenings are required to install doors, and additional beams are required to strengthen the beam with blades.
You can upholster it with any material that will make the structure hermetically sealed on all sides. Of course, wood paneling will add color.
The combined sheathing consists of boards nailed to the front of the mill and plywood sheathed on the back wall.
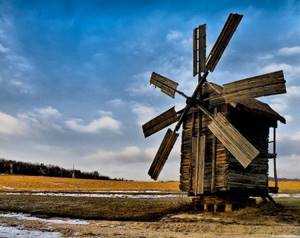
How to install a roof.
There is no strictly defined roof shape for a mill. It can be either a flat and straight roof, or installed at a certain angle. For waterproofing, you must first lay roofing felt, and then assemble the roof from wood or plywood.
Mill blades.
The blades are the main element of your design. But, since the windmill serves only as a decoration for the site, they can be made of lighter material, which is not capable of creating sufficient power to rotate the wheel inside the mill. It will be enough to have two axles installed crosswise and covered with a board. The dimensions of the blades must be proportional to the installed mill.
Windmill – video
Final finishing
Like any craft made from wood, a mill should have an attractive appearance and a coating that ensures its durability. For this purpose, all wooden parts without exception are impregnated with an antiseptic, which will protect the wood from rot and pests, thereby guaranteeing a long service life.
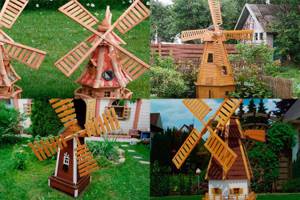
The finishing touch will be painting. Any wood paint for exterior work is suitable, the color and shade is at the discretion of the master. A mill made of beautiful wood can simply be coated with several layers of varnish.
