Who among the owners of dachas or country cottages does not dream of having their own swimming pool on the site? And don’t think that this is an extremely expensive structure that requires a lot of effort during construction and operation. With minimal skills in working with building materials and some expenses, you can build an inexpensive pool.
In this article we will tell you how to make a pool at your dacha with your own hands from various materials (concrete, frame, film), and also demonstrate video and photos.
Pools may vary. For some, an inflatable container installed in a suitable place and filled with water from a hose will be enough. If you want to build a solid stationary reservoir that can last for many years, you will have to work.
First of all, you need to choose a suitable location. It should be kept away from beds and trees. The less debris that falls into the water, the less maintenance effort will be required. In addition, you need to think about the water supply and drainage. It is better to choose a simple shape of the pool, without sharp corners: in the form of an oval, circle, square or rectangle.
The simplest and cheapest way to install a pool is to cover the hole in the ground with a special film. However, this structure cannot be called reliable and durable. More often, owners prefer to build pools from concrete or polymer materials.
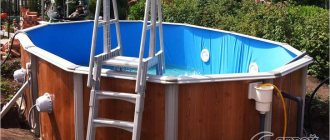
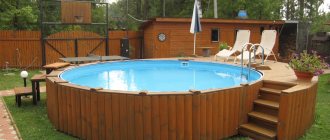
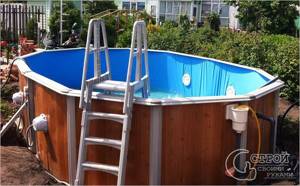
Frame
A frame pool is considered a fairly simple structure, quite suitable for independent construction. Its peculiarity is its design, which consists of a frame “skeleton” made of metal pipes. The bowl is lined with three layers of PVC film. Inside it has a special mesh made of nylon, which gives the material additional tensile strength. The metal frame holds the water pressure.
It is placed with some depression in the ground or simply on the surface. The area for the pool must be prepared: remove all vegetation, and level the bottom of the shallow pit and fill it with sand or gravel. In some cases, even a concrete pad is poured.
Then the entire surface is lined with heat and waterproofing. Penofol or folitep are best suited here. These are modern thermal insulation materials made of foamed polyethylene covered with aluminum foil. The mats are laid end to end and the seams are taped with construction tape.
After this, the pool itself is assembled according to the instructions included with the kit. The only necessary tool for the job is a screwdriver.
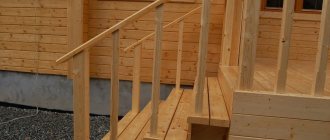
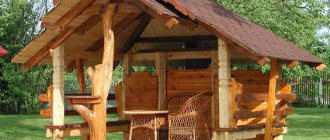
Construction of a lumber frame
A wooden frame should be used when it is necessary to equip a pool covered with polycarbonate - wooden beams will be used as the basis for a future canopy. The work procedure is not much different from the construction of a greenhouse:
- Development of a drawing of a future shelter for a pond.
- Arrangement of a columnar or strip foundation. The specific type is selected depending on the characteristics of the soil and the depth of its freezing in winter.
- Construction of a wooden frame from a bar 50x50 or 50x40 mm.
- It is mandatory to prime all wooden surfaces with aluminum primer. To provide increased protection against moisture and fungus, you can additionally paint the frame.
- Mount cellular polycarbonate sheets onto the formed frame, not forgetting to seal the joints and ends with extensions.
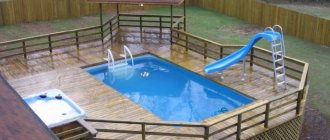
Before making an indoor pool from polycarbonate, be sure to decide on the type of structure: it can be stationary or sliding (telescopic canopy). In the first case, a pavilion is mounted above the reservoir, which, if desired, can even be turned into a winter garden, and in the second case, a mobile structure that can be removed if necessary. It is much simpler to build a stationary canopy: its construction is practically no different from the construction of a greenhouse.
In this way, you can equip both a frame and an inflatable pool under polycarbonate with your own hands. Moreover, the design options and design solutions are unlimited.
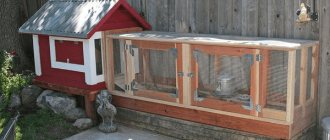
To make a pool frame from polycarbonate, the best option would be to use a metal profile pipe.
The work order is as follows:
- A metal frame is installed along the edges of the dug pit.
- Then the frame is covered with boards.
- Communications are being carried out.
- Landscape elements are being arranged: hills, steps.
At this point, the preparatory work can be considered completed. All that remains is to assemble a pool covered with polycarbonate with your own hands, organize drainage and fill the reservoir with water.
Concrete
When constructing a concrete pool, work also begins with digging a pit. In this case, the entire bowl is sunk into the ground. When calculating the dimensions of the pit, do not forget to add approximately 0.4 m to the wall thickness. The shape of the pit should follow the contours of the pool itself. The optimal depth can be considered 1.4 m. To make the recess as reliable as possible, its walls need to be given a slight slope to the outer sides, about 5°.
Concrete bowl
The finished pit of the desired shape must be carefully leveled, the soil compacted and a sand cushion about 30 cm thick laid on the bottom. Then the pool is waterproofed, everything is covered with waterproofing material (roofing felt with bitumen mastic) in several layers and the formwork is installed. Liquid concrete is poured into the gap between the wooden panels and the earthen wall. Additionally, the walls are reinforced with double metal mesh. It simultaneously counteracts the water pressure in the pool and the ground pressure.
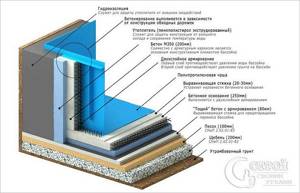
Section of a concrete pool bowl diagram
Note!
Concrete grade – no less than M350.
The bottom of the future pool is also reinforced with mesh and filled with a layer of concrete of at least 20 cm. When the solution hardens, the formwork is removed and the entire surface is rubbed with “cement laitance” - a liquid solution of cement and water without adding sand. This process is also called ironing. It allows you to remove microcracks on the frozen surface and prevent their occurrence in the future.
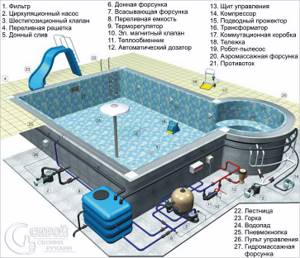
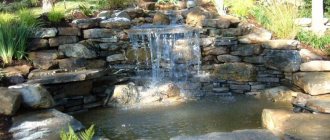
Pool equipment
At the final stage, the walls and floor of the pool bowl are finished with a decorative coating. Usually these are ceramic tiles. However, it is first necessary to install a ladder, nozzles, waterfalls and underwater lights, equipment that makes it easier to maintain the pool.
We invite you to see a photo report of the construction of a concrete pool:
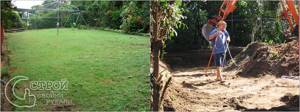
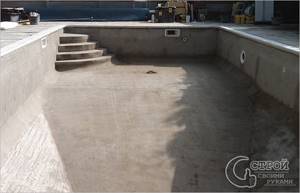
Preparing the site
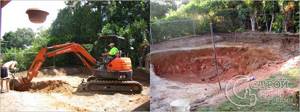
Pit
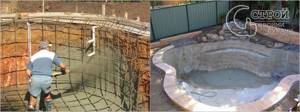
Concreting
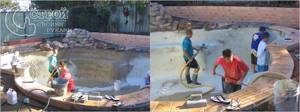
Finishing and installation of equipment
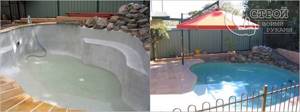
Result
Film pool
Finishing with waterproofing film
Due to its versatility of use, PVC film is widely used for arranging swimming pools. It is used:
- to create a pool in the ground;
- for arranging frame pools;
- for sealing the concrete base of the pool bowl;
- as a repair kit for an old pool.
Note!
PVC film has a thickness of 0.5–2 mm. The thinnest one is suitable only for small pools with minimal load. It is best to use a film no thinner than 1.5 mm with a reinforcing layer of fabric.
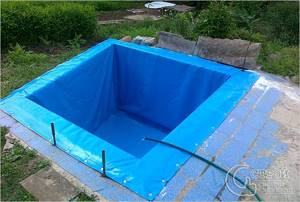
Pool in the ground
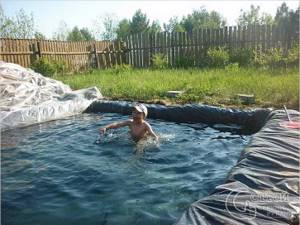
Pool made of film in the ground
If you want to make a pool quickly and relatively inexpensively, then in this case you can dig a pit with gently sloping walls, which will be the base of the pool. Carefully remove plant roots and compact the soil. Make sure that there are no sharp stones left anywhere, as they can damage the canvas.
The entire bottom of the pool is covered with sifted sand, in a layer of at least 3 cm, and leveled. You can lay a layer of mineral wool as a thermal insulation material, but it is better to spread roofing material, as it is not afraid of moisture. Spread a non-woven cloth over this cake and only then a film. After this, you can weld the seams.
Note!
Before you start welding the seams, you need to practice on scraps of material so as not to spoil the fabric intended for sealing the pool.
In order to secure the edges of the sheet, you can use a special mounting angle to which the film is welded. A simpler option is to dig in the edges of the film. In this case, a decorative stone edging is often made around the pool.
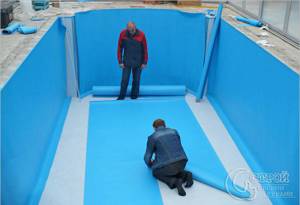
Concrete pool
Concrete film pool
We will not dwell in detail on creating the design of the pool itself - it should be a reinforced container. The main advantage of using PVC film is that it does not require waterproofing. If the surface is not perfectly smooth, then it would be correct to use a substrate, which can be geotextiles or the same roofing felt. The actions with the film are similar when arranging a pool in the ground.
All that remains is to choose a method for attaching the film to the edges of the pool (it is better if it is a special mounting corner) and you can use the product.
Repairing an old swimming pool
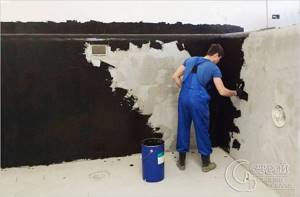
Application of liquid rubber
It is no secret that a permanent pool can lose its tightness or even crack over time. If the crack is constantly expanding, then no sealing, even applying liquid rubber, will help. In this case, you can, just like for a concrete pool, use PVC film, having previously sealed the cracks and leveled the base.
How to make a polycarbonate pool with your own hands?
To make such a reservoir, you must adhere to the following procedure:
- Mark a place on the site for the pit. It should not be located at the lowest point of the site: otherwise wastewater will flow directly into the pool.
- Carry out excavation work. The depth of the pit is selected depending on the project and the characteristics of the soil: if the groundwater is located close to the surface, then you will have to build a reservoir protruding above the ground, using this solution as a blind area.
- The dimensions of the excavated pit should be 20–25 cm larger than the dimensions of the subsequently installed bowl.
- Then you need to strengthen the bottom with small crushed stone and sand and level it.
- At the next stage, the frame is arranged and communications are laid out.
- Then the bowl is arranged.
To operate a reservoir regardless of weather conditions (and with proper preparation, even at any time of the year), it is necessary to build a high-quality canopy. To make an indoor pool from polycarbonate, you will need a structural (cellular) polycarbonate sheet, accessories to it (connecting and end profiles), perforated tape and fasteners. Wooden blocks can be used as a frame for the pavilion.
Most often, site owners prefer to build an indoor polycarbonate pool with their own hands with a greenhouse-type canopy: this design is easy to install, yet reliable and has maximum illumination.
Polypropylene
A polypropylene pool also requires a pit and pouring a concrete bowl. The polymer allows you to solve the main problem when constructing swimming pools - providing reliable waterproofing. Polypropylene is an extremely durable material and can take any shape. Pools from it are made in two ways:
- buy a ready-made bowl of the desired size and shape;
- sheet polypropylene is purchased and a bowl is made from it.
Note!
The cost of both methods is approximately the same.
Welding of sheets is carried out using a thermal welding machine - an extruder.

Polypropylene bowl - concreting
After installing the polypropylene bowl and installing all communications, concrete is poured on top again and decorative material is laid.
It is polypropylene pools that are most suitable for installation in a summer cottage. They are not afraid of temperature changes and weather vagaries.