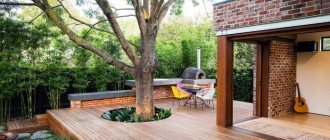
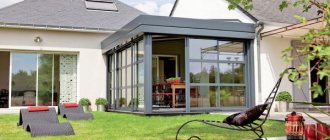
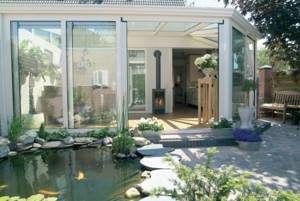
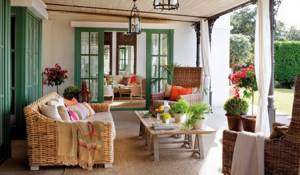
Enclosed veranda for a brick house It is difficult to imagine a residential or country house without a veranda; it is not only a decoration of the building, but also an important functional room. In winter, a covered terrace protects the main entrance from rain, snow, wind, and in summer it gives coolness on a hot day.
In this article we will talk about how to attach a veranda to a brick house and cover the main stages of construction.
What types of verandas are there?
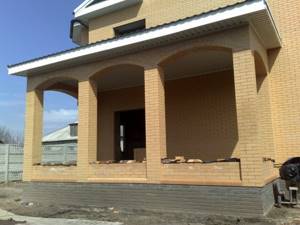
Open brick veranda
The structure is a covered extension to the house and comes in three types:
- The open terrace (see Terraces and gazebos: organizing recreation on a country plot) has no windows, columns are installed around the perimeter, and between them there are enclosing railings or sides, which can be of different heights (but usually not higher than 70 cm) and made of different materials ;
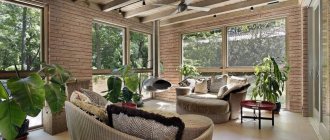
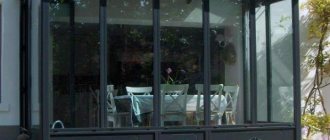
- The enclosed terrace is surrounded by walls with many large windows letting in a lot of light;
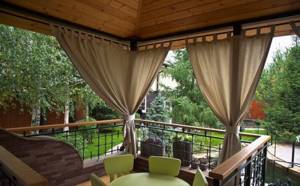
- Mixed type - part of the extension is protected by windows, the rest of the space is equipped only with a roof.
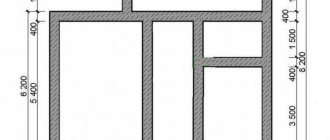
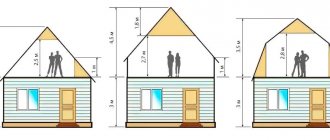
Important! Verandas are attached to the front or end side of the house, made up to 6 m long and no more than 3 m wide (the veranda can be of almost any size)
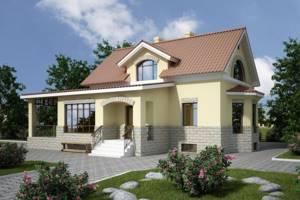
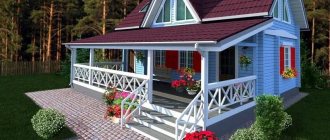
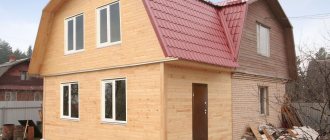
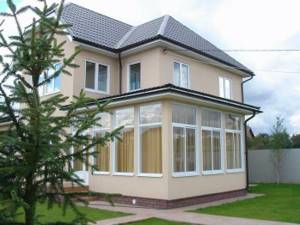
Mixed brick veranda for a house with an attic
Usually, to preserve the style, the extension itself is built from the same material as the main building - the veranda for a brick house is also made of brick, although the options may be different. These are mainly unheated rooms and are actively used only in the summer season.
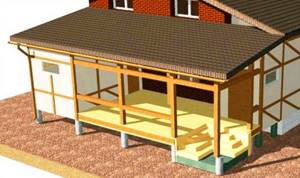
Shed roof for house extension
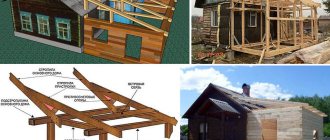
The most economical and simple roof structure for an extension is a lean-to roof. As a rule, it is connected to the wall of the main structure by a node with a longitudinal connection. At the same time, it is not recommended to make a rigid connection between the roof structure of the extension and the wall of the house. The reason is the use of foundations that are not connected to each other. In an extension it is usually columnar. Uneven shrinkage of both structures is guaranteed to cause the destruction of the rigid connection between them.
Joining a pitched roof
Attaching the rafter system of the extension to the house can be done in two ways, depending on the positioning.
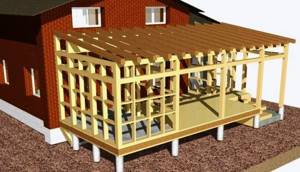
The rafter system of the extension is an autonomous structure
Through a sliding connection with a longitudinal groove or a device, the shrinkage compensator ensures reliable fastening to the wall and at the same time prevents the formation of cracks due to uneven shrinkage.
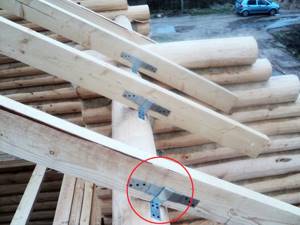
Shrinkage compensator device
The greatest problems arise in the nodal structures connecting the roofing pie of the extension to the wall. At such joints, gutters or aprons made of galvanized sheet are provided to drain water.
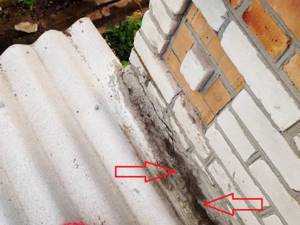
Leak points at poorly insulated joints
If possible, the roof of the extension should be placed under the roof of the main house. The slope angle must be at least 10º. The material of both roofs should be the same or at least comparable in color and texture.
It should be noted that the attached premises are usually located below the main building. Consequently, water will flow onto their roof and snow will fall from the main roof. Therefore, issues of strength and waterproofing must be given priority. The connection to the main building is made through an embedded beam.
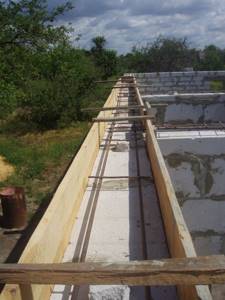
Foundation structure

Strip foundation for a veranda
Everyone knows that construction begins with the installation of the foundation for the building.
There are also some nuances here:
- When building a veranda and a house at the same time, the foundation is made integral for both structures. Moreover, this will be correct from the point of view of dressing. In this case, you will get a monolithic structure.
- The addition of a veranda to a brick house that was built a long time ago can be carried out on a separate foundation.
- Since the extension is a lightweight structure, the foundation for it will be a shallow strip foundation; it is sufficient to lay it to a depth of 40–50 cm. The width is equal to the length of the brick with an addition of 10 cm.
- A sand cushion 10–15 cm thick is placed at the bottom of the dug trench and spilled with water to compact it.
- The formwork rises above the ground by 15–20 cm.
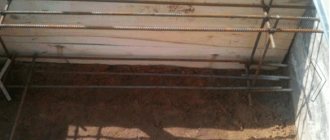
- Reinforcement is made with separate rods with a diameter of 8–10 mm or frames.
- It is recommended to lay concrete at one time, if this does not work out, then layer by layer.
- After the mixture has completely set, waterproofing is done along the perimeter of the foundation surface with roofing felt to protect the brick from moisture penetration.
For comfort and relaxation
The veranda can be built of brick or foam blocks, covered with clapboard or the same material as the house. Instead of aesthetic glass, plastic or polycarbonate can be used for glazing.
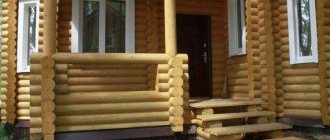
The roof is constructed as a gable or single-pitch roof, but always from the same roofing material as for the main residential building. But if the house is built of timber or logs, then a wooden veranda is attached to the house.
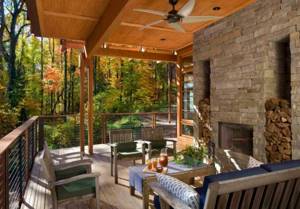
Using environmentally friendly and easy-to-process material, you can make an extension to your house, which will become a comfortable area for relaxation and summer living.
This platform can be a simple quadrangular shape or in the form of a bay window, with modest railings or carved balusters, on a strip or tubular foundation.
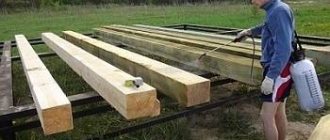
For a closed type, a permanent floor covering is made in the room. To do this, first they construct logs from timber, treat them with an antiseptic, and only then lay the boards.
The frame of the veranda is built from beams 10 cm thick and wide. Sometimes screw piles are used as supports. Windows and doors are installed after the main frame is built.
Construction of veranda walls
For brickwork you will need a cement-sand mixture. You can prepare masonry mortar yourself or use a mortar mixer.
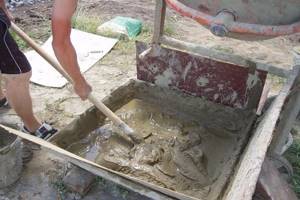
Preparation of mortar for brickwork
How to make a solution
The amount of binder and inert materials is taken in the following proportions:
- Cement – 1 part;
- Sand – 4 parts;
- Water is added gradually, the composition is mixed until a homogeneous mass is formed.
Important! To make the solution plastic, you can add clay or lime to the mixture. This material does not set longer and more completely fills the seams between the bricks.
- Instead of cement-sand mortar, you can use special ready-made masonry mixtures, to which you just need to add a certain amount of water. They are easy to mix; instructions for use are included in each package.
- But since the price of such materials is quite high, it is recommended to use them for small volumes of work.
Brickwork installation
Extension of a veranda to a brick house
- Markings are made along the foundation and they begin to lay brick pillars for the veranda; the distance between them should not be more than 2.5–3 m. The pillars are laid out with a section of one brick, and after every 2–3 rows the verticality is verified.
- Mortgages are immediately built into the masonry to secure window frames and door blocks.
- Window and door openings are covered with lintels, and a monolithic reinforced belt is installed around the perimeter of the finished masonry to firmly connect the entire structure.
Reinforcement of a monolithic belt
Roofing
After the concrete has hardened, the reinforced belts begin to install the roofing elements:
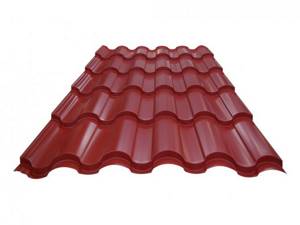
- Brick verandas for country houses are covered with aerated concrete or hollow-core slabs, and timber beams are also used with the ceiling lined with boards or plywood.
- The slope is made of bars or boards installed at an angle of 30–40 degrees and adjacent to the house at the upper end.
- A continuous rough flooring is made over the bars, which is covered with roofing material (slate, ondulin, soft tiles, etc.).

Brick veranda roof frame, installation of rafters
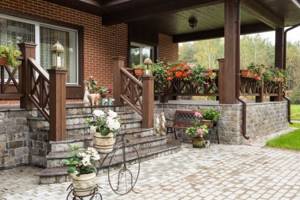
Porch installation
After the walls are erected, a brick veranda porch is made:
- It is recommended to fill the base under it with concrete, that is, arrange a screed 5–10 cm thick the size of the porch or a little more and lay brick on it.
Important! You can simply level it well, compact the soil, build a sand cushion and lay waterproofing. If this is not done, then moisture from the ground, penetrating capillarily into the brick, will quickly destroy it.
- The terrace porch of a brick house can be made monolithic. To do this, you need to set the formwork to the desired configuration and fill it with concrete mixture. If the structure is small, then reinforcement is not required, but if the volume is large, wire mesh with a diameter of 3–4 mm is laid in the steps.
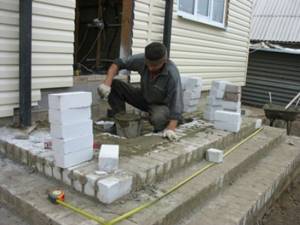
Brick porch construction
How to build a brick veranda yourself?
The attached terrace includes the following construction stages:
- Preparing the site for construction.
- Foundation for the veranda.
- Laying walls.
- Installation of windows and doors.
- Finishing work and cleaning.
Preparing the site
To build a veranda extension, you need to dismantle the old porch of the house, remove the canopy, clean the area, determine a work space for storing building materials and debris, and prepare the necessary tools and materials. To work you will need:
- building materials for the roof (metal tiles or bitumen tiles, ondulin);
- brick;
- concrete;
- gravel;
- bitumen;
- crushed stone;
- sand;
- slats;
- lathing boards;
- roof beams.
Foundation
The base is required and is done on the same level as the house. This will eliminate the need for additional tightening tools. Since the brick terrace is small, it will be more convenient to use a columnar foundation; it is carried out without being tied to the base of the house. To fill the foundation with pillars, we dig holes to a depth of 1 m, at the same level as the house. We fill the bottom with layers of sand and crushed stone. Then pour the concrete base and insert supporting brick pillars. The part of them that is on top will reach the height of the base of the house itself. For a long veranda you will need a strip foundation. Then you need to dig a trench, place the formwork a little higher than required and pour concrete, periodically wetting it with water so that cracks do not appear on the surface in the future.
Wall masonry
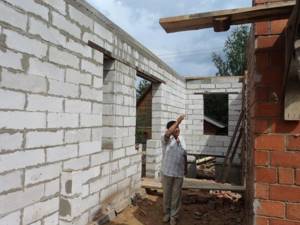
Before building a brick terrace, be sure to check the levelness of the foundation and waterproof the floor. Then stretch the cords horizontally along the base to ensure evenness of the masonry. They will serve as a level for the concrete. Lay the first row of bricks along these cords, then a layer of insulation and again brick. Do not forget to mark the places for windows and doors in which to place concrete lintels. A reinforced concrete belt is placed on the last row. To do this, you need to lay a metal mesh, fill it with concrete and wait until it dries. Now there are no cracks in the walls. Temporary rafters are attached to the top of it, which will help when installing the roof.
Attachment to the house
So that cracks do not form at the junction with the house. The main thing is to make the attached veranda from a material that matches the house itself. For the structural strength of both buildings, it is necessary to perform brick-to-brick masonry, using reinforcing mesh. When finished, foam the joints with polyurethane foam, and decorate the corner with decorative masonry (if necessary).
Roof installation
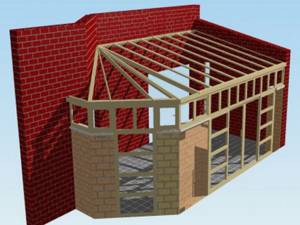
The material and color of the roof are often chosen to be the same as the house itself to which the extension is being made. For ease of installation of drainage, a pitched roof would be successful. Installation is carried out at a slight angle so that the rain flows down on its own. A gable roof is installed with the narrow part facing the house itself. A polygonal coating would also be an interesting option. In all cases, before installation, a sheathing should be constructed from boards. Based on the future roof covering material, it is arranged closely or at intervals.
To speed up roof installation, you can use plywood.
Attaching the veranda to the main building
It is recommended to connect an old brick country house with a veranda built later through an expansion joint of 30-40 mm, otherwise seasonal shrinkage can damage the main building and harm the extension itself.
- After some time, when the ground movement stops, it will be possible to make a rigid connection between the veranda and the base.
- If brick houses with an attic and a terrace are built simultaneously on a single foundation, then rigid fastening of both buildings is done during the construction process, in this case the shrinkage of the house and veranda will occur evenly and will not harm the structure.
If you set yourself a goal, then making an extension to a brick house in your country house with your own hands is quite possible. We hope that the photos and videos in this article will provide you with the information you need and help turn your dream into reality.