Sculptural wood carving will make it possible to decorate an apartment, private house or country house with interesting works that will enliven the interior. This hobby can also bring some income to the master. After all, the art of wooden sculpture has many admirers all over the world.
Therefore, if a future master has decided to master this profession, he should get as much information as possible about artistic wood carving.
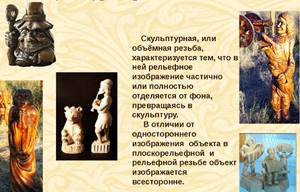
Features of sculptural carving
People learned to carve figures from wood many thousands of years ago. Today this art is as popular as it was at the dawn of human history. Sculptural carving has many fans around the world. What are its advantages over making sculptures from other materials, such as stone? This type of art:
- does not require a large room for work;
- allows you to easily find the material you need;
- makes it possible to buy it inexpensively;
- does not take much time from the master.
In addition, tools for work can be found without problems, and, if necessary, made with your own hands.
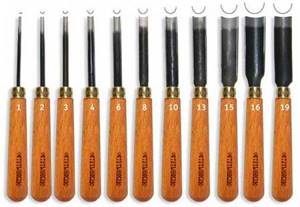
Sculpture Carving Tool Set
In addition, wood as a material is more versatile than stone, plastic or metal. From it a master can create not only a work of art, but also beautiful household items. A carved chair, a decorative shelf, or a watch case intricately carved from a beautiful piece of wood will become a decoration for your home or cottage. Or a wonderful gift, the value of which is that it is made by hand by a master.
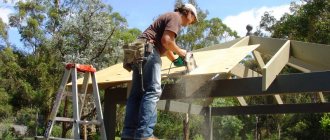
A craftsman who has mastered carving skills can start decorating a home. Window trim, shutters, roof ridges, or intricate decorations on porches and verandas - everything can be done by a carver.
Another advantage of wood as a material for carving is that it is very plastic and easy to process.
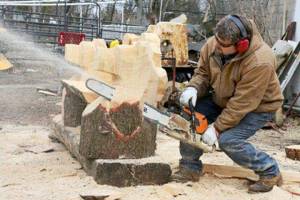
The process of making a wood sculpture
You can carve abstract sculptures and classical images from it, and even create compositions in which treated and untreated wood are mixed.
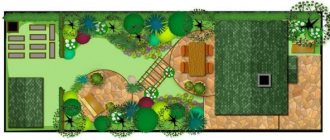
How to most successfully fit a wooden sculpture into the overall appearance of the site?
Not always even the most modern composition can be successfully combined with all elements of the street interior. It is worth remembering the basic principles before deciding on a theme and starting to make a sculpture from wood:
- use a preliminary “preview” by installing a mock-up made of cardboard, as a result you can determine the most successful location;
— there is no need to strive to make the sculpture the center of the site, it is more important to grasp the compatibility with the surrounding landscape and create a kind of “little world” around the statue;
- try to combine several elements in a single composition - trimmed trees, flower beds, flower arches, figures made of stone, wood, etc.
What do you need for work?
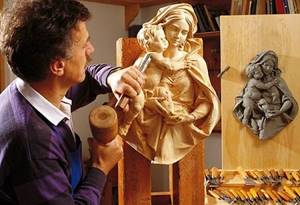
Of all the artistic arts, creating sculptures is the most difficult.
And not only because it is labor-intensive and requires time and physical effort. A sculptor must be able to see the future work of art in a piece of wood. How he does it? One of the geniuses of the Renaissance, Michelangelo Buanarotti (1475-1564), said that he simply takes the material and cuts off everything unnecessary from it.
To do this, imagination alone will not be enough. You need tools for wood carving, with the help of which, in fact, sculptural carving is made. What is included in the arsenal of a master carver? This:
- hatchet for trimming workpieces;
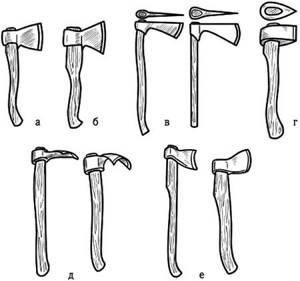
Various types of hatchets for sculpture carving - adze;
- cutter knives for rough processing;
- chisels (with different feather profiles);
- gravel;
- files.
Various shapes of the cutting part are needed for processing recesses of different depths and shapes, as well as when processing surfaces.
A novice craftsman can purchase ready-made sets of tools for work. As he masters the art of wood carving, he will adapt them to suit himself, leaving the excess and adding the missing. Some specialists make the tool themselves, reworking existing factory sources or ordering special cutters of a special shape from toolmakers.
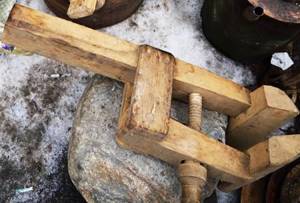
To fix the workpieces, you need a wood carpenter's vice and clamps. In addition, you will need a set of sandpaper and tools for straightening and sharpening working tools.
If the process of creating a wooden sculpture requires special surface treatment, then soft napkins and cloth will be needed to rub in wax and compounds to give the material a certain color.
DIY garden sculpture made of wood. Master Class
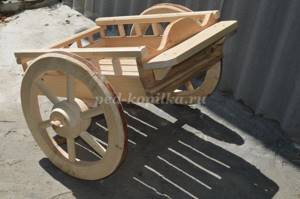
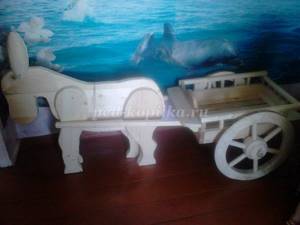
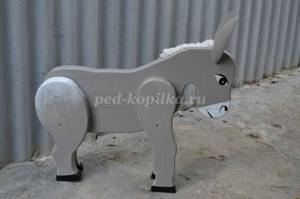
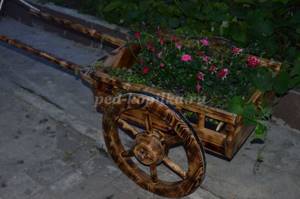
Master class on creating a landscape sculpture “Donkey with a cart”

Author: Larkina Ekaterina Yuryevna, teacher, State budgetary educational institution for orphans and children without parental care, Belgorod Orphanage “Yuzhny”, Belgorod. Description: Landscape sculpture has been used since ancient times as a small architectural form for the design of gardens and plots. It was in ancient Greece that the tradition of decorating the garden with sculptures originated. A correctly selected object emphasizes the beauty and individuality of each site, and in the abundance of factory sculptures, originality is lost. An object created by yourself will become a real highlight of any landscape design. Wooden sculptures in the shape of animals look great on the site. “Donkey with a cart” is a wonderful decorative figurine, ideal for giving the site the mood of wild nature and forest, introducing light nuances, complementing the image of the park, and setting a good mood for the owners and guests of the garden. Of course, making this sculpture is very difficult and often you cannot do it without male support, but the result is worth it! Goal: creating an original garden composition. Objectives: - training in the design and creation of landscape sculpture; — development of creative abilities, initiative and independence; — education of aesthetic taste in the design of a garden plot. Purpose: this material will be of interest to teachers, parents, as well as anyone involved in landscape design. Required material: - decorative cart for the garden (two-wheeled cart). It can be purchased or ordered from a local craftsman. Or maybe someone will find a replacement for it or refuse to use it altogether!
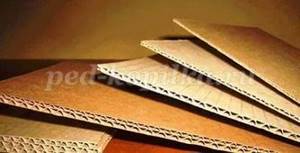
- cardboard;
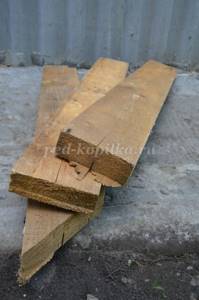
- boards;
- pencil, brushes, screws, screwdriver, scissors, adhesive tape, furniture stapler, gray primer, white and black paint, wood varnish, household cord, gas burner;
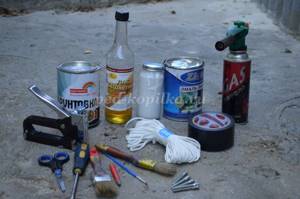
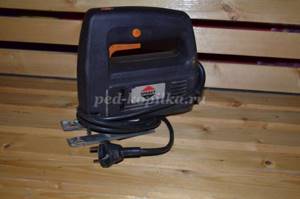
- jigsaw;
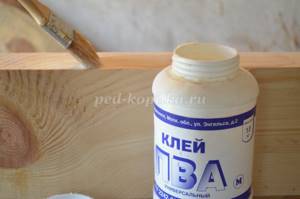
- plane, brush, PVA glue, clamp;

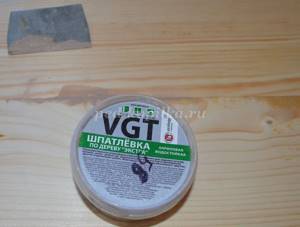
- wood putty, spatula;
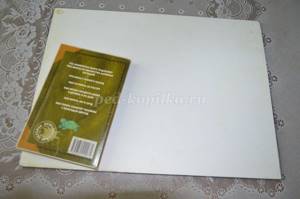
- a book and a cutting board (can be replaced with any other hard surface)
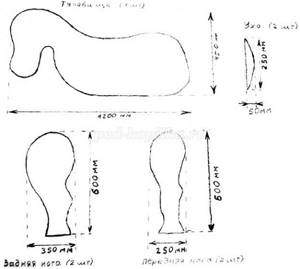
Templates:
Progress of the master class:
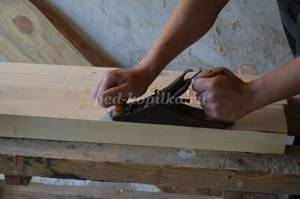
We process and level the boards with a plane.
Coat the edges of the boards with PVA glue.
We connect the boards together by holding them in clamps.

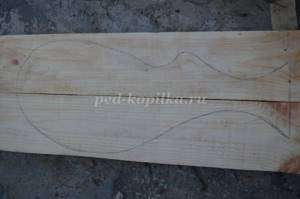
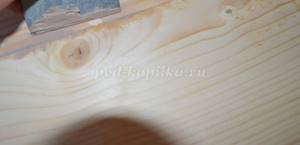
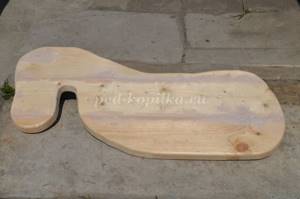
A day later, after the glue has dried and the boards are fastened together, if necessary, additionally treat the glued surface with a plane to level the surface. We draw on thick cardboard and cut out sketches of the donkey’s torso, hind and front legs. One by one, we place the prepared patterns on the glued boards and trace them with a pencil.
Using a jigsaw, we cut out the blanks of the future donkey: front and rear legs, torso.

Don't forget about the donkey ears.

We cover the seams on the resulting sculpture elements with wood putty.
It turns out: the body of a donkey.
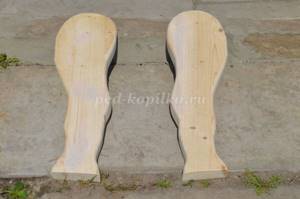
Hind legs.
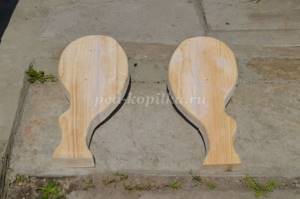
Front legs.
Putting all the pieces together to preview the sculpture.
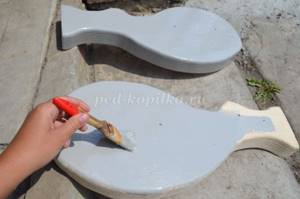
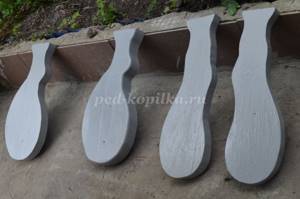
We paint the details of the donkey figurine with a gray primer.
Leave the sculpture parts to dry completely.
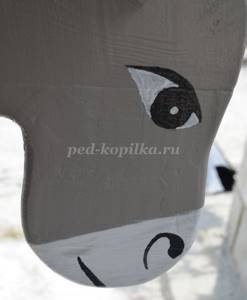
After the surface of the body has completely dried, we design the donkey’s face.
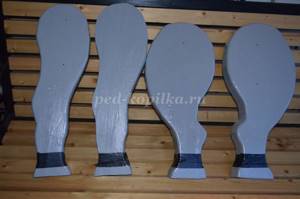
Apply duct tape to the hoof line and paint the remaining gap with black paint; after the paint has dried, remove the duct tape.
We assemble all the elements of the figure using a screwdriver and screws.
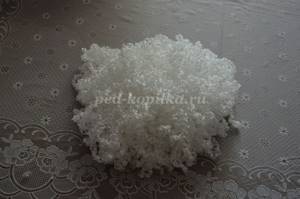
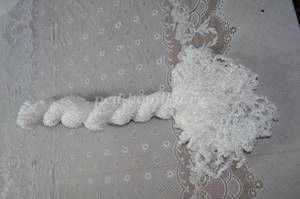
Let's start with the donkey's forelock. We unravel the household cord and wrap it around a book (a dense surface of the required length).

We tie it on one side and cut it on the other side (pompom manufacturing technology), the forelock of our donkey is ready.
We use the same principle to make a mane (unraveling a household cord, winding it onto a hard surface of the required length, tying it on one side and cutting it on the opposite side).

We make several buns for a more voluminous donkey mane.

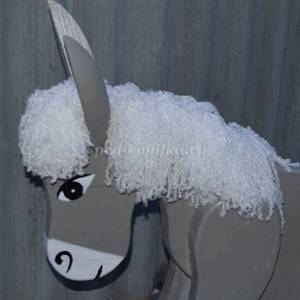
Using a furniture stapler, we attach the mane and forelock to the donkey’s body.
We get a donkey with a lush mane.
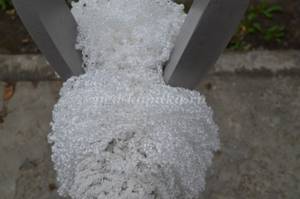
Let's start making the donkey's tail. We pull the loose household cord into a bundle and tighten it with a rope at the end.
We attach the tail to the donkey's body using a furniture stapler and tie a bow.

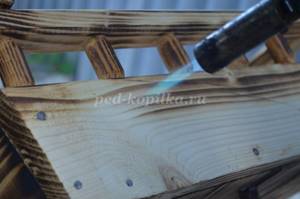
Let's start finalizing the cart. Using a gas burner, burn the surface until the wood texture and knots appear.
We paint the wheel rims with black paint.
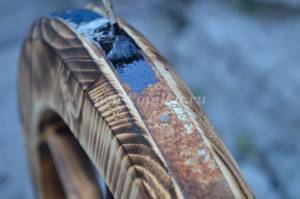
We cover the surface of the cart with varnish in several layers, first waiting for each layer to dry completely.

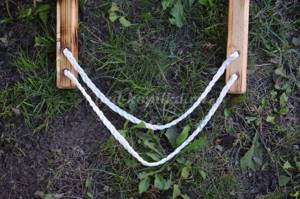
We use a cord to make an improvised harness for a donkey.

We thread it into the holes of the wheelbarrow shafts.
We assemble the cart and plant it with flowers.
We harness our donkey to the cart, singing a children's song: “The donkey is carrying a cart with flowers, the Sun is laughing, he sings a song: - I’m taking a very tasty load home. We will be well-fed with a gray-haired cow.” I’ll bring a whole bouquet to the barn and treat the goat, of course!” (I. Glazkova) This is how our garden sculpture turned out, creative inspiration, friends!
We recommend watching:
DIY summer garden design DIY stone waterfall and concrete pond DIY gypsum garden sculpture painting DIY garden figurines from scrap materials
Similar articles:
Decorating a garden plot with your own hands. Crocodile
Workplace organization
For classes, it is necessary to equip a special place with a workbench or work table. Above it you can place shelves and cabinets for storing tools, workpieces, and wood processing products.
There must be a directional light source to ensure adequate illumination of the workplace. Experienced craftsmen advise choosing a white lamp, without yellowness or other shades. “Multi-colored” lighting will disrupt the perception of the material and will not give the master the opportunity to see the nuances of the material, its structure and textures.
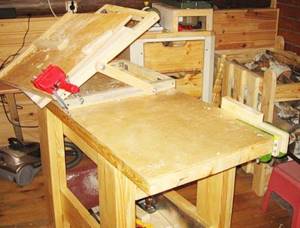
Wood carving workbench
Wood processing involves a large amount of fine dust, so it would be optimal to install an exhaust hood above the workbench. It must be required if electric grinding tools are used during the work process.
To dry sculptures and other works after impregnation with special means, you can equip a special drying cabinet with heating elements. If drying occurs naturally, you need to ensure good ventilation of the room.
In some cases, craftsmen use open fire to treat the surface of the material. This could be a blowtorch or a gas torch. Work with flame should be carried out in a place protected from fire. It is recommended to keep water or a fire extinguisher nearby.
Materials
When creating garden sculptures, the following materials are used:
- gypsum;
- stone;
- polyurethane foam;
- cement.
However, wood remains the most suitable. To make large sculptures, you will need a massive log; small figures can be made from branches or logs. The harvested wood should be free of mold, rot, and traces of insects.
When making a small wooden figurine, first wash the material and separate the bark. Debris, bark and even wood chips can be used to create decorative compositions, so don’t rush to throw them away.
During the work, a lot of sawdust and shavings will remain, which will be useful in the repair and restoration of sculptures: they will serve as material for sealing cracks and unnecessary holes. Sawdust is mixed with varnish to obtain a viscous mass, which fills the holes. The putty should not be too thin and not too thick.
It is recommended to dry the workpiece in a warm, dry place, wrapping it in polyethylene. This is done to protect the wood from deformation and cracking. It is recommended to collect waste generated during work immediately in a separate container and also store it in a dry place.
To make a small figurine, select:
- Apple tree;
- cypress;
- birch;
- hazel
Boxwood and rosewood are difficult to work with, and it is better for a beginner to deal with soft woods. However, when working with hardwood, the “misses” left on the wood due to inaccurate movements of the novice carver are not so noticeable.
Preliminary preparation of wood
To make a future masterpiece, you can take undried wood.
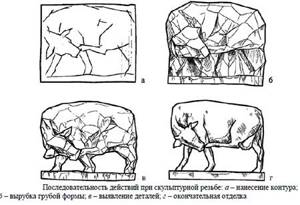
Step-by-step making of a carved wooden sculpture
There should be no knots or holes on it, of course, if their presence does not fit into the artistic concept of the work. Also, the material must be free of cracks, holes and chips, in addition, without traces of the activity of wood-boring worms.
Having selected a suitable piece of wood, the craftsman begins preparing it for work. The bark is removed from it with an adze or a hatchet. It is separated in strips along the fibers, being careful not to damage the surface underneath. Some craftsmen recommend leaving sections of bark at the ends of the workpiece (10-15 centimeters on each side) so that drying is not so intense. This will protect the wood from cracking and deformation.
The ends of the trunks are covered with a layer of paint or drying oil, putty can be used. The main thing is to completely cover the surface through which moisture intensively escapes. Thick paper is glued over the fresh coating.
Wooden carved sculpture of a man
After this, the piece of wood is left to dry. Considering that many specialist carvers prepare material for future use, it is necessary to equip a special place for storing it. It should be well ventilated, without dampness and direct sunlight.
Drying large areas takes about two years. At first, the workpieces lie in the open air under a canopy, without contact with the ground. They must be well ventilated. After the deck is transferred to a room where the process of removing moisture is completed.
The tree should not be completely dry. The optimal moisture content for wood carving is 8-10 percent.
When preparing materials, the craftsman must remember that at different times of the year, wood has different degrees of moisture. The maximum juice is contained in trunks and branches cut down from June to August, the minimum - in preparations obtained from November to December.
Preparation
Before you start, understand how to select shapes. You need to know the following:
- the figures should be in harmony with the rest of the garden objects. Even a nice wooden figurine, if it doesn’t “fit in,” will not create the expected effect;
- if you have doubts about harmony, make a paper model of the area and cut out the figures from cardboard. Place the prototypes where they belong and appreciate the scenery. A change of location may be necessary. Visualization like this can help a lot;
- piling up several massive sculptures in a small area is not recommended, as this will make it difficult to perceive the whole picture. It’s better to place one or two figures so that everything looks harmonious;
- the sculpture does not necessarily have to occupy a place in the center of the exhibition. Several small wooden figures can be placed near the bushes. Also, there can be only one wooden sculpture in the garden, but it is advisable to add decorative elements: climbing plants, fences, an arch.
Methods for removing moisture and processing
In different regions, wood drying occurs differently, depending primarily on natural conditions. Our ancestors recommended steaming the material before starting the process. To do this, the workpiece is placed in a large cast-iron container, with a little water poured into the bottom. The covered container was placed in a Russian oven and left overnight.
In the apartment, the stove will be replaced by an oven. To make steaming effective, add table salt to the liquid (5 tablespoons per 1 liter of water). Drying lasts 3 hours at a temperature of about plus 80 degrees Celsius. After this, the workpiece is left at room temperature for 3 weeks so that the moisture leaves it naturally. The harder the wood, the longer it takes to dry. Apple or pear trees are aged for about three months, and oak trees - up to two years.
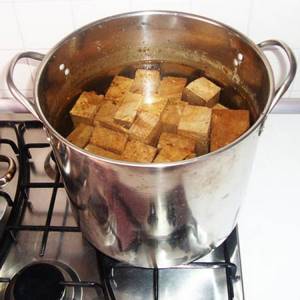
Before drying, some craftsmen boil the material in drying oil. This method is good for small pieces of hardwood. Thanks to this they acquire a pleasant brown color. And if you dry the workpiece in river sand, it will turn golden brown.
To do this, sand is poured into a large container, the workpiece is placed on it, sand is poured on top again, then the workpiece is placed again, all the way to the top. The container is placed in the oven or oven to warm up. The stronger the fire, the more intense the color of the wood.
Homemade garden sculptures
Hand-made figurines for the garden do not necessarily have to be masterpieces of art. No one expects private sculptors to carve antique statues from marble, but even the simplest figurine, made with soul and positive emotions in the process, will be a pleasure to the eye. And then you can improve your skills, going from flat painted figures to three-dimensional products.
Wooden sculptures
If you are a skilled carver, then it will not be difficult for you to make decorations for your property from wood. But if not, then you shouldn’t be upset, because wooden sculptures for the garden with your own hands may not necessarily be carved. Use your imagination!

Scraps of boards and plywood can also be an excellent material for garden decorations.
- Anyone can make a miniature well or a fairy-tale hut on chicken legs from planed branches.
- Various stumps, snags and logs can themselves suggest a decorative theme with their shape.
In general, there is room to roam “thoughts along the tree” and in our context this takes on direct meaning.
Note! The only weak point of wooden sculptures can be considered the need to remove them from the open air indoors for storage during the winter.
Concrete and plaster sculptures
Another option for the simple production of garden decorative elements for the garden is casting from plaster. You can make flowerpots and figurines from it using homemade molds.
If you have already purchased a sculpture for your garden, you can make a clone of it from plaster.
For this you will need:
- Prepare dry clay, sifted through a large sieve (purchase or dig up in a quarry). Dilute it in a bowl of water until thick.
- Now we will make a stencil mold by pressing the existing figure into the clay: first from the front side, then from the “rear”.
- The forms are exposed to the sun and dried well. If cracks form during drying, fill them with plasticine.
- Let's prepare a gypsum solution without lumps from water and dry gypsum to the state of liquid sour cream.
Important! Before filling, the molds must be lubricated with wax or paraffin, Vaseline.
- Pour the gypsum mixture into the molds and leave to harden for about 20 hours at a temperature of 16 to 25 degrees.
- We glue the finished halves of the sculpture with moisture-resistant glue.
- Uneven joints can be smoothed out with sandpaper.
- Next, the most enjoyable part of the work is painting the figure.
Remember that paints should also be moisture resistant.
Advice! You can decorate the base of a concrete sculpture with elements cast from plaster in silicone baking molds, which every housewife has in her kitchen.
DIY concrete garden sculptures can come in a wide variety of shapes.
To make them you need:
- First, assemble the frame of the future figurine or container from any available materials.
- Then gradually apply the solution to the frame, allowing the bottom layer to dry a little.
- The mortar for modeling is prepared in a 1:3 ratio from cement and sand.
For your information! We recommend starting your activity in sculptural modeling with the simplest forms in the form of mushrooms, beetles or caterpillars.
Using cement mortar, you can build an ancient castle with masonry made of stones and decoration made of broken tiles and ceramics. The price of such decoration in any case will be much lower than that of a finished sculpture. After all, you will only have to spend money on the purchase of cement, sand and gypsum.
Sculptures from “what was”
A person with creative abilities in every thing that seems completely unsuitable for this, sees an object for translating his ideas into reality.
Such craftsmen make garden sculptures with their own hands from scrap materials such as:
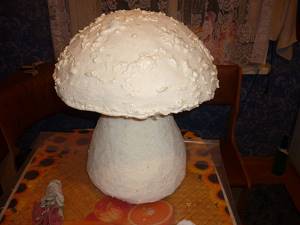
This is what an unprocessed foam mushroom looks like
- Plastic bottles.
- Car tires.
- Broken dishes.
- Branches after pruning trees.
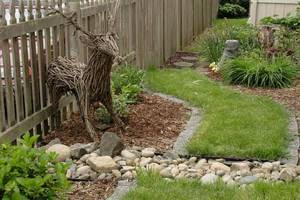
Using branches you can create the most unusual images of animals or mythical creatures
- Old furniture and much more.
In general, by using your imagination and showing ingenuity, you can make an individual decoration for your site from almost anything.
Interesting! If you have an old car or bicycle that is not suitable for transportation, they can also be used to transform them into original sculptures for the garden.
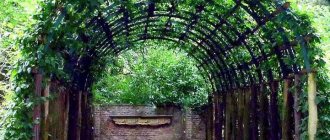
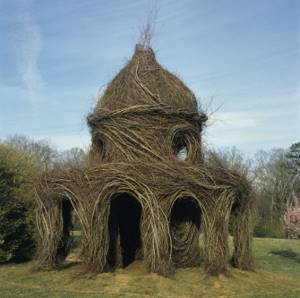
Green sculptures
Topiary - the technology of curly pruning of plants is one of the oldest techniques of landscape design. To create decorative forms from green spaces, in addition to imagination, you need serious patience and special tools.
To create such a sculpture, you need to wait several years until the plant reaches the desired size.
There are three ways to create living decorations in the garden:
- Traditional, that is, pruning and trimming a living plant, performed according to the frame or “by eye.”
- Figures grown on the basis of peat.
- Ivy sculptures.
You can decorate your garden by planting flowers in the most unexpected objects - an old teapot, a shoe, etc.
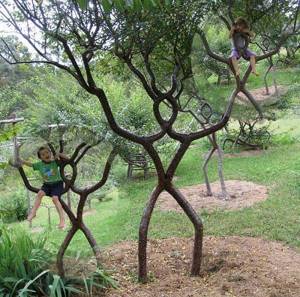
How to work with arbosculpture
The principle of operation is that the shape of trunks and branches changes. How it's done? There are several ways:
- securing the branches to the frame, the shape of which they will take;
- merging branches and trunks of different trees;
- You can use the method of forming fruit trees on a trellis.
The frame can be of any shape, but must be metal. Trellis are taken only flat.
When creating the presented type of sculpture, increased attention should be given to pruning young branches, for which you should use high-quality garden tools. It is necessary to understand the difference between cutting and trimming. In the first case, the shoots are removed to the base. In the second, the required length is simply removed. Cutting is required so that extra branches do not interfere with the formation of the imagined image. Pruning is aimed at changing the direction of branch growth.
The technique also involves changing the roots of the tree. Thus, there are a number of trees whose root system protrudes beyond the boundaries of the soil. Then they can be involved in the matter. In this case, the work will be completed much faster, and intertwining the roots will be much easier.
However, such trees cannot be used in Russian conditions due to the harsh climate. The root system will simply freeze, which means the arbosculpture will be damaged.
Wood sculpture. Where to begin?
Creating a sculpture from wood is an endlessly interesting and complex process. By breaking it down into several successive stages, we will greatly simplify the task associated with understanding the basics themselves.Stage one is preliminary.
The theater begins, as we know, with a coat rack, and the ocean begins with an inconspicuous coastline that does not stand out in any way.
Where should a future brilliant sculptor begin after the decision to become one has been made finally and irrevocably? Of course, from the choice of material. By doing this difficult, but very exciting activity, you will also be able to determine the level of your artistic taste. After all, the main task of a wood sculptor is to reveal an image already created by nature. By unmistakably defining it as the one and only, you will take the first step in the right direction. How long this will last is unknown. Therefore, we “start” from the spot when the treasured “detail” has already been found by you. And immediately, let's move on to practical actions. First you need to clean the object you have chosen from rotten and rotten wood. A regular knife is best for this. The only condition is that the knife should not be sharp. Remember - wood is a fairly fragile material. One careless move and your beautiful workpiece will turn into a piece of ordinary wood. Having removed what is unnecessary, wash it under running water to remove dust and dirt that will interfere with your further work.
Your next actions will be related to such an issue as drying, which, in principle, is a topic for a separate conversation, but since there is no way around it, I can give one small recommendation. Let's call it, for example, “accelerated drying.” What is the essence of the process? If the workpiece is small, and it is absolutely impossible to wait two to three years, proceed as follows: wrap the part in something that can absorb moisture well, for example paper or material, then use the second layer with something of the opposite quality. This could be, for example: ordinary polyethylene. Place the packaged part in a place with a constant high temperature, naturally this is not an oven, and after a day or two, change the first, damp or even wet layer of packaging. After a few days, determine the result of drying using it; the next time you replace the paper, you will make sure that there is no moisture.
Stage two is the main one.
The wood is dry and you can start working. What is most important for us at this stage, of course, is the tool. What does a wood carver use?
Let me note right away that the list of tools is relatively small. This is a set of knives and chisels with different section profiles. They will be accompanied by a hand drill and a wooden hammer. And such an item as a scraper is an absolutely necessary thing for cleaning and leveling the surface. That's basically it. And one more thing, a good professional tool is not easy to find and it is not cheap, but by spending a substantial amount once, you will provide yourself with everything you need for many years. The method of converting ordinary instruments into special ones is also practiced. I don’t presume to judge how much cheaper it is, but it will definitely take you a lot of time. In addition, you will need to ensure the quality of the steel from which the tools are made, which is very problematic to do. And the most important thing at the end is that all tools must be perfectly sharpened, take care of this.
Question: “What about the process itself? How to create something that has not yet existed in nature?” not discussed here. At this point, forgive yourself. The creative process is very personal and one might even say intimate, and any advice in this area will only harm you. Your mind and your artistic flair are your only and unique advisers. Trust them, and you certainly won't go wrong!
Stage three is compositional.
That's all. Your masterpiece is ready. The sleepless nights and pangs of creativity are behind us. And...something is still wrong. Something haunts you and, looking at the finished work, you suddenly realize that your “diamond” requires an appropriate setting. Of course, you forgot about the stand for your sculpture!
The choice of stand is a matter of your taste. There are no strictly defined standards here. All you need to remember is that it should serve as a harmonious continuation of your work. Therefore, any natural growths or stumps can be a good base. Copper parts and composite glue are ideal for fastening. By the way, with the help of the latter, genuine masterpieces are often created, because with a successful choice of “blanks”, it is simply enough to connect them together and here in front of you is a beautiful bird or a creepy forest monster, and this with a minimum of effort!
Stage four - about the dangers of varnish and the benefits of cracks.
Varnish cannot be used. That's all. The natural beauty of wood is incompatible with it, and you will ruin everything you took so long to create. On the contrary, cracks and all other “disadvantages” of wood are its advantages. Your task is not to hide, but to emphasize and highlight them. To protect your work and at the same time not to spoil it, chemical restoration and protection preparations, of which there are now a great many in the public domain, will help, and special literature, of which there is also plenty, will help you decide on their choice. Don’t forget about the Internet, where on special forums you can find answers to any of your questions, and it won’t cost you a penny.