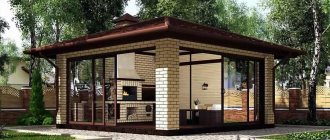
Your own bathhouse at the dacha always has a special atmosphere of comfort and warmth. An excellent option for interior decoration is the construction of a brick oven. You can build the structure anew, or you can line the iron stove with bricks in the bathhouse. The advantage of such a structure is the ability of the owner to regulate the temperature in the firebox directly from the steam room, because the exit is located in the main hall of the bathhouse.
Photos of a brick stove for a bathhouse, made by yourself, can be found on practical design web resources.
Brief overview of the article
Advantages of a brick stove
Unlike most stoves, such a model can easily be built independently. Brickwork is one of the easiest work options for a craftsman.
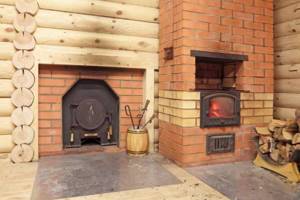
In addition, the advantages of a heater stove for a brick bath include:
- Beautiful exterior design. The masonry goes well with the wooden interior of the bathhouse.
- Good heat retention in the steam room, especially when using refractory bricks.
- Environmental Safety. When heated, no toxic fumes are released, and the steam is absolutely safe for humans.
- The brick is resistant to high humidity.
- A large number of models differing in shape, size and type of design.
- The brick can act as a base on which tiles or other decorative material can later be attached.
To build a brick stove for a bathhouse, you can always find ready-made projects with step-by-step instructions.
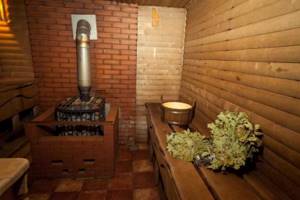
Safety precautions during construction
Before you start building a brick sauna stove with your own hands, you need to remember a few special requirements:
- the location of such a design is the wall opposite the steam room shelves;
- between all heating elements of the oven it is necessary to maintain a distance of 30-40 cm. With additional protection, this figure can be reduced to 15-20 cm;
- It is necessary to make a gap equipped with additional protective material between the chimney and the roof. A figured steel plate is fixed on top of it;
- Before the firebox, it is necessary to lay a sheet of metal 1 cm thick on the floor in case of coals falling out.
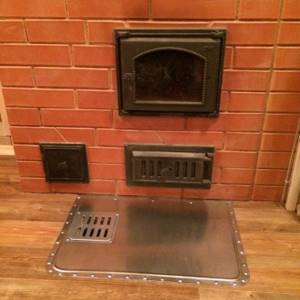
Metal backing in front of the firebox
Tip: It is better to use an open container as a heating tank.
Disadvantages of brick stoves
Furnaces of this type may also have certain disadvantages:
- Large weight of the structure. A bathhouse with a brick stove requires a mandatory pouring of the foundation.
- The need to equip a high-quality chimney. It is better for a specialist to carry out this stage of work, so that the draft ensures a high-quality outflow of smoke from the steam room.
- Significant financial investments, including the cost of specialist work.
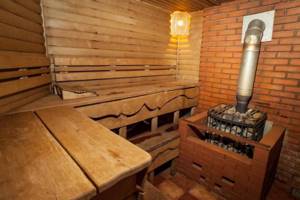
Another significant disadvantage of practical use is the long heating time of the stove (for some models it is about 3 hours).
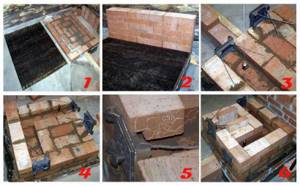
Indispensable qualities of a brick stove for a bathhouse.
Brick sauna stoves have already gone out of fashion. Modern production of steel units, the race for cheapness and deceptive simplicity have already partly erased the image of a real Russian bath from people's memory.
But now my memory is slowly returning. Although there are already modern ideas about sauna stoves.
No matter where we start listing, each point is still important in itself. So:
- High “quality” of steam.
It is difficult to evaluate quality subjectively, but when such an assessment is verified by dozens and hundreds of opinions based on personal experience... For example, in the furnaces that we make - two-bell furnaces with a tank for white stones of a modern modification - the steam output is measured to be about 300 degrees. This kind of steam feels completely different. It cannot be compared with the steam that is formed in a boiling tank of water...
Such steam is achieved by cleverly constructing a tank and releasing steam from it. The water reaches the stones already heated. But even if you use a regular tank, the stones in the sauna stove are much hotter than those lying on top of a metal one. Therefore, steam will be better in any case.
- High heat capacity of the furnace.
Yes, such a stove takes a long time to heat, but once it is melted, it takes a long time to cool down. A brick stove, although for a bathhouse, is well suited for the home. That is, for the steam room that is located in the house. As a rule, these are houses - baths. Nowadays, few people have the opportunity to immediately build a house to live in. First they build a bathhouse. Then, living in it, they build a house. But even if you immediately design something that is not very large, it will still be a house with a steam room. If you put such a heat-intensive brick stove with a sauna in it, it will be an excellent heating device.
- Useful, soft and pleasant radiation from the brick.
It is very pleasant to be in the steam room where the brick stove is laid out. Gentle heat, even from a hot stove, warms the body to depth without burning. It doesn't burn oxygen. They say that the infrared radiation of clay (brick) is very suitable for humans. But no matter what anyone says, after visiting such a bathhouse there is no doubt that there is something in this and there is a lot...
Materials and tools for work
For independent work, you should prepare a certain set of materials and tools:
- Brick (it is better to line the stove in a bathhouse with refractory bricks, which have excellent technical characteristics).
- Cement, sand and gravel for mixing the solution.
- Reinforced iron to strengthen the stove.
- Decorating materials.
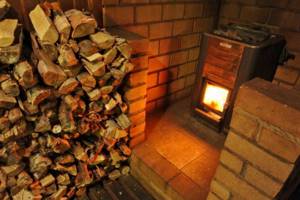
You will also need auxiliary tools: trowels, tape measure, building level, grinder for cutting bricks (for example, for corner joints). A diagram of the future construction and instructions for arranging the chimney will not be superfluous.
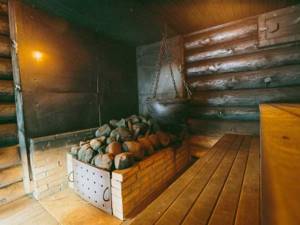
Furnace construction rules
For independent work, there are a number of certain rules that should be followed:
- The brick oven is installed against the wall opposite the shelves in the bathhouse.
- Be sure to leave a safety zone - this is a small gap between the outer wall and the wooden floor.
- A furnace model is pre-selected: with a permanent or periodic method of operation.
- It is better to place the firebox in the dressing room to ensure maximum safety for people in the steam room.
- If there is an old stone stove in the bathhouse, it is not at all necessary to demolish it - just cover the stove with bricks.
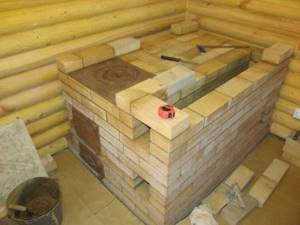
Before starting construction work, it is necessary to assess the condition of the underlying foundation and its ability to withstand the significant weight of the brick structure.
Features of brick kilns
There are options for periodic operation, inside which the temperature can reach 800˚C, and the volume of the steam room can be 30 m3 or more. There are also permanent brick kilns.
Below we highlight the main differences between this equipment and other types.
- A closed heater, which is not the case in metal or cast iron samples. As a result, it became possible to maintain the desired temperature in the steam room longer.
- The steam room can be used for its intended purpose only after 3-5 hours of intensive heating.
- Before starting sauna procedures, the fuel must be given time to burn completely.
Advantages
- A closed heater makes it possible to install equipment without using fireproof wall protection;
- Large volume of stones;
- The stones have no contact with combustion products;
- Keeps warm for a long time;
- It is possible to heat large rooms;
- Sufficient level of fire safety.
Flaws
- Heavy weight, which requires the installation of a recessed foundation for the sauna stove, from 600 mm.
- Having certain masonry skills. Otherwise, achieving real steam will be impossible.
DIY oven construction
The traditional option for work is a brick sauna stove with a tank. Its construction can be divided into several stages:
- Preparation of the drawing.
- Pouring the foundation.
- Construction of furnace walls.
- Chimney design.
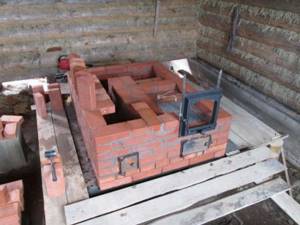
The work is completed with decorative finishing of surfaces.
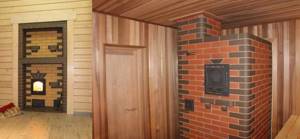
Do-it-yourself brick stoves for a bath: projects and their features
The size of the oven depends on the area of the room itself. It is equally important to decide on a budget; a brick bathhouse is not cheap. It is unlikely that you can do a complex project yourself; a simple budget option is easier to implement.
On the Internet you can find many different designs for brick stoves for a bath, but it is important to be careful: even the smallest mistake in the project can lead to dire consequences. If you decide to make even the slightest change to the drawing, be sure to consult a professional. Any mistake can cause a fire.
When designing, you must also take into account the following nuances:
- if the heater is located above the firebox, then the height of the firebox should be more than 55 cm (8-9 rows of bricks). Reducing it will cause the temperature of the bath stones to decrease and the amount of soot to increase;
- a gap of at least 30 cm must be left between the stove and the walls. If the walls are covered with special protection, the distance can be reduced to 15-20 cm;
- the firebox in the heater, the blower doors must be made large to ensure good air flow.
We recommend reading:
The best stones for a bath: how to choose from many options?
The stove design is not just a drawing of the stove; you also need to prepare a plan for the sauna stove, which indicates the order of laying out the bricks of each row. Despite the variety of drawings, many of them have common features:
- the blower door is usually installed when constructing the third row;
- ash well and air duct grille - when installing the fourth;
- installation of the blower door is completed on the sixth;
- the firebox door and grate are mounted on the seventh;
- channels - on the fourteenth.
Depending on the design features, sauna stoves can be either grate-free or grate-type.
Grateless stoves are easier to maintain and have lower fuel consumption. But only well-dried firewood is suitable for them.
Grate furnaces have a separate blower in which a powerful flame is formed. Thanks to it, the room quickly warms up to the required temperature. Freshly harvested and damp firewood is suitable for such a firebox.
Designs of brick sauna stoves may include a water tank; there are also designs without it. It is better to immediately choose a stove with a water tank, since in this case you will be able to simultaneously heat water for various needs.
Preparation of the drawing
The most important stage for the construction of a high-quality stove in a bathhouse is the preparation of a plan diagram, which should display:
- Design dimensions.
- Type of selected model.
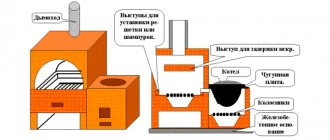
- The location of the firebox and the exit for storing firewood.
- Location and dimensions of the chimney.
- Details of the compartment for stones.
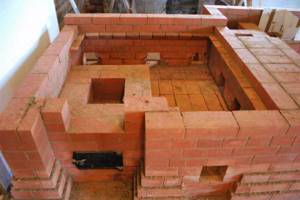
All parameters must be thought out in advance and then transferred to paper. During work, it is worth periodically reviewing the drawings, coordinating your actions.
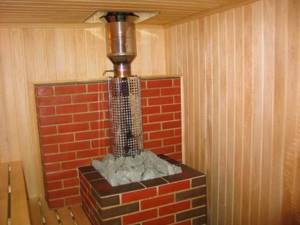
If you wish, you can always use the services of a professional builder who will draw up the optimal drawing. Before starting work, it is also better to watch several video lessons on how to correctly draw up a high-quality drawing.

Pouring the foundation for the furnace
The construction of the stove is carried out at the stage of erecting the frame of the bathhouse itself. Most often, free space is left for the firebox. At the selected point you need to dig a trench. Next, markings are made using pegs and rope. The dimensions of the trench should exceed the area of the stove base by 10-15 cm in all directions.
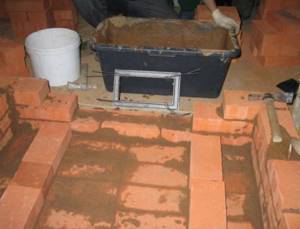
After laying a sand cushion, a layer of broken brick or glass, a solution should be prepared. Pouring the solution can be done in several ways, depending on the type of foundation (strip or column type).
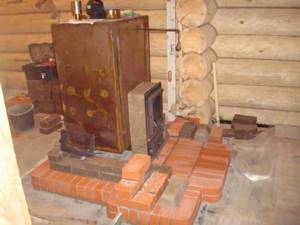
Before work, it is necessary to calculate the stability of the foundation and the required thickness of the fill to support the weight of the structure. In most cases, the foundation is strengthened with reinforced iron, which is laid in various layers of cement mortar.
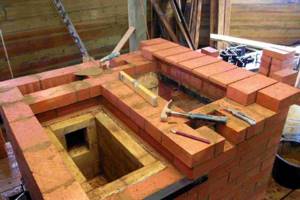
Furnace laying
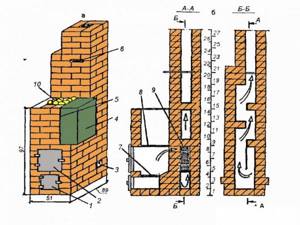
Before you begin, make the correct design of a stove for a sauna with your own hands from brick, the drawings of which can be taken from the Internet. Be sure to make a cut and a step-by-step plan for each row. When laying, check the rectangularity, horizontality, verticality, according to the instructions, follow the rule of bandaging the elements.
They place the stove near the wall where the smoke ducts pass. The heating unit is not placed near the outer wall with windows, so as not to block the flow of light. Preparation consists of marking the floor and digging a hole for the base of the stove.
Foundation
A brick stove is massive and heavy, so a foundation is built. The base is buried into the soil at least 0.5 m so that the structure does not tilt or sag when the ground is moistened and frozen.
The size of the foundation is 10 cm larger than the stove on each side. A gap of at least 5 cm is left between the foundations of the stove and the load-bearing wall of the house, which is sealed with sand.
Choose a rubble concrete or concrete base; in dry soil, lay ceramic bricks on a cement-sand mortar. The surface of the foundation is leveled with a similar solution, covered with roll insulation in 2-3 layers on mastic.
Laying the base
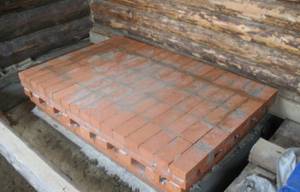
An asbestos sheet is laid on a clay solution, and metal is installed on top. The first row is laid dry, the dimensions and location of the seams are checked. After this, the bricks are placed on the mortar, first the corner ones, then the row elements along the cord. The thickness of the wall (¼, ½, 1 brick) depends on the design of the stove.
Clay preparation
Frozen clay that was outdoors during the winter is better suited. The clay is pre-soaked in rainwater for 2–3 days. To do this, use wooden boxes lined with iron inside.
For bricks, use a sand-clay mortar; for plaster, use the same mixture with the addition of lime.
Laying the ash pit and firebox
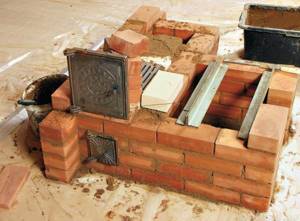
The dimensions of the chamber are selected depending on the cubic capacity of one fuel load. The firebox is connected to the ash pan by grates. The grate is placed below the door so that burning elements do not fall out when opening.
The firebox is made with inclined walls so that the ash rolls down them into the ash pit. A gap of 5 mm is made between the metal and the brick so that the firebox does not collapse due to different expansion of the materials.
Laying heater passages and installing a water tank
The rows are laid exactly according to the order drawings in order to obtain passages passable for smoke. Gases can go inside the room if they do not find a way out due to the wrong location of the passage or a dead end.
The boiler is installed in accordance with the design; for the internal version, a two-layer masonry is used to increase heat transfer.
Chimney
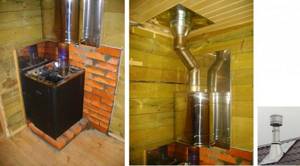
Use internal channels in the wall or install sandwich pipes with socket joints. The first element is connected to the outlet of the stove chimney, the rest are secured with clamps to the walls.
A hole is made in the ceiling so that the pipe does not touch the wooden structures. A sleeve with a layer of thermal insulation is put on the chimney. They are fixed to the roof, covering the joint with a skirt made of rubberized material.
Plaster
The layer is applied with a thickness of about 15 mm. Before work, the stove is heated to speed up the drying time. The surface is moistened with water, and the first layer is applied completely. Wait until it sets, apply a second layer. The area is rubbed with a plaster float to make it look even. After drying, whiten with lime.
You can heat it for the first time when the structure is completely dry. To do this, leave the vents, blower doors, and combustion chamber open for a week to increase the circulation of fresh flows inside all passages. If the oven is not dry, cracks will appear inside when heated.
Construction of furnace walls
Brick laying is carried out according to a pre-prepared scheme. Instructions on how to make a brick sauna stove with your own hands:
- A working solution is prepared from sand and fireclay clay. A feature of brick kilns is the use of a refractory composition rather than a classic cement mortar.
- Any stove has four main compartments: a firebox, an ash chamber, a water tank and a chimney. For optimal performance, the working bricks should be pre-numbered. You can learn from experienced stove makers what kind of brick to line a stove in a bathhouse with.
- The first row of material is laid without using a solution.
- When laying further rows, the layer between the brick rows is made up to 4 mm thick.
- The construction of internal partitions is carried out simultaneously with the laying of external walls in order to see the result of the work.
- Each subsequent row overlaps the previous one by 50% in order to maximize the strength of the joints.
- The quality of the wall structure is periodically checked using a building level.
- It is important to ensure that the smooth side of the brick faces the chimney.
- Steel strips and grooves for metal wire are installed for the firebox doors and ash chamber.
- For the firebox, a steel sheet of sufficient thickness is laid between the lower section and the chamber. Stones will later be placed on this sheet to heat the air.

After finishing the masonry of the walls, massive metal doors for the cells are installed using rotary fasteners at the joints.
DIY brick sauna stoves: assembly features
The quality of the stove directly depends on the material used. To install it, it is recommended not to skimp on bricks, but to choose high-quality fireproof material that will not crack after a year of use.
To make a stove, you will also need clay, which is easy to find in natural conditions, and can also be purchased along with bricks.
Step 1. Construction of the foundation
The brick oven is quite heavy, so it is necessary to make a foundation for it. It should be 5-10 cm larger than the size of the oven on each side.
For the foundation, it is necessary to prepare a pit more than 50 cm deep, fill it with sand (10 cm layer), pour water and fill it with crushed stone, broken bricks and stones. Next, pour concrete and fill it again with a mixture of stones and crushed stone.
We recommend reading:
What types of stoves are there for baths and saunas: where to choose?
When building a foundation, you may also need to make formwork. At ground level you need to lay a layer of waterproofing, and then lay a brick foundation to the floor level.
Step 2. Assembling the oven
To install a sauna stove, you need to prepare a solution by mixing clay, sand and water. To decide how to assemble the stove, you need to prepare the order of the masonry. The first two rows are usually made solid - they serve as the basis of the structure, then assembly is carried out according to a pre-prepared scheme.
Below is the order of brick sauna stoves:
After laying each row, you need to check how evenly it is laid. Any deviation is unacceptable.
Step 3. Installation of the chimney
The size of the chimney must correspond to the size of the stove itself. When installing the stove, you need to ensure that it rises 0.5 m or more above the roof.
The pipe passage must be insulated with heat-insulating materials (for example, basalt wool).
Making a brick oven with your own hands is quite difficult. If you have experience in laying bricks and are confident in your abilities, then prepare the order of the sauna stove and feel free to get to work. But if you have doubts, it is better to contact an experienced stove maker (at least for advice). It is quite difficult to fix an already assembled stove; it often takes more effort than laying a stove from scratch.
Author of the publication
offline 2 years
